This is the full developer documentation for UDS Documentation
-----
# Basic Requirements (10m)
## System Requirements
[Section titled “System Requirements”](#system-requirements)
In order to start using UDS on macOS or Linux, your system needs to meet the following requirements:
* At least 16GB of RAM
* At least 8 CPU cores
* Approximately 40GB of available storage for storing and deploying UDS
Windows Users running Windows Subsystem for Linux (WSL) will require an even more powerful setup. It is advised that your system has the following:
* At least 32GB of RAM
* At least 10 or more CPU cores
WSL has access to 50% of the host machine’s available RAM (e.g. 32GB allows WSL access to 16GB), and 100% of its available CPUs.
Note
WSL’s resource allocation defaults can be changed with the creation of a `.wslconfig` or `wsl.config`.
Optional, but recommended are the following, as they’re used in other examples and tutorials:
* A code editor of your choice
* [Helm](https://helm.sh/)
* A graphical Kubernetes cluster management tool, such as:
* [K9s](https://k9scli.io/)
* [Kubernetes for Visual Studio Code](https://marketplace.visualstudio.com/items?itemName=ms-kubernetes-tools.vscode-kubernetes-tools)
* [Lens](https://k8slens.dev/) (non-free at companies over $10m in revenue)
If you don’t have any of these, you can continue with the following setup guides to install these tools or verify that you have everything you need.
## Setup Guides
[Section titled “Setup Guides”](#setup-guides)
#### Install Docker Desktop
[Section titled “Install Docker Desktop”](#install-docker-desktop)
If you’ve done development with Docker in the past, you may already have it installed. If you do, you can likely skip the rest of this step.
Use of Docker Desktop at a company with greater than 250 employees or $10 million in annual revenue requires a paid subscription. If you don’t wish to use Docker Desktop as a result, we would recommend an alternative platform such as [colima](https://github.com/abiosoft/colima), which is free and open-source.
Visit the [Docker Desktop](https://www.docker.com/products/docker-desktop/) website. (Linux users see the Note below) and select the correct download version for the Docker Desktop based on your computer’s OS. Once the installer is downloaded, navigate to the location it downloaded (usually the Downloads folder) and install Docker Desktop.
Note
Docker Desktop support on Linux is not as extensive as macOS, and at the time of this writing, the latest Ubuntu 24.04 LTS is not yet supported. Due to a change in how the latest Ubuntu release restricts the unprivileged namespaces, `sudo sysctl -w kernel.apparmor_restrict_unprivileged_userns=0` needs to be run at least once. Refer to the Ubuntu Blog for more details.
All of the above said, you do not have to run Docker Desktop on Linux, and can instead install Docker Engine.
After installation, you can follow OS-specific steps below.
### OS-specific steps
[Section titled “OS-specific steps”](#os-specific-steps)
* macOS
**1. Install Homebrew**
[Homebrew](https://brew.sh/) is a widely used package manager for macOS which also works with Linux. You can install it via the following terminal command:
```bash
/bin/bash -c "$(curl -fsSL https://raw.githubusercontent.com/Homebrew/install/HEAD/install.sh)"
```
**2. Install k3d**
For getting started quickly, we recommend using [k3d](https://k3d.io/), a lightweight wrapper for [k3s](https://github.com/rancher/k3s), which is Rancher Lab’s minimal Kubernetes distribution. k3d’s site contains detailed installation instructions, but if you’re using Homebrew, you can easily install it with a simple command:
```bash
brew install k3d
```
* Linux
**1. Install Homebrew**
[Homebrew](https://brew.sh/) is a widely used package manager for macOS, although it also works with Linux. You can install it via the following terminal command:
```bash
/bin/bash -c "$(curl -fsSL https://raw.githubusercontent.com/Homebrew/install/HEAD/install.sh)"
```
After installation, you’ll need to ensure the `brew` command is added to your PATH. The installer should tell you how to do this, and the command should look similar to the following:
```bash
`(echo; echo 'eval "$(/home/linuxbrew/.linuxbrew/bin/brew shellenv)"') >> /home/[USERNAME]/.bashrc`
```
You will also need to install Homebrew’s dependencies:
```bash
sudo apt-get install build-essential
```
Lastly, it’s recommended to install GCC:
```bash
brew install gcc
```
**2. Install k3d**
For getting started quickly, we recommend using [k3d](https://k3d.io/), a lightweight wrapper for [k3s](https://github.com/rancher/k3s), which is Rancher Lab’s minimal Kubernetes distribution. k3d’s site contains detailed installation instructions, but if you’re using Homebrew, you can easily install it with a simple command:
```bash
brew install k3d
```
* Windows
Caution
Your computer needs to be running Windows 10 version 2004 and higher (Build 19041 and higher) or Windows 11. If you are on an older build, there are manual installation steps for older versions of WSL available [here](https://learn.microsoft.com/en-us/windows/wsl/install-manual).
#### Overview
[Section titled “Overview”](#overview)
We will be following [Install WSL | Microsoft Learn](https://learn.microsoft.com/en-us/windows/wsl/install) for compatible Windows builds. However, the Microsoft instructions will provide more details if needed and will be more up-to-date over time.
#### WSL —install
[Section titled “WSL —install”](#wsl-install)
If you are running Windows at or above the mentioned Builds, we can use the WSL —install command.
Open PowerShell and run this command: `wsl --install`
The `--install` argument performs the following actions:
* Enables the optional WSL and Virtual Machine Platform components.
* Downloads and installs the latest Linux kernel.
* Sets WSL 2 as the default.
* Downloads and installs the Ubuntu Linux distribution (reboot may be required).
Once the —install command is complete, you will be asked to restart your computer. After the restart, a terminal should open and ask you to create a username and password. If the terminal does not open, we can select the start menu and search for and select Ubuntu to open its terminal. Once the terminal opens, it will ask us to create a Username and Password for Linux. Go ahead and do that.
Now that we have WSL working and have installed Ubuntu let’s do some Linux housekeeping and run the following command in the Ubuntu terminal:
`sudo apt update && sudo apt upgrade`
Caution
Based on end user reports you may need to be on a Linux kernel version of 6.6.x+ in order to have the required kernel modules for Istio (see [prerequisite documentation](https://uds.defenseunicorns.com/reference/uds-core/prerequisites/#istio)). You can update your kernel to the latest prerelease version using `wsl --update --pre-release`.
#### WSL Configurations
[Section titled “WSL Configurations”](#wsl-configurations)
By default, WSL will have access 100% of your system’s CPU cores and 50% of your memory/RAM. If you need to increase the available memory/RAM or change configurations, you will need to create a `.wslconfig` or wsl.config by following [these instructions](https://learn.microsoft.com/en-us/windows/wsl/wsl-config)
```plaintext
Example .wslconfig
[ws12]
memory=25GB
```
#### End Of WSL installation and Setup
[Section titled “End Of WSL installation and Setup”](#end-of-wsl-installation-and-setup)
From this point on, the paths for Windows WSL and macOS converge. The next step is to install Docker Desktop.
#### Troubleshooting WSL
[Section titled “Troubleshooting WSL”](#troubleshooting-wsl)
If you’re having issues with WSL, you can try some of the following:
* **Check your BIOS Settings**
If Ubuntu does not start up, you may need to enable virtualization in your BIOS.
* This will require entering the BIOS for your machine and enabling virtualization. An online search can help you find instructions on how to do this. If you’re on a work computer, you’ll need to have access to the BIOS settings, which may require a password or a system administrator who can do it for you.
* **Verify that Windows features are enabled**
From the start menu, search `turn Windows features on or off`. The following features should have a checked box:
* Virtual Machine Platform
* Windows Subsystem for Linux
* **Check what version of WSL is running**
Run `wsl -l -v` in a PowerShell or Windows Terminal prompt. If Ubuntu has a `1` listed under `VERSION`, change it to a 2:
`wsl --set-version [distro name] 2` (replacing \[distro name]) with the name of the Linux distribution.
* **Run Windows as a VM**
* If you’re running Windows in a VM, you need to enable nested virtualization. This is a hardware-specific feature and needs to be enabled in your BIOS settings for the host machine and in the Hypervisor software you’re running. Not all CPUs or Hypervisor software support nested virtualization.
Tip
If you need to update the WSL kernel, use this command: `wsl --update`
-----
# Install and Deploy UDS (15m)
## Getting Started with UDS Bundles
[Section titled “Getting Started with UDS Bundles”](#getting-started-with-uds-bundles)
UDS Core provides published [bundles](https://uds.defenseunicorns.com/reference/bundles/overview/) that serve multiple purposes: you can utilize them for experimenting with UDS Core or for UDS Package development when you only require specific components of UDS Core. These bundles leverage [UDS K3d](https://github.com/defenseunicorns/uds-k3d) to establish a local k3d cluster.
UDS Bundles deployed for development and testing purposes are comprised of a shared configuration that equips users with essential tools, emulating a development environment for convenience. If deploying to a production environment, users have the ability to modify variables and configurations to best fit specific mission needs by creating their own bundle.
Caution
These UDS Bundles are designed specifically for development and testing environments and are *not intended for production use*. Additionally, they serve as examples for creating customized bundles.
For additional information on UDS Bundles, please see the [UDS Bundles](/structure/bundles/) page.
## Deploy UDS Core
[Section titled “Deploy UDS Core”](#deploy-uds-core)
In this section, you will deploy UDS Core for the first time.
### Step 1: Install the [UDS CLI](https://uds.defenseunicorns.com/reference/cli/overview)
[Section titled “Step 1: Install the UDS CLI”](#step-1-install-the-uds-cli)
The very first step is installation of the UDS CLI. Having installed Homebrew previously, you can do so with the following command:
```bash
brew tap defenseunicorns/tap && brew install uds
```
Tip
You can see all releases of the UDS CLI on the [UDS CLI GitHub repository](https://github.com/defenseunicorns/uds-cli/releases)
### Step 2: Deploy the UDS Bundle
[Section titled “Step 2: Deploy the UDS Bundle”](#step-2-deploy-the-uds-bundle)
The UDS Bundle being deployed in this example is the [`k3d-core-demo`](https://github.com/defenseunicorns/uds-core/blob/main/bundles/k3d-standard/README.md) bundle, which creates a local k3d cluster with UDS Core installed.
To deploy this bundle, run the `uds deploy k3d-core-demo:latest` command in the terminal:
```bash
uds deploy k3d-core-demo:latest
# deploy this bundle?
y
```
Note
You can also deploy a specific version of the bundle, see all versions of the bundle [here](https://github.com/defenseunicorns/uds-core/pkgs/container/packages%2Fuds%2Fbundles%2Fk3d-core-demo).
If you deploy a specific version and want to update UDS Core, on top of your existing cluster, this can also be done using the [`--packages` flag](/reference/cli/quickstart-and-usage/#specifying-packages-using---packages) to deploy just core (rather than redeploying the full cluster as well): `uds deploy k3d-core-demo: --packages core`
**Optional:**
Use the following command to visualize resources in the cluster via [k9s:](https://k9scli.io/)
```bash
uds zarf tools monitor
```
### Step 3: Clean Up
[Section titled “Step 3: Clean Up”](#step-3-clean-up)
Use the following command to tear down the k3d cluster:
```bash
k3d cluster delete uds
```
If you opted to use Colima, use the following command to tear down the virtual machine that the cluster was running on:
```bash
colima delete -f
```
## UDS Bundle Development
[Section titled “UDS Bundle Development”](#uds-bundle-development)
In addition to the demo bundle, there is also a [`k3d-slim-dev bundle`](https://github.com/defenseunicorns/uds-core/tree/main/bundles/k3d-slim-dev) designed specifically for working with UDS Core with *only* Istio, Keycloak, and Pepr installed. To use it, execute the following command:
```bash
uds deploy k3d-core-slim-dev:latest
```
Note
You can also deploy a specific version of the bundle, see all versions of the bundle [here](https://github.com/defenseunicorns/uds-core/pkgs/container/packages%2Fuds%2Fbundles%2Fk3d-core-slim-dev).
If you deploy a specific version and want to update UDS Core, on top of your existing cluster, this can also be done using the [`--packages` flag](/reference/cli/quickstart-and-usage/#specifying-packages-using---packages) to deploy just core (rather than redeploying the full cluster as well): `uds deploy k3d-core-slim-dev: --packages core-base,core-identity-authorization`
## Developing UDS Core
[Section titled “Developing UDS Core”](#developing-uds-core)
UDS Core development leverages the `uds zarf dev deploy` command. To simplify the setup process, a dedicated UDS Task is available. Please ensure you have [NodeJS](https://nodejs.org/en/download/) version 20 or later installed before proceeding.
Below is an example of the workflow developing the [metrics-server package](https://github.com/defenseunicorns/uds-core/tree/main/src/metrics-server):
```bash
# Create the dev environment
uds run dev-setup
# If developing the Pepr module:
npx pepr dev
# If not developing the Pepr module (can be run multiple times):
npx pepr deploy
# Deploy the package (can be run multiple times)
uds run dev-deploy --set PKG=metrics-server
```
## Testing UDS Core
[Section titled “Testing UDS Core”](#testing-uds-core)
You can perform a complete test of UDS Core by running the following command:
```bash
uds run test-uds-core
```
This command initiates the creation of a local k3d cluster, installs UDS Core, and executes a set of tests identical to those performed in CI. If you wish to run tests targeting a specific package, you can utilize the `PKG` environment variable.
The example below runs tests against the metrics-server package:
```bash
UDS_PKG=metrics-server uds run test-single-package
```
Note
You can specify the `--set FLAVOR=registry1` flag to test using Iron Bank images instead of the upstream images.
-----
# Acronyms & Key Terminology
## Key Terms
[Section titled “Key Terms”](#key-terms)
Before diving further into UDS and its features, it is essential to understand some key terms that form the foundation of UDS:
### Mission Heroes
[Section titled “Mission Heroes”](#mission-heroes)
Mission Heroes are individuals focused on securely migrating their application workloads across various environments - ranging from shifting between multiple cloud providers to transitioning between cloud, on-premises, or edge environments. Mission Heroes leverage UDS Bundles to deliver unique mission objectives on their timelines and within their preferred environments.
### Zarf Package
[Section titled “Zarf Package”](#zarf-package)
A Zarf Package plays a critical role in the UDS platform by facilitating the packaging and delivery of applications and capabilities.
### UDS Package
[Section titled “UDS Package”](#uds-package)
A UDS Package is a collection of open-source applications bundled together to create a single UDS Package. UDS Packages are bundled and delivered in a consistent and repeatable manner to achieve successful mission outcomes. These packages leverage UDS to bundle, deploy, and operate securely in the Mission Heroes specific environment.
### UDS Application
[Section titled “UDS Application”](#uds-application)
A UDS Application represents a specific open-source tool selected to accomplish a function in the mission operations process. Each application is accomplished by selecting a specific tool to perform the function. For instance, source code management can be accomplished using a tool like GitLab, and runtime policy enforcement can be achieved with a tool like Kyverno.
### UDS Application Dependency
[Section titled “UDS Application Dependency”](#uds-application-dependency)
A UDS Application dependency refers to environment-specific needs and infrastructure that must be met for a bundle with core applications to operate successfully. UDS Applications are designed to provide distinct functions and services. However, some UDS Applications may rely on external resources, services, or configurations to function as intended within a particular environment.
### UDS Core
[Section titled “UDS Core”](#uds-core)
UDS Core is a collection of several individual applications combined into a single Zarf Package that establishes a secure baseline for secure cloud-native systems. It comes equipped with comprehensive compliance documentation and prioritizes seamless support for highly regulated and egress-limited environments.
### UDS Bundle
[Section titled “UDS Bundle”](#uds-bundle)
A UDS Bundle is the fundamental building block of UDS. Each bundle is comprised of one or more UDS Applications or Packages that are grouped to enable a key part of the mission. These bundles provide a structured approach to assembling capabilities and enable the effective deployment of mission-oriented functionalities.
### Declarative Baseline
[Section titled “Declarative Baseline”](#declarative-baseline)
A declarative baseline is an explicit specification of the desired configuration and deployment of software components. Users may use declarative baselines to create a Zarf Package or UDS Bundle in UDS to precisely define what is intended to be deployed. The term “baseline” is used to emphasize that this declaration serves as the foundation for the final configuration, ensuring that the end-state matches the stated intentions.
### Authority to Operate
[Section titled “Authority to Operate”](#authority-to-operate)
Authority to Operate (ATO) is a formal declaration that a system or application meets specific security requirements and is approved to operate in a given environment. Achieving ATO demonstrates compliance with regulations and standards, providing assurance that the system has undergone rigorous security testing and validation.
### Software Bill of Materials
[Section titled “Software Bill of Materials”](#software-bill-of-materials)
A Software Bill of Materials (SBOM) is a comprehensive list of components used in building a software product. It provides transparency into the software supply chain, detailing the dependencies and libraries that make up the software. SBOMs are essential for understanding and managing software vulnerabilities, facilitating effective risk management and compliance efforts.
### Open Security Controls Assessment Language
[Section titled “Open Security Controls Assessment Language”](#open-security-controls-assessment-language)
NIST Open Security Controls Assessment Language (OSCAL) simplifies the process of implementing, assessing, and documenting security controls, promoting consistency and efficiency in security management and compliance activities. It provides a common framework for expressing security requirements, controls, and assessment procedures, facilitating interoperability and automation across security tools and platforms.
### Flavor (as in UDS Package or Bundle flavor)
[Section titled “Flavor (as in UDS Package or Bundle flavor)”](#flavor-as-in-uds-package-or-bundle-flavor)
UDS Packages and so bundles include docker images from someone’s registries. Per mission-hero preference we can typically pull from one of three sources:
1. Unicorn Images. These are the best available images, with the fastest response time to new CVEs, lowest CVE counts, and smallest images. This flavor is denoted in source code as `unicorn` and may use different registry sources based on what is best.
2. Platform One’s Ironbank. This image source is often required on DoD contracts. The flavor is denoted in source code as `registry1`.
3. The vendor’s image registry. We refer to the vendor-flavor as `upstream`.
This builds off of [Zarf’s package-flavors](https://docs.zarf.dev/ref/examples/package-flavors/#_top).
## How UDS Works
[Section titled “How UDS Works”](#how-uds-works)
The UDS workflow is a systematic approach that enables Mission Heroes achieve mission objectives by deploying mission applications effectively and securely. UDS simplifies the deployment process while ensuring the delivery of secure and mission-critical applications. From establishing secure runtimes with a UDS Bundle to enhancing deployment efficiency with UDS Packages and deploying tailored mission capabilities, UDS empowers Mission Heroes to achieve successful and secure deployments across various environments. UDS supports your team at every step, from building foundational environments to deploying mission-specific applications that drive impactful outcomes.
### Infrastructure as Code (IaC)
[Section titled “Infrastructure as Code (IaC)”](#infrastructure-as-code-iac)
UDS Core applications rely on various dependencies, such as relational databases, key-value stores, and object stores. These requirements can be met through environment-provided services hosted within the infrastructure layer. UDS offers two approaches for fulfilling these dependencies: utilizing in-cluster resources or leveraging external infrastructure services.
The decision to provision external resources is based on mission environment specifics, granting your teams the flexibility to adapt while maintaining operational efficiency. UDS IaC ensures consistency and reduces manual efforts, providing an optimal foundation for various mission needs through the automation of provisioning, configuration, and management of infrastructure resources.
### Building the UDS Core Bundle
[Section titled “Building the UDS Core Bundle”](#building-the-uds-core-bundle)
The UDS workflow begins with the creation and maintenance of a UDS Bundle. This bundle forms the foundation of a secure runtime environment for your mission applications. UDS Bundles provide the necessary baseline tools that ensure the security, compliance, and reliability of your mission-critical applications.
UDS Bundles are created to include essential components, configurations, and security measures. They lay the groundwork for deploying additional capabilities and software without compromising security. By building and employing UDS Bundles, Mission Heroes can establish a consistent and secure runtime environment that serves as a strong foundation for software deployments.
### Deploying Mission-Specific Packages
[Section titled “Deploying Mission-Specific Packages”](#deploying-mission-specific-packages)
The final phase of the UDS workflow involves the deployment of mission-specific packages onto the secure UDS environments that have been established. These packages are tailored to meet the unique needs of your mission and enhance the execution of your application.
Mission-specific packages are bundled and delivered alongside your application. They provide specialized functionalities, services, and tools that align with your mission objectives. Whether it’s generative AI-driven solutions, software factories, collaborative tools, or identity and access management, UDS enables you to deploy these packages whenever and in whatever environment best fits your mission needs.
-----
# Mission & Technical Relevance
Unicorn Delivery Service (UDS) is a hardware-agnostic software landscape built on top of the secure runtime platform provided by UDS Core. The UDS software landscape enables application development teams to focus their efforts on feature development and delivering value while reducing the time spent grappling with the intricacies of individual runtime environments. Simultaneously, it allows platform teams to allocate more resources to system operation and less to the concerns associated with application nuances.
With UDS, mission teams can:
* Orchestrate applications into any supported environment with a secure runtime platform.
* Streamline application deployment, management, accreditation, and scalability across developer and production environments.
* Facilitate obtaining an Authority to Operate (ATO) with documentation evidence to support that controls are met.
* Leverage open-source tools.
## UDS Mission Bundles and Packages
[Section titled “UDS Mission Bundles and Packages”](#uds-mission-bundles-and-packages)
UDS consists of three main components, each serving a distinct purpose and working together to enable the deployment of mission capabilities and applications effectively.
**UDS Packages:** UDS Packages refer to the specific requirements of a Mission Hero. These packages must be bundled and delivered in a consistent and repeatable manner to effectively achieve mission outcomes. UDS Packages are integrated into UDS through a process that involves the coordination of various open-source projects.
**UDS Applications:** Reusable collections of external tools that enable and extend the functionality of UDS Bundles. They include object storage, databases, and other tools that assist Mission Heroes in delivering software and achieving mission objectives. Mission Applications are synonymous with external supporting applications, tested and proven reliable, packaged as Zarf Packages, and then readily prepared for deployment within the UDS environment.
**Mission Capabilities:** Represent the unique requirements and tools essential for our Mission Heroes to achieve their mission objectives. These capabilities include a wide range of functionalities, tools, and resources specifically tailored to meet the needs of our Mission Heroes.
**UDS Bundle:** A collection of UDS Packages that combine mission-critical tools into a secure runtime environment supported by UDS. UDS Bundles provide the foundational layer for deploying additional mission applications and must be deployed before any other UDS Package.
### Current UDS Mission Capabilities
[Section titled “Current UDS Mission Capabilities”](#current-uds-mission-capabilities)
| **Mission Capability** | **Description** |
| ----------------------------- | -------------------------------------------------------------------------------------------------------------------------------------------------------------------------------------------------------------------------------------------------------------------------------------------------------------------------------------------------------------------------------------------------------------------------------------------------------------------------------------------------------------------------------------------------------------------------------------------------------------------------------------------------------------- |
| **Software Factory** | Software Factory is designed to enhance software development in enterprise DevSecOps pipelines in cloud, on-premises, or edge systems. It offers a comprehensive package of preconfigured, open-source tools to host secure CI/CD pipelines in any environment. Software Factory automates the software delivery process, ensures security across the entire CI/CD pipeline, and provides Mission Heroes with immediate assurances of software safety. With Software Factory, Mission Heroes gain data independence, support and maintenance options, and secure CI/CD pipelines that adhere to industry and DoD best practices. |
| **Your App Your Environment** | Your App Your Environment streamlines application deployment for Mission Heroes, enabling seamless selection, deployment, and management of mission-critical software on a Kubernetes cluster. Leveraging UDS and open-source projects, it efficiently addresses challenges like egress-limited or air-gapped environment software delivery. Integrated with Defense Unicorns’ DevSecOps Reference Guide compliant architecture, it ensures compliance and security, meeting 70% of technical security controls out of the box. Teams maintain ownership and independence over their applications, with the flexibility to deploy across various environments. |
## Powered by Open Source Tools
[Section titled “Powered by Open Source Tools”](#powered-by-open-source-tools)
At a high level, UDS bundles infrastructure, platform, and mission applications in a way that makes them portable to different mission systems and environments. It is an end-to-end solution that establishes and leverages a secure and declarative baseline to streamline software delivery. UDS tightly integrates and leverages Defense Unicorns’ open source projects: Zarf, Pepr, and Lula. The UDS CLI serves as the interaction point connecting these components, facilitating seamless deployment and security of infrastructure within the UDS platform.
## Environments Supported by UDS
[Section titled “Environments Supported by UDS”](#environments-supported-by-uds)
UDS Bundles are designed to be deployed across various environments, providing flexibility and adaptability for your mission needs. UDS is adaptable to the requirements of different software applications and missions, ensuring successful deployment in diverse environments. Below are the environments where bundles can be deployed:
| **Environment** | **Description** |
| ----------------- | ------------------------------------------------------------------------------------------------------------------------------------------------------------------------------------------------------------------------------------------------------------------------------------------------------------------------------------------------------------------------------------------------------------------------------------------------------------------------- |
| **Cloud** | UDS Bundles support both classified and unclassified cloud environments, including AWS, Azure, Google Cloud, and others. Deploy mission capabilities confidently to public, private, or hybrid cloud environments with UDS. |
| **On-Premises** | UDS Bundles are equipped to handle on-premises deployment for missions requiring it. Deploy capabilities securely within your infrastructure, providing a secure and controlled environment for software applications. Mission Heroes can bundle and deploy software to servers located within the organization’s premises using UDS. |
| **Tactical Edge** | UDS extends its capabilities to edge environments, enabling the deployment of software to devices with limited resources and connectivity. For scenarios where edge computing is crucial, UDS facilitates the deployment and operation of mission capabilities at the edge of the network, ensuring efficient and responsive operations. Tactical edge deployments are suitable for scenarios where low latency and real-time processing are critical to mission success. |
-----
# UDS Technical Structure
## Foundational apps
[Section titled “Foundational apps”](#foundational-apps)
UDS Core provides a foundational set of applications that form the backbone of a secure and efficient mission environment. Each application addresses critical aspects of microservices communication, monitoring, logging, security, compliance, and data protection. These applications are essential for establishing a reliable runtime environment and ensuring that mission-critical applications operate seamlessly.
By leveraging these applications within UDS Core, users can confidently deploy and operate source packages that meet stringent security and performance standards. UDS Core provides the applications and flexibility required to achieve diverse mission objectives, whether in cloud, on-premises, or edge environments. UDS source packages cater to the specific needs of Mission Heroes and their mission-critical operations. Below, we’ll discuss some of those key applications.
## Powered by Open Source Tools
[Section titled “Powered by Open Source Tools”](#powered-by-open-source-tools)
At a high level, UDS bundles infrastructure, platform, and mission applications in a way that makes them portable to different mission systems and environments. It is an end-to-end solution that establishes and leverages a secure and declarative baseline to streamline software delivery. UDS tightly integrates and leverages Defense Unicorns’ open source projects: Zarf, Pepr, and Lula. The UDS CLI serves as the interaction point connecting these components, facilitating seamless deployment and security of infrastructure within the UDS platform.
### Zarf
[Section titled “Zarf”](#zarf)
Zarf is the generic bundler and installer for UDS. It plays a critical role in the UDS platform by simplifying the packaging and delivery of applications. Zarf delivers platform infrastructure and applications in a declarative state via a collection of Zarf Packages while reducing the need for mission personnel in constrained or classified environments to be Kubernetes or platform experts.
Zarf enables the deployment of Big Bang and other DevSecOps tools, platforms, or infrastructure across security boundaries and classification levels. Zarf also simplifies the installation, updating, and maintenance of DevSecOps capabilities such as Kubernetes clusters, logging, and Software Bill of Materials (SBOM) compliance out of the box. Most importantly, Zarf keeps applications and systems running even when disconnected. For more information, see the [Zarf documentation](https://docs.zarf.dev/docs/zarf-overview) or [Zarf GitHub page](https://github.com/defenseunicorns/zarf#readme).
### Pepr
[Section titled “Pepr”](#pepr)
Pepr automates the integration of applications with runtime capabilities within an environment. This is the core project that will enable the agnostic runtime of applications into any UDS environment as Pepr will adjust the application configuration to be compatible with the target environment. Pepr seamlessly integrates UDS Bundles and Zarf Components, forming a growing library of bundles and components. It streamlines the integration process, enabling application teams to leverage a wide range of pre-built bundles and packages without the need for extensive manual configuration. For additional information, please see the [Pepr GitHub page](https://github.com/defenseunicorns/pepr#readme).
### Lula
[Section titled “Lula”](#lula)
Lula is the compliance bridge that leverages the NIST OSCAL framework to automate and simplify compliance in a Kubernetes environment. Lula will demonstrate control inheritance and validation for each UDS Package within the UDS environment. Lula documents and validates controls satisfied by applications, expediting the accreditation process and generating real-time reports for authorizing officials, reducing the burden on the site reliability engineering team and other individuals involved in manually providing control mapping and responses. For additional information, please see the [Lula GitHub page](https://github.com/defenseunicorns/lula#readme).
## UDS CLI
[Section titled “UDS CLI”](#uds-cli)
The UDS CLI serves as the primary interface for users to interact with various components within the UDS platform. The UDS CLI streamlines the deployment process of mission applications and secure infrastructure. The UDS CLI simplifies the tasks involved in running mission applications while maintaining regulatory compliance in a unified and efficient manner.
UDS CLI simplifies deployment by bundling multiple Zarf Packages into a single deployable artifact. This process ensures that UDS Bundles, which encompass infrastructure, platform, and mission applications, can be efficiently deployed within any Mission Hero’s system environment. Additionally, the UDS CLI extends its capabilities to Pepr, where multiple Pepr applications are bundled and deployed as a single Pepr Module to support UDS Bundles during runtime.
The UDS CLI is the interaction point for the entire UDS platform and combines and deploys various UDS products. This unified interface allows users to interact with UDS as a comprehensive platform, simplifying the management of mission-critical applications and components.
## UDS Core Capabilities
[Section titled “UDS Core Capabilities”](#uds-core-capabilities)
| **Capability** | **Application** |
| ---------------------------------- | ------------------------------------------------------------------------------------------------------------------------------------------------------------------------------------------------------------------------------------------------------------------------------------------------------------------------------------------------------------------------------------------------------------------------------------------------------------------------------------------------------------------------- |
| **Service Mesh** | **[Istio](https://istio.io/):** A powerful service mesh that provides traffic management, load balancing, security, and observability features. |
| **Monitoring** | **[Metrics Server](https://kubernetes-sigs.github.io/metrics-server/):** Provides container resource utilization metrics API for Kubernetes clusters. &#xNAN;**[Prometheus](https://prometheus.io/):** Scrapes Metrics Server API and application metrics and stores the data in a time-series database for insights into application health and performance. &#xNAN;**[Grafana](https://grafana.com/grafana/):** Provides visualization and alerting capabilities based on Prometheus’s time-series database of metrics. |
| **Logging** | **[Vector](https://vector.dev/):** A companion agent that efficiently gathers and sends container logs to Loki and other storage locations (S3, SIEM tools, etc), simplifying log monitoring, troubleshooting, and compliance auditing, enhancing the overall observability of the mission environment. &#xNAN;**[Loki](https://grafana.com/docs/loki/latest/):** A log aggregation system that allows users to store, search, and analyze logs across their applications. |
| **Security and Compliance** | **[NeuVector](https://open-docs.neuvector.com/):** Offers container-native security, protecting applications against threats and vulnerabilities. *(Note: NeuVector will be removed from UDS Core on November 10, 2025)* &#xNAN;**[Falco](https://falco.org/):** Provides real-time threat detection and security monitoring for cloud-native environments. &#xNAN;**[Pepr](https://pepr.dev/):** UDS policy engine and operator for enhanced security and compliance. |
| **Identity and Access Management** | **[Keycloak](https://www.keycloak.org/):** A robust open-source Identity and Access Management solution, providing centralized authentication, authorization, and user management for enhanced security and control over access to mission-critical resources. |
| **Backup and Restore** | **[Velero](https://velero.io/):** Provides backup and restore capabilities for Kubernetes clusters, ensuring data protection and disaster recovery. |
| **Authorization** | **[AuthService](https://github.com/istio-ecosystem/authservice):** Offers centralized authorization services, managing access control and permissions within the Istio mesh. AuthService plays a supporting role to Keycloak as it handles part of the OIDC redirect flow. |
-----
# Why UDS?
UDS creates, supports, and maintains a secure runtime platform that simplifies software delivery and deployment for both application development teams and platform teams. UDS deploys mission applications into any environment while providing documentation and evidence to facilitate obtaining an Authority to Operate (ATO). By leveraging the power of open source projects like Zarf, Pepr, Lula, and more, UDS enables the creation of portable and compliant software artifacts.
With UDS, mission teams can:
* Deploy a new accreditable software environment swiftly and seamlessly.
* Update mission application bundles and packages on-demand in minutes.
* Deploy mission applications to classified and unclassified cloud, on-premises, and edge environments.
* Use open and extensible architectures.
* Avoid data and vendor lock-in.
## Security and Compliance
[Section titled “Security and Compliance”](#security-and-compliance)
UDS places a strong emphasis on security and compliance, enabling Mission Heroes to meet stringent requirements for obtaining an Authority to Operate (ATO). It implements the Open Security Controls Assessment Language (OSCAL) framework, which binds compliance to specific software features, ensuring that controls required for accreditation are met efficiently. By integrating security and compliance into the software development and deployment lifecycle, UDS helps your team proactively address potential vulnerabilities, reduce risk, and maintain a secure software ecosystem.
## Enhanced Portability and Cross-Platform Support
[Section titled “Enhanced Portability and Cross-Platform Support”](#enhanced-portability-and-cross-platform-support)
UDS offers enhanced portability, allowing teams to deploy their software artifacts across diverse environments regardless of underlying infrastructure. Whether it’s cloud-based, on-premises, or edge environments, UDS ensures that mission applications can be easily migrated and executed on different platforms. This seamless deployment across domains reduces the need for platform-specific modifications, accelerating the ATO process through the incorporation of compliance documentation directly into the software delivery pipeline. UDS’s portability enables Mission Heroes to adapt quickly to changing infrastructure needs and expand their reach to various environments.
## Open Source and Avoiding Vendor Lock
[Section titled “Open Source and Avoiding Vendor Lock”](#open-source-and-avoiding-vendor-lock)
UDS is built on a foundation of open-source technologies, providing Mission Heroes with the freedom to access and modify the underlying code. By leveraging open-source projects like Zarf, Pepr, Keycloak, Istio, and more, UDS ensures that users can avoid vendor lock-in and maintain control over their data. This open approach allows Mission Heroes to customize and optimize their software delivery processes.
## Leverage UDS Core
[Section titled “Leverage UDS Core”](#leverage-uds-core)
UDS Core offers a foundational suite of applications designed to establish a secure and efficient mission environment. It encompasses critical functionalities such as collaboration, monitoring, logging, security, compliance, and data protection. By utilizing these integrated applications, Mission Heroes can confidently deploy and operate source packages that adhere to rigorous security and performance standards.
-----
# UDS Bundles
A UDS Bundle is a collection of [UDS Packages](/structure/packages) designed to facilitate the delivery of software solutions for specific missions or software delivery processes. With UDS Bundles, teams can efficiently adapt to the unique requirements of each mission without sacrificing the reliability and security of the software delivery process.
UDS Bundles enable:
* A structured and repeatable approach for delivering software solutions tailored to diverse mission needs. Each bundle serves as a collection of capabilities, facilitating the delivery of software solutions for specific mission objectives.
* Efficient adaptability to the unique requirements of each mission without compromising the reliability and security of the software delivery process.
* Secure and consistent software delivery by bundling tools and configurations required for specific mission capabilities, ensuring a standardized and reusable approach.
## Benefits of UDS Bundles
[Section titled “Benefits of UDS Bundles”](#benefits-of-uds-bundles)
**Consistency:** UDS Bundles provide a standardized approach to software delivery, ensuring consistency across different missions and environments.
**Reusability:** The modular nature of UDS Bundles allows for the reuse of capabilities, saving time and effort in software delivery.
**Security and Compliance:** By incorporating controls and documented configurations, UDS Bundles promote secure and compliant software deployments.
**Scalability:** UDS Bundles can be adapted and extended to accommodate different mission requirements and environments.
## Key Features
[Section titled “Key Features”](#key-features)
### Modularity and Reusability
[Section titled “Modularity and Reusability”](#modularity-and-reusability)
UDS Bundles are designed to be modular and reusable, allowing teams to combine different bundles as needed to meet the specific requirements of their missions or projects. By leveraging pre-defined capabilities and tools, UDS Bundles provide a standardized and consistent approach to software delivery.
### Composition of UDS Bundles
[Section titled “Composition of UDS Bundles”](#composition-of-uds-bundles)
Each UDS Bundle is composed of a set of capabilities, where each capability is achieved by selecting specific tools or functional components to perform the required functions. This composition ensures that essential functionalities and configurations are encapsulated within the bundle, making it easier to deploy and operate the software solutions.
### UDS Core Bundle
[Section titled “UDS Core Bundle”](#uds-core-bundle)
The UDS Core Bundle holds a significant role within the UDS architecture. It serves as the foundational bundle that must be delivered before deploying any other optional bundles or mission capabilities. The UDS Core Bundle establishes the basic architecture and secure runtime environment needed for successful software delivery using UDS.
### Versatility of UDS Bundles
[Section titled “Versatility of UDS Bundles”](#versatility-of-uds-bundles)
UDS Bundles are versatile and can be shared and deployed across different environments, enabling consistent and reliable results in various scenarios. This adaptability makes UDS Bundles suitable for diverse mission needs and environments.
### Security and Compliance
[Section titled “Security and Compliance”](#security-and-compliance)
UDS Bundles include SBOMs for all included packages, including anything that [Zarf](https://docs.zarf.dev/ref/sboms/) has pulled and packaged. When using and integrating your bundle with UDS Core, you also benefit from compliance and security standards that are automatically handled for you during deployment, such as network policies and pod security policies. For additional details on the security protection provided by UDS see the [Security Overview section](/security/overview/).
-----
# UDS Packages
> UDS Package Reference
A UDS Package is a [Zarf Package](https://docs.zarf.dev/ref/packages/) with two additions:
1. It is meant to be deployed on top of [UDS Core](/reference/uds-core/overview/).
2. It contains the [UDS Package Kubernetes custom resource](/reference/configuration/custom-resources/packages-v1alpha1-cr/).
These packages include all the [OCI images](https://opencontainers.org/) (docker containers), [Helm charts](https://circleci.com/blog/what-is-helm/#:~:text=A%20Helm%20chart%20is%20a,up%20your%20application%20as%20needed.), and supplemental Kubernetes manifests required for the app to communicate with UDS Core. The UDS Operator in turn auto-applies appropriate security and network policies to assure a secure and compliant running environment. A UDS package *does not* include dependencies like databases or object storage\*. These external dependencies are deployed next to a UDS Package inside a [UDS Bundle](/structure/bundles/).
To move from the theoretical to the concrete, see the next section on the anatomy of a UDS Package repo.
## Anatomy of a UDS Package Repo
[Section titled “Anatomy of a UDS Package Repo”](#anatomy-of-a-uds-package-repo)
*Disclaimer: the exact file structure of UDS Packages is subject to change. This document will fall out of date but should retain conceptual accuracy. After understanding this point-in-time snapshot of how a UDS package is built, it should be fairly trivial to extend that knowledge to grasp UDS packages as improved in the interim. To aid in it’s utility as a teaching tool, links to source code are pinned to a specific GitLab Package release.*
For an in-depth developer-focused treatment of UDS Packages, see [the documentation in GitHub](https://github.com/defenseunicorns/uds-common/blob/main/docs/uds-packages/guide.md). You can also view the UDS package template [in GitHub here](https://github.com/defenseunicorns/uds-package-template/tree/main). This document will go over the main components of a UDS package and their functions at an overview level, and then show specifically how these components are tied together in the case of GitLab.
### Anatomy Overview
[Section titled “Anatomy Overview”](#anatomy-overview)
| Directory / Top-level file | Role | Function |
| :------------------------- | :----------------------------------- | :-------------------------------------------------------------------------------------------------------------------------------------------------------------------------------------------------------------------------------------------------------------------------------------------------------------------------------------------------------------------------------------------------------------------------------------------------------------------------------------------------------------------------------------------------------------------------------------------------------------------------------------------------------------------------------------------------------------------------------------------------------------------------------------------------------------------------------- |
| `.github/` | CI/CD | Directives to GitHub, primarily it contains the build, test, and release pipeline(s). |
| `adr/` | Docs | ”ADR” stands for Architectural Decision Records. These documents record key architectural decisions and their reasoning. |
| `bundle/` | Testing & Development | When you’re testing a UDS Package, you need to be able to deploy it with other applications such as databases in order to test your configuration. The `bundle/` directories in UDS Package repos are for just that. They deploy light-weight databases, key-value stores, and object stores as needed alongside the application to permit testing. They also serve as an example of how to use the UDS Package in a bundle. Nothing in the `bundle/` directory ever becomes part of the UDS Application Package. |
| `charts/` | UDS Package Component | This is for helm charts which are created supplementally to the application’s helm chart. This includes at minimum the UDS Package manifest and the SAML/OIDC configuration for automatic integration with our Keycloak SSO application (which is part of UDS Core). Not infrequently it will also include another resource or two as needed to fully integrate into the UDS ecosystem on an app-specific basis. |
| `common/` | UDS Package Component | This directory holds a single `zarf.yaml` file which is the base Zarf package definition. It is imported by the root-level `zarf.yaml`. You can think of it like the parent-class object in an object-oriented-programming model. This generally pulls the charts from the `charts/` directory and the main application’s helm chart into the Zarf package but leaves [flavor](/overview/acronyms-and-terms/#flavor-as-in-uds-package-or-bundle-flavor) specific details out. |
| `docs/` | Docs | Documentation about the UDS Package. |
| `src/` | Testing & Development | This contains additional zarf package source code in each leaf-directory. These are never made into a part of the UDS Package. Rather, they are included in the test bundle to help glue the application to the larger ecosystem. This often includes a zarf package that contains only the application’s namespace resource. By putting this in a separate zarf package and deploying it ahead of time, secrets deployed to the application’s namespace by other packages (such as authentication secrets) do not get deleted when you run `zarf package remove `. This will be revisited when discussing the `bundle/` directory in the GitLab repo below. |
| `tasks/` | Testing & Development | These tasks run via the [UDS CLI](https://github.com/defenseunicorns/uds-cli) which uses the [maru task runner](https://github.com/defenseunicorns/maru-runner) under the surface to perform workflows like “build, deploy, test” (normally called `dev`) or “publish built artifact”. These tasks are a mixture of bespoke repo-specific tasks and included tasks from the [uds-common repo](https://github.com/defenseunicorns/uds-common/tree/main/tasks). The entrypoint to these tasks is the top-level `tasks.yaml` file which is to the UDS CLI what a [Makefile](https://www.gnu.org/software/make/manual/make.html#Simple-Makefile) is to [GNU make](https://www.gnu.org/software/make/manual/make.html) or as a Rakefile is to Ruby. These tasks are also executed as part of the CI/CD pipeline defined in `.github/`. |
| `tests/` | Testing & Development | This contains files related to the playbook tests which are used to verify that the application in a UDS Package appears to be working as configured in the test bundle (in `bundle/`). These tests are integration-level tests focused on validating connections between the application and the UDS ecosystem. |
| `values/` | UDS Package Component | This directory typically contains four helm `values.yaml` files which are fed into the main application’s helm chart to configure it. Of note, the `common-values.yaml` file contains all configuration *common* to all deployment [flavors](/overview/acronyms-and-terms/#flavor-as-in-uds-package-or-bundle-flavor) and the `-values.yaml` files contain the image URLs for the given value and any configuration changes required to make it work with this specific [flavor](/overview/acronyms-and-terms/#flavor-as-in-uds-package-or-bundle-flavor) of images. |
| *misc top-level files* | Licensing, tool configurations, etc. | Most of the top-level files are self-explanatory or largely irrelevant to most users. The remainder of this table will discuss only the most important ones. |
| `tasks.yaml` | Testing & Development | As mentioned when discussing the `tasks/` directory. This file defines all tasks accessible to the command `uds run `. View them by running `uds run --list`. |
| `zarf.yaml` | UDS Package Component | This is *the* Zarf package which is in this case also a UDS Package. If this were a code repository, this file would be the `main` function. It defines all top-level Zarf variables, and then includes one component per flavor, each component importing the `common/zarf.yaml` package. Each component (which stands for a package flavor) adds the `values/-values.yaml` file to set the images to the desired flavor in the helm chart and lists the needed images so Zarf can pull them down and add them to the package at build time. These components are turned on or off by the “flavor” variable value at build time producing only one of the components at any time in the final UDS Package. |
These directories may be easiest understood through a detailed example.
### GitLab’s UDS Package Anatomy
[Section titled “GitLab’s UDS Package Anatomy”](#gitlabs-uds-package-anatomy)
GitLab is the cornerstone application in the UDS Software Factory. You can view the UDS Package for GitLab [on Defense Unicorn’s GitHub](https://github.com/defenseunicorns/uds-package-gitlab). This dive into UDS Package anatomy will use the repo as it existed in release [v17.3.6-uds.1](https://github.com/defenseunicorns/uds-package-gitlab/tree/v17.3.6-uds.1). That is, GitLab version 17.3.6, second package release for that version (zero-indexed).
Rather than reviewing the repo according to the alphabetical ordering of it’s directories as in the table above, components of the repo are discussed in terms of how they build to produce a UDS Package, and not all components will receive the same screen-time, rather, what follows is something of a guided tour through the repository.
#### GitLab’s UDS Package Components
[Section titled “GitLab’s UDS Package Components”](#gitlabs-uds-package-components)
##### `common/zarf.yaml`
[Section titled “common/zarf.yaml”](#commonzarfyaml)
Starting with [`common/zarf.yaml`](https://github.com/defenseunicorns/uds-package-gitlab/blob/v17.3.6-uds.1/common/zarf.yaml) we have the base [`ZarfPackageConfig`](https://docs.zarf.dev/ref/packages/#zarfpackageconfig). It is reprinted in abbreviated form below with comments added for clear in-line explanation.
```yaml
kind: ZarfPackageConfig # A UDS Package is just a kind of Zarf Package
metadata:
name: gitlab-common
description: "UDS GitLab Common Package"
# Recall later that all three helm charts below are part of a single zarf component, GitLab.
components:
- name: gitlab
required: true
charts: # These charts are deployed in the order listed, use this to your advantage
# Adds SSO, postgre, and redis auth secrets which are expected (required) by the main
# app (if missing, will break the deployment). Also includes the UDS Package resource
# which makes this Zarf Package also a UDS Package.
- name: uds-gitlab-config
namespace: gitlab
version: 0.2.0
localPath: ../charts/config # Note the filepath, this references charts/config
# The GitLab application
- name: gitlab
namespace: gitlab
# The upstream helm chart. Note the repo url given is NOT the git repo which is
# https://gitlab.com/gitlab-org/charts/gitlab. Googling can be required to connect
# a helm chart repo to it's source code repo. Some UDS Packages will use the Big
# Bang helm chart instead, or, rarely, a Defense Unicorns produced helm chart.
url: https://charts.gitlab.io/
gitPath: chart
version: "8.5.1"
valuesFiles:
# Note we pull in the common values file. The top-level zarf.yaml will add overrides
# for the desired flavor
- ../values/common-values.yaml
# If you inspect https://github.com/defenseunicorns/uds-package-gitlab/blob/v17.3.6-uds.1/charts/settings/templates/_settings-pod.tpl
# you will see this chart creates a job that further configures GitLab in ways that
# could not be done via Helm at deploy-time.
- name: uds-gitlab-settings
namespace: gitlab
version: 0.1.0 # These "helper" charts rarely change version. Often, they are
# forever this version, 0.1.0.
localPath: ../charts/settings # Note the filepath, this references charts/settings
actions:
onDeploy:
after:
...
# multiple zarf jobs to ensure each part of GitLab is happy after deployment
```
##### `./zarf.yaml`
[Section titled “./zarf.yaml”](#zarfyaml)
If we go now to the root-level [zarf.yaml](https://github.com/defenseunicorns/uds-package-gitlab/blob/v17.3.6-uds.1/zarf.yaml) file we can see the [Zarf variables](https://docs.zarf.dev/ref/values/) and [flavors](/overview/acronyms-and-terms/#flavor-as-in-uds-package-or-bundle-flavor) get added in.
```yaml
kind: ZarfPackageConfig # As before, a UDS Package is just a Zarf Package with made for UDS
metadata:
name: gitlab
description: "UDS GitLab Package"
version: "17.3.6-uds.1" # As mentioned earlier, this document is locked to a specific
# version for consistency.
# These variables are given values within the UDS ecosystem in one of two ways: either they
# are given a value in the UDS bundle definition (if the correct value can be known at bundle
# build time) or in the UDS configuration (use only if the correct value cannot be known
# until deploy time).
variables:
- name: DOMAIN
default: "uds.dev"
- name: BUCKET_PREFIX # Incidentally, buckets refer to object storage such as S3.
default: "uds-"
- name: BUCKET_SUFFIX
default: ""
- name: GITLAB_REDIS_ENDPOINT # Redis is always replaced with valkey in a UDS deployment
default: ""
- name: GITLAB_REDIS_SCHEME
default: "redis"
- name: GITLAB_DB_NAME # This refers to the Postgresql db.
default: "gitlabdb"
- name: GITLAB_DB_USERNAME
default: "gitlab"
- name: GITLAB_DB_ENDPOINT
default: "postgresql"
- name: GITLAB_PAGES_ENABLED # A GitLab documentation feature
default: "false"
- name: GITLAB_SIGNUP_ENABLED # A GitLab feature related account creation
default: "true"
- name: DISABLE_REGISTRY_REDIRECT
default: "false"
description: "If your storage endpoint is not publicly accessible set this to true"
components:
# For each component, notice the "only" keyword and how each component requires a
# different flavor. Consequently, only one of the following components are included.
# Notice too, that each one imports the gitlab component from the common/zarf.yaml
# file discussed above, and so automatically includes both "helper" charts (from charts/).
# Registry1 flavor as shown by the 'only' block.
- name: gitlab
required: true
description: "Deploy gitlab with registry1 images"
import:
path: common # The crucial import
only:
flavor: registry1 # This is the Ironbank flavor
cluster:
architecture: amd64 # The architecture _must_ be amd64 because Ironbank does not have
# all the ARM-based images required for GitLab.
charts:
- name: gitlab
valuesFiles:
- values/registry1-values.yaml # Add the registry1-values.yaml file to further
# configure the chart and override values in the
# values/common-values.yaml file if necessary.
- name: uds-gitlab-settings
valuesFiles:
# Because the gitlab settings setting job runs in an image, also grab the Ironbank
# version of the required image. See:
# https://github.com/defenseunicorns/uds-package-gitlab/blob/v17.3.6-uds.1/charts/settings/values.yaml#L8
- values/registry1-values.yaml
images:
# Here we list all the images referenced in the values.yaml files. This is how Zarf
# knows which images to pull down, package with the helm charts & manifests, and deploy
# to the image registry it will put in-cluster (this is part of how it enables
# air-gapped deployments). List abbreviated for space. For more, see:
# https://docs.zarf.dev/ref/components/#container-images
- "registry1.dso.mil/ironbank/gitlab/gitlab/certificates:17.3.6"
...
- "registry1.dso.mil/ironbank/gitlab/gitlab/gitlab-exporter:17.3.6"
# Upstream flavor as shown by the 'only' block.
- name: gitlab
required: true
description: "Deploy gitlab"
import:
path: common # The crucial import again
only:
flavor: upstream # This component is what we get if flavor is upstream.
# Note no processor architecture restrictions. The upstream Gitlab registry has ARM-
# based images.
charts:
- name: gitlab
valuesFiles:
- values/upstream-values.yaml # Using the upstream values file.
- name: uds-gitlab-settings
valuesFiles:
- values/upstream-values.yaml # Setting upstream image values similarly to the
# settings chart
images:
# The upstream image URLs, again abbreviated for the sake of space.
- "registry.gitlab.com/gitlab-org/build/cng/certificates:v17.3.6"
...
- "registry.gitlab.com/gitlab-org/build/cng/gitlab-exporter:v17.3.6"
# Unicorn flavor as shown by the 'only' block.
- name: gitlab
required: true
description: "Deploy gitlab with rapidfort images"
import: # See this
path: common
only:
flavor: unicorn # See this
charts:
- name: gitlab
valuesFiles:
- values/unicorn-values.yaml # See this
- name: uds-gitlab-settings
valuesFiles:
- values/unicorn-values.yaml # And this
images:
# And finally the rapidfort OCI image URLs
- "quay.io/rfcurated/gitlab/certificates:17.10.5-jammy-scratch-rfcurated"
...
- "quay.io/rfcurated/gitlab/gitlab-exporter:17.10.5-15.2.0-jammy-fips-rfcurated"
```
#### GitLab’s Testing & Development
[Section titled “GitLab’s Testing & Development”](#gitlabs-testing--development)
As explained in the [anatomy overview](/structure/packages/#anatomy-of-a-uds-package-repo), the [bundle/](https://github.com/defenseunicorns/uds-package-gitlab/tree/v17.3.6-uds.1/bundle) directory contains a bundle using the GitLab UDS Package and serves two functions. First, it provides a way to deploy and test GitLab as configured by the UDS Package. Second, like any good test, it is a form of documentation showing how Gitlab may be connected into a bundle.
Bundle files get larger than the `zarf.yaml` files previously explored so this one will be more severely abbreviated.
[uds-bundle.yaml](https://github.com/defenseunicorns/uds-package-gitlab/blob/v17.3.6-uds.1/bundle/uds-bundle.yaml) excerpts:
```yaml
kind: UDSBundle
metadata:
name: gitlab-test
description: A UDS bundle for deploying Gitlab and it's dependencies on a development cluster
version: 17.3.6-uds.1
# A UDS Bundle contains many UDS Packages. UDS Bundles never contain other bundles.
packages:
# This provides object storage with the AWS S3 API in-cluster. While useful for development
# and testing, this service is often provided by an off-cluster service in large deployments.
# Repo behind the package: https://github.com/defenseunicorns/uds-package-minio-operator
- name: dev-minio
repository: ghcr.io/defenseunicorns/packages/uds/dev-minio
ref: 0.0.2
# This is a bit of an odd duck. We create the namespace for GitLab ahead of time so if we run
# `zarf package remove gitlab` we don't lose the namespace. This keeps secrets generated by
# applications like postgres around so the re-deployed GitLab package can still discover how
# to authenticate with these services. This is frequently helpful.
- name: dev-namespace
path: ../ # Note the path, when `uds run dev` is executed, one of the build jobs will put
# the built zarf package defined in src/namespace/zarf.yaml in the root directory.
# This path anticipates this fact as the bundle is built after the zarf packages
# are built.x
ref: 0.1.0
# This provides a postgres database in cluster.
# Repo behind the package: https://github.com/defenseunicorns/uds-package-postgres-operator
- name: postgres-operator
repository: ghcr.io/defenseunicorns/packages/uds/postgres-operator
ref: 1.13.0-uds.2-upstream
overrides:
postgres-operator:
uds-postgres-config:
values:
- path: postgresql
value:
enabled: true
teamId: "uds"
volume:
size: "10Gi"
numberOfInstances: 2
users:
gitlab.gitlab: [] # heads up, usernames are always namespace.app
databases:
gitlabdb: gitlab.gitlab
version: "14"
ingress:
- remoteNamespace: gitlab
# This is our Redis replacement because it's totally open source.
# Repo behind the package: https://github.com/defenseunicorns/uds-package-valkey
- name: valkey
repository: ghcr.io/defenseunicorns/packages/uds/valkey
ref: 7.2.7-uds.0-upstream
overrides:
valkey:
uds-valkey-config:
values:
- path: custom
value:
- direction: Ingress
selector:
app.kubernetes.io/name: valkey
remoteNamespace: gitlab
port: 6379
description: "Ingress from GitLab"
- path: copyPassword # This is how we get the access secret where GitLab expects it.
value:
enabled: true
namespace: gitlab
secretName: gitlab-redis
secretKey: password
# This puts a secret in the gitlab namespace containing access information for MinIO (S3 mimic)
# It's in src/dev-secrets in the GitLab repo.
- name: dev-secrets
path: ../
ref: 0.1.0
# This is where we add the GitLab UDS Package to the bundle. Recall that it had two charts included:
# - https://github.com/defenseunicorns/uds-package-gitlab/tree/v17.3.6-uds.1/charts
# - https://github.com/defenseunicorns/uds-package-gitlab/blob/v17.3.6-uds.1/common/zarf.yaml#L14
# - https://github.com/defenseunicorns/uds-package-gitlab/blob/v17.3.6-uds.1/common/zarf.yaml#L25
- name: gitlab
# Note that the path for the GitLab Zarf package (which is a UDS package) is '../' same as for
# the dev-secret package because all zarf packages are built before the bundle is built, and put
# in the repo's root dir.
path: ../
ref: 17.3.6-uds.1 # FYI: versions tend to be -uds.
overrides:
gitlab:
# This is the chart in `charts/` which we're configuring here.
# Notice how we can hardcode a value to a path (under values:) OR we can add a variable
# and assign it to a path (everything under variables). These variables can be overridden
# at deploy-time via entries in the uds-config.yaml. Creating variables in your bundle
# is a super powerful way to expose parts of the underlying helm chart for deploy-time
# configuration. Full lists and dictionaries can be given as a variable value too, so
# it's very malleable.
uds-gitlab-config:
values:
- path: ssh.enabled
value: true
- path: ssh.port
value: 2223
variables:
- name: GITLAB_SSO_ENABLED
description: "Boolean to enable or disable sso things"
path: "sso.enabled"
...
- name: GITLAB_REQUIRED_GROUPS
description: "Array of group names that are required for GitLab access."
path: "sso.requiredGroups"
gitlab:
values:
- path: gitlab.gitlab-shell.enabled
value: true
- path: global.shell.port
value: 2223
# The hostname is known after deploying it once and from knowing the namespace
# we're putting the operator in.
- path: global.psql.host
value: pg-cluster.postgres.svc.cluster.local
# The username is known from the yaml above. As warned there too, don't try to get
# away from the app.app usernames, or, if you're having problems, try app.namespace.
# See postgre operator package docs for more here, if you can avoid changing it,
# you'll avoid a set of problems.
- path: "global.psql.username"
value: "gitlab.gitlab"
# These hard-coded values are known via experience combined with what's given to the
# postgres operator above. The name of the secret the operator creates is predictable.
- path: "global.psql.password.secret"
value: "gitlab.gitlab.pg-cluster.credentials.postgresql.acid.zalan.do"
# This hostname is known based on experience (deploying once and seeing what the
# service name was) and knowing the namespace the valkey package is deploying too.
- path: global.redis.host
value: valkey-master.valkey.svc.cluster.local
variables:
- name: GITLAB_SSO_ENABLED
description: "Boolean to enable or disable sso things"
path: "global.appConfig.omniauth.enabled"
...
- name: SHELL_REPLICAS
description: "Gitlab Shell Min Replicas"
path: "gitlab.gitlab-shell.minReplicas"
uds-gitlab-settings:
values:
- path: settingsJob.application.enabled_git_access_protocol
value: all
variables:
- name: BOT_ACCOUNTS
description: "Bot Accounts to Create"
path: "botAccounts"
```
## Footnotes
[Section titled “Footnotes”](#footnotes)
\*object storage is the type of storage most commonly associated with AWS’ S3 service. In Azure it’s called Blob Storage, in Kubernetes it is typically MinIO, and it goes by various other names in other storage platforms.
-----
# uds
> UDS CLI command reference for uds.
## uds
[Section titled “uds”](#uds)
CLI for UDS Bundles
```plaintext
uds COMMAND [flags]
```
### Options
[Section titled “Options”](#options)
```plaintext
-a, --architecture string Architecture for UDS bundles and Zarf packages
-h, --help help for uds
--insecure Allow access to insecure registries and disable other recommended security enforcements such as package checksum and signature validation. This flag should only be used if you have a specific reason and accept the reduced security posture.
-l, --log-level string Log level when running UDS-CLI. Valid options are: warn, info, debug, trace (default "info")
--no-color Disable color output
--no-log-file Disable log file creation
--no-progress Disable fancy UI progress bars, spinners, logos, etc
--oci-concurrency int Number of concurrent layer operations to perform when interacting with a remote bundle. (default 3)
--skip-signature-validation Skip signature validation for packages
--tmpdir string Specify the temporary directory to use for intermediate files
--uds-cache string Specify the location of the UDS cache directory (default "~/.uds-cache")
```
### SEE ALSO
[Section titled “SEE ALSO”](#see-also)
* [uds completion](/reference/cli/commands/uds_completion/) - Generate the autocompletion script for the specified shell
* [uds create](/reference/cli/commands/uds_create/) - Create a bundle from a given directory or the current directory
* [uds deploy](/reference/cli/commands/uds_deploy/) - Deploy a bundle from a local tarball or oci:// URL
* [uds dev](/reference/cli/commands/uds_dev/) - \[beta] Commands useful for developing bundles
* [uds inspect](/reference/cli/commands/uds_inspect/) - Display the metadata of a bundle
* [uds logs](/reference/cli/commands/uds_logs/) - View most recent UDS CLI logs
* [uds monitor](/reference/cli/commands/uds_monitor/) - Monitor a UDS Cluster
* [uds publish](/reference/cli/commands/uds_publish/) - Publish a bundle from the local file system to a remote registry
* [uds pull](/reference/cli/commands/uds_pull/) - Pull a bundle from a remote registry and save to the local file system
* [uds remove](/reference/cli/commands/uds_remove/) - Remove a bundle that has been deployed already
* [uds run](/reference/cli/commands/uds_run/) - Run a task using maru-runner
* [uds version](/reference/cli/commands/uds_version/) - Shows the version of the running UDS-CLI binary
-----
# uds completion
> UDS CLI command reference for uds completion.
## uds completion
[Section titled “uds completion”](#uds-completion)
Generate the autocompletion script for the specified shell
### Synopsis
[Section titled “Synopsis”](#synopsis)
Generate the autocompletion script for uds for the specified shell. See each sub-command’s help for details on how to use the generated script.
### Options
[Section titled “Options”](#options)
```plaintext
-h, --help help for completion
```
### Options inherited from parent commands
[Section titled “Options inherited from parent commands”](#options-inherited-from-parent-commands)
```plaintext
-a, --architecture string Architecture for UDS bundles and Zarf packages
--insecure Allow access to insecure registries and disable other recommended security enforcements such as package checksum and signature validation. This flag should only be used if you have a specific reason and accept the reduced security posture.
-l, --log-level string Log level when running UDS-CLI. Valid options are: warn, info, debug, trace (default "info")
--no-color Disable color output
--no-log-file Disable log file creation
--no-progress Disable fancy UI progress bars, spinners, logos, etc
--oci-concurrency int Number of concurrent layer operations to perform when interacting with a remote bundle. (default 3)
--skip-signature-validation Skip signature validation for packages
--tmpdir string Specify the temporary directory to use for intermediate files
--uds-cache string Specify the location of the UDS cache directory (default "~/.uds-cache")
```
### SEE ALSO
[Section titled “SEE ALSO”](#see-also)
* [uds](/reference/cli/commands/uds/) - CLI for UDS Bundles
* [uds completion bash](/reference/cli/commands/uds_completion_bash/) - Generate the autocompletion script for bash
* [uds completion fish](/reference/cli/commands/uds_completion_fish/) - Generate the autocompletion script for fish
* [uds completion zsh](/reference/cli/commands/uds_completion_zsh/) - Generate the autocompletion script for zsh
-----
# uds completion bash
> UDS CLI command reference for uds completion bash.
## uds completion bash
[Section titled “uds completion bash”](#uds-completion-bash)
Generate the autocompletion script for bash
### Synopsis
[Section titled “Synopsis”](#synopsis)
Generate the autocompletion script for the bash shell.
This script depends on the ‘bash-completion’ package. If it is not installed already, you can install it via your OS’s package manager.
To load completions in your current shell session:
```plaintext
source <(uds completion bash)
```
To load completions for every new session, execute once:
#### Linux:
[Section titled “Linux:”](#linux)
```plaintext
uds completion bash > /etc/bash_completion.d/uds
```
#### macOS:
[Section titled “macOS:”](#macos)
```plaintext
uds completion bash > $(brew --prefix)/etc/bash_completion.d/uds
```
You will need to start a new shell for this setup to take effect.
```plaintext
uds completion bash
```
### Options
[Section titled “Options”](#options)
```plaintext
-h, --help help for bash
--no-descriptions disable completion descriptions
```
### Options inherited from parent commands
[Section titled “Options inherited from parent commands”](#options-inherited-from-parent-commands)
```plaintext
-a, --architecture string Architecture for UDS bundles and Zarf packages
--insecure Allow access to insecure registries and disable other recommended security enforcements such as package checksum and signature validation. This flag should only be used if you have a specific reason and accept the reduced security posture.
-l, --log-level string Log level when running UDS-CLI. Valid options are: warn, info, debug, trace (default "info")
--no-color Disable color output
--no-log-file Disable log file creation
--no-progress Disable fancy UI progress bars, spinners, logos, etc
--oci-concurrency int Number of concurrent layer operations to perform when interacting with a remote bundle. (default 3)
--skip-signature-validation Skip signature validation for packages
--tmpdir string Specify the temporary directory to use for intermediate files
--uds-cache string Specify the location of the UDS cache directory (default "~/.uds-cache")
```
### SEE ALSO
[Section titled “SEE ALSO”](#see-also)
* [uds completion](/reference/cli/commands/uds_completion/) - Generate the autocompletion script for the specified shell
-----
# uds completion fish
> UDS CLI command reference for uds completion fish.
## uds completion fish
[Section titled “uds completion fish”](#uds-completion-fish)
Generate the autocompletion script for fish
### Synopsis
[Section titled “Synopsis”](#synopsis)
Generate the autocompletion script for the fish shell.
To load completions in your current shell session:
```plaintext
uds completion fish | source
```
To load completions for every new session, execute once:
```plaintext
uds completion fish > ~/.config/fish/completions/uds.fish
```
You will need to start a new shell for this setup to take effect.
```plaintext
uds completion fish [flags]
```
### Options
[Section titled “Options”](#options)
```plaintext
-h, --help help for fish
--no-descriptions disable completion descriptions
```
### Options inherited from parent commands
[Section titled “Options inherited from parent commands”](#options-inherited-from-parent-commands)
```plaintext
-a, --architecture string Architecture for UDS bundles and Zarf packages
--insecure Allow access to insecure registries and disable other recommended security enforcements such as package checksum and signature validation. This flag should only be used if you have a specific reason and accept the reduced security posture.
-l, --log-level string Log level when running UDS-CLI. Valid options are: warn, info, debug, trace (default "info")
--no-color Disable color output
--no-log-file Disable log file creation
--no-progress Disable fancy UI progress bars, spinners, logos, etc
--oci-concurrency int Number of concurrent layer operations to perform when interacting with a remote bundle. (default 3)
--skip-signature-validation Skip signature validation for packages
--tmpdir string Specify the temporary directory to use for intermediate files
--uds-cache string Specify the location of the UDS cache directory (default "~/.uds-cache")
```
### SEE ALSO
[Section titled “SEE ALSO”](#see-also)
* [uds completion](/reference/cli/commands/uds_completion/) - Generate the autocompletion script for the specified shell
-----
# uds completion zsh
> UDS CLI command reference for uds completion zsh.
## uds completion zsh
[Section titled “uds completion zsh”](#uds-completion-zsh)
Generate the autocompletion script for zsh
### Synopsis
[Section titled “Synopsis”](#synopsis)
Generate the autocompletion script for the zsh shell.
If shell completion is not already enabled in your environment you will need to enable it. You can execute the following once:
```plaintext
echo "autoload -U compinit; compinit" >> ~/.zshrc
```
To load completions in your current shell session:
```plaintext
source <(uds completion zsh)
```
To load completions for every new session, execute once:
#### Linux:
[Section titled “Linux:”](#linux)
```plaintext
uds completion zsh > "${fpath[1]}/_uds"
```
#### macOS:
[Section titled “macOS:”](#macos)
```plaintext
uds completion zsh > $(brew --prefix)/share/zsh/site-functions/_uds
```
You will need to start a new shell for this setup to take effect.
```plaintext
uds completion zsh [flags]
```
### Options
[Section titled “Options”](#options)
```plaintext
-h, --help help for zsh
--no-descriptions disable completion descriptions
```
### Options inherited from parent commands
[Section titled “Options inherited from parent commands”](#options-inherited-from-parent-commands)
```plaintext
-a, --architecture string Architecture for UDS bundles and Zarf packages
--insecure Allow access to insecure registries and disable other recommended security enforcements such as package checksum and signature validation. This flag should only be used if you have a specific reason and accept the reduced security posture.
-l, --log-level string Log level when running UDS-CLI. Valid options are: warn, info, debug, trace (default "info")
--no-color Disable color output
--no-log-file Disable log file creation
--no-progress Disable fancy UI progress bars, spinners, logos, etc
--oci-concurrency int Number of concurrent layer operations to perform when interacting with a remote bundle. (default 3)
--skip-signature-validation Skip signature validation for packages
--tmpdir string Specify the temporary directory to use for intermediate files
--uds-cache string Specify the location of the UDS cache directory (default "~/.uds-cache")
```
### SEE ALSO
[Section titled “SEE ALSO”](#see-also)
* [uds completion](/reference/cli/commands/uds_completion/) - Generate the autocompletion script for the specified shell
-----
# uds create
> UDS CLI command reference for uds create.
## uds create
[Section titled “uds create”](#uds-create)
Create a bundle from a given directory or the current directory
```plaintext
uds create [DIRECTORY] [flags]
```
### Options
[Section titled “Options”](#options)
```plaintext
-c, --confirm Confirm bundle creation without prompting
-h, --help help for create
-n, --name string Specify the name of the bundle
-o, --output string Specify the output (an oci:// URL) for the created bundle
-k, --signing-key string Path to private key file for signing bundles
-p, --signing-key-password string Password to the private key file used for signing bundles
-v, --version string Specify the version of the bundle
```
### Options inherited from parent commands
[Section titled “Options inherited from parent commands”](#options-inherited-from-parent-commands)
```plaintext
-a, --architecture string Architecture for UDS bundles and Zarf packages
--insecure Allow access to insecure registries and disable other recommended security enforcements such as package checksum and signature validation. This flag should only be used if you have a specific reason and accept the reduced security posture.
-l, --log-level string Log level when running UDS-CLI. Valid options are: warn, info, debug, trace (default "info")
--no-color Disable color output
--no-log-file Disable log file creation
--no-progress Disable fancy UI progress bars, spinners, logos, etc
--oci-concurrency int Number of concurrent layer operations to perform when interacting with a remote bundle. (default 3)
--skip-signature-validation Skip signature validation for packages
--tmpdir string Specify the temporary directory to use for intermediate files
--uds-cache string Specify the location of the UDS cache directory (default "~/.uds-cache")
```
### SEE ALSO
[Section titled “SEE ALSO”](#see-also)
* [uds](/reference/cli/commands/uds/) - CLI for UDS Bundles
-----
# uds deploy
> UDS CLI command reference for uds deploy.
## uds deploy
[Section titled “uds deploy”](#uds-deploy)
Deploy a bundle from a local tarball or oci:// URL
```plaintext
uds deploy [BUNDLE_TARBALL|OCI_REF] [flags]
```
### Options
[Section titled “Options”](#options)
```plaintext
-c, --confirm Confirms bundle deployment without prompting. ONLY use with bundles you trust
-h, --help help for deploy
-p, --packages stringArray Specify which zarf packages you would like to deploy from the bundle. By default all zarf packages in the bundle are deployed.
-r, --resume Only deploys packages from the bundle which haven't already been deployed
--retries int Specify the number of retries for package deployments (applies to all pkgs in a bundle) (default 3)
--set stringToString Specify deployment variables to set on the command line (KEY=value) (default [])
```
### Options inherited from parent commands
[Section titled “Options inherited from parent commands”](#options-inherited-from-parent-commands)
```plaintext
-a, --architecture string Architecture for UDS bundles and Zarf packages
--insecure Allow access to insecure registries and disable other recommended security enforcements such as package checksum and signature validation. This flag should only be used if you have a specific reason and accept the reduced security posture.
-l, --log-level string Log level when running UDS-CLI. Valid options are: warn, info, debug, trace (default "info")
--no-color Disable color output
--no-log-file Disable log file creation
--no-progress Disable fancy UI progress bars, spinners, logos, etc
--oci-concurrency int Number of concurrent layer operations to perform when interacting with a remote bundle. (default 3)
--skip-signature-validation Skip signature validation for packages
--tmpdir string Specify the temporary directory to use for intermediate files
--uds-cache string Specify the location of the UDS cache directory (default "~/.uds-cache")
```
### SEE ALSO
[Section titled “SEE ALSO”](#see-also)
* [uds](/reference/cli/commands/uds/) - CLI for UDS Bundles
-----
# uds dev
> UDS CLI command reference for uds dev.
## uds dev
[Section titled “uds dev”](#uds-dev)
\[beta] Commands useful for developing bundles
### Options
[Section titled “Options”](#options)
```plaintext
-h, --help help for dev
```
### Options inherited from parent commands
[Section titled “Options inherited from parent commands”](#options-inherited-from-parent-commands)
```plaintext
-a, --architecture string Architecture for UDS bundles and Zarf packages
--insecure Allow access to insecure registries and disable other recommended security enforcements such as package checksum and signature validation. This flag should only be used if you have a specific reason and accept the reduced security posture.
-l, --log-level string Log level when running UDS-CLI. Valid options are: warn, info, debug, trace (default "info")
--no-color Disable color output
--no-log-file Disable log file creation
--no-progress Disable fancy UI progress bars, spinners, logos, etc
--oci-concurrency int Number of concurrent layer operations to perform when interacting with a remote bundle. (default 3)
--skip-signature-validation Skip signature validation for packages
--tmpdir string Specify the temporary directory to use for intermediate files
--uds-cache string Specify the location of the UDS cache directory (default "~/.uds-cache")
```
### SEE ALSO
[Section titled “SEE ALSO”](#see-also)
* [uds](/reference/cli/commands/uds/) - CLI for UDS Bundles
* [uds dev deploy](/reference/cli/commands/uds_dev_deploy/) - \[beta] Creates and deploys a UDS bundle in dev mode
-----
# uds dev deploy
> UDS CLI command reference for uds dev deploy.
## uds dev deploy
[Section titled “uds dev deploy”](#uds-dev-deploy)
\[beta] Creates and deploys a UDS bundle in dev mode
### Synopsis
[Section titled “Synopsis”](#synopsis)
\[beta] Creates and deploys a UDS bundle from a given directory or OCI repository in dev mode, setting package options like YOLO mode for faster iteration.
```plaintext
uds dev deploy [BUNDLE_DIR|OCI_REF] [flags]
```
### Options
[Section titled “Options”](#options)
```plaintext
-f, --flavor string [beta] Specify which zarf package flavor you want to use.
--force-create [beta] For local bundles with local packages, specify whether to create a zarf package even if it already exists.
-h, --help help for deploy
-p, --packages stringArray Specify which zarf packages you would like to deploy from the bundle. By default all zarf packages in the bundle are deployed.
-r, --ref stringToString Specify which zarf package ref you want to deploy. By default the ref set in the bundle yaml is used. (default [])
--set stringToString Specify deployment variables to set on the command line (KEY=value) (default [])
```
### Options inherited from parent commands
[Section titled “Options inherited from parent commands”](#options-inherited-from-parent-commands)
```plaintext
-a, --architecture string Architecture for UDS bundles and Zarf packages
--insecure Allow access to insecure registries and disable other recommended security enforcements such as package checksum and signature validation. This flag should only be used if you have a specific reason and accept the reduced security posture.
-l, --log-level string Log level when running UDS-CLI. Valid options are: warn, info, debug, trace (default "info")
--no-color Disable color output
--no-log-file Disable log file creation
--no-progress Disable fancy UI progress bars, spinners, logos, etc
--oci-concurrency int Number of concurrent layer operations to perform when interacting with a remote bundle. (default 3)
--skip-signature-validation Skip signature validation for packages
--tmpdir string Specify the temporary directory to use for intermediate files
--uds-cache string Specify the location of the UDS cache directory (default "~/.uds-cache")
```
### SEE ALSO
[Section titled “SEE ALSO”](#see-also)
* [uds dev](/reference/cli/commands/uds_dev/) - \[beta] Commands useful for developing bundles
-----
# uds inspect
> UDS CLI command reference for uds inspect.
## uds inspect
[Section titled “uds inspect”](#uds-inspect)
Display the metadata of a bundle
```plaintext
uds inspect [BUNDLE_TARBALL|OCI_REF|BUNDLE_YAML_FILE] [flags]
```
### Options
[Section titled “Options”](#options)
```plaintext
-e, --extract Create a folder of SBOMs contained in the bundle
-h, --help help for inspect
-k, --key string Path to a public key file that will be used to validate a signed bundle
-i, --list-images Derive images from a uds-bundle.yaml file and list them
-v, --list-variables List all configurable variables in a bundle (including zarf variables)
-s, --sbom Create a tarball of SBOMs contained in the bundle
```
### Options inherited from parent commands
[Section titled “Options inherited from parent commands”](#options-inherited-from-parent-commands)
```plaintext
-a, --architecture string Architecture for UDS bundles and Zarf packages
--insecure Allow access to insecure registries and disable other recommended security enforcements such as package checksum and signature validation. This flag should only be used if you have a specific reason and accept the reduced security posture.
-l, --log-level string Log level when running UDS-CLI. Valid options are: warn, info, debug, trace (default "info")
--no-color Disable color output
--no-log-file Disable log file creation
--no-progress Disable fancy UI progress bars, spinners, logos, etc
--oci-concurrency int Number of concurrent layer operations to perform when interacting with a remote bundle. (default 3)
--skip-signature-validation Skip signature validation for packages
--tmpdir string Specify the temporary directory to use for intermediate files
--uds-cache string Specify the location of the UDS cache directory (default "~/.uds-cache")
```
### SEE ALSO
[Section titled “SEE ALSO”](#see-also)
* [uds](/reference/cli/commands/uds/) - CLI for UDS Bundles
-----
# uds logs
> UDS CLI command reference for uds logs.
## uds logs
[Section titled “uds logs”](#uds-logs)
View most recent UDS CLI logs
```plaintext
uds logs [flags]
```
### Options
[Section titled “Options”](#options)
```plaintext
-h, --help help for logs
```
### Options inherited from parent commands
[Section titled “Options inherited from parent commands”](#options-inherited-from-parent-commands)
```plaintext
-a, --architecture string Architecture for UDS bundles and Zarf packages
--insecure Allow access to insecure registries and disable other recommended security enforcements such as package checksum and signature validation. This flag should only be used if you have a specific reason and accept the reduced security posture.
-l, --log-level string Log level when running UDS-CLI. Valid options are: warn, info, debug, trace (default "info")
--no-color Disable color output
--no-log-file Disable log file creation
--no-progress Disable fancy UI progress bars, spinners, logos, etc
--oci-concurrency int Number of concurrent layer operations to perform when interacting with a remote bundle. (default 3)
--skip-signature-validation Skip signature validation for packages
--tmpdir string Specify the temporary directory to use for intermediate files
--uds-cache string Specify the location of the UDS cache directory (default "~/.uds-cache")
```
### SEE ALSO
[Section titled “SEE ALSO”](#see-also)
* [uds](/reference/cli/commands/uds/) - CLI for UDS Bundles
-----
# uds monitor
> UDS CLI command reference for uds monitor.
## uds monitor
[Section titled “uds monitor”](#uds-monitor)
Monitor a UDS Cluster
### Synopsis
[Section titled “Synopsis”](#synopsis)
Tools for monitoring a UDS Cluster and connecting to the UDS Engine for advanced troubleshooting
### Options
[Section titled “Options”](#options)
```plaintext
-h, --help help for monitor
-n, --namespace string Limit monitoring to a specific namespace
```
### Options inherited from parent commands
[Section titled “Options inherited from parent commands”](#options-inherited-from-parent-commands)
```plaintext
-a, --architecture string Architecture for UDS bundles and Zarf packages
--insecure Allow access to insecure registries and disable other recommended security enforcements such as package checksum and signature validation. This flag should only be used if you have a specific reason and accept the reduced security posture.
-l, --log-level string Log level when running UDS-CLI. Valid options are: warn, info, debug, trace (default "info")
--no-color Disable color output
--no-log-file Disable log file creation
--no-progress Disable fancy UI progress bars, spinners, logos, etc
--oci-concurrency int Number of concurrent layer operations to perform when interacting with a remote bundle. (default 3)
--skip-signature-validation Skip signature validation for packages
--tmpdir string Specify the temporary directory to use for intermediate files
--uds-cache string Specify the location of the UDS cache directory (default "~/.uds-cache")
```
### SEE ALSO
[Section titled “SEE ALSO”](#see-also)
* [uds](/reference/cli/commands/uds/) - CLI for UDS Bundles
* [uds monitor pepr](/reference/cli/commands/uds_monitor_pepr/) - Observe Pepr operations in a UDS Cluster
-----
# uds monitor pepr
> UDS CLI command reference for uds monitor pepr.
## uds monitor pepr
[Section titled “uds monitor pepr”](#uds-monitor-pepr)
Observe Pepr operations in a UDS Cluster
### Synopsis
[Section titled “Synopsis”](#synopsis)
View UDS Policy enforcements, UDS Operator events and additional Pepr operations
```plaintext
uds monitor pepr [policies | operator | allowed | denied | failed | mutated] [flags]
```
### Examples
[Section titled “Examples”](#examples)
```plaintext
# Aggregates all admission and operator logs into a single stream
uds monitor pepr
# Stream UDS Operator actions (Package processing, status updates, and errors)
uds monitor pepr operator
# Stream UDS Policy logs (Allow, Deny, Mutate)
uds monitor pepr policies
# Stream UDS Policy allow logs
uds monitor pepr allowed
# Stream UDS Policy deny logs
uds monitor pepr denied
# Stream UDS Policy mutation logs
uds monitor pepr mutated
# Stream UDS Policy deny logs and UDS Operator error logs
uds monitor pepr failed
```
### Options
[Section titled “Options”](#options)
```plaintext
-f, --follow Continuously stream Pepr logs
-h, --help help for pepr
--json Return the raw JSON output of the logs
--since duration Only return logs newer than a relative duration like 5s, 2m, or 3h. Defaults to all logs.
-t, --timestamps Show timestamps in Pepr logs
```
### Options inherited from parent commands
[Section titled “Options inherited from parent commands”](#options-inherited-from-parent-commands)
```plaintext
-a, --architecture string Architecture for UDS bundles and Zarf packages
--insecure Allow access to insecure registries and disable other recommended security enforcements such as package checksum and signature validation. This flag should only be used if you have a specific reason and accept the reduced security posture.
-l, --log-level string Log level when running UDS-CLI. Valid options are: warn, info, debug, trace (default "info")
-n, --namespace string Limit monitoring to a specific namespace
--no-color Disable color output
--no-log-file Disable log file creation
--no-progress Disable fancy UI progress bars, spinners, logos, etc
--oci-concurrency int Number of concurrent layer operations to perform when interacting with a remote bundle. (default 3)
--skip-signature-validation Skip signature validation for packages
--tmpdir string Specify the temporary directory to use for intermediate files
--uds-cache string Specify the location of the UDS cache directory (default "~/.uds-cache")
```
### SEE ALSO
[Section titled “SEE ALSO”](#see-also)
* [uds monitor](/reference/cli/commands/uds_monitor/) - Monitor a UDS Cluster
-----
# uds publish
> UDS CLI command reference for uds publish.
## uds publish
[Section titled “uds publish”](#uds-publish)
Publish a bundle from the local file system to a remote registry
```plaintext
uds publish [BUNDLE_TARBALL] [OCI_REF] [flags]
```
### Options
[Section titled “Options”](#options)
```plaintext
-h, --help help for publish
-v, --version string [Deprecated] Specify the version of the bundle to be published. This flag will be removed in a future version. Users should use the --version flag during creation to override the version defined in uds-bundle.yaml
```
### Options inherited from parent commands
[Section titled “Options inherited from parent commands”](#options-inherited-from-parent-commands)
```plaintext
-a, --architecture string Architecture for UDS bundles and Zarf packages
--insecure Allow access to insecure registries and disable other recommended security enforcements such as package checksum and signature validation. This flag should only be used if you have a specific reason and accept the reduced security posture.
-l, --log-level string Log level when running UDS-CLI. Valid options are: warn, info, debug, trace (default "info")
--no-color Disable color output
--no-log-file Disable log file creation
--no-progress Disable fancy UI progress bars, spinners, logos, etc
--oci-concurrency int Number of concurrent layer operations to perform when interacting with a remote bundle. (default 3)
--skip-signature-validation Skip signature validation for packages
--tmpdir string Specify the temporary directory to use for intermediate files
--uds-cache string Specify the location of the UDS cache directory (default "~/.uds-cache")
```
### SEE ALSO
[Section titled “SEE ALSO”](#see-also)
* [uds](/reference/cli/commands/uds/) - CLI for UDS Bundles
-----
# uds pull
> UDS CLI command reference for uds pull.
## uds pull
[Section titled “uds pull”](#uds-pull)
Pull a bundle from a remote registry and save to the local file system
```plaintext
uds pull [OCI_REF] [flags]
```
### Options
[Section titled “Options”](#options)
```plaintext
-h, --help help for pull
-k, --key string Path to a public key file that will be used to validate a signed bundle
-o, --output string Specify the output directory for the pulled bundle
```
### Options inherited from parent commands
[Section titled “Options inherited from parent commands”](#options-inherited-from-parent-commands)
```plaintext
-a, --architecture string Architecture for UDS bundles and Zarf packages
--insecure Allow access to insecure registries and disable other recommended security enforcements such as package checksum and signature validation. This flag should only be used if you have a specific reason and accept the reduced security posture.
-l, --log-level string Log level when running UDS-CLI. Valid options are: warn, info, debug, trace (default "info")
--no-color Disable color output
--no-log-file Disable log file creation
--no-progress Disable fancy UI progress bars, spinners, logos, etc
--oci-concurrency int Number of concurrent layer operations to perform when interacting with a remote bundle. (default 3)
--skip-signature-validation Skip signature validation for packages
--tmpdir string Specify the temporary directory to use for intermediate files
--uds-cache string Specify the location of the UDS cache directory (default "~/.uds-cache")
```
### SEE ALSO
[Section titled “SEE ALSO”](#see-also)
* [uds](/reference/cli/commands/uds/) - CLI for UDS Bundles
-----
# uds remove
> UDS CLI command reference for uds remove.
## uds remove
[Section titled “uds remove”](#uds-remove)
Remove a bundle that has been deployed already
```plaintext
uds remove [BUNDLE_TARBALL|OCI_REF] [flags]
```
### Options
[Section titled “Options”](#options)
```plaintext
-c, --confirm REQUIRED. Confirm the removal action to prevent accidental deletions
-h, --help help for remove
-p, --packages stringArray Specify which zarf packages you would like to remove from the bundle. By default all zarf packages in the bundle are removed.
```
### Options inherited from parent commands
[Section titled “Options inherited from parent commands”](#options-inherited-from-parent-commands)
```plaintext
-a, --architecture string Architecture for UDS bundles and Zarf packages
--insecure Allow access to insecure registries and disable other recommended security enforcements such as package checksum and signature validation. This flag should only be used if you have a specific reason and accept the reduced security posture.
-l, --log-level string Log level when running UDS-CLI. Valid options are: warn, info, debug, trace (default "info")
--no-color Disable color output
--no-log-file Disable log file creation
--no-progress Disable fancy UI progress bars, spinners, logos, etc
--oci-concurrency int Number of concurrent layer operations to perform when interacting with a remote bundle. (default 3)
--skip-signature-validation Skip signature validation for packages
--tmpdir string Specify the temporary directory to use for intermediate files
--uds-cache string Specify the location of the UDS cache directory (default "~/.uds-cache")
```
### SEE ALSO
[Section titled “SEE ALSO”](#see-also)
* [uds](/reference/cli/commands/uds/) - CLI for UDS Bundles
-----
# uds run
> UDS CLI command reference for uds run.
## uds run
[Section titled “uds run”](#uds-run)
Run a task using maru-runner
```plaintext
uds run [flags]
```
### Options
[Section titled “Options”](#options)
```plaintext
-h, --help help for run
```
### Options inherited from parent commands
[Section titled “Options inherited from parent commands”](#options-inherited-from-parent-commands)
```plaintext
-a, --architecture string Architecture for UDS bundles and Zarf packages
--insecure Allow access to insecure registries and disable other recommended security enforcements such as package checksum and signature validation. This flag should only be used if you have a specific reason and accept the reduced security posture.
-l, --log-level string Log level when running UDS-CLI. Valid options are: warn, info, debug, trace (default "info")
--no-color Disable color output
--no-log-file Disable log file creation
--no-progress Disable fancy UI progress bars, spinners, logos, etc
--oci-concurrency int Number of concurrent layer operations to perform when interacting with a remote bundle. (default 3)
--skip-signature-validation Skip signature validation for packages
--tmpdir string Specify the temporary directory to use for intermediate files
--uds-cache string Specify the location of the UDS cache directory (default "~/.uds-cache")
```
### SEE ALSO
[Section titled “SEE ALSO”](#see-also)
* [uds](/reference/cli/commands/uds/) - CLI for UDS Bundles
-----
# uds version
> UDS CLI command reference for uds version.
## uds version
[Section titled “uds version”](#uds-version)
Shows the version of the running UDS-CLI binary
### Synopsis
[Section titled “Synopsis”](#synopsis)
Displays the version of the UDS-CLI release that the current binary was built from.
```plaintext
uds version [flags]
```
### Options
[Section titled “Options”](#options)
```plaintext
-h, --help help for version
```
### Options inherited from parent commands
[Section titled “Options inherited from parent commands”](#options-inherited-from-parent-commands)
```plaintext
-a, --architecture string Architecture for UDS bundles and Zarf packages
--insecure Allow access to insecure registries and disable other recommended security enforcements such as package checksum and signature validation. This flag should only be used if you have a specific reason and accept the reduced security posture.
-l, --log-level string Log level when running UDS-CLI. Valid options are: warn, info, debug, trace (default "info")
--no-color Disable color output
--no-log-file Disable log file creation
--no-progress Disable fancy UI progress bars, spinners, logos, etc
--oci-concurrency int Number of concurrent layer operations to perform when interacting with a remote bundle. (default 3)
--skip-signature-validation Skip signature validation for packages
--tmpdir string Specify the temporary directory to use for intermediate files
--uds-cache string Specify the location of the UDS cache directory (default "~/.uds-cache")
```
### SEE ALSO
[Section titled “SEE ALSO”](#see-also)
* [uds](/reference/cli/commands/uds/) - CLI for UDS Bundles
-----
# Overview
The [UDS CLI](https://github.com/defenseunicorns/uds-cli) is the primary interface for users to interact with various components within the UDS landscape. It streamlines the deployment process of mission applications and secure infrastructure, simplifying tasks involved in running mission applications while maintaining regulatory compliance in a unified and efficient manner.
The UDS CLI simplifies deployment by bundling multiple Zarf Packages into a single deployable artifact. This process ensures that UDS Bundles, which encompass infrastructure, platform, and mission applications, can be efficiently deployed within any Mission Hero’s system environment. Additionally, the UDS CLI extends its capabilities to Pepr, where multiple Pepr applications are bundled and deployed as a single Pepr Module to support UDS Bundles during runtime.
-----
# Quickstart and Usage
## Install
[Section titled “Install”](#install)
Recommended installation method is with Brew:
```bash
brew tap defenseunicorns/tap && brew install uds
```
UDS CLI Binaries are also included with each [Github Release](https://github.com/defenseunicorns/uds-cli/releases)
## Contributing
[Section titled “Contributing”](#contributing)
Build instructions and contributing docs are located in [CONTRIBUTING.md](https://github.com/defenseunicorns/uds-cli/blob/main/CONTRIBUTING.md).
## Quickstart
[Section titled “Quickstart”](#quickstart)
The UDS-CLI’s flagship feature is deploying multiple, independent Zarf packages. To create a `UDSBundle` of Zarf packages, create a `uds-bundle.yaml` file like so:
```yaml
kind: UDSBundle
metadata:
name: example
description: an example UDS bundle
version: 0.0.1
packages:
- name: init
repository: ghcr.io/defenseunicorns/packages/init
ref: v0.33.0
optionalComponents:
- git-server
- name: podinfo
repository: ghcr.io/defenseunicorns/uds-cli/podinfo
ref: 0.0.1
```
The above `UDSBundle` deploys the Zarf init package and podinfo.
The packages referenced in `packages` can exist either locally or in an OCI registry. See [here](https://github.com/defenseunicorns/uds-cli/tree/main/src/test/bundles/03-local-and-remote) for an example that deploys both local and remote Zarf packages. More `UDSBundle` examples can be found in the [src/test/bundles](https://github.com/defenseunicorns/uds-cli/tree/main/src/test/bundles) folder.
### Declarative Syntax
[Section titled “Declarative Syntax”](#declarative-syntax)
The syntax of a `uds-bundle.yaml` is entirely declarative. As a result, the UDS CLI will not prompt users to deploy optional components in a Zarf package. If you want to deploy an optional Zarf component, it must be specified in the `optionalComponents` key of a particular `package`.
### First-class UDS Support
[Section titled “First-class UDS Support”](#first-class-uds-support)
When running `deploy`,`inspect`,`remove`, and `pull` commands, UDS CLI contains shorthand for interacting with the Defense Unicorns org on GHCR. Specifically, unless otherwise specified, paths will automatically be expanded to the Defense Unicorns org on GHCR. For example:
* `uds deploy unicorn-bundle:v0.1.0` is equivalent to `uds deploy ghcr.io/defenseunicorns/packages/uds/bundles/unicorn-bundle:v0.1.0`
The bundle matching and expansion is ordered as follows:
1. Local with a `tar.zst` extension
2. Remote path: `oci://ghcr.io/defenseunicorns/packages/uds/bundles/`
3. Remote path: `oci://ghcr.io/defenseunicorns/packages/delivery/`
4. Remote path: `oci://ghcr.io/defenseunicorns/packages/`
That is to say, if the bundle is not local, UDS CLI will check path 2, path 3, etc for the remote bundle artifact. This behavior can be overridden by specifying the full path to the bundle artifact, for example `uds deploy ghcr.io/defenseunicorns/dev/path/dev-bundle:v0.1.0`.
### Bundle Create
[Section titled “Bundle Create”](#bundle-create)
Pulls the Zarf packages from the registry and bundles them into an OCI artifact.
There are 2 ways to create Bundles:
1. Inside an OCI registry: `uds create -o ghcr.io/defenseunicorns/dev`
2. Locally on your filesystem: `uds create `
Note
The `--insecure` flag is necessary when interacting with a local registry, but not from secure, remote registries such as GHCR.
### Bundle Deploy
[Section titled “Bundle Deploy”](#bundle-deploy)
Deploys the bundle
There are 2 ways to deploy Bundles:
1. From an OCI registry: `uds deploy ghcr.io/defenseunicorns/dev/:`
2. From your local filesystem: `uds deploy uds-bundle-.tar.zst`
#### Specifying Packages using `--packages`
[Section titled “Specifying Packages using --packages”](#specifying-packages-using---packages)
By default all the packages in the bundle are deployed, but you can also deploy only certain packages in the bundle by using the `--packages` flag.
As an example: `uds deploy uds-bundle-.tar.zst --packages init,nginx`
#### Resuming Bundle Deploys using `--resume`
[Section titled “Resuming Bundle Deploys using --resume”](#resuming-bundle-deploys-using---resume)
By default all the packages in the bundle are deployed, regardless of if they have already been deployed, but you can also choose to only deploy packages that have not already been deployed by using the `--resume` flag
As an example: `uds deploy uds-bundle-.tar.zst --resume`
### Pruning Unreferenced Packages
[Section titled “Pruning Unreferenced Packages”](#pruning-unreferenced-packages)
In the process of upgrading bundles, it’s common to swap or remove packages from a `uds-bundle.yaml`. These packages can become `unreferenced`, meaning that they are still deployed to the cluster, but are no longer referenced by a bundle. To remove these packages from the cluster, you can use the `--prune` flag when deploying a bundle.
#### Pre-Deploy View
[Section titled “Pre-Deploy View”](#pre-deploy-view)
When `uds deploy` is executed, the bundle’s metadata, along with a list of its packages and each package’s overrides and Zarf variables, will be outputted to the terminal. Unlike [`inspect --list-variables`](#viewing-variables), this output will show the value set for each override or Zarf variable. Overrides and variables that have not been set will not be shown in the output.
Note
To view this output more easily or for troubleshooting, run `deploy` without the `--confirm` flag.
### Bundle Inspect
[Section titled “Bundle Inspect”](#bundle-inspect)
Inspect the `uds-bundle.yaml` of a bundle
1. From an OCI registry: `uds inspect oci://ghcr.io/defenseunicorns/dev/:`
2. From your local filesystem: `uds inspect uds-bundle-.tar.zst`
#### Viewing Images in a Bundle
[Section titled “Viewing Images in a Bundle”](#viewing-images-in-a-bundle)
It is possible to derive images from a `uds-bundle.yaml`, local UDS tarball artifacts, and remote OCI repos. This can be useful for situations where you need to know what images will be bundled before you actually create the bundle or what images will be deployed if using an already created bundle. This is accomplished with the `--list-images` flag. For example:
`uds inspect --list-images [BUNDLE_YAML_FILE|BUNDLE_TARBALL|OCI_REF]`
This command will return a list of images derived from the bundle’s packages, taking into account optional and required package components.
The list of images will be grouped by package they are derived from and outputted in a YAML format.
e.g. `uds inspect k3d-core-slim-dev:0.26.0 --list-images`
```yaml
core-slim-dev:
- docker.io/istio/pilot:1.22.3-distroless
- docker.io/istio/proxyv2:1.22.3-distroless
- ghcr.io/defenseunicorns/pepr/controller:v0.34.1
- quay.io/keycloak/keycloak:24.0.5
- ghcr.io/defenseunicorns/uds/identity-config:0.6.0
init:
- library/registry:2.8.3
- library/registry:2.8.3
- ghcr.io/zarf-dev/zarf/agent:v0.38.2
```
*To extract only the image names and de-dupe*:
`uds inspect k3d-core-slim-dev:0.26.0 --list-images | yq '.[] | .[]'` | sort | uniq
```yaml
docker.io/istio/pilot:1.22.3-distroless
docker.io/istio/proxyv2:1.22.3-distroless
ghcr.io/defenseunicorns/pepr/controller:v0.34.1
ghcr.io/defenseunicorns/uds/identity-config:0.6.0
ghcr.io/zarf-dev/zarf/agent:v0.38.2
library/registry:2.8.3
quay.io/keycloak/keycloak:24.0.5
```
#### Viewing SBOMs
[Section titled “Viewing SBOMs”](#viewing-sboms)
There are 2 additional flags for the `uds inspect` command you can use to extract and view SBOMs:
* Output the SBOMs as a tar file: `uds inspect ... --sbom`
* Output SBOMs into a directory as files: `uds inspect ... --sbom --extract`
This functionality will use the `sboms.tar` of the underlying Zarf packages to create new a `bundle-sboms.tar` artifact containing all SBOMs from the Zarf packages in the bundle.
#### Viewing Variables
[Section titled “Viewing Variables”](#viewing-variables)
To view the configurable overrides and Zarf variables of a bundle’s packages:
`uds inspect --list-variables [BUNDLE_YAML_FILE|BUNDLE_TARBALL|OCI_REF]`
### Bundle Publish
[Section titled “Bundle Publish”](#bundle-publish)
Local bundles can be published to an OCI registry like so: `uds publish .tar.zst oci://`
As an example: `uds publish uds-bundle-example-arm64-0.0.1.tar.zst oci://ghcr.io/github_user`
#### Tagging
[Section titled “Tagging”](#tagging)
Note
Using the `version` flag with `uds publish` is deprecated, and will be removed in a future version. Users should use the `--version` flag in `uds create` to override the version specified in `uds-bundle.yaml`.
Bundles, by default, are tagged based on the bundle version found in the metadata of the `uds-bundle.yaml` file. To override the default tag, you can use the `--version` flag like so:
`uds publish uds-bundle-example-arm64-0.0.1.tar.zst oci://ghcr.io/github_user --version `
### Bundle Remove
[Section titled “Bundle Remove”](#bundle-remove)
Removes the bundle
There are 2 ways to remove Bundles:
1. From an OCI registry: `uds remove oci://ghcr.io/defenseunicorns/dev/: --confirm`
2. From your local filesystem: `uds remove uds-bundle-.tar.zst --confirm`
By default all the packages in the bundle are removed, but you can also remove only certain packages in the bundle by using the `--packages` flag.
As an example: `uds remove uds-bundle-.tar.zst --packages init,nginx`
### Logs
[Section titled “Logs”](#logs)
Note
Only works with `uds deploy` for now, may work for other operations but isn’t guaranteed.
The `uds logs` command can be used to view the most recent logs of a bundle operation. Note that depending on your OS temporary directory and file settings, recent logs are purged after a certain amount of time, so this command may return an error if the logs are no longer available.
## Bundle Architecture and Multi-Arch Support
[Section titled “Bundle Architecture and Multi-Arch Support”](#bundle-architecture-and-multi-arch-support)
There are several ways to specify the architecture of a bundle according to the following precedence:
1. Setting `--architecture` or `-a` flag during `uds ...` operations: `uds create --architecture arm64`
2. Setting a `UDS_ARCHITECTURE` environment variable
3. Setting the `options.architecture` key in a `uds-config.yaml`
4. Setting the `metadata.architecture` key in a `uds-bundle.yaml`
This means that setting the `--architecture` flag takes precedence over all other methods of specifying the architecture.
UDS CLI supports multi-arch bundles. This means you can push bundles with different architectures to the same remote OCI repository, at the same tag. For example, you can push both an `amd64` and `arm64` bundle to `ghcr.io//:0.0.1`.
### Architecture Validation
[Section titled “Architecture Validation”](#architecture-validation)
When deploying a local bundle, the bundle’s architecture will be used for comparison against the cluster architecture to ensure compatibility. If deploying a remote bundle, by default the bundle is pulled based on system architecture, which is then checked against the cluster.
Note
It is possible to override the bundle architecture used at validation time by using the `--architecture` / `-a` flag.
If, for example, you have a multi-arch remote bundle that you want to deploy from an arm64 machine to an amd64 cluster, the validation with fail because the system arch does not match the cluster arch. However, you can pull the correct bundle version by specifying the arch with the command line architecture flag.
e.g. `uds deploy -a amd64 --confirm`
## Variables and Configuration
[Section titled “Variables and Configuration”](#variables-and-configuration)
The UDS CLI can be configured with a `uds-config.yaml` file. This file can be placed in the current working directory or specified with an environment variable called `UDS_CONFIG`. The basic structure of the `uds-config.yaml` is as follows:
```yaml
options:
log_level: debug
architecture: arm64
no_log_file: false
no_progress: false
uds_cache: /tmp/uds-cache
tmp_dir: /tmp/tmp_dir
insecure: false
oci_concurrency: 3
shared:
domain: uds.dev # shared across all packages in a bundle
variables:
my-zarf-package: # name of Zarf package
ui_color: green # key is not case sensitive and refers to name of Zarf variable
UI_MSG: "Hello Unicorn"
hosts: # variables can be complex types such as lists and maps
- host: burning.boats
paths:
- path: "/"
pathType: "Prefix"
```
The `options` key contains UDS CLI options that are not specific to a particular Zarf package. The `variables` key contains variables that are specific to a particular Zarf package. If you want to share insensitive variables across multiple Zarf packages, you can use the `shared` key, where the key is the variable name and the value is the variable value.
### Sharing Variables
[Section titled “Sharing Variables”](#sharing-variables)
Zarf package variables can be passed between Zarf packages:
```yaml
kind: UDSBundle
metadata:
name: simple-vars
description: show how vars work
version: 0.0.1
packages:
- name: output-var
repository: localhost:888/output-var
ref: 0.0.1
exports:
- name: OUTPUT
- name: receive-var
repository: localhost:888/receive-var
ref: 0.0.1
imports:
- name: OUTPUT
package: output-var
```
Variables that you want to make available to other packages are in the `export` block of the Zarf package to export a variable from. By default, all exported variables are available to all of the packages in a bundle. To have another package ingest a specific exported variable, like in the case of variable name collisions, use the `imports` key to name both the `variable` and `package` that the variable is exported from, like in the example above.
In the example above, the `OUTPUT` variable is created as part of a Zarf Action in the [output-var](https://github.com/defenseunicorns/uds-cli/tree/main/src/test/packages/no-cluster/output-var) package, and the [receive-var](https://github.com/defenseunicorns/uds-cli/tree/main/src/test/packages/no-cluster/receive-var) package expects a variable called `OUTPUT`.
### Sharing Variables Across Multiple Packages
[Section titled “Sharing Variables Across Multiple Packages”](#sharing-variables-across-multiple-packages)
If a Zarf variable has the same name in multiple packages and you don’t want to set it multiple times via the import/export syntax, you can set an environment variable prefixed with `UDS_` and it will be applied to all the Zarf packages in a bundle. For example, if multiple packages require a `DOMAIN` variable, you could set it once with a `UDS_DOMAIN` environment variable and it would be applied to all packages. Note that this can also be done with the `shared` key in the `uds-config.yaml` file.
On deploy, you can also set package variables by using the `--set` flag. If the package name isn’t included in the key (example: `--set super=true`) the variable will get applied to all of the packages. If the package name is included in the key (example: `--set cool-package.super=true`) the variable will only get applied to that package.
### Variable Precedence and Specificity
[Section titled “Variable Precedence and Specificity”](#variable-precedence-and-specificity)
In a bundle, variables can come from 6 sources. Those sources and their precedence are shown below in order of least to most specificity:
* declared in a Zarf pkg
* `import`’ed from a bundle package’s `export`
* configured in the `shared` key in a `uds-config.yaml`
* configured in the `variables` key in a `uds-config.yaml`
* set with an environment variable prefixed with `UDS_` (ex. `UDS_OUTPUT`)
* set using the `--set` flag when running the `uds deploy` command
That is to say, variables set using the `--set` flag take precedence over all other variable sources.
### Configuring Zarf Init Packages
[Section titled “Configuring Zarf Init Packages”](#configuring-zarf-init-packages)
Zarf init packages that are typically deployed using `zarf init` have a few special flags that are attached to that command. These options can be configured like any other variable: specified in a `uds-config.yaml`, as an environment variable prefixed with `UDS_` or via the `--set` flag.
uds-config.yaml
```yaml
variables:
zarf-init:
INIT_REGISTRY_URL: "https://my-registry.io"
INIT_REGISTRY_PUSH_USERNAME: "registry-user"
```
## Duplicate Packages And Naming
[Section titled “Duplicate Packages And Naming”](#duplicate-packages-and-naming)
It is possible to deploy multiple instances of the same Zarf package in a bundle. For example, the following `uds-bundle.yaml` deploys 3 instances of the [helm-overrides](https://github.com/defenseunicorns/uds-cli/blob/main/src/test/packages/helm/zarf.yaml) Zarf packages:
```yaml
kind: UDSBundle
metadata:
name: duplicates
description: testing a bundle with duplicate packages in specified namespaces
version: 0.0.1
packages:
- name: helm-overrides
repository: localhost:5000/helm-overrides
ref: 0.0.1
overrides:
podinfo-component:
unicorn-podinfo: # name of Helm chart
namespace: podinfo-ns
# note the unique name and namespace
- name: helm-overrides-duplicate
repository: localhost:5000/helm-overrides
ref: 0.0.1
overrides:
podinfo-component:
unicorn-podinfo:
namespace: another-podinfo-ns
# note the unique name, namespace and the path to the Zarf package tarball
- name: helm-overrides-local-duplicate
path: src/test/packages/helm/zarf-package-helm-overrides-arm64-0.0.1.tar.zst
ref: 0.0.1
overrides:
podinfo-component:
unicorn-podinfo:
namespace: yet-another-podinfo-ns
```
The naming conventions for deploying duplicate packages are as follows:
1. The `name` field of the package in the `uds-bundle.yaml` must be unique
2. The duplicate packages must be deployed in different namespaces
3. In order to deploy duplicates of local packages, the `path` field must point to a Zarf package tarball instead of to a folder.
Note
Today the duplicate packages feature is only supported for packages with Helm charts. This is because Helm charts’ [namespaces can be overridden](https://github.com/defenseunicorns/uds-cli/blob/main/docs/reference/bundles/overrides.md) at deploy time.
## Zarf Integration
[Section titled “Zarf Integration”](#zarf-integration)
UDS CLI includes a vendored version of Zarf inside of its binary. To use Zarf, simply run `uds zarf `. For example, to create a Zarf package, run `uds zarf create `, or to use the [airgap tooling](https://docs.zarf.dev/docs/the-zarf-cli/cli-commands/zarf_tools) that Zarf provides, run `uds zarf tools `.
## Dev Mode
[Section titled “Dev Mode”](#dev-mode)
Note
Dev mode is a BETA feature
Dev mode facilitates faster dev cycles when developing and testing bundles
```sh
uds dev deploy |
```
The `dev deploy` command performs the following operations:
* Deploys the bundle in [YOLO](https://docs.zarf.dev/faq/#what-is-yolo-mode-and-why-would-i-use-it) mode, eliminating the need to do a `zarf init`
* Any `kind: ZarfInitConfig` packages in the bundle will be ignored
* For local bundles:
* For local packages:
* Creates the Zarf tarball if one does not already exist or the `--force-create` flag can be used to force the creation of a new Zarf package
* The Zarf tarball is created in the same directory as the `zarf.yaml`
* The `--flavor` flag can be used to specify what flavor of a package you want to create (example: `--flavor podinfo=upstream` to specify the flavor for the `podinfo` package or `--flavor upstream` to specify the flavor for all the packages in the bundle)
* For remote packages:
* The `--ref` flag can be used to specify what package ref you want to deploy (example: `--ref podinfo=0.2.0`)
* Creates a bundle from the newly created Zarf packages
## Monitor
[Section titled “Monitor”](#monitor)
UDS CLI provides a `uds monitor` command that can be used to monitor the status of a UDS cluster
### Monitor Pepr
[Section titled “Monitor Pepr”](#monitor-pepr)
To monitor the status of a UDS cluster’s admission and operator controllers, run: `uds monitor pepr`
#### UDS Controllers
[Section titled “UDS Controllers”](#uds-controllers)
UDS clusters contain two Kubernetes controllers, both created using [Pepr](https://pepr.dev/):
1. **Admission Controller**: Corresponds to the `pepr-uds-core` pods in the cluster. This controller is responsible for validating and mutating resources in the cluster including the enforcement of [UDS Exemptions](https://uds.defenseunicorns.com/reference/configuration/uds-configure-policy-exemptions).
2. **Operator Controller**: Corresponds to the `pepr-uds-core-watcher` pods. This controller is responsible for managing the lifecyle of [UDS Package](https://uds.defenseunicorns.com/reference/configuration/uds-operator/) resources in the cluster.
#### Monitor Args
[Section titled “Monitor Args”](#monitor-args)
Aggregate all admission and operator logs into a single stream:
```bash
uds monitor pepr
```
Stream UDS Operator actions (UDS Package processing, status updates, and errors):
```bash
uds monitor pepr operator
```
Stream UDS Policy logs (Allow, Deny, Mutate):
```bash
uds monitor pepr policies
```
Stream UDS Policy allow logs:
```bash
uds monitor pepr allowed
```
Stream UDS Policy deny logs:
```bash
uds monitor pepr denied
```
Stream UDS Policy mutation logs:
```bash
uds monitor pepr mutated
```
Stream UDS Policy deny logs and UDS Operator error logs: `uds monitor pepr failed`
#### Monitor Flags
[Section titled “Monitor Flags”](#monitor-flags)
`-f, --follow` Continuously stream Pepr logs
`--json` Return the raw JSON output of the logs “ \`—since duration Only return logs newer than a relative duration like 5s, 2m, or 3h. Defaults to all logs.
`-t, --timestamps` Show timestamps in Pepr log
-----
# Schema Validation
When working with UDS configuration files, it can be useful to setup your IDE to know about the various schemas that UDS uses.
The recommended method of validating schemas is by the use of `yaml-language-server` file headers:
For `uds-bundle.yaml`
```yaml
# yaml-language-server: $schema=https://raw.githubusercontent.com/defenseunicorns/uds-cli/main/uds.schema.json
```
For `zarf.yaml`
```yaml
# yaml-language-server: $schema=https://raw.githubusercontent.com/defenseunicorns/uds-cli/main/zarf.schema.json
```
For `tasks.yaml`
```yaml
# yaml-language-server: $schema=https://raw.githubusercontent.com/defenseunicorns/uds-cli/main/tasks.schema.json
```
This method works with both VSCode and Goland (Jetbrains IDEs).
### Other IDE-specific Methods
[Section titled “Other IDE-specific Methods”](#other-ide-specific-methods)
### VS Code
[Section titled “VS Code”](#vs-code)
To do this in VS Code you can install the [YAML Extension](https://marketplace.visualstudio.com/items?itemName=redhat.vscode-yaml) and add the following to your `settings.json` (pinning `main` to your UDS CLI version if desired):
```json
"yaml.schemas": {
"https://raw.githubusercontent.com/defenseunicorns/uds-cli/main/uds.schema.json": "uds-bundle.yaml"
},
```
#### Goland (Jetbrains IDEs)
[Section titled “Goland (Jetbrains IDEs)”](#goland-jetbrains-ides)
Use this method if you want to apply the schema to all YAML files in your project without modifying them. Open the IDE settings and navigate to `Languages & Frameworks` -> `Schemas and DTDs` -> `JSON Schema Mappings` and add a new schema using the ”+” icon as shown below:
Don’t forget to set the file path pattern for the JSON schema to apply to.
-----
# UDS Runner
UDS CLI contains vendors and configures the [maru-runner](https://github.com/defenseunicorns/maru-runner) build tool to make compiling and building UDS bundles simple.
## Quickstart
[Section titled “Quickstart”](#quickstart)
### Running a Task
[Section titled “Running a Task”](#running-a-task)
To run a task from a `tasks.yaml`:
```bash
uds run
```
#### Running a Task from a specific tasks file
[Section titled “Running a Task from a specific tasks file”](#running-a-task-from-a-specific-tasks-file)
```bash
uds run -f
```
The Maru [docs](https://github.com/defenseunicorns/maru-runner) describe how to build `tasks.yaml` files to configure the runner. The functionality in UDS CLI is mostly identical with the following exceptions
### Variables Set with Environment Variables
[Section titled “Variables Set with Environment Variables”](#variables-set-with-environment-variables)
When running a `tasks.yaml` with `uds run my-task` you can set variables using environment prefixed with `UDS_`
For example, running `UDS_FOO=bar uds run echo-foo` on the following task will echo `bar`.
```yaml
variables:
- name: FOO
default: foo
tasks:
- name: echo-foo
actions:
- cmd: echo ${FOO}
```
### Running UDS and Zarf Commands
[Section titled “Running UDS and Zarf Commands”](#running-uds-and-zarf-commands)
To run `uds` commands from within a task, you can invoke your system `uds` binary using the `./uds` syntax. Similarly, UDS CLI vendors Zarf, and tasks can run vendored Zarf commands using `./zarf`. For example:
```yaml
tasks:
- name: default
actions:
- cmd: ./uds inspect k3d-core-istio-dev:0.16.1 # uses system uds
- cmd: ./zarf tools kubectl get pods -A # uses vendored Zarf
```
Note
UDS CLI automatically removes progress bars from `./uds` commands and if `CI=true`then it will also remove progress bars from `uds run` commands.
### Architecture Environment Variable
[Section titled “Architecture Environment Variable”](#architecture-environment-variable)
When running tasks with `uds run`, there is a special `UDS_ARCH` environment variable accessible within tasks that is automatically set to your system architecture, but is also configurable with a `UDS_ARCHITECTURE` environmental variable. For example:
```yaml
tasks:
- name: print-arch
actions:
- cmd: echo ${UDS_ARCH}
```
* Running `uds run print-arch` will echo your local system architecture
* Running `UDS_ARCHITECTURE=amd64 uds run print-arch` will echo “amd64”
### No Dependency on Zarf
[Section titled “No Dependency on Zarf”](#no-dependency-on-zarf)
Since UDS CLI also vendors [Zarf](https://github.com/zarf-dev/zarf), there is no need to also have Zarf installed on your system.
-----
# 404
> Page not found. If you came to this page via search results, we're currently in the process of migrating content and some URLs may not be accurate. Please return to the docs home or use the search above to find what you're looking for. We apologize for the inconvenience!
-----
# Mission Capabilities
## What is a UDS Mission Capability?
[Section titled “What is a UDS Mission Capability?”](#what-is-a-uds-mission-capability)
UDS Mission Capabilities consist of a wide range of tools and resources essential for our Mission Heroes to achieve their mission objectives. UDS Mission Capabilities are securely and reliably packaged, deployed, and operated in the environments needed by your teams.
Mission Capabilities encompass various mission-specific resources, including AI models, databases, specialized configurations, and more. These packages are optional components of UDS, designed to support mission-critical operations effectively. They are preconfigured and packaged in a consistent and repeatable manner to ensure secure and reliable operation.
### Secure and Reliable Operation
[Section titled “Secure and Reliable Operation”](#secure-and-reliable-operation)
UDS Mission Capabilities are securely and reliably packaged, deployed, and operated in the environments needed by our Mission Heroes. Security and reliability are at the core of UDS, ensuring that mission-critical operations are executed with confidence.
### Ready-to-Use Packages
[Section titled “Ready-to-Use Packages”](#ready-to-use-packages)
UDS Mission Capabilities ensure that teams have the right tools at their disposal, securely and consistently packaged, to accomplish their missions successfully. These capabilities are ready-to-use, minimizing the setup time and ensuring that Mission Heroes can focus on their mission-critical tasks right from the start. UDS simplifies the mission environment, allowing Mission Heroes to work efficiently.
### Reusability and Dependability
[Section titled “Reusability and Dependability”](#reusability-and-dependability)
Mission Capabilities are designed for reusability and dependability. Once created and validated, these capabilities can be leveraged across multiple missions, reducing redundancy and development effort. The proven reliability of these capabilities ensures that teams can depend on them for mission-critical tasks without hesitation.
-----
# Deploy Software Factory
## Prerequisites
[Section titled “Prerequisites”](#prerequisites)
* [K3D](https://k3d.io/) version v5.6.0 for development and testing environments.
* Any [CNCF Certified Kubernetes Cluster](https://www.cncf.io/training/certification/software-conformance/#logos) for production environments.
* [UDS CLI](https://github.com/defenseunicorns/uds-cli?tab=readme-ov-file#install) version 0.10.4 or later.
## Apple Silicon Mac Users
[Section titled “Apple Silicon Mac Users”](#apple-silicon-mac-users)
When deploying on an Apple Silicon Mac, you have the option to utilize [Colima](https://github.com/abiosoft/colima), an open-source alternative to Docker Desktop, for deploying this bundle. You can install Colima via Homebrew by executing the command `brew install colima`.
To set up an appropriately configured Colima virtual machine, run the following command:
```bash
colima start --cpu 11 --memory 32 --disk 100 --vm-type vz --vz-rosetta --arch aarch64 --profile uds
```
Certain configurations must be set on the host to ensure a smooth deployment of SonarQube and UDS Core. Note: From our testing these steps are not required with Docker Desktop.
SSH To the colima VM:
```bash
colima ssh --profile uds
```
Then run the following commands:
```bash
sudo sysctl -w vm.max_map_count=1524288
sudo sysctl -w fs.file-max=1000000
ulimit -n 1000000
ulimit -u 8192
sudo sysctl --load
sudo swapoff -a
sudo sysctl fs.inotify.max_user_instances=8192
sudo sysctl -p
exit
```
## Linux Users
[Section titled “Linux Users”](#linux-users)
Depending on your Linux distribution and its configuration, you may need to execute the following steps to ensure the proper deployment of Software Factory and/or UDS Core:
```bash
sudo sysctl -w vm.max_map_count=1524288
sudo sysctl -w fs.file-max=1000000
ulimit -n 1000000
ulimit -u 8192
sudo sysctl --load
sudo swapoff -a
sudo sysctl fs.inotify.max_user_instances=8192
sudo sysctl -p
```
## Quickstart
[Section titled “Quickstart”](#quickstart)
\*\*Step 1: Install [UDS CLI](https://uds.defenseunicorns.com/reference/cli/overview/)
```bash
brew tap defenseunicorns/tap && brew install uds
```
**Step 2: Deploy**
To experiment with the UDS Software Factory, you can use the [`k3d-swf-demo`](https://github.com/defenseunicorns/uds-software-factory/blob/main/bundles/k3d-demo/README.md) bundle to create a local K3d cluster featuring complete installations of UDS Core and Software Factory.
To deploy this bundle, run the following command:
```bash
uds deploy k3d-swf-demo:0.2.2
```
**Optional:**
Use the following command to visualize resources in the cluster via [K9s:](https://k9scli.io/)
```bash
uds zarf tools monitor
```
**Step 3: Clean Up**
Upon completion of the Software Factory demo bundle, execute the following command to tear down the K3d cluster:
```bash
k3d cluster delete uds
```
Alternatively, you have the option to deploy the [`swf-dev`](https://github.com/defenseunicorns/uds-software-factory/blob/main/bundles/dev/README.md) bundle, designed to be deployed atop [`k3d-core-slim-dev`](https://github.com/defenseunicorns/uds-core/blob/main/bundles/k3d-slim-dev/README.md). This bundle encompasses the entire Software Factory, while leveraging only a portion of the underlying UDS Core baseline. This design allows the bundle to run on a broader range of hardware, specifically tailored for local development environments.
If using the `swf-dev` bundle, users have two options for deployment:
* Build and deploy directly from the source.
* Deploy the pre-built artifacts hosted in the GHCR OCI registry.
### OCI
[Section titled “OCI”](#oci)
Run the below command to deploy the `k3d-core-slim-dev` bundle:
```bash
uds deploy k3d-core-slim-dev:0.22.0
```
Then run the following command to deploy the `swf-dev` bundle on top of the development cluster:
```bash
uds deploy swf-dev:0.2.2
```
You can then configure keycloak. Use zarf connect to establish a connection to the keycloak admin endpoint:
```bash
uds zarf connect keycloak
```
Refer to the UDS Core [documentation](https://uds.defenseunicorns.com/reference/uds-core/overview/) for more details on how to configure keycloak users and groups.
### Source
[Section titled “Source”](#source)
**Step 1: Clone the Software Factory Repository**
```bash
git clone https://github.com/defenseunicorns/uds-software-factory.git
```
To build and deploy from the source you can utilize the [UDS tasks](https://github.com/defenseunicorns/uds-software-factory/tree/main/tasks) by running:
```bash
uds run
```
If you need to create a test user in keyloak you can then run:
```bash
uds run setup:create-doug-user
```
-----
# Software Factory
The Software Factory platform is a comprehensive solution designed to simplify and secure the software development process. It offers a package of software development tools, and extensible preconfigured DevSecOps pipelines, built on top of the UDS Core common baseline to enable Mission Heroes to focus on meeting their mission objectives. Software Factory is designed for the rapid deployment of secure Continuous Integration/Continuous Delivery (CI/CD) pipelines. Software Factory is engineered to operate in any environment, making it the ideal choice for on-premises, cloud, or tactical edge systems. The core purpose is to safeguard development environments while automating the software delivery workflow.
Software Factory introduces a declarative packaging of tools for source code management, CI/CD, value stream metrics, artifact repository, team collaboration and identity management. This all-in-one solution enables users to create secure and efficient CI/CD pipelines wherever and whenever needed. The integration of these tools ensures that every stage of the software delivery pipeline becomes an automated safeguard, ensuring that code and applications are ready for secure deployment in production environments. Software Factory equips Mission Heroes with an out-of-the-box, secure solution to meet their software delivery objectives, simplifying the path to secure and efficient software development.
## Key Features
[Section titled “Key Features”](#key-features)
**Faster Authorization:** Helps you meet most NIST controls by default, reducing compliance overhead. This accelerates the Authorization process, enabling you to focus on mission critical tasks.
**Portability:** Deploy anywhere and produce application artifacts that are deployable across different environments. This versatility allows you to build on the low side and seamlessly deploy to the high side, enhancing flexibility and mission adaptability.
**Data Independence:** You have full ownership of the environment and the data within it. You can extend the solution to meet bespoke mission needs, giving you the freedom to choose your support providers. This competitive approach helps control costs and ensures data sovereignty.
**Extensibility:** Software Factory offers an open architecture and pipeline templates aligned with supply chain best practices. This flexibility allows you to customize SWF to fit your specific mission or application requirements. You can tailor the platform to align with your unique needs and workflows.
## Software Factory UDS Packages
[Section titled “Software Factory UDS Packages”](#software-factory-uds-packages)
| UDS Package | Functionality |
| ----------------- | ------------------------------------------------------------------------------------------------------------------------------------------------------------------------------------------------------------------------------------------------------------------------------------------------------------------------------------------------------------------------------------------------------------------------------------------------------------------------------------------------------------- |
| **Gitlab** | **Source Code Management:** A DevOps software package that can develop, secure, and operate software. GitLab offers robust version control for your source code, making it easy to collaborate, track changes, and maintain a secure codebase. **Container Registry:** It provides a centralized location for storing and managing container images, facilitating seamless deployment and version control. **Secret Storage:** Securely manage and access sensitive data like credentials and configurations. |
| **GitLab Runner** | **Continuous Integration:** GitLab Runner is a Continuous Integration runner that integrates with GitLab, facilitating automated builds, testing, and deployment of your applications. |
| **Mattermost** | **Online Chat Service:** Mattermost is an open-source, self-hostable online chat service, providing a platform for real-time communication and collaboration within teams. |
| **SonarQube** | **Code Quality:** SonarQube continuously evaluates code quality and identifies issues, helping maintain code integrity and reduce technical debt. |
Note
If you are interested in learning more about Software Factory or would like to receive a demo, please [contact us](https://www.defenseunicorns.com/contactus)!
-----
# Software Factory Bundles
Note
The following UDS Bundles are designed specifically for development and testing environments and are *not intended for production use*.
## [swf-dev](https://github.com/defenseunicorns/uds-software-factory/tree/main/bundles/dev)
[Section titled “swf-dev”](#swf-dev)
**Bundle Overview**
This bundle is primarily for development purposes and requires an existing K3d cluster to deploy.
**System Requirements**
This bundle requires `9 CPUs and 28GB of memory` available to run effectively.
**Bundle Applications**
| Application | Description |
| ----------------- | ----------------------------------------------------------------------------------------------------------------------------------------------------------------------------------------- |
| Minio | In-cluster S3 Object Storage solution. |
| Postgres Operator | In-cluster PostgreSQL Database management tool. |
| GitLab | A comprehensive DevOps software package facilitating software development, security, and operational tasks. |
| GitLab Runner | A Continuous Integration (CI) runner tightly integrated with GitLab, streamlining automation of build, test, and deployment workflows. |
| Mattermost | An open-source, self-hostable online chat service empowering real-time communication for teams and organizations. |
| SonarQube | An open-source platform developed by SonarSource, dedicated to the continuous inspection of code quality, ensuring adherence to high standards across the software development lifecycle. |
## [k3d-swf-demo](https://github.com/defenseunicorns/uds-software-factory/tree/main/bundles/k3d-demo)
[Section titled “k3d-swf-demo”](#k3d-swf-demo)
**Bundle Overview**
Demo bundle of Software Factory deployed on top of [UDS Core](https://github.com/defenseunicorns/uds-core) that includes the deployment of an underlying K3d cluster.
**System Requirements**
* This bundle requires a minimum of `11 CPUs and 32GB of memory` available to run effectively.
* This bundle is best deployed on an adequately sized Linux machine with Docker or equivalent installed.
**Bundle Applications**
| Application | Description |
| ----------------- | ----------------------------------------------------------------------------------------------------------------------------------------------------------------------------------------- |
| UDS-K3d | Containerized K3s with opinionated deployment for UDS development. |
| Minio | In-cluster S3 Object Storage solution. |
| Postgres Operator | In-cluster PostgreSQL Database management tool. |
| UDS Core | Comprehensive suite including Service Mesh, IdAM, Monitoring, Logging, Metrics, UDS Policy Engine and Operator, Container Security, Backup and Restore functionalities. |
| GitLab | A comprehensive DevOps software package facilitating software development, security, and operational tasks. |
| GitLab Runner | A Continuous Integration (CI) runner tightly integrated with GitLab, streamlining automation of build, test, and deployment workflows. |
| Mattermost | An open-source, self-hostable online chat service empowering real-time communication for teams and organizations. |
| SonarQube | An open-source platform developed by SonarSource, dedicated to the continuous inspection of code quality, ensuring adherence to high standards across the software development lifecycle. |
-----
# Your App Your Environment
Your App Your Environment revolutionizes application deployment for Mission Heroes, providing a seamless process for selecting, deploying, and managing mission-critical software on a Kubernetes cluster. Leveraging UDS and an array of open-source projects, Your App Your Environment is engineered to handle complex challenges, including egress-limited or air-gapped software delivery, ensuring robust and efficient deployment solutions. Offering flexibility, Your App Your Environment delivers cloud-native applications tailored to the unique needs of mission teams, empowering them to succeed in any environment, whether in the cloud, on-premises, or at the tactical edge.
By integrating with Defense Unicorns’ recommended DevSecOps Reference Guide compliant architecture, Your App Your Environment ensures compliance and security by default, providing a secure baseline with documented NIST 800-53 controls. Your App Your Environment meets 70% of technical security controls out of the box, significantly accelerating application delivery timelines towards achieving Authority to Operate (ATO).
With Your App Your Environment, teams maintain ownership and independence over their applications, avoiding reliance on vendor-locked solutions, and can package and deploy applications across various environments, guaranteeing compatibility and adaptability to diverse operational scenarios.
## Key Features
[Section titled “Key Features”](#key-features)
**Accelerate Authorization:** Leverage Defense Unicorns’ recommended DevSecOps Reference Guide compliant architecture to integrate your app with a secure baseline that comes with documented NIST 800-53 controls.
**Mission Ownership:** Your App Your Environment enables teams to maintain ownership of their application, preventing reliance on vendor-locked solutions.
**Deploy Anywhere:** Your App Your Environment packages and delivers your mission application across multiple environments, including cloud, on-premises, and tactical edge.
Note
If you are interested in learning more about Your App Your Environment, please [contact us](https://www.defenseunicorns.com/contactus)!
-----
# Bundle Overrides
Bundle overrides provide a mechanism to customize Helm charts inside of Zarf packages.
## Quickstart
[Section titled “Quickstart”](#quickstart)
Consider the following `zarf.yaml` and `values.yaml` which deploys [podinfo](https://github.com/stefanprodan/podinfo) with a couple of custom values:
zarf.yaml
```yaml
kind: ZarfPackageConfig
metadata:
name: helm-overrides-package
version: 0.0.1
components:
- name: helm-overrides-component
required: true
charts:
- name: podinfo
version: 6.4.0
namespace: podinfo
url: https://github.com/stefanprodan/podinfo.git
gitPath: charts/podinfo
valuesFiles:
- values.yaml
images:
- ghcr.io/stefanprodan/podinfo:6.4.0
---
# values.yaml
replicaCount: 1
ui:
color: blue
```
The bundle overrides feature allows users to override the values specified in Zarf packages. For example:
```yaml
kind: UDSBundle
metadata:
name: helm-overrides
description: testing a bundle with Helm overrides
version: 0.0.1
packages:
- name: helm-overrides-package
path: "path/to/pkg"
ref: 0.0.1
overrides:
helm-overrides-component:
podinfo:
valuesFiles:
- values.yaml
values:
- path: "replicaCount"
value: 2
variables:
- name: UI_COLOR
path: "ui.color"
description: "Set the color for podinfo's UI"
default: "purple"
```
values.yaml
```yaml
podAnnotations:
customAnnotation: "customValue"
```
This bundle will deploy the `helm-overrides-package` Zarf package and override the `replicaCount`, `ui.color`, and `podAnnotations` values in the `podinfo` chart. The `values` can’t be modified after the bundle has been created. However, at deploy time, users can override the `UI_COLOR` and other `variables` using a environment variable called `UDS_UI_COLOR` or by specifying it in a `uds-config.yaml` like so:
```yaml
variables:
helm-overrides-package:
UI_COLOR: green
```
## Overrides
[Section titled “Overrides”](#overrides)
### Syntax
[Section titled “Syntax”](#syntax)
Consider the following bundle `overrides`:
```yaml
packages:
- name: helm-overrides-package
path: "path/to/pkg"
ref: 0.0.1
overrides:
helm-overrides-component: # component name inside of the helm-overrides-package Zarf pkg
podinfo: # chart name from the helm-overrides-component component
valuesFiles:
- values.yaml
values:
- path: "replicaCount"
value: 2
variables:
- name: UI_COLOR
path: "ui.color"
description: "Set the color for podinfo's UI"
default: "purple"
```
values.yaml
```yaml
podAnnotations:
customAnnotation: "customValue"
```
In this example, the `helm-overrides-package` Zarf package has a component called `helm-overrides-component` which contains a Helm chart called `podinfo`; note how these names are keys in the `overrides` block. The `podinfo` chart has a `replicaCount` value that is overridden to `2`, a `podAnnotations` value that is overridden to include `customAnnotation: "customValue"` and a variable called `UI_COLOR` that is overridden to `purple`.
### Values Files
[Section titled “Values Files”](#values-files)
The `valuesFiles` in an `overrides` block are a list of `file`’s. It allows users to override multiple values in a Zarf package component’s underlying Helm chart, by providing a file with those values instead of having to include them all individually in the `overrides` block.
### Values
[Section titled “Values”](#values)
The `values` in an `overrides` block are a list of `path` and `value` pairs. They allow users to override values in a Zarf package component’s underlying Helm chart. Note that values are specified by bundle authors and **cannot be modified** after the bundle has been created.
#### Path
[Section titled “Path”](#path)
The `path` uses dot notation to specify the location of a value to override in the underlying Helm chart. For example, the `replicaCount` path in the `podinfo` chart is located at the top-level of the [podinfo values.yaml](https://github.com/stefanprodan/podinfo/blob/master/charts/podinfo/values.yaml), so the path is simply `replicaCount`, while the `ui.color` path is located under the `ui` key, so the path is `ui.color`.
#### Value
[Section titled “Value”](#value)
The `value` is the value to set at the `path`. Values can be simple values such as numbers and strings, as well as, complex lists and objects, for example:
```yaml
---
overrides:
helm-overrides-component:
podinfo:
values:
- path: "podinfo.tolerations"
value:
- key: "unicorn"
operator: "Equal"
value: "defense"
effect: "NoSchedule"
- path: podinfo.podAnnotations
value:
customAnnotation: "customValue"
```
#### Bundle Variables as Values
[Section titled “Bundle Variables as Values”](#bundle-variables-as-values)
Bundle and Zarf variables can be used to set override values by using the syntax `${...}`. For example:
uds-config.yaml
```yaml
variables:
helm-overrides-package:
replica_count: 2
```
```yaml
kind: UDSBundle
metadata:
name: example-bundle
description: Example for using an imported variable to set an overrides value
version: 0.0.1
packages:
- name: output-var
repository: localhost:888/output-var
ref: 0.0.1
exports:
- name: COLOR
- name: helm-overrides-package
path: "../../packages/helm"
ref: 0.0.1
overrides:
podinfo-component:
unicorn-podinfo:
values:
- path: "podinfo.replicaCount"
value: ${REPLICA_COUNT}
- path: "podinfo.ui.color"
value: ${COLOR}
```
In the example above `${REPLICA_COUNT}` is set in the `uds-config.yaml` file and `${COLOR}` is set as an export from the `output-var` package. Note that you could also set these values with the `shared` key in a `uds-config.yaml`, environment variables prefixed with `UDS_` or with the `--set` flag during deployment.
#### Value Precedence
[Section titled “Value Precedence”](#value-precedence)
Value precedence is as follows:
1. The `values` in an `overrides` block
2. `values` set in the last `valuesFile` (if more than one specified)
3. `values` set in the previous `valuesFile` (if more than one specified)
### Variables
[Section titled “Variables”](#variables)
Variables are similar to [values](#values) in that they allow users to override values in a Zarf package component’s underlying Helm chart; they also share a similar syntax. However, unlike `values`, `variables` can be overridden at deploy time. For example, consider the `variables` key in the following `uds-bundle.yaml`:
```yaml
kind: UDSBundle
metadata:
name: example-bundle
version: 0.0.1
packages:
- name: helm-overrides-package
path: "../../packages/helm"
ref: 0.0.1"
overrides:
podinfo-component:
unicorn-podinfo:
variables:
- name: UI_COLOR
path: "ui.color"
description: "Set the color for podinfo's UI"
default: "purple"
```
There are 3 ways to override the `UI_COLOR` variable:
1. **UDS config**: you can create a `uds-config.yaml` file in the same directory as the bundle and specify the variable to override. For example, to override the `UI_COLOR` variable, you can create a `uds-config.yaml`:
```yaml
variables:
helm-overrides-package:
ui_color: green # Note that the variable for `UI_COLOR` can be upper or lowercase
```
2. **Environment variables**: you can create an environment variable prefixed with `UDS_` and the name of the variable. For example, to override the `UI_COLOR` variable, you can create an environment variable called `UDS_UI_COLOR` and set it to the desired value. Note that environment variables take precedence over `uds-config.yaml` variables.
3. **—set Flag**: you can also override the variable using the CLI’s `--set` flag. For example, to override the `UI_COLOR` variable, you can run one of the following commands:
```bash
# by default ui_color will apply to all packages in the bundle
uds deploy example-bundle --set ui_color=green
# to specify a specific package that the variable should apply to you can prepend th package name to the variable
uds deploy example-bundle --set helm-overrides-package.ui_color=green
```
> **:warning: Warning**: Because Helm override variables and Zarf variables share the same —set syntax, be careful with variable names to avoid conflicts.
Note
A variable that is not overridden by any of the methods above and has no default will be ignored.
#### Variable Precedence
[Section titled “Variable Precedence”](#variable-precedence)
Variable precedence is as follows:
1. The `--set` flag
2. Environment variables
3. `uds-config.yaml` variables
4. Variables `default` in the`uds-bundle.yaml`
#### Variable Types
[Section titled “Variable Types”](#variable-types)
Variables can be of either type `raw` or `file`. The type will default to raw if not set explicitly.
Caution
If a variable is set to accept a file as its value, but is missing the `file` type, then the file will not be processed.
```yaml
kind: UDSBundle
metadata:
name: example-bundle
version: 0.0.1
packages:
- name: helm-overrides-package
path: "../../packages/helm"
ref: 0.0.1
overrides:
podinfo-component:
unicorn-podinfo:
variables:
- name: UI_COLOR
path: "ui.color"
description: "variable UI_COLOR accepts a raw value (e.g. a string, int, map) like "purple", which is passed to the ui.color helm path"
type: raw
- name: test_secret
path: "testSecret"
description: "variable TEST_SECRET will resolve to the contents of a file (e.g. test.cert), which gets passed to the testSecret helm path"
type: file
```
**File Paths**
If a file path is not absolute, it will be set as relative to the `uds-config.yaml` directory.
e.g. the following `uds-config.yaml` is in [`src/test/bundles/07-helm-overrides/variable-files/`](https://github.com/defenseunicorns/uds-cli/blob/main/src/test/bundles/07-helm-overrides/uds-config.yaml)
```yaml
variables:
helm-overrides:
test_secret: test.cert
```
This means when `test.cert` is evaluated it will first be appended to the config path like so `src/test/bundles/07-helm-overrides/variable-files/test.cert`.
If the file path is already set to the same relative path as the config, then no merging will take place.
Note
UDS CLI does not encrypt or base64 encode any file contents before passing said data to Zarf or Helm.
For example, if the file contains a key to be used in a Kubernetes secret, it must be base64 encoded before being ingested by UDS CLI.
### Sensitive
[Section titled “Sensitive”](#sensitive)
Variables can be specified as sensitive, which means their values, regardless of how they’re set, will be masked in output.
```yaml
kind: UDSBundle
metadata:
name: example-bundle
version: 0.0.1
packages:
- name: helm-overrides-package
path: "../../packages/helm"
ref: 0.0.1
overrides:
podinfo-component:
unicorn-podinfo:
variables:
- name: SECRET_VAL
path: "testSecret"
description: "should be masked in output"
sensitive: true
```
### Namespace
[Section titled “Namespace”](#namespace)
It’s also possible to specify a namespace for a packaged Helm chart to be installed in. For example, to deploy the a chart in the `custom-podinfo` namespace, you can specify the `namespace` in the `overrides` block:
```yaml
kind: UDSBundle
metadata:
name: example-bundle
version: 0.0.1
packages:
- name: helm-overrides-package
path: "../../packages/helm"
ref: 0.0.1
overrides:
podinfo-component:
unicorn-podinfo:
namespace: custom-podinfo # custom namespace!
values:
- path: "podinfo.replicaCount"
value: 1
```
### View All Variables
[Section titled “View All Variables”](#view-all-variables)
When working with a local or remote bundle you can view all overrides and zarf variables by running `uds inspect --list-variables BUNDLE_TARBALL|OCI_REF]`
-----
# Overview
## Bundle Anatomy
[Section titled “Bundle Anatomy”](#bundle-anatomy)
A UDS Bundle is an OCI artifact with the following form:

-----
# Velero Cloud Provider Snapshot Support
This document describes how to enable volume snapshot support in Velero for cloud-provider-specific infrastructure in `uds-core`. This allows backup and restoration of persistent volumes via native snapshot mechanisms provided by each cloud provider.
Velero can create snapshots of Persistent Volumes using the underlying cloud provider’s native storage features:
## AWS (EBS) Snapshot Support
[Section titled “AWS (EBS) Snapshot Support”](#aws-ebs-snapshot-support)
### Enable Snapshots in UDS-Core
[Section titled “Enable Snapshots in UDS-Core”](#enable-snapshots-in-uds-core)
To enable snapshotting of EBS volumes by Velero, add the following Helm overrides to your UDS bundle:
```yaml
velero:
velero:
values:
- path: snapshotsEnabled
value: true
- path: schedules.udsbackup.template.snapshotVolumes
value: true
```
These values ensure that volume snapshots are included in the default `udsbackup` schedule.
### IAM Permissions for EBS Snapshotting
[Section titled “IAM Permissions for EBS Snapshotting”](#iam-permissions-for-ebs-snapshotting)
The Velero service account must have an IRSA role with the necessary permissions to manage EBS snapshots. Add the following IAM policy statements to your Velero IRSA role definition:
```hcl
# Example IAM policy for Velero AWS plugin
# velero aws plugin policy scope from here: https://github.com/vmware-tanzu/velero-plugin-for-aws?tab=readme-ov-file#set-permissions-for-velero
# ref policy for scoping based on tags: https://cloudonaut.io/restricting-access-to-ec2-instances-based-on-tags/
data "aws_iam_policy_document" "velero_policy" {
statement {
effect = "Allow"
actions = [
"kms:ReEncryptFrom",
"kms:ReEncryptTo"
]
# Replace with the ARN of your EBS volume encryption KMS key
resources = [""]
}
statement {
effect = "Allow"
actions = ["ec2:DescribeVolumes", "ec2:DescribeSnapshots"]
resources = ["*"]
}
statement {
effect = "Allow"
actions = ["ec2:CreateVolume"]
resources = ["*"]
condition {
test = "StringEquals"
variable = "aws:RequestTag/ebs.csi.aws.com/cluster"
values = ["true"]
}
}
statement {
effect = "Allow"
actions = ["ec2:CreateSnapshot"]
resources = ["*"]
condition {
test = "StringEquals"
variable = "aws:RequestTag/ebs.csi.aws.com/cluster"
values = ["true"]
}
}
statement {
effect = "Allow"
actions = ["ec2:CreateSnapshot"]
resources = ["*"]
condition {
test = "StringEquals"
variable = "ec2:ResourceTag/ebs.csi.aws.com/cluster"
values = ["true"]
}
}
statement {
effect = "Allow"
actions = ["ec2:DeleteSnapshot"]
resources = ["*"]
condition {
test = "StringEquals"
variable = "ec2:ResourceTag/ebs.csi.aws.com/cluster"
values = ["true"]
}
}
statement {
effect = "Allow"
actions = ["ec2:CreateTags"]
resources = ["*"]
condition {
test = "ForAllValues:StringEquals"
variable = "aws:RequestTag/ebs.csi.aws.com/cluster"
values = ["true"]
}
condition {
test = "ForAllValues:StringEqualsIfExists"
variable = "ec2:ResourceTag/ebs.csi.aws.com/cluster"
values = ["true"]
}
}
}
```
This policy restricts actions to volumes and snapshots tagged by the EBS CSI driver, following AWS best practices.
## Future Expansion
[Section titled “Future Expansion”](#future-expansion)
This document is structured to support multiple cloud providers. Planned additions:
* [ ] Azure Disk snapshot support
* [ ] GCP PD snapshot support
* [ ] Generic backup configurations
-----
# RKE2 CSI Snapshotting on vSphere
## Introduction
[Section titled “Introduction”](#introduction)
As of Velero v1.14, the velero-plugin-for-csi is included in Velero. This means you no longer need to install a separate velero-plugin-for-csi or the [velero-plugin-for-vsphere](https://github.com/vmware-tanzu/velero-plugin-for-vsphere). This guide covers the configuration required to enable Velero to use a vSphere CSI driver for volume snapshots of a UDS Core deployment.
## Prerequisites
[Section titled “Prerequisites”](#prerequisites)
* An RKE2 Kubernetes cluster (additional configuration may be required for other distributions)
* Access to vSphere infrastructure
* UDS Core deployment with Velero configured for S3-compatible object storage
## Using a CSI driver in an RKE2 cluster
[Section titled “Using a CSI driver in an RKE2 cluster”](#using-a-csi-driver-in-an-rke2-cluster)
The following instructions are specific to an RKE2 cluster, and assume bucket variables required for S3 object storage have already been set. The below tips are not meant to be step-by-step instructions, but useful tips for configuring the CSI driver. To integrate Velero with a CSI driver, you should first install both [rancher-vsphere-cpi](https://github.com/rancher/vsphere-charts/tree/main/charts/rancher-vsphere-cpi) and [rancher-vsphere-csi](https://github.com/rancher/vsphere-charts/tree/main/charts/rancher-vsphere-csi). Installation of the vSphere CPI/CSI on RKE2 is done via setting `cloud-provider-name: rancher-vsphere` in RKE2’s `config.yaml`.
Note
While RKE2 deploys these helm charts automatically, they will not function correctly until properly configured with vSphere credentials and other settings. The HelmChartConfig overrides shown later in this document are essential for providing these configurations.
## CSI Driver Configuration
[Section titled “CSI Driver Configuration”](#csi-driver-configuration)
When using a vSphere CSI driver, a user must be created in vSphere with the appropriate permissions at the appropriate vSphere object levels. These roles and privileges can be found at [Broadcom vSphere Roles and Privileges](https://techdocs.broadcom.com/us/en/vmware-cis/vsphere/container-storage-plugin/3-0/getting-started-with-vmware-vsphere-container-storage-plug-in-3-0/vsphere-container-storage-plug-in-deployment/preparing-for-installation-of-vsphere-container-storage-plug-in.html#GUID-0AB6E692-AA47-4B6A-8CEA-38B754E16567-en). This user is referenced below as `vsphere_csi_username` and `vsphere_csi_password` and is used by Velero to authenticate with the vSphere vCenter API to provision, manage, and snapshot volumes.
Note
Some roles referenced in the Broadcom link come pre-created and combined with other roles in vSphere, thus the referenced Broadcom roles may be named slightly different in vSphere (e.g., CNS-Datastore role may be called CNS-Supervisor-Datastore in vSphere; CNS-Host-Config-Storage and CNS-VM roles may be combined and called CNS-Supervisor-Host-Config-Storage-And-CNS-VM in vSphere).
At least three overrides must occur in the vSphere CSI driver configuration: `blockVolumeSnapshot`, `configTemplate` and `global-max-snapshots-per-block-volume`
* `blockVolumeSnapshot` must be enabled on the CSI driver to allow the deployment of the [csi-snapshotter](https://github.com/kubernetes-csi/external-snapshotter) sidecar, which is required to create snapshots of volumes
* `configTemplate` must be completely overridden, to allow overriding of the `global-max-snapshots-per-block-volume` setting
* `global-max-snapshots-per-block-volume` should be added as an override within the `configTemplate`, to allow control of how many snapshots are allowed per volume
Example rancher-vsphere-cpi and rancher-vsphere-csi overrides:
```yaml
---
apiVersion: helm.cattle.io/v1
kind: HelmChartConfig
metadata:
name: rancher-vsphere-cpi
namespace: kube-system
spec:
valuesContent: |-
vCenter:
host: "{{ vsphere_server }}"
port: 443
insecureFlag: true
datacenters: ""
username: "{{ vsphere_csi_username }}"
password: "{{ vsphere_csi_password }}"
credentialsSecret:
name: "vsphere-cpi-creds"
generate: true
---
apiVersion: helm.cattle.io/v1
kind: HelmChartConfig
metadata:
name: rancher-vsphere-csi
namespace: kube-system
spec:
valuesContent: |-
vCenter:
datacenters: ""
username: "{{ vsphere_csi_username }}"
password: "{{ vsphere_csi_password }}"
configSecret:
configTemplate: |
[Global]
cluster-id = "{{ rke2_token }}"
user = "{{ vsphere_csi_username }}"
password = "{{ vsphere_csi_password }}"
port = 443
insecure-flag = "1"
[VirtualCenter "{{ vsphere_server }}"]
datacenters = ""
[Snapshot]
global-max-snapshots-per-block-volume = 12
csiNode:
tolerations:
- operator: "Exists"
effect: "NoSchedule"
blockVolumeSnapshot:
enabled: true
storageClass:
reclaimPolicy: Retain
```
## Snapshot Limit Configuration
[Section titled “Snapshot Limit Configuration”](#snapshot-limit-configuration)
The default snapshot limit (3) is insufficient for UDS Core’s 10-day [backup retention policy](https://github.com/defenseunicorns/uds-core/blob/main/src/velero/values/values.yaml#L35-L47).
* Each UDS backup creates approximately 13 snapshots distributed across all volumes
* For a cluster that has 13 volumes, each nightly UDS backup will create 1 snapshot per volume
* After 3 days of backups, the default `global-max-snapshots-per-block-volume` will have been met, and further backups will fail
* To account for 10 days of UDS backups (assuming 13 volumes), set the `global-max-snapshots-per-block-volume` to a minimum of 10
* Consider setting a higher `global-max-snapshots-per-block-volume` to create a buffer that accommodates manual backups or restore testing (e.g., `global-max-snapshots-per-block-volume=12`)
If the following error is seen when creating a backup, the `global-max-snapshots-per-block-volume` needs to be adjusted:
```yaml
name: /prometheus-kube-prometheus-stack-prometheus-0 message: /Error backing up item error: /error
executing custom action (groupResource=volumesnapshots.snapshot.storage.k8s.io, namespace=monitoring,
name=velero-prometheus-kube-prometheus-stack-prometheus-db-prom2n67g): rpc error: code = Unknown desc
= CSI got timed out with error: Failed to check and update snapshot content:\n failed to take snapshot
of the volume 6e908637-1c40-41ab-a65b-0460b403e364: "rpc error: code = FailedPrecondition desc =\n the
number of snapshots on the source volume 6e908637-1c40-41ab-a65b-0460b403e364 reaches the configured
maximum (3)"
```
## Create a VolumeSnapshotClass
[Section titled “Create a VolumeSnapshotClass”](#create-a-volumesnapshotclass)
In addition to the above CSI driver overrides, a `VolumeSnapshotClass` must be defined to tell Velero how to create snapshots. This can be achieved by creating a velero-config Zarf package that contains the VolumeSnapshotClass manifest, and having your uds-bundle.yaml deploy this package. The `VolumeSnapshotClass` defines the driver, which in the below example is vSphere.
Example `VolumeSnapshotClass` deployment:
```yaml
apiVersion: snapshot.storage.k8s.io/v1
kind: VolumeSnapshotClass
metadata:
name: vsphere-csi-snapshot-class
labels:
velero.io/csi-volumesnapshot-class: "true"
driver: csi.vsphere.vmware.com
deletionPolicy: Retain
```
## Configure Velero for CSI Support
[Section titled “Configure Velero for CSI Support”](#configure-velero-for-csi-support)
In the uds-bundle.yaml Velero overrides, you must `EnableCSI`, set `snapshotsEnabled` to `true`, define the `volumeSnapshotLocation` as the CSI driver, and set `snapshotVolumes` to `true`.
Example uds-bundle.yaml core-backup-restore layer overrides:
```yaml
overrides:
velero:
velero:
values:
- path: configuration.features
value: EnableCSI
- path: snapshotsEnabled
value: true
- path: configuration.volumeSnapshotLocation
value:
- name: default
provider: velero.io/csi
- path: schedules.udsbackup.template.snapshotVolumes
value: true
```
## Additional Tips
[Section titled “Additional Tips”](#additional-tips)
* When restoring specific namespaces, always use the `--include-namespaces` flag to avoid creating unnecessary VolumeSnapshotContents:
```plaintext
velero restore create --from-backup --include-namespaces
```
* Be cautious when deleting backups that have been used for restores, as this may attempt to delete VolumeSnapshotContents that are still in use by restored volumes.
* Velero’s garbage collection runs hourly by default. Ensure your TTL settings allow enough time for cleanup before hitting snapshot limits.
* The [pyvmomi-community-samples](https://github.com/vmware/pyvmomi-community-samples/tree/master) repo contains several scripts that are useful for interacting with the vSphere client. In particular, the [fcd\_list\_vdisk\_snapshots](https://github.com/vmware/pyvmomi-community-samples/blob/master/samples/fcd_list_vdisk_snapshots.py) script allows you to list snapshots stored in vSphere, even when they can’t be directly viewed in the vSphere UI. This comes in handy when snapshots and VolumeSnapshotContents get manually deleted from the cluster, but are not cleaned up appropriately in vSphere.
## Resources
[Section titled “Resources”](#resources)
[Velero CSI Snapshot Support](https://velero.io/docs/main/csi/)
[Kubernetes CSI Snapshot API](https://kubernetes.io/docs/concepts/storage/volume-snapshots/)
[Rancher vSphere](https://github.com/rancher/vsphere-charts/tree/main)
[Rancher vSphere Configuration Reference](https://rke.docs.rancher.com/config-options/cloud-providers/vsphere/config-reference)
[global-max-snapshots-per-block-volume](https://techdocs.broadcom.com/us/en/vmware-cis/vsphere/container-storage-plugin/3-0/getting-started-with-vmware-vsphere-container-storage-plug-in-3-0/using-vsphere-container-storage-plug-in/volume-snapshot-and-restore/volume-snapshot-and-restor-0.html#:~:text=For%20a%20better%20performance%2C%20use,default%20is%20set%20to%20three)
[How Velero Works](https://velero.io/docs/main/how-velero-works/)
-----
# Clusterconfig CR (v1alpha1)
[]()
# Clusterconfig
[Section titled “Clusterconfig”](#clusterconfig)
| Field | Type | Description |
| -------- | --------------------- | ----------- |
| metadata | [Metadata](#Metadata) | |
| spec | [Spec](#Spec) | |
[]()
## Metadata
[Section titled “Metadata”](#metadata)
| Field | Type | Description |
| ----- | ------------------------------------ | ----------- |
| name | string (enum):- `uds-cluster-config` | |
[]()
## Spec
[Section titled “Spec”](#spec)
| Field | Type | Description |
| ---------- | ------------------------- | ----------- |
| attributes | [Attributes](#Attributes) | |
| expose | [Expose](#Expose) | |
| networking | [Networking](#Networking) | |
| policy | [Policy](#Policy) | |
[]()
### Attributes
[Section titled “Attributes”](#attributes)
| Field | Type | Description |
| ----------- | --------- | ------------------------------------------------ |
| clusterName | string | Friendly name to associate with your UDS cluster |
| tags | string\[] | Tags to apply to your UDS cluster |
[]()
### Expose
[Section titled “Expose”](#expose)
| Field | Type | Description |
| ----------- | ------ | ------------------------------------------------------------------------ |
| adminDomain | string | Domain all cluster services on the admin gateway will be exposed on |
| caCert | string | The trusted CA that signed your domain certificates if using Private PKI |
| domain | string | Domain all cluster services will be exposed on |
[]()
### Networking
[Section titled “Networking”](#networking)
| Field | Type | Description |
| ------------- | --------- | ---------------------------------------------------------------------------------------------------------------------------------------------------------------------- |
| kubeApiCIDR | string | CIDR range for your Kubernetes control plane nodes. This is a manual override that can be used instead of relying on Pepr to automatically watch and update the values |
| kubeNodeCIDRs | string\[] | CIDR(s) for all Kubernetes nodes (not just control plane). Similar reason to above,annual override instead of relying on watch |
[]()
### Policy
[Section titled “Policy”](#policy)
| Field | Type | Description |
| -------------------- | ------- | ----------------------------------------------------------------------------- |
| allowAllNsExemptions | boolean | Allow UDS Exemption custom resources to live in any namespace (default false) |
-----
# Exemptions CR (v1alpha1)
[]()
# Exemptions
[Section titled “Exemptions”](#exemptions)
| Field | Type | Description |
| ----- | ------------- | ----------- |
| spec | [Spec](#Spec) | |
[]()
## Spec
[Section titled “Spec”](#spec)
| Field | Type | Description |
| ---------- | ----------------------------- | ----------------- |
| exemptions | [Exemptions\[\]](#Exemptions) | Policy exemptions |
[]()
### Exemptions
[Section titled “Exemptions”](#exemptions-1)
| Field | Type | Description |
| ----------- | ---------------------------------------------------------------------------------------------------------------------------------------------------------------------------------------------------------------------------------------------------------------------------------------------------------------------------------------------------------------------------------------------------------------------------------------------------------------------------------------------------- | -------------------------------------------------- |
| description | string | Reasons as to why this exemption is needed |
| matcher | [Matcher](#Matcher) | Resource to exempt (Regex allowed for name) |
| policies | Policies\[] (enum):- `DisallowHostNamespaces`
- `DisallowNodePortServices`
- `DisallowPrivileged`
- `DisallowSELinuxOptions`
- `DropAllCapabilities`
- `RequireNonRootUser`
- `RestrictCapabilities`
- `RestrictExternalNames`
- `RestrictHostPathWrite`
- `RestrictHostPorts`
- `RestrictIstioAmbientOverrides`
- `RestrictIstioSidecarOverrides`
- `RestrictIstioTrafficOverrides`
- `RestrictIstioUser`
- `RestrictProcMount`
- `RestrictSeccomp`
- `RestrictSELinuxType`
- `RestrictVolumeTypes` | A list of policies to override |
| title | string | title to give the exemption for reporting purposes |
[]()
#### Matcher
[Section titled “Matcher”](#matcher)
| Field | Type | Description |
| --------- | --------------------------------- | ----------- |
| kind | string (enum):- `pod`
- `service` | |
| name | string | |
| namespace | string | |
-----
# Packages CR (v1alpha1)
[]()
# Packages
[Section titled “Packages”](#packages)
| Field | Type | Description |
| ----- | ------------- | ----------- |
| spec | [Spec](#Spec) | |
[]()
## Spec
[Section titled “Spec”](#spec)
| Field | Type | Description |
| ------- | ----------------------- | -------------------------------------------- |
| monitor | [Monitor\[\]](#Monitor) | Create Service or Pod Monitor configurations |
| network | [Network](#Network) | Network configuration for the package |
| sso | [Sso\[\]](#Sso) | Create SSO client configurations |
[]()
### Monitor
[Section titled “Monitor”](#monitor)
| Field | Type | Description |
| ---------------------- | ----------------------------------------------------------------------------------------------------------------------------------- | --------------------------------------------------------------------------------------------------------------- |
| authorization | [Authorization](#Authorization) | Authorization settings. |
| description | string | A description of this monitor entry, this will become part of the ServiceMonitor name |
| fallbackScrapeProtocol | string (enum):- `OpenMetricsText0.0.1`
- `OpenMetricsText1.0.0`
- `PrometheusProto`
- `PrometheusText0.0.4`
- `PrometheusText1.0.0` | The protocol for Prometheus to use if a scrape returns a blank, unparsable, or otherwise invalid Content-Type |
| kind | string (enum):- `PodMonitor`
- `ServiceMonitor` | The type of monitor to create; PodMonitor or ServiceMonitor. ServiceMonitor is the default. |
| path | string | HTTP path from which to scrape for metrics, defaults to \`/metrics\` |
| podSelector | | Labels to match pods in the namespace to apply the policy to. Leave empty to apply to all pods in the namespace |
| portName | string | The port name for the serviceMonitor |
| selector | | Labels to match pods in the namespace to apply the policy to. Leave empty to apply to all pods in the namespace |
| targetPort | number | The service targetPort. This is required so the NetworkPolicy can be generated correctly. |
[]()
#### Authorization
[Section titled “Authorization”](#authorization)
| Field | Type | Description |
| ----------- | --------------------------- | ------------------------------------------------------------------------------------------------------------------- |
| credentials | [Credentials](#Credentials) | Selects a key of a Secret in the namespace that contains the credentials for authentication. |
| type | string | Defines the authentication type. The value is case-insensitive. "Basic" is not a supported value. Default: "Bearer" |
[]()
##### Credentials
[Section titled “Credentials”](#credentials)
| Field | Type | Description |
| -------- | ------- | ---------------------------------------------------------------------------------------------------------------- |
| key | string | The key of the secret to select from. Must be a valid secret key. |
| name | string | Name of the referent. More info: https\://kubernetes.io/docs/concepts/overview/working-with-objects/names/#names |
| optional | boolean | Specify whether the Secret or its key must be defined |
[]()
### Network
[Section titled “Network”](#network)
| Field | Type | Description |
| ----------- | --------------------------- | ------------------------------------------------------------------ |
| allow | [Allow\[\]](#Allow) | Allow specific traffic (namespace will have a default-deny policy) |
| expose | [Expose\[\]](#Expose) | Expose a service on an Istio Gateway |
| serviceMesh | [ServiceMesh](#ServiceMesh) | Service Mesh configuration for the package |
[]()
#### Allow
[Section titled “Allow”](#allow)
| Field | Type | Description |
| -------------------- | ----------------------------------------------------------------------------------------- | ----------------------------------------------------------------------------------------------------------------------- |
| description | string | A description of the policy, this will become part of the policy name |
| direction | string (enum):- `Ingress`
- `Egress` | The direction of the traffic |
| labels | | The labels to apply to the policy |
| podLabels | | Deprecated: use selector |
| port | number | The port to allow (protocol is always TCP) |
| ports | number\[] | A list of ports to allow (protocol is always TCP) |
| remoteCidr | string | Custom generated policy CIDR |
| remoteGenerated | string (enum):- `KubeAPI`
- `KubeNodes`
- `IntraNamespace`
- `CloudMetadata`
- `Anywhere` | Custom generated remote selector for the policy |
| remoteHost | string | Remote host to allow traffic out to |
| remoteNamespace | string | The remote namespace to allow traffic to/from. Use \* or empty string to allow all namespaces |
| remotePodLabels | | Deprecated: use remoteSelector |
| remoteProtocol | string (enum):- `TLS`
- `HTTP` | Protocol used for external connection |
| remoteSelector | | The remote pod selector labels to allow traffic to/from |
| remoteServiceAccount | string | The remote service account to restrict incoming traffic from within the remote namespace. Only valid for Ingress rules. |
| selector | | Labels to match pods in the namespace to apply the policy to. Leave empty to apply to all pods in the namespace |
| serviceAccount | string | The service account to restrict outgoing traffic from within the package namespace. Only valid for Egress rules. |
[]()
#### Expose
[Section titled “Expose”](#expose)
| Field | Type | Description |
| ------------ | ----------------------------- | --------------------------------------------------------------------------------------------------------------------------------------------------------------------------- |
| advancedHTTP | [AdvancedHTTP](#AdvancedHTTP) | Advanced HTTP settings for the route. |
| description | string | A description of this expose entry, this will become part of the VirtualService name |
| domain | string | The domain to expose the service on, only valid for additional gateways (not tenant, admin, or passthrough) |
| gateway | string | The name of the gateway to expose the service on (default: tenant) |
| host | string | The hostname to expose the service on |
| match | [Match\[\]](#Match) | Match the incoming request based on custom rules. Not permitted when using the passthrough gateway. |
| podLabels | | Deprecated: use selector |
| port | number | The port number to expose |
| selector | | Labels to match pods in the namespace to apply the policy to. Leave empty to apply to all pods in the namespace |
| service | string | The name of the service to expose |
| targetPort | number | The service targetPort. This defaults to port and is only required if the service port is different from the target port (so the NetworkPolicy can be generated correctly). |
[]()
##### AdvancedHTTP
[Section titled “AdvancedHTTP”](#advancedhttp)
| Field | Type | Description |
| -------------- | --------------------------------- | --------------------------------------------------------------------------------------------------- |
| corsPolicy | [CorsPolicy](#CorsPolicy) | Cross-Origin Resource Sharing policy (CORS). |
| directResponse | [DirectResponse](#DirectResponse) | A HTTP rule can either return a direct\_response, redirect or forward (default) traffic. |
| headers | [Headers](#Headers) | |
| match | [Match\[\]](#Match) | Match the incoming request based on custom rules. Not permitted when using the passthrough gateway. |
| redirect | [Redirect](#Redirect) | A HTTP rule can either return a direct\_response, redirect or forward (default) traffic. |
| retries | [Retries](#Retries) | Retry policy for HTTP requests. |
| rewrite | [Rewrite](#Rewrite) | Rewrite HTTP URIs and Authority headers. |
| timeout | string | Timeout for HTTP requests, default is disabled. |
| weight | integer | Weight specifies the relative proportion of traffic to be forwarded to the destination. |
[]()
###### CorsPolicy
[Section titled “CorsPolicy”](#corspolicy)
| Field | Type | Description |
| ---------------- | --------------------------------- | --------------------------------------------------------------------------------------------------------- |
| allowCredentials | boolean | Indicates whether the caller is allowed to send the actual request (not the preflight) using credentials. |
| allowHeaders | string\[] | List of HTTP headers that can be used when requesting the resource. |
| allowMethods | string\[] | List of HTTP methods allowed to access the resource. |
| allowOrigin | string\[] | |
| allowOrigins | [AllowOrigins\[\]](#AllowOrigins) | String patterns that match allowed origins. |
| exposeHeaders | string\[] | A list of HTTP headers that the browsers are allowed to access. |
| maxAge | string | Specifies how long the results of a preflight request can be cached. |
[]()
###### AllowOrigins
[Section titled “AllowOrigins”](#alloworigins)
| Field | Type | Description |
| ------ | ------ | ------------------------------------------------------------------------- |
| exact | string | |
| prefix | string | |
| regex | string | RE2 style regex-based match (https\://github.com/google/re2/wiki/Syntax). |
[]()
###### DirectResponse
[Section titled “DirectResponse”](#directresponse)
| Field | Type | Description |
| ----- | ------------- | ------------------------------------------- |
| body | [Body](#Body) | Specifies the content of the response body. |
[]()
###### Body
[Section titled “Body”](#body)
| Field | Type | Description |
| ------ | ------ | -------------------------------------- |
| bytes | string | response body as base64 encoded bytes. |
| string | string | |
[]()
###### Headers
[Section titled “Headers”](#headers)
| Field | Type | Description |
| -------- | --------------------- | ----------- |
| request | [Request](#Request) | |
| response | [Response](#Response) | |
[]()
###### Request
[Section titled “Request”](#request)
| Field | Type | Description |
| ------ | --------- | ----------- |
| add | | |
| remove | string\[] | |
| set | | |
[]()
###### Response
[Section titled “Response”](#response)
| Field | Type | Description |
| ------ | --------- | ----------- |
| add | | |
| remove | string\[] | |
| set | | |
[]()
###### Match
[Section titled “Match”](#match)
| Field | Type | Description |
| ------------- | ----------------- | -------------------------------------------------------------------- |
| ignoreUriCase | boolean | Flag to specify whether the URI matching should be case-insensitive. |
| method | [Method](#Method) | |
| name | string | The name assigned to a match. |
| queryParams | | Query parameters for matching. |
| uri | [Uri](#Uri) | |
[]()
###### Method
[Section titled “Method”](#method)
| Field | Type | Description |
| ------ | ------ | ------------------------------------------------------------------------- |
| exact | string | |
| prefix | string | |
| regex | string | RE2 style regex-based match (https\://github.com/google/re2/wiki/Syntax). |
[]()
###### Uri
[Section titled “Uri”](#uri)
| Field | Type | Description |
| ------ | ------ | ------------------------------------------------------------------------- |
| exact | string | |
| prefix | string | |
| regex | string | RE2 style regex-based match (https\://github.com/google/re2/wiki/Syntax). |
[]()
###### Redirect
[Section titled “Redirect”](#redirect)
| Field | Type | Description |
| ------------ | ------------------------------------------------------------- | ----------------------------------------------------------------------------------------------------------------------------------------------------------------------------------- |
| authority | string | On a redirect, overwrite the Authority/Host portion of the URL with this value. |
| derivePort | string (enum):- `FROM_PROTOCOL_DEFAULT`
- `FROM_REQUEST_PORT` | On a redirect, dynamically set the port: \* FROM\_PROTOCOL\_DEFAULT: automatically set to 80 for HTTP and 443 for HTTPS.Valid Options: FROM\_PROTOCOL\_DEFAULT, FROM\_REQUEST\_PORT |
| port | integer | On a redirect, overwrite the port portion of the URL with this value. |
| redirectCode | integer | On a redirect, Specifies the HTTP status code to use in the redirect response. |
| scheme | string | On a redirect, overwrite the scheme portion of the URL with this value. |
| uri | string | On a redirect, overwrite the Path portion of the URL with this value. |
[]()
###### Retries
[Section titled “Retries”](#retries)
| Field | Type | Description |
| --------------------- | ------- | ------------------------------------------------------------------------------------ |
| attempts | integer | Number of retries to be allowed for a given request. |
| perTryTimeout | string | Timeout per attempt for a given request, including the initial call and any retries. |
| retryOn | string | Specifies the conditions under which retry takes place. |
| retryRemoteLocalities | boolean | Flag to specify whether the retries should retry to other localities. |
[]()
###### Rewrite
[Section titled “Rewrite”](#rewrite)
| Field | Type | Description |
| --------------- | ----------------------------------- | -------------------------------------------------------------------- |
| authority | string | rewrite the Authority/Host header with this value. |
| uri | string | rewrite the path (or the prefix) portion of the URI with this value. |
| uriRegexRewrite | [UriRegexRewrite](#UriRegexRewrite) | rewrite the path portion of the URI with the specified regex. |
[]()
###### UriRegexRewrite
[Section titled “UriRegexRewrite”](#uriregexrewrite)
| Field | Type | Description |
| ------- | ------ | ------------------------------------------------------------------------- |
| match | string | RE2 style regex-based match (https\://github.com/google/re2/wiki/Syntax). |
| rewrite | string | The string that should replace into matching portions of original URI. |
[]()
##### Match
[Section titled “Match”](#match-1)
| Field | Type | Description |
| ------------- | ----------------- | -------------------------------------------------------------------- |
| ignoreUriCase | boolean | Flag to specify whether the URI matching should be case-insensitive. |
| method | [Method](#Method) | |
| name | string | The name assigned to a match. |
| queryParams | | Query parameters for matching. |
| uri | [Uri](#Uri) | |
[]()
###### Method
[Section titled “Method”](#method-1)
| Field | Type | Description |
| ------ | ------ | ------------------------------------------------------------------------- |
| exact | string | |
| prefix | string | |
| regex | string | RE2 style regex-based match (https\://github.com/google/re2/wiki/Syntax). |
[]()
###### Uri
[Section titled “Uri”](#uri-1)
| Field | Type | Description |
| ------ | ------ | ------------------------------------------------------------------------- |
| exact | string | |
| prefix | string | |
| regex | string | RE2 style regex-based match (https\://github.com/google/re2/wiki/Syntax). |
[]()
#### ServiceMesh
[Section titled “ServiceMesh”](#servicemesh)
| Field | Type | Description |
| ----- | ------------------------------------- | --------------------------------------------------------------------------- |
| mode | string (enum):- `sidecar`
- `ambient` | Set the service mesh mode for this package (namespace), defaults to sidecar |
[]()
### Sso
[Section titled “Sso”](#sso)
| Field | Type | Description |
| ------------------------- | ---------------------------------------------- | ------------------------------------------------------------------------------------------------------------------------------------------------------------------------ |
| adminUrl | string | This URL will be used for every binding to both the SP's Assertion Consumer and Single Logout Services. |
| alwaysDisplayInConsole | boolean | Always list this client in the Account UI, even if the user does not have an active session. |
| attributes | | Specifies attributes for the client. |
| baseUrl | string | Default URL to use when the auth server needs to redirect or link back to the client. |
| clientAuthenticatorType | string (enum):- `client-secret`
- `client-jwt` | The client authenticator type |
| clientId | string | The client identifier registered with the identity provider. |
| defaultClientScopes | string\[] | Default client scopes |
| description | string | A description for the client, can be a URL to an image to replace the login logo |
| enableAuthserviceSelector | | Labels to match pods to automatically protect with authservice. Leave empty to disable authservice protection |
| enabled | boolean | Whether the SSO client is enabled |
| groups | [Groups](#Groups) | The client SSO group type |
| name | string | Specifies display name of the client |
| protocol | string (enum):- `openid-connect`
- `saml` | Specifies the protocol of the client, either 'openid-connect' or 'saml' |
| protocolMappers | [ProtocolMappers\[\]](#ProtocolMappers) | Protocol Mappers to configure on the client |
| publicClient | boolean | Defines whether the client requires a client secret for authentication |
| redirectUris | string\[] | Valid URI pattern a browser can redirect to after a successful login. Simple wildcards are allowed such as 'https\://unicorns.uds.dev/\*' |
| rootUrl | string | Root URL appended to relative URLs |
| secret | string | The client secret. Typically left blank and auto-generated. |
| secretAnnotations | | Additional annotations to apply to the generated secret, can be used for pod reloading with a selector |
| secretLabels | | Additional labels to apply to the generated secret, can be used for pod reloading |
| secretName | string | The name of the secret to store the client secret |
| secretTemplate | | A template for the generated secret |
| serviceAccountsEnabled | boolean | Enables the client credentials grant based authentication via OpenID Connect protocol. |
| standardFlowEnabled | boolean | Enables the standard OpenID Connect redirect based authentication with authorization code. |
| webOrigins | string\[] | Allowed CORS origins. To permit all origins of Valid Redirect URIs, add '+'. This does not include the '\*' wildcard though. To permit all origins, explicitly add '\*'. |
[]()
#### Groups
[Section titled “Groups”](#groups)
| Field | Type | Description |
| ----- | --------- | ------------------------------------------- |
| anyOf | string\[] | List of groups allowed to access the client |
[]()
#### ProtocolMappers
[Section titled “ProtocolMappers”](#protocolmappers)
| Field | Type | Description |
| --------------- | ----------------------------------------- | ------------------------------------------------ |
| config | | Configuration options for the mapper. |
| consentRequired | boolean | Whether user consent is required for this mapper |
| name | string | Name of the mapper |
| protocol | string (enum):- `openid-connect`
- `saml` | Protocol of the mapper |
| protocolMapper | string | Protocol Mapper type of the mapper |
-----
# IRSA Support
Several applications within UDS Core can be configured to utilize resources that are external to your Kubernetes cluster, such as object storage and databases. If you are running in AWS, you can leverage [IRSA](https://docs.aws.amazon.com/eks/latest/userguide/iam-roles-for-service-accounts.html) to provide applications within UDS Core with a secure means of accessing external resources.
The following applications in UDS Core that support IRSA are:
* [Loki](#loki)
* [Velero](#velero)
Note
There may be additional applications in UDS Core that are not mentioned in this list that support IRSA. Only the applications listed above have been validated for IRSA support within UDS Core.
This guide will cover how to configure IRSA for each application.
## Prerequisites
[Section titled “Prerequisites”](#prerequisites)
Configuring IRSA requires that you have configured an IAM OIDC provider for your cluster. Refer to the IRSA [documentation](https://docs.aws.amazon.com/eks/latest/userguide/enable-iam-roles-for-service-accounts.html) for more information.
You must also create IAM Roles and Policies for each application. Refer to the IRSA [documentation](https://docs.aws.amazon.com/eks/latest/userguide/associate-service-account-role.html) for more information.
## Bundle Configuration
[Section titled “Bundle Configuration”](#bundle-configuration)
Configuring applications within UDS Core to use IRSA requires that you declare overrides in UDS Bundle configuration. Below are the necessary overrides for each application.
Note
The examples below are not exhaustive representations of all of the values you will need to supply to configure external storage.
The examples below declare new `variables` for IRSA Role ARN annotations, allowing for these values to be passed in dynamically via `uds-config.yaml` as opposed to being hardcoded as `overrides`.
### Loki
[Section titled “Loki”](#loki)
Loki can be configured to use IRSA by setting the following overrides in your `uds-bundle.yaml`:
```yaml
packages:
- name: core
repository: oci://ghcr.io/defenseunicorns/packages/uds/core
ref: x.x.x
overrides:
loki:
loki:
# Override default values set in uds-core-loki package
values:
- path: loki.storage.s3.endpoint
value: ""
- path: loki.storage.s3.secretAccessKey
value: ""
- path: loki.storage.s3.accessKeyId
value: ""
# Declare new variable for IRSA Role ARN
variables:
- name: LOKI_IRSA_ROLE_ARN
description: "ARN of Loki IAM Role to annotate Loki ServiceAccount with."
# Maps to Loki's helm values for ServiceAccount annotations:
# See https://github.com/grafana/loki/blob/0dc9d677b6ed5c4440346ab54e9776185900be38/production/helm/loki/values.yaml#L733
path: serviceAccount.annotations.eks\.amazonaws\.com/role-arn
```
Next, in your `uds-config.yaml`, supply a value for `LOKI_IRSA_ROLE_ARN`:
```yaml
variables:
core:
loki_irsa_role_arn: ""
```
### Velero
[Section titled “Velero”](#velero)
Velero can be configured to use IRSA by setting the following overrides in your `uds-bundle.yaml`:
```yaml
packages:
- name: core
repository: oci://ghcr.io/defenseunicorns/packages/uds/core
ref: x.x.x
overrides:
velero:
velero:
# Override default values set in uds-core-velero package
values:
- path: credentials.useSecret
value: false
# Declare new variable for IRSA Role ARN
variables:
- name: VELERO_IRSA_ROLE_ARN
description: "IRSA ARN annotation to use for Velero"
# Maps to Velero's helm values for ServiceAccount annotations:
# See https://github.com/vmware-tanzu/helm-charts/blob/fcc60b0ca3886eb760151c69c166108a807efdef/charts/velero/values.yaml#L491
path: serviceAccount.server.annotations.irsa/role-arn
```
Next, in your `uds-config.yaml`, supply a value for `VELERO_IRSA_ROLE_ARN`:
```yaml
variables:
core:
velero_irsa_role_arn: ""
```
-----
# Managing Loki Storage Upgrades and Overrides
When deploying or upgrading Loki, it is crucial to handle storage configuration properly to ensure smooth data continuity and prevent data loss. This document outlines why the logic for setting the schema date (`from`) is necessary, how to manage upgrades, and how to override the default behavior if required.
## Why This Logic Is Necessary
[Section titled “Why This Logic Is Necessary”](#why-this-logic-is-necessary)
Loki stores index data based on a schema configuration that defines when a particular storage type (`store`) starts being used. When migrating to or upgrading within a new storage type, careful handling of the `from` date ensures that data is not mistakenly indexed using an incorrect schema.
There are three primary scenarios that this logic addresses:
1. New Installation (Fresh Deployments)
* If no existing secret is found (i.e., a fresh Loki installation), the system should default to a past date (`now - 48h`).
* This prevents data from being indexed incorrectly if time synchronization issues exist.
2. Upgrading Loki (Secret Exists but No New Storage Configuration)
* If the secret exists but does **not** include the new storage type configuration, this is treated as an upgrade.
* To prevent indexing issues, the `from` date should default to a future date (`now + 48h`), allowing time to transition without data loss.
3. Existing Storage Configuration Found
* If an existing storage configuration is already defined, the system should use its `from` date to maintain continuity.
This approach ensures that both new and upgrading installations transition smoothly without manual intervention.
## Managing Upgrades
[Section titled “Managing Upgrades”](#managing-upgrades)
When upgrading Loki with an existing deployment, follow these best practices to ensure a seamless transition:
1. Check Existing Configuration
* Retrieve the existing Loki `Secret` using:
```sh
kubectl get secret loki -n loki -o yaml
```
* Check if `config.yaml` exists and whether `schema_config.configs` contains an entry for the intended storage type.
* We recommend saving a copy of the the current schema config list, in the case of problems this can be used with overrides.
2. Automatic Upgrade Handling
* The upgrade logic will automatically update the schema configuration to include the latest storage type and version.
* If you want to opt out of automatic upgrades, you will need to manually override the configuration and maintain separate values from the default settings.
## Overriding the Default Behavior
[Section titled “Overriding the Default Behavior”](#overriding-the-default-behavior)
In some cases, you may want to **disable a specific storage type** or manually override the schema configuration. To do so, use bundle overrides to do this:
```yaml
- name: core
repository: ghcr.io/defenseunicorns/packages/uds/core
ref: x.x.x
overrides:
loki:
loki:
values:
# Setting this value will override the default auto-lookup behavior
- path: loki.schemaConfig.configs
value:
# Self-manage configs here, making sure to include any previous dates you used
- from: 2022-01-11
store: boltdb-shipper
object_store: "{{ .Values.loki.storage.type }}"
schema: v12
index:
prefix: loki_index_
period: 24h
# Example: Explicitly set a date for TSDB and the v13 schema, making sure this is in the future
- from: 2025-03-25
store: tsdb
object_store: "{{ .Values.loki.storage.type }}"
schema: v13
index:
prefix: loki_index_
period: 24h
```
It is important to ensure that the from date is set in the future, accounting for time zones, to avoid potential indexing issues. Additionally, schema configurations must be listed in sequential order, with the latest configuration appearing last to ensure proper data indexing.
For more details on changing the schema, refer to the official Loki documentation: [Changing the Schema](https://grafana.com/docs/loki/latest/operations/storage/schema/#changing-the-schema)
-----
# Log Based Alerting
UDS Core deploys Loki with log alerting and metrics recording capabilities enabled through the Loki Ruler. This allows you to create alerts based on log patterns and generate metrics from logs using recording rules. The Loki Ruler evaluates LogQL expressions and can send alerts to Alertmanager and recording rule metrics to Prometheus.
## Overview
[Section titled “Overview”](#overview)
Log-based alerting in UDS Core provides two main capabilities:
1. [Loki Alerting Rules](https://grafana.com/docs/loki/latest/alert/#alerting-rules): Generate alerts when specific log patterns are detected
2. [Loki Recording Rules](https://grafana.com/docs/loki/latest/alert/#recording-rules): Create metrics from log queries for better performance and to enable metric-based alerting
The Loki Ruler component evaluates these rules and integrates with the existing monitoring stack:
* **Alerts** -> Sent to Alertmanager
* **Recording Rules** -> Metrics sent to Prometheus for storage and further alerting
## Architecture Flow
[Section titled “Architecture Flow”](#architecture-flow)
* Applications send logs to Loki
* Loki Ruler (a part of the Loki backend pods) evaluates rules against log data
* Alerting rules trigger notifications via Alertmanager
* Alerts are routed through notification channels
* Recording rules create metrics stored in Prometheus
* Metrics are available for dashboards and further alerting
## Deploying Rules
[Section titled “Deploying Rules”](#deploying-rules)
Rules are deployed using Kubernetes ConfigMaps or Secrets with specific labels that Loki’s sidecar watches for. The sidecar automatically loads any ConfigMaps/Secrets labeled with `loki_rule: "1"`.
### Rule File Structure
[Section titled “Rule File Structure”](#rule-file-structure)
Rules must be in YAML format following the [Loki ruler configuration](https://grafana.com/docs/loki/latest/alert/) specification:
```yaml
groups:
- name: example-group
rules:
- alert: HighErrorRate
expr: |
rate({app="my-app"} |= "ERROR" [5m]) > 0.1
for: 5m
labels:
severity: warning
team: backend
annotations:
summary: "High error rate detected"
description: "Error rate is {{ $value }} errors per second"
- record: my_app:error_rate
expr: |
rate({app="my-app"} |= "ERROR" [5m])
```
### Deploying Alerting Rules
[Section titled “Deploying Alerting Rules”](#deploying-alerting-rules)
Create a ConfigMap with your alerting rules. Here’s an example that monitors error rates and application logs availability:
```yaml
apiVersion: v1
kind: ConfigMap
metadata:
name: my-app-alert-rules
namespace: my-app-namespace
labels:
loki_rule: "1" # Required label for Loki sidecar to pick up
data:
rules.yaml: |
groups:
- name: my-app-alerts
rules:
- alert: ApplicationErrors
expr: |
sum(rate({namespace="my-app-namespace"} |= "ERROR" [5m])) > 0.05
for: 2m
labels:
severity: warning
service: my-app
annotations:
summary: "High error rate for my-app"
runbook_url: "https://wiki.company.com/runbooks/my-app-errors"
- alert: ApplicationLogsDown
expr: |
absent_over_time({namespace="my-app-namespace",app="my-app"}[5m])
for: 1m
labels:
severity: critical
service: my-app
annotations:
summary: "Application is not producing logs"
description: "No logs received from application for 5 minutes"
```
### Deploying Recording Rules
[Section titled “Deploying Recording Rules”](#deploying-recording-rules)
Recording rules create metrics from log queries which can be used to enable more performative metric-based alerting:
```yaml
apiVersion: v1
kind: ConfigMap
metadata:
name: my-app-recording-rules
namespace: my-app-namespace
labels:
loki_rule: "1"
data:
recording-rules.yaml: |
groups:
- name: my-app-metrics
interval: 30s # How often to evaluate the rules
rules:
- record: my_app:request_rate # name of the metric produced in prometheus
expr: |
sum(rate({namespace="my-app-namespace",app="my-app"} |= "REQUEST" [1m]))
- record: my_app:error_rate
expr: |
sum(rate({namespace="my-app-namespace",app="my-app"} |= "ERROR" [1m]))
- record: my_app:error_percentage
expr: |
(
sum(rate({namespace="my-app-namespace",app="my-app"} |= "ERROR" [1m]))
/
sum(rate({namespace="my-app-namespace",app="my-app"} [1m]))
) * 100
```
You can then create Prometheus alerting rules based on these recorded metrics using a [PrometheusRule CRD](https://prometheus-operator.dev/docs/api-reference/api/#monitoring.coreos.com/v1.PrometheusRule) (these rules will automatically be sent to Alertmanager):
```yaml
apiVersion: monitoring.coreos.com/v1
kind: PrometheusRule
metadata:
name: my-app-prometheus-alerts
namespace: my-app-namespace
labels:
prometheus: kube-prometheus-stack-prometheus
spec:
groups:
- name: my-app-prometheus-alerts
rules:
- alert: HighErrorPercentage
expr: my_app:error_percentage > 5
for: 5m
labels:
severity: warning
service: my-app
annotations:
description: "High error rate on my-app"
runbook_url: "https://wiki.company.com/runbooks/my-app-high-errors"
```
## Best Practices
[Section titled “Best Practices”](#best-practices)
### Rule Organization
[Section titled “Rule Organization”](#rule-organization)
* Group related rules together using meaningful group names
* Use consistent labeling across rules for better organization
* Include runbook URLs in alert annotations for operational guidance
### Performance Considerations
[Section titled “Performance Considerations”](#performance-considerations)
* Use recording rules for complex or frequently-evaluated queries
* Set appropriate evaluation intervals (default: 1m, adjust based on needs)
* Be mindful of cardinality when creating recorded metrics
### Alert Quality
[Section titled “Alert Quality”](#alert-quality)
* Set appropriate `for` durations to reduce noise
* Include meaningful labels for routing and filtering
* Provide actionable descriptions and summary annotations
* Test alerts before deploying to production
## Integration with Existing Monitoring
[Section titled “Integration with Existing Monitoring”](#integration-with-existing-monitoring)
Recording rules from Loki create metrics that integrate seamlessly with existing Prometheus-based monitoring:
1. **Grafana Dashboards**: Use recorded metrics in dashboards alongside other Prometheus metrics
2. **Prometheus Alerts**: Create traditional metric-based alerts using recorded metrics
3. **Alertmanager**: All alerts (direct from Loki and Prometheus-based) route through the same Alertmanager instance in UDS Core
This approach provides a unified monitoring experience while leveraging the power of log-based analysis.
-----
# Monitoring and Metrics
UDS Core deploys Prometheus and Grafana to provide metrics collection and dashboarding. Out of the box all applications in UDS Core will have their metrics collected by Prometheus, with some default dashboards present in Grafana for viewing this data. This document primarily focuses on the integrations and options provided for extending this to monitor any additional applications you would like to deploy.
## Capturing Metrics
[Section titled “Capturing Metrics”](#capturing-metrics)
There are a few options within UDS Core to collect metrics from your application. Since the prometheus operator is deployed we recommend using the `ServiceMonitor` and/or `PodMonitor` custom resources to capture metrics. These resources are commonly supported in application helm charts and should be used if available. UDS Core also supports generating these resources from the `monitor` list in the `Package` spec, since charts do not always support monitors. This also provides a simplified way for other users to create monitors, similar to the way `VirtualServices` are generated with the `Package` CR. A full example of this can be seen below:
```yaml
...
spec:
monitor:
# Example Service Monitor
- selector: # Selector for the service to monitor
app: foobar
portName: metrics # Name of the port to monitor
targetPort: 1234 # Corresponding target port on the pod/container (for network policy)
# Optional properties depending on your application
description: "Metrics" # Add to customize the service monitor name
kind: ServiceMonitor # optional, kind defaults to service monitor if not specified. PodMonitor is the other valid option.
podSelector: # Add if pod labels are different than `selector` (for network policy)
app: barfoo
path: "/mymetrics" # Add if metrics are exposed on a different path than "/metrics"
authorization: # Add if authorization is required for the metrics endpoint
credentials:
key: "example-key"
name: "example-secret"
optional: false
type: "Bearer"
# Example Pod Monitor
- portName: metrics # Name of the port on the pod to monitor
targetPort: 1234 # Corresponding target port on the pod/container (for network policy)
selector: # Selector for pod(s) to monitor; note: pod monitors support `podSelector` as well, both options behave the same
app: barfoo
kind: PodMonitor
# Optional properties depending on your application
description: "Metrics" # Add to customize the pod monitor name
path: "/mymetrics" # Add if metrics are exposed on a different path than "/metrics"
authorization: # Add if authorization is required for the metrics endpoint
credentials:
key: "example-key"
name: "example-secret"
optional: false
type: "Bearer"
```
## Adding Dashboards
[Section titled “Adding Dashboards”](#adding-dashboards)
Grafana within UDS Core is configured with [a sidecar](https://github.com/grafana/helm-charts/blob/6eecb003569dc41a494d21893b8ecb3e8a9741a0/charts/grafana/values.yaml#L926-L928) that will watch for new dashboards added via configmaps or secrets and load them into Grafana dynamically. In order to have your dashboard added the configmap or secret must be labelled with `grafana_dashboard: "1"`, which is used by the sidecar to watch and collect new dashboards.
Your configmap/secret must have a data key named `.json`, with a multi-line string of the dashboard json as the value. See the below example for app dashboards created this way:
```yaml
apiVersion: v1
kind: ConfigMap
metadata:
name: my-app-dashboards
namespace: my-app
labels:
grafana_dashboard: "1"
data:
# The value for this key should be your full JSON dashboard
my-dashboard.json: |
{
"annotations": {
"list": [
{
"builtIn": 1,
...
# Helm's Files functions can also be useful if deploying in a helm chart: https://helm.sh/docs/chart_template_guide/accessing_files/
my-dashboard-from-file.json: |
{{ .Files.Get "dashboards/my-dashboard-from-file.json" | nindent 4 }}
```
Grafana provides helpful documentation on [how to build dashboards](https://grafana.com/docs/grafana/latest/getting-started/build-first-dashboard/) via the UI, which can then be [exported as JSON](https://grafana.com/docs/grafana/latest/dashboards/share-dashboards-panels/#export-a-dashboard-as-json) so that they can be captured in code and loaded as shown above.
### Grouping Dashboards
[Section titled “Grouping Dashboards”](#grouping-dashboards)
Grafana supports creation of folders for dashboards to provide better organization. UDS Core does not utilize folders by default but the sidecar supports simple values configuration to dynamically create and populate folders. The example overrides below show how to set this up and place the UDS Core default dashboards into a uds-core folder:
```yaml
- name: core
repository: ghcr.io/defenseunicorns/packages/uds/core
ref: x.x.x
overrides:
grafana:
grafana:
values:
# This value allows us to specify a grafana_folder annotation to indicate the file folder to place a given dashboard into
- path: sidecar.dashboards.folderAnnotation
value: grafana_folder
# This value configures the sidecar to build out folders based upon where dashboard files are
- path: sidecar.dashboards.provider.foldersFromFilesStructure
value: true
kube-prometheus-stack:
kube-prometheus-stack:
values:
# This value adds an annotation to the defaults dashboards to specify that they should be grouped under a `uds-core` folder
- path: grafana.sidecar.dashboards.annotations
value:
grafana_folder: "uds-core"
loki:
uds-loki-config:
values:
# This value adds an annotation to the loki dashboards to specify that they should be grouped under a `uds-core` folder
- path: dashboardAnnotations
value:
grafana_folder: "uds-core"
```
Dashboards deployed outside of core can then be grouped separately by adding the annotation `grafana_folder` to your configmap or secret, with a value for the folder name you want. For example:
```yaml
apiVersion: v1
kind: ConfigMap
metadata:
name: my-app-dashboards
namespace: my-app
labels:
grafana_dashboard: "1"
annotations:
# The value of this annotation determines the group that your dashboard will be under
grafana_folder: "my-app"
data:
# Your dashboard data here
```
Note
If using this configuration, any dashboards without a `grafana_folder` annotation will still be loaded in Grafana, but will not be grouped (they will appear at the top level outside of any folders). Also note that new dashboards in UDS Core may also need to be overridden to add the folder annotation, this example represents the current set of dashboards deployed by default.
## Adding Datasources
[Section titled “Adding Datasources”](#adding-datasources)
Grafana in UDS Core is deployed with a [datasource sidecar](https://github.com/grafana/helm-charts/blob/main/charts/grafana/values.yaml#L872-L875) that watches for external datasource `ConfigMap`s or `Secret`s. This allows you to extend Grafana’s datasource configuration without modifying the default datasources deployed by UDS Core.
### Extending the Default Datasource ConfigMap
[Section titled “Extending the Default Datasource ConfigMap”](#extending-the-default-datasource-configmap)
The default UDS Core deployment creates a `ConfigMap` named `grafana-datasources`, which includes built-in datasources like Prometheus, Loki, and Alertmanager. You can extend this list by providing additional datasource definitions via the `extraDatasources` value in your UDS bundle.
```yaml
overrides:
grafana:
uds-grafana-config:
values:
- path: extraDatasources
value:
- name: Prometheus
type: prometheus
access: proxy
url: http://kube-prometheus-stack-prometheus.monitoring.svc.cluster.local:9090
```
These entries will be injected into the existing `datasources.yaml` generated in the `grafana-datasources` ConfigMap. This keeps your configuration declarative and avoids needing to replace the whole configmap.
The datasource will appear alongside the default ones when Grafana boots, and no extra ConfigMap management is required.
-----
# Pepr Policies
## Common Pepr Policies for UDS Core
[Section titled “Common Pepr Policies for UDS Core”](#common-pepr-policies-for-uds-core)
### Pepr Policy Exemptions
[Section titled “Pepr Policy Exemptions”](#pepr-policy-exemptions)
These policies are based on the [Big Bang](https://p1.dso.mil/services/big-bang) policies created with Kyverno. You can find the source policies [here](https://repo1.dso.mil/big-bang/product/packages/kyverno-policies), Policy Names below also have links to the referenced Big Bang policy.
Exemptions can be specified by a [UDS Exemption CR](/reference/configuration/uds-operator/exemption/#exemption). These take the place of Kyverno Exceptions.
If a resource is exempted, it will be annotated as `uds-core.pepr.dev/uds-core-policies.: exempted`
### Pepr Policy Mutations
[Section titled “Pepr Policy Mutations”](#pepr-policy-mutations)
Note
Mutations can be exempted using the same [Pepr Policy Exemptions](#pepr-policy-exemptions) references as the validations.
| Pepr Mutation🔗 | Mutated Fields | Mutation Logic |
| ------------------------------------------------------------------------------------------------------------------------------- | -------------------------------------------------------------------------------------------------------------------- | -------------------------------------------------------------------------------------------------------------------------------------------------------------------------------------------------------------------------------------------------------------------------------------------------- |
| [Disallow Privilege Escalation](https://github.com/defenseunicorns/uds-core/blob/v0.27.0/src/pepr/policies/security.ts#L14-L75) | `containers[].securityContext.allowPrivilegeEscalation` | Mutates `allowPrivilegeEscalation` to `false` if undefined, unless the container is privileged or `CAP_SYS_ADMIN` is added. |
| [Require Non-root User](https://github.com/defenseunicorns/uds-core/blob/v0.27.0/src/pepr/policies/security.ts#L77-L167) | `securityContext.runAsUser`, `securityContext.runAsGroup`, `securityContext.fsGroup`, `securityContext.runAsNonRoot` | Pods are mutated to ensure workloads do not run as root, mutating `runAsNonRoot: true`. Users can define user, group, and fsGroup IDs to run the pod as by using the `uds/user`, `uds/group`, `uds/fsgroup` pod labels. If not provided these default to `runAsUser: 1000` and `runAsGroup: 1000`. |
| [Drop All Capabilities](https://github.com/defenseunicorns/uds-core/blob/v0.27.0/src/pepr/policies/security.ts#L329-L376) | `containers[].securityContext.capabilities.drop` | Ensures all capabilities are dropped by setting `capabilities.drop` to `["ALL"]` for all containers. |
### Pepr Policy Validations
[Section titled “Pepr Policy Validations”](#pepr-policy-validations)
| Policy Name🔗 | Exemption Reference🔗 | Policy Description |
| -------------------------------------------------------------------------------------------------------------------------------------------------------------------------------------------------------------------------------------------------------------------------------------------------------------- | :-----------------------------------------------------------------------------------------------------------------------------: | ------------------------------------------------------------------------------------------------------------------------------------------------------------------------------------------------------------------------------------------------------------------------------------------------------------------------------------------------------------------------------------------------------------------------------------------------------------------------------------------------------------------------------------------------------------------------------------------------------------------------------------------------------------------------------------------------------------------------------------------------------------------------------------------------------------------------------------------------------------------------------------------------------------------------------------------------------------------------------------------------------------------------------------------------------------------------------------------------------------------------------------------------------------------------------------------------------------------------------------------------------------------------------------------------------------------------------------------------------------------------------------------------------------------------------------------------------------------------------------------------------------------------- |
| [Disallow Host Namespaces](https://repo1.dso.mil/big-bang/product/packages/kyverno-policies/-/blob/main/chart/templates/disallow-host-namespaces.yaml) | [`DisallowHostNamespaces`](https://github.com/defenseunicorns/uds-core/blob/v0.27.0/src/pepr/policies/networking.ts#L7-L35) | Implemented: ✅ Subject: **Pod** Severity: **high** Host namespaces (Process ID namespace, Inter-Process Communication namespace, and network namespace) allow access to shared information and can be used to elevate privileges. Pods should not be allowed access to host namespaces. This policy ensures fields which make use of these host namespaces are set to `false`. |
| [Disallow NodePort Services](https://repo1.dso.mil/big-bang/product/packages/kyverno-policies/-/blob/main/chart/templates/disallow-nodeport-services.yaml) | [`DisallowNodePortServices`](https://github.com/defenseunicorns/uds-core/blob/v0.27.0/src/pepr/policies/networking.ts#L88-L110) | Implemented: ✅ Subject: **Service** Severity: **medium** A Kubernetes Service of type NodePort uses a host port to receive traffic from any source. A NetworkPolicy cannot be used to control traffic to host ports. Although NodePort Services can be useful, their use must be limited to Services with additional upstream security checks. This policy validates that any new Services do not use the `NodePort` type. |
| Disallow Privileged [Escalation](https://repo1.dso.mil/big-bang/product/packages/kyverno-policies/-/blob/main/chart/templates/disallow-privilege-escalation.yaml) and [Pods](https://repo1.dso.mil/big-bang/product/packages/kyverno-policies/-/blob/main/chart/templates/disallow-privileged-containers.yaml) | [`DisallowPrivileged`](https://github.com/defenseunicorns/uds-core/blob/v0.27.0/src/pepr/policies/security.ts#L14-L75) | Implemented: ✅ Subject: **Pod** Severity: **high** Privilege escalation, such as via set-user-ID or set-group-ID file mode, should not be allowed. Privileged mode also disables most security mechanisms and must not be allowed. This policy ensures the `allowPrivilegeEscalation` field is set to false and `privileged` is set to false or undefined. |
| [Disallow SELinux Options](https://repo1.dso.mil/big-bang/product/packages/kyverno-policies/-/blob/main/chart/templates/disallow-selinux-options.yaml) | [`DisallowSELinuxOptions`](https://github.com/defenseunicorns/uds-core/blob/v0.27.0/src/pepr/policies/security.ts#L244-L285) | Implemented: ✅ Subject: **Pod** Severity: **high** SELinux options can be used to escalate privileges. This policy ensures that the `seLinuxOptions` specified are not used. |
| [Drop All Capabilities](https://repo1.dso.mil/big-bang/product/packages/kyverno-policies/-/blob/main/chart/templates/require-drop-all-capabilities.yaml) | [`DropAllCapabilities`](https://github.com/defenseunicorns/uds-core/blob/v0.27.0/src/pepr/policies/security.ts#L329-L376) | Implemented: ✅ Subject: **Pod** Severity: **medium** Capabilities permit privileged actions without giving full root access. All capabilities should be dropped from a Pod, with only those required added back. This policy ensures that all containers explicitly specify `drop: ["ALL"]`. |
| [Require Non-root User](https://repo1.dso.mil/big-bang/product/packages/kyverno-policies/-/blob/main/chart/templates/require-non-root-user.yaml) | [`RequireNonRootUser`](https://github.com/defenseunicorns/uds-core/blob/v0.27.0/src/pepr/policies/security.ts#L77-L167) | Implemented: ✅ Subject: **Pod** Severity: **high** Following the least privilege principle, containers should not be run as root. This policy ensures containers either have `runAsNonRoot` set to `true` or `runAsUser` > 0. |
| [Restrict Capabilities](https://repo1.dso.mil/big-bang/product/packages/kyverno-policies/-/blob/main/chart/templates/restrict-capabilities.yaml) | [`RestrictCapabilities`](https://github.com/defenseunicorns/uds-core/blob/v0.27.0/src/pepr/policies/security.ts#L378-L413) | Implemented: ✅ Subject: **Pod** Severity: **high** Capabilities permit privileged actions without giving full root access. Adding capabilities beyond the default set must not be allowed. This policy ensures users cannot add additional capabilities beyond the allowed list to a Pod. |
| [Restrict External Names (CVE-2020-8554)](https://repo1.dso.mil/big-bang/product/packages/kyverno-policies/-/blob/main/chart/templates/restrict-external-names.yaml) | [`RestrictExternalNames`](https://github.com/defenseunicorns/uds-core/blob/v0.27.0/src/pepr/policies/networking.ts#L67-L86) | Implemented: ✅ Subject: **Service** Severity: **medium** Service external names can be used for a MITM attack (CVE-2020-8554). External names can be used by an attacker to point back to localhost or internal IP addresses for exploitation. This policy restricts services using external names to a specified list. |
| [Restrict hostPath Volume Writable Paths](https://repo1.dso.mil/big-bang/product/packages/kyverno-policies/-/blob/main/chart/templates/restrict-host-path-write.yaml) | [`RestrictHostPathWrite`](https://github.com/defenseunicorns/uds-core/blob/v0.27.0/src/pepr/policies/storage.ts#L54-L92) | Implemented: ✅ Subject: **Pod** Severity: **medium** hostPath volumes consume the underlying node’s file system. If hostPath volumes are not universally disabled, they should be required to be read-only. Pods which are allowed to mount hostPath volumes in read/write mode pose a security risk even if confined to a “safe” file system on the host and may escape those confines. This policy checks containers for hostPath volumes and validates they are explicitly mounted in readOnly mode. |
| [Restrict Host Ports](https://repo1.dso.mil/big-bang/product/packages/kyverno-policies/-/blob/main/chart/templates/restrict-host-ports.yaml) | [`RestrictHostPorts`](https://github.com/defenseunicorns/uds-core/blob/v0.27.0/src/pepr/policies/networking.ts#L37-L65) | Implemented: ✅ Subject: **Pod** Severity: **high** Access to host ports allows potential snooping of network traffic and should not be allowed, or at minimum restricted to a known list. This policy ensures only approved ports are defined in container’s `hostPort` field. |
| [Restrict Proc Mount](https://repo1.dso.mil/big-bang/product/packages/kyverno-policies/-/blob/main/chart/templates/restrict-proc-mount.yaml) | [`RestrictProcMount`](https://github.com/defenseunicorns/uds-core/blob/v0.27.0/src/pepr/policies/security.ts#L169-L198) | Implemented: ✅ Subject: **Pod** Severity: **high** The default /proc masks are set up to reduce the attack surface. This policy ensures nothing but the specified procMount can be used. By default only “Default” is allowed. |
| [Restrict Seccomp](https://repo1.dso.mil/big-bang/product/packages/kyverno-policies/-/blob/main/chart/templates/restrict-seccomp.yaml) | [`RestrictSeccomp`](https://github.com/defenseunicorns/uds-core/blob/v0.27.0/src/pepr/policies/security.ts#L200-L242) | Implemented: ✅ Subject: **Pod** Severity: **high** The SecComp profile should not be explicitly set to Unconfined. This policy, requiring Kubernetes v1.19 or later, ensures that the `seccompProfile.Type` is undefined or restricted to the values in the allowed list. By default, this is `RuntimeDefault` or `Localhost`. |
| [Restrict SELinux Type](https://repo1.dso.mil/big-bang/product/packages/kyverno-policies/-/blob/main/chart/templates/restrict-selinux-type.yaml) | [`RestrictSELinuxType`](https://github.com/defenseunicorns/uds-core/blob/v0.27.0/src/pepr/policies/security.ts#L287-L327) | Implemented: ✅ Subject: **Pod** Severity: **high** SELinux options can be used to escalate privileges. This policy ensures that the `seLinuxOptions` type field is undefined or restricted to the allowed list. |
| [Restrict Istio User](https://istio.io/latest/docs/ops/deployment/application-requirements/#pod-requirements) | [`RestrictIstioUser`](https://github.com/defenseunicorns/uds-core/blob/main/src/pepr/policies/istio.ts) | Implemented: ✅ Subject: **Pod** Severity: **high** The Istio proxy user/group (1337) should only be used by trusted Istio components. This policy enforces that only Istio waypoint pods, Istio gateways, or Istio proxies (sidecars) can run as UID/GID 1337. This prevents unauthorized pods from running with elevated privileges that could be used to bypass security controls. |
| [Restrict Istio Sidecar Configuration Overrides](https://istio.io/latest/docs/reference/config/annotations/) | [`RestrictIstioSidecarOverrides`](https://github.com/defenseunicorns/uds-core/blob/main/src/pepr/policies/istio.ts) | Implemented: ✅ Subject: **Pod** Severity: **high** Certain Istio sidecar configuration annotations can be used to override secure defaults, potentially introducing security risks. This policy prevents the usage of dangerous Istio annotations that can modify secure sidecar configuration, such as custom proxy images or bootstrap configurations. **Blocked annotations:** - `sidecar.istio.io/bootstrapOverride` - Overrides entire Envoy bootstrap config - `sidecar.istio.io/discoveryAddress` - Can redirect sidecar to an untrusted control plane - `sidecar.istio.io/proxyImage` - Allows use of arbitrary proxy images - `proxy.istio.io/config` - Fully overrides proxy configuration - `sidecar.istio.io/userVolume` - Adds custom volumes to the sidecar container - `sidecar.istio.io/userVolumeMount` - Adds custom volume mounts to the sidecar container |
| [Restrict Istio Traffic Interception Overrides](https://istio.io/latest/docs/reference/config/annotations/) | [`RestrictIstioTrafficOverrides`](https://github.com/defenseunicorns/uds-core/blob/main/src/pepr/policies/istio.ts) | Implemented: ✅ Subject: **Pod** Severity: **high** Istio traffic annotations or labels can be used to modify how traffic is intercepted and routed, which can lead to security bypasses or unintended network paths. This policy prevents the usage of annotations or labels that can potentially bypass secure networking controls, including disabling sidecar injection via label or annotation. **Blocked annotations:** - `sidecar.istio.io/inject` - Can disable sidecar injection - `traffic.sidecar.istio.io/excludeInboundPorts` - Can bypass inbound port interception - `traffic.sidecar.istio.io/excludeInterfaces` - Can exclude network interfaces from interception - `traffic.sidecar.istio.io/excludeOutboundIPRanges` - Can bypass outbound IP range interception - `traffic.sidecar.istio.io/excludeOutboundPorts` - Can bypass outbound port interception - `traffic.sidecar.istio.io/includeInboundPorts` - Can modify inbound port interception - `traffic.sidecar.istio.io/includeOutboundIPRanges` - Can modify outbound IP range interception - `traffic.sidecar.istio.io/includeOutboundPorts` - Can modify outbound port interception - `sidecar.istio.io/interceptionMode` - Can change interception mode (REDIRECT/TPROXY) - `traffic.sidecar.istio.io/kubevirtInterfaces` - Can modify kubevirt interface handling - `istio.io/redirect-virtual-interfaces` - Can modify virtual interface traffic handling **Blocked labels:** - `sidecar.istio.io/inject` - Can disable sidecar injection |
| [Restrict Istio Ambient Mesh Overrides](https://istio.io/latest/docs/reference/config/annotations/) | [`RestrictIstioAmbientOverrides`](https://github.com/defenseunicorns/uds-core/blob/main/src/pepr/policies/istio.ts) | Implemented: ✅ Subject: **Pod** Severity: **high** Istio ambient mesh annotations can be used to modify secure mesh behavior. This policy prevents the usage of annotations that could potentially bypass secure ambient mesh controls. **Blocked annotations:** - `ambient.istio.io/bypass-inbound-capture` - Bypasses inbound traffic capture in ambient mesh mode |
| [Restrict Volume Types](https://repo1.dso.mil/big-bang/product/packages/kyverno-policies/-/blob/main/chart/templates/restrict-volume-types.yaml) | [`RestrictVolumeTypes`](https://github.com/defenseunicorns/uds-core/blob/v0.27.0/src/pepr/policies/storage.ts#L7-L52) | Implemented: ✅ Subject: **Pod** Severity: **medium** Volume types, beyond the core set, should be restricted to limit exposure to potential vulnerabilities in Container Storage Interface (CSI) drivers. In addition, HostPath volumes should not be. |
| [Restrict Sysctls](https://repo1.dso.mil/big-bang/product/packages/kyverno-policies/-/blob/main/chart/templates/restrict-sysctls.yaml) | Not Implemented | Implemented: ❌ Subject: **Pod** Severity: **high** Sysctl can disable security mechanisms or affect all containers on a host, and should be restricted to an allowed “safe” subset. A sysctl is considered safe if it is namespaced and is isolated from other Pods and processes on the same Node. This policy ensures that all sysctls are in the allowed list. |
| [Restrict Image Registries](https://repo1.dso.mil/big-bang/product/packages/kyverno-policies/-/blob/main/chart/templates/restrict-image-registries.yaml) | Not Implemented | Implemented: ❌ Subject: **Pod** Severity: **high** Images from unknown, public registries can be of dubious quality and may not be scanned and secured, representing a high degree of risk. Requiring use of known, approved registries helps reduce threat exposure by ensuring image pulls only come from them. This policy validates that all images originate from a registry in the approved list. |
| [Restrict hostPath Volume PV Paths](https://repo1.dso.mil/big-bang/product/packages/kyverno-policies/-/blob/main/chart/templates/restrict-host-path-mount-pv.yaml) | Not Implemented | Implemented: ❌ Subject: **PersistentVolume** Severity: **medium** PersistentVolume using hostPath consume the underlying node’s file system. If not universally disabled, they should be restricted to specific host paths to prevent access to sensitive information. This policy ensures that PV hostPath is in the allowed list. |
| [Restrict hostPath Volume Mountable Paths](https://repo1.dso.mil/big-bang/product/packages/kyverno-policies/-/blob/main/chart/templates/restrict-host-path-mount.yaml) | Not Implemented | Implemented: ❌ Subject: **Pod** Severity: **medium** hostPath volumes consume the underlying node’s file system. If hostPath volumes are not universally disabled, they should be restricted to specific host paths to prevent access to sensitive information. This policy ensures that hostPath volume paths are in the allowed list. |
| [Restrict External IPs (CVE-2020-8554)](https://repo1.dso.mil/big-bang/product/packages/kyverno-policies/-/blob/main/chart/templates/restrict-external-ips.yaml) | Not Implemented | Implemented: ❌ Subject: **Service** Severity: **medium** Service externalIPs can be used for a MITM attack (CVE-2020-8554). This policy restricts externalIPs to a specified list. |
| [Restrict AppArmor Profile](https://repo1.dso.mil/big-bang/product/packages/kyverno-policies/-/blob/main/chart/templates/restrict-apparmor.yaml) | Not Implemented | Implemented: ❌ Subject: **Pod** Severity: **high** On hosts using Debian Linux distros, AppArmor is used as an access control framework. AppArmor uses the ‘runtime/default’ profile by default. This policy ensures Pods do not override the AppArmor profile with values outside of the allowed list. |
| [Require Image Signature](https://repo1.dso.mil/big-bang/product/packages/kyverno-policies/-/blob/main/chart/templates/require-image-signature.yaml) | Not Implemented | Implemented: ❌ Subject: **Pod** Severity: **high** Using the Cosign project, OCI images may be signed to ensure supply chain security is maintained. Those signatures can be verified before pulling into a cluster. This policy checks the signature to ensure it has been signed by verifying its signature against the public key. |
| [Require Non-root Group](https://repo1.dso.mil/big-bang/product/packages/kyverno-policies/-/blob/main/chart/templates/require-non-root-group.yaml) | Not Implemented | Implemented: ❌ Subject: **Pod** Severity: **high** Following the least privilege principle, access to the root group ID should be forbidden in containers. This policy ensures containers are running with groups > 0. |
| [Disallow AutoMount Service Account Tokens](https://repo1.dso.mil/big-bang/product/packages/kyverno-policies/-/blob/main/chart/templates/disallow-auto-mount-service-account-token.yaml) | Not Implemented | Implemented: ❌ Subject: **Pod, ServiceAccount** Severity: **high** Auto-mounting of Kubernetes API credentials is not ideal in all circumstances. This policy finds Pods and Service Accounts that automount kubernetes api credentials. |
-----
# Private Certificate Authority (CA) Configuration
Some UDS Core components need to connect to external services over TLS. By default, they trust the well-known public certificate authorities (CAs) that come with their container images. If your environment uses self-signed certificates or certificates issued by a private CA, these components will not trust those endpoints unless you explicitly provide the CA bundle.
Example scenarios include:
* **Your domain cert is self-signed or private PKI**: Grafana would need the CA for SSO to work with Keycloak
* **External dependencies use private PKI**: Velero, Loki (object storage) and potentially Grafana/Keycloak for databases, data sources, external identity providers
This guide explains how to configure UDS Core components to recognize and trust your private CA certificates. Not every component requires this configuration — only those that make outbound TLS connections (for example, to identity providers, object storage, or other HTTPS endpoints).
Who should use this guide?
If your UDS Core environment connects to services using **self-signed certificates** or certificates issued by a **private CA**, you’ll need to follow this configuration. If you only use certificates from public, trusted CAs (e.g., Let’s Encrypt, DigiCert), you do **not** need these steps.
Security Consideration
Mounting additional volumes and certificates can introduce minimal security risks by expanding the attack surface. Only mount trusted CA certificates from verified sources and regularly audit your certificate configurations.
## Prerequisites
[Section titled “Prerequisites”](#prerequisites)
Before configuring private PKI, you’ll need the following:
1. The trusted CA bundle in PEM format that your certificates are signed by
2. A ConfigMap containing the trusted CA bundle from (1), available in each namespace (a tool like [trust-manager](https://cert-manager.io/docs/trust/trust-manager/) can help automate this)
Note
For the examples in this guide, we assume you have a ConfigMap named `private-ca` with a key `ca.pem` that contains your CA bundle.
```yaml
apiVersion: v1
kind: ConfigMap
metadata:
name: private-ca
namespace:
data:
ca.pem: |
-----BEGIN CERTIFICATE-----
MIIDeTCCAmGgAwIBAgIUQj......hQ==
-----END CERTIFICATE-----
```
## CA Mounting Approaches
[Section titled “CA Mounting Approaches”](#ca-mounting-approaches)
There are two main approaches for configuring applications to trust private CA certificates:
### System CA Bundle Replacement
[Section titled “System CA Bundle Replacement”](#system-ca-bundle-replacement)
This approach replaces the entire system CA bundle with your custom bundle at the container level. This gives you complete control but requires your bundle to include both your private CAs and any public CAs the application needs.
**When to use:**
* You want complete control over which CAs are trusted
* Your environment should only trust specific private CAs
* You need to restrict trust to a limited set of CAs
**Paths:**
* Debian/Ubuntu: `/etc/ssl/certs/ca-certificates.crt`
* RedHat/CentOS: `/etc/pki/tls/certs/ca-bundle.crt`
### Additional CA Trust (Go Applications)
[Section titled “Additional CA Trust (Go Applications)”](#additional-ca-trust-go-applications)
Many Go-based applications automatically check `/etc/ssl/certs/ca.pem` for additional CA certificates alongside the system bundle. This approach adds your private CAs without replacing the system CAs.
**When to use:**
* You want to trust private CAs alongside standard public CAs
* The application is Go-based and supports this path
* You prefer a less intrusive approach
**Path:**
* `/etc/ssl/certs/ca.pem` (Go applications)
## Component Configuration
[Section titled “Component Configuration”](#component-configuration)
### Authservice
[Section titled “Authservice”](#authservice)
Authservice can be configured with an additional trusted CA bundle when UDS Core ingress gateways are deployed with private PKI.
To configure, set `UDS_CA_CERT` as an environment variable with a Base64 encoded PEM formatted CA bundle that can be used to verify the certificates of the tenant gateway.
See [trusted CA SSO doc](/reference/configuration/single-sign-on/trusted-ca) for complete Authservice configuration details.
### Grafana
[Section titled “Grafana”](#grafana)
Grafana may need to access external https services. If these services use certificates signed by a private CA, Grafana needs to be configured to trust these certificates.
Configure Grafana to trust private certificates by mounting the CA bundle via UDS Bundle overrides:
```yaml
values:
- path: extraConfigmapMounts
value:
- name: ca-certs
mountPath: /etc/ssl/certs/ca.pem # Adds CA alongside system CAs (Go applications)
# Alternative - System CA replacement (requires bundle with both private and public CAs):
# mountPath: /etc/ssl/certs/ca-certificates.crt # For Debian/Ubuntu images (upstream, unicorn flavors)
# mountPath: /etc/pki/tls/certs/ca-bundle.crt # For RedHat-based images (registry1 flavor)
configMap: private-ca
readOnly: true
subPath: ca.pem
```
Caution
Mounting to system CA paths (`/etc/ssl/certs/ca-certificates.crt` or `/etc/pki/tls/certs/ca-bundle.crt`) replaces the system CA bundle. Ensure your CA bundle includes both your private CA certificates and any public CAs that Grafana needs to trust.
For additional details on Grafana private CA configuration, see the [upstream Grafana documentation](https://grafana.com/docs/grafana/latest/setup-grafana/installation/helm/#configure-a-private-ca-certificate-authority).
### Velero
[Section titled “Velero”](#velero)
Velero may need to access external backup storage services. If these services use certificates signed by a private CA, Velero needs to be configured to trust these certificates.
Configure Velero to trust private certificates by mounting the CA bundle via UDS Bundle overrides:
```yaml
values:
- path: extraVolumeMounts
value:
- name: ca-certs
mountPath: /etc/ssl/certs/ca.pem # Recommended: Adds CA alongside system CAs (Go applications)
# Alternative - System CA replacement (requires bundle with both private and public CAs):
# mountPath: /etc/ssl/certs/ca-certificates.crt # For Debian/Ubuntu images (upstream, unicorn flavors)
# mountPath: /etc/pki/tls/certs/ca-bundle.crt # For RedHat-based images (registry1 flavor)
subPath: ca.pem
readOnly: true
- path: extraVolumes
value:
- name: ca-certs
configMap:
name: private-ca
```
Caution
Mounting to system CA paths (`/etc/ssl/certs/ca-certificates.crt` or `/etc/pki/tls/certs/ca-bundle.crt`) replaces the system CA bundle. Ensure your CA bundle includes both your private CA certificates and any public CAs that Velero needs to trust.
### Loki
[Section titled “Loki”](#loki)
Loki components need to access external storage backends. To configure Loki to use S3-compatible storage with private certificates, you need to provide the CA bundle to all components.
Configure Loki to trust private certificates using global volume mounts:
```yaml
values:
- path: global.extraVolumeMounts
value:
- name: ca-certs
mountPath: /etc/ssl/certs/ca.pem # Adds CA alongside system CAs (Go applications)
# Alternative - System CA replacement (requires bundle with both private and public CAs):
# mountPath: /etc/ssl/certs/ca-certificates.crt # For Debian/Ubuntu images (upstream, unicorn flavors)
# mountPath: /etc/pki/tls/certs/ca-bundle.crt # For RedHat-based images (registry1 flavor)
subPath: ca.pem
- path: global.extraVolumes
value:
- name: ca-certs
configMap:
name: private-ca
```
Caution
Mounting to system CA paths replaces the system CA bundle for all Loki components. Ensure your CA bundle includes both your private CA certificates and any public CAs that Loki needs to trust.
### Keycloak
[Section titled “Keycloak”](#keycloak)
Keycloak needs to validate certificates when connecting to external identity providers or LDAP servers. Configure Keycloak to trust private certificates using additional truststore paths:
```yaml
values:
- path: extraVolumeMounts
value:
- name: ca-certs
mountPath: /tmp/ca-certs
readOnly: true
- path: extraVolumes
value:
- name: ca-certs
configMap:
name: private-ca
- path: truststorePaths
value:
- "/tmp/ca-certs"
```
This configuration:
* Mounts your private CA ConfigMap to `/tmp/ca-certs`
* Configures Keycloak to scan this directory using the `--truststore-paths` startup argument
* Preserves Keycloak’s default truststore while adding your private certificates
For additional details on Keycloak truststore configuration, see the [upstream Keycloak documentation](https://www.keycloak.org/server/keycloak-truststore#_configuring_the_system_truststore).
-----
# Resource Configuration and High Availability
Depending on your environment and the scale of your cluster, you might need to adjust UDS Core components for high availability or to optimize resources. Below are common areas where resource overrides can be useful when deploying UDS Core.
When modifying resources and replica counts it can be useful to observe pod resource metrics in Grafana to make an informed choice on what may be necessary for your environment. Where available HPA ([Horizontal Pod Autoscalers](https://kubernetes.io/docs/tasks/run-application/horizontal-pod-autoscale/)) are beneficial to dynamically scale up/down based on usage.
## Monitoring
[Section titled “Monitoring”](#monitoring)
### Prometheus Stack
[Section titled “Prometheus Stack”](#prometheus-stack)
Prometheus is a common place to customize when scaling to larger cluster sizes (more nodes and/or workloads). To scale prometheus beyond a single replica its TSDB must be externalized using one of the [supported options](https://prometheus.io/docs/operating/integrations/#remote-endpoints-and-storage). UDS Core has not yet done extensive testing on this setup. It is also helpful to modify resources for Prometheus using a helm override for the `prometheus.prometheusSpec.resources` value:
```yaml
packages:
- name: core
repository: oci://ghcr.io/defenseunicorns/packages/uds/core
ref: x.x.x
overrides:
kube-prometheus-stack:
kube-prometheus-stack:
values:
- path: prometheus.prometheusSpec.resources
value:
# Example values only
requests:
cpu: 200m
memory: 1Gi
limits:
cpu: 500m
memory: 4Gi
```
### Grafana
[Section titled “Grafana”](#grafana)
Grafana can be configured in a high availability (HA) setup by utilizing an external PostgreSQL database. See the example values below for configuring Grafana in HA mode:
```yaml
# Example HA Bundle Configuration
packages:
- name: core
repository: oci://ghcr.io/defenseunicorns/packages/uds/core
ref: x.x.x
overrides:
grafana:
grafana:
variables:
- name: GRAFANA_HA
description: Enable HA Grafana
path: autoscaling.enabled
uds-grafana-config:
variables:
- name: GRAFANA_PG_HOST
description: Grafana postgresql host
path: postgresql.host
- name: GRAFANA_PG_PORT
description: Grafana postgresql port
path: postgresql.port
- name: GRAFANA_PG_PORT
description: Grafana postgresql port
path: postgresql.port
- name: GRAFANA_PG_DATABASE
description: Grafana postgresql database
path: postgresql.database
- name: GRAFANA_PG_PASSWORD
description: Grafana postgresql password
path: postgresql.password
- name: GRAFANA_PG_USER
description: Grafana postgresql username
path: postgresql.user
```
## Logging
[Section titled “Logging”](#logging)
### Vector
[Section titled “Vector”](#vector)
By default Vector runs as a daemonset, automatically scaling across all nodes to ensure logs are captured from each host. Typically Vector does not need any other modifications, but you can customize its resource configuration by overriding the `resources` helm value (using the component and chart name of `vector`). Vector recommends the below resourcing when running in production:
```yaml
resources:
requests:
memory: "64Mi"
cpu: "500m"
limits:
memory: "1024Mi"
cpu: "6000m"
```
### Loki
[Section titled “Loki”](#loki)
By default Loki will deploy in a multi-replica setup. See the below example for modifying replica counts of the read/write/backend pods:
```yaml
packages:
- name: core
repository: oci://ghcr.io/defenseunicorns/packages/uds/core
ref: x.x.x
overrides:
loki:
loki:
values:
- name: LOKI_WRITE_REPLICAS
path: write.replicas
default: "3"
- name: LOKI_READ_REPLICAS
path: read.replicas
default: "3"
- name: LOKI_BACKEND_REPLICAS
path: backend.replicas
default: "3"
```
You will also want to connect Loki to an [external storage provider](https://grafana.com/docs/loki/latest/configure/storage/#chunk-storage) such as AWS S3, which can be done by overriding the `loki.storage` values.
## Identity & Authorization
[Section titled “Identity & Authorization”](#identity--authorization)
### Keycloak
[Section titled “Keycloak”](#keycloak)
Keycloak can be configured in a HA setup if an external database (postgresql) is provided. See the below example values for configuring HA Keycloak:
```yaml
packages:
- name: core
repository: oci://ghcr.io/defenseunicorns/packages/uds/core
ref: x.x.x
overrides:
keycloak:
keycloak:
values:
- path: devMode
value: false
# Enable HPA to autoscale Keycloak
- path: autoscaling.enabled
value: true
variables:
- name: KEYCLOAK_DB_HOST
path: postgresql.host
- name: KEYCLOAK_DB_USERNAME
path: postgresql.username
- name: KEYCLOAK_DB_DATABASE
path: postgresql.database
- name: KEYCLOAK_DB_PASSWORD
path: postgresql.password
```
Alternatively, you can configure the postgres `username`, `password`, and `host` using references to pre-existing secrets. This is useful if you are using shared secrets for the database credentials or external secrets from another source.
```yaml
packages:
- name: core
repository: oci://ghcr.io/defenseunicorns/packages/uds/core
ref: x.x.x
overrides:
keycloak:
keycloak:
values:
- path: devMode
value: false
# Enable HPA to autoscale Keycloak
- path: autoscaling.enabled
value: true
variables:
- name: KEYCLOAK_DB_HOST_SECRETREF_NAME
path: postgresql.secretRef.host.name
- name: KEYCLOAK_DB_HOST_SECRETREF_KEY
path: postgresql.secretRef.host.key
- name: KEYCLOAK_DB_USERNAME_SECRETREF_NAME
path: postgresql.secretRef.username.name
- name: KEYCLOAK_DB_USERNAME_SECRETREF_KEY
path: postgresql.secretRef.username.key
- name: KEYCLOAK_DB_DATABASE
path: postgresql.database
- name: KEYCLOAK_DB_PASSWORD_SECRETREF_NAME
path: postgresql.secretRef.password.name
- name: KEYCLOAK_DB_PASSWORD_SECRETREF_KEY
path: postgresql.secretRef.password.key
```
Note
When using secret references, you may use a mixture of both secret references and direct values for `username`, `password`, and `host`. The `database` and `port` values are configured using direct values.
When running Keycloak on new Kernels 6.12+, it may be necessary to override Keycloak Environment Variables and set `JAVA_OPTS_KC_HEAP` to `-XX:MaxRAMPercentage=70 -XX:MinRAMPercentage=70 -XX:InitialRAMPercentage=50 -XX:MaxRAM=1G`. This happens due to a fact that Java doesn’t properly recognize the amount of memory allocated by the CGroups. By specifying `-XX:MaxRAM` equal to the memory limits, this setting gets overridden. Here’s an example:
```yaml
packages:
- name: core
repository: oci://ghcr.io/defenseunicorns/packages/uds/core
ref: x.x.x
overrides:
keycloak:
keycloak:
values:
# Override Java memory settings
- path: env[0]
value:
- name: JAVA_OPTS_KC_HEAP
value: "-XX:MaxRAMPercentage=70 -XX:MinRAMPercentage=70 -XX:InitialRAMPercentage=50 -XX:MaxRAM=2G"
# Override limits - both figures need to match!
- path: resources.limits.memory
value: "2Gi"
```
You can also configure autoscaling for the Keycloak [waypoint](https://istio.io/latest/docs/ambient/usage/waypoint/) (its Istio Layer7 proxy). The independent scalability of the waypoint proxy ensures that you never encounter a bottleneck due to service mesh integration. An HPA is enabled by default for the waypoint, with access to the configuration parameters via values. The below override example includes the default values which could be changed based on your needs:
```yaml
packages:
- name: core
repository: oci://ghcr.io/defenseunicorns/packages/uds/core
ref: x.x.x
overrides:
keycloak:
keycloak:
values:
- path: waypoint.horizontalPodAutoscaler.minReplicas
value: 1
- path: waypoint.horizontalPodAutoscaler.maxReplicas
value: 5
- path: waypoint.horizontalPodAutoscaler.metrics
value:
- type: Resource
resource:
name: cpu
target:
type: Utilization
averageUtilization: 90
- path: waypoint.deployment.requests.cpu
value: 250m
- path: waypoint.deployment.requests.memory
value: 256Mi
```
### AuthService
[Section titled “AuthService”](#authservice)
AuthService can be configured in a HA setup if an [external session store](https://github.com/istio-ecosystem/authservice/blob/f8193e22db11183d0d3a9da58da39267f15c3ae0/config/README.md#authservice-config-v1-oidc-RedisConfig) is provided (key value store like Redis/Valkey). For configuring an external session store you can set the `UDS_AUTHSERVICE_REDIS_URI` env when deploying or via your `uds-config.yaml`:
```yaml
variables:
core:
AUTHSERVICE_REDIS_URI: redis://redis.redis.svc.cluster.local:6379
```
To scale up replicas or modify resource requests/limits you can use UDS bundle overrides for the helm values of `replicaCount` and `resources` (using the component and chart name of `authservice`).
## Runtime Security
[Section titled “Runtime Security”](#runtime-security)
### Falco
[Section titled “Falco”](#falco)
Falco’s FalcoSidekick component runs with 2 replicas by default for high availability. This ensures alert processing continues if one replica fails. You can adjust the replica count based on your environment needs:
```yaml
packages:
- name: core
repository: oci://ghcr.io/defenseunicorns/packages/uds/core
ref: x.x.x
overrides:
falco:
falco:
values:
- path: falcosidekick.replicaCount
value: 3 # Set replicas to 3 (default is 2)
```
For production environments, keeping the default of 2 or more replicas is recommended to ensure continuous alert processing and delivery to your logging/monitoring systems.
-----
# Runtime Security Alerting
Runtime security alerting enables real-time notifications when potentially malicious activity is detected in your environment.
## Falco Alerting
[Section titled “Falco Alerting”](#falco-alerting)
### Default Rules and Events
[Section titled “Default Rules and Events”](#default-rules-and-events)
UDS Core ships Falco with [stable default rules](https://github.com/falcosecurity/rules/blob/main/rules/falco_rules.yaml) that detect common security threats such as:
* Privilege escalation attempts
* Unauthorized file access
* Suspicious network activity
* Container breakout attempts
See more about default rules in the [Falco documentation](https://falco.org/docs/reference/rules/default-rules/).
#### Additional Rulesets
[Section titled “Additional Rulesets”](#additional-rulesets)
Note
UDS Core ships with **sandbox** and **incubating** rulesets from the Falco community, but they are **disabled by default**. More information from Falco about these rulesets can be found [here](https://falco.org/docs/reference/rules/default-rules/).
#### Enabling and Configuring Rulesets
[Section titled “Enabling and Configuring Rulesets”](#enabling-and-configuring-rulesets)
To enable the [sandbox and incubating](https://falco.org/docs/reference/rules/default-rules/) rulesets and exclude specific rules, override the `extraRules` value in your UDS Core bundle:
```yaml
overrides:
falco:
uds-falco-config:
values:
- path: "sandboxRulesEnabled"
value: true
- path: "incubatingRulesEnabled"
value: true
- path: "disabledRules"
value: ["Write below root", "Read environment variable from /proc files"]
```
This configuration:
1. Enables the sandbox ruleset while excluding the “Write below root” rule.
2. Enables the incubating ruleset while excluding the “Read environment variable from /proc files” rule.
#### Finding Rule Names for `disabledRules`
[Section titled “Finding Rule Names for disabledRules”](#finding-rule-names-for-disabledrules)
The rule names used in the `disabledRules` array should match the `rule` field from the Falco rules files. `disabledRules` applies to all rulesets from falco, including the default rules and any additional rulesets you enable. You can find these rule names in the following locations:
1. **From Falco Official Documentation**:
* [List of Falco Rules](https://falco.org/docs/reference/rules/default-rules/)
2. **In the rule files shipped with UDS Core**:
* Sandbox rules: [`src/falco/chart/rules/sandbox-rules.yaml`](https://github.com/defenseunicorns/uds-core/blob/main/src/falco/chart/rules/sandbox-rules.yaml)
* Incubating rules: [`src/falco/chart/rules/incubating-rules.yaml`](https://github.com/defenseunicorns/uds-core/blob/main/src/falco/chart/rules/incubating-rules.yaml)
Look for entries that start with `- rule:` to find the rule names.
3. **From Falco logs**: When Falco detects an event, it logs the rule name in the output. You can find these logs by querying Loki with:
```txt
{rule=~".+"}
```
### Querying Events with Loki
[Section titled “Querying Events with Loki”](#querying-events-with-loki)
By default, Falco generates events for rule violations and ships them to Loki for centralized log aggregation and querying.
You can query Falco events in Grafana Explore using the Loki data source with the following query:
```txt
{priority=~".+"}
```
This query retrieves all Falco events with any priority level. You can filter further by specific priorities or rules such as:
```txt
{priority="Warning"}
{rule="Search Private Keys or Passwords"}
```
### Grafana Dashboards
[Section titled “Grafana Dashboards”](#grafana-dashboards)
The upstream Falco helm chart includes a Grafana dashboard out of the box for visualizing security events logs for Falcosidekick. The dashboard `Falco Logs` is automatically available in Grafana when Falco is deployed and can be accessed through the standard UDS Core Grafana interface.
### External Alert Forwarding
[Section titled “External Alert Forwarding”](#external-alert-forwarding)
While Loki integration provides centralized logging of Falco events, it’s recommended to configure external alert forwarding using [Falco Sidekick’s native output forwarding](https://github.com/falcosecurity/falcosidekick#outputs) for real-time notifications. It is generally a good idea to send these alerts to a messaging platform like Slack, Microsoft Teams where these security events can be more visbile to relevant teams.
Network Egress
By default, the Falco UDS Package locks down network egress for security reasons. If you need to ship alerts to external services, ensure you override the `additionalNetworkAllow` value like so:
```yaml
packages:
- name: core
repository: oci://ghcr.io/defenseunicorns/packages/uds/core
ref: x.x.x-upstream
optionalComponents:
- falco
overrides:
falco:
uds-falco-config:
values:
- path: additionalNetworkAllow
value:
# ref: https://uds.defenseunicorns.com/reference/configuration/custom-resources/packages-v1alpha1-cr/#allow
# Allow egress to your.remotehost.com on port 443 using TLS
- direction: Egress
selector:
app.kubernetes.io/name: falcosidekick
ports:
- 443
remoteHost: your.remotehost.com # set to the hostname where you want to send events
remoteProtocol: TLS
description: "Allow egress Falco Sidekick to your.remotehost.com" # update description as needed
```
#### Slack Integration
[Section titled “Slack Integration”](#slack-integration)
To configure Slack alerts for Falco events, add the following bundle overrides:
```yaml
packages:
- name: core
repository: oci://ghcr.io/defenseunicorns/packages/uds/core
ref: x.x.x-upstream
optionalComponents:
- falco
overrides:
falco:
falco:
values:
- path: falcosidekick.config.slack
value:
slack:
# -- Slack Webhook URL (ex: ), if not `empty`, Slack output is *enabled*
webhookurl: ""
# -- Slack channel (optional)
channel: "#"
# -- Slack Footer (optional)
footer: ""
# -- Slack icon (optional)
icon: ""
# -- Slack username (optional)
username: ""
# -- `all` (default), `text` (only text is displayed in Slack), `fields` (only fields are displayed in Slack)
outputformat: "all"
# -- minimum priority of event to use this output, order is `emergency\|alert\|critical\|error\|warning\|notice\|informational\|debug or ""`
minimumpriority: "notice"
# -- a Go template to format Slack Text above Attachment, displayed in addition to the output from `slack.outputformat`. If empty, no Text is displayed before Attachment
messageformat: ""
uds-falco-config:
values:
- path: additionalNetworkAllow
value:
- direction: Egress
selector:
app.kubernetes.io/name: falcosidekick
ports:
- 443
remoteHost: api.slack.com
remoteProtocol: TLS
description: "Allow egress Falco Sidekick to Slack API"
```
This configuration will send Falco alerts with priority “notice” and above to your specified Slack channel.
#### Mattermost Integration
[Section titled “Mattermost Integration”](#mattermost-integration)
To configure Mattermost alerts for Falco events, add the following bundle overrides:
```yaml
packages:
- name: core
repository: oci://ghcr.io/defenseunicorns/packages/uds/core
ref: x.x.x-upstream
optionalComponents:
- falco
overrides:
falco:
falco:
values:
- path: falcosidekick.config.mattermost
value:
mattermost:
# -- Mattermost Webhook URL (ex: ), if not `empty`, Mattermost output is *enabled*
webhookurl: ""
# -- Mattermost Footer (optional)
footer: ""
# -- Mattermost icon (avatar) (optional)
icon: ""
# -- Mattermost username (optional)
username: ""
# -- `all` (default), `text` (only text is displayed in Mattermost), `fields` (only fields are displayed in Mattermost)
outputformat: "all"
# -- minimum priority of event to use this output, order is `emergency\|alert\|critical\|error\|warning\|notice\|informational\|debug or ""`
minimumpriority: "notice"
# -- a Go template to format Mattermost Text above Attachment, displayed in addition to the output from `mattermost.outputformat`. If empty, no Text is displayed before Attachment
messageformat: ""
uds-falco-config:
values:
- path: additionalNetworkAllow
value:
- direction: Egress
selector:
app.kubernetes.io/name: falcosidekick
ports:
- 443
remoteHost: your.mattermost.instance # replace with your Mattermost hostname
remoteProtocol: TLS
description: "Allow egress Falco Sidekick to Mattermost instance"
```
This configuration will send Falco alerts with priority “notice” and above to your specified Mattermost instance.
#### Microsoft Teams Integration
[Section titled “Microsoft Teams Integration”](#microsoft-teams-integration)
To configure Microsoft Teams alerts for Falco events, add the following bundle overrides:
```yaml
packages:
- name: core
repository: oci://ghcr.io/defenseunicorns/packages/uds/core
ref: x.x.x-upstream
optionalComponents:
- falco
overrides:
falco:
falco:
values:
- path: falcosidekick.config.teams
value:
teams:
# -- Teams Webhook URL (ex: ), if not `empty`, Teams output is *enabled*
webhookurl: ""
# -- Teams section image (optional)
activityimage: ""
# -- `all` (default), `text` (only text is displayed in Teams), `facts` (only facts are displayed in Teams)
outputformat: "all"
# -- minimum priority of event to use this output, order is `emergency\|alert\|critical\|error\|warning\|notice\|informational\|debug or ""`
minimumpriority: "notice"
uds-falco-config:
values:
- path: additionalNetworkAllow
value:
- direction: Egress
selector:
app.kubernetes.io/name: falcosidekick
ports:
- 443
remoteHost: outlook.office.com
remoteProtocol: TLS
description: "Allow egress Falco Sidekick to Microsoft Teams"
```
This configuration will send Falco alerts with priority “notice” and above to your specified Microsoft Teams channel.
-----
# Runtime Security Overview
UDS Core provides runtime security capabilities to monitor and protect applications during execution. Runtime security solutions detect threats and malicious behavior in real-time across containerized workloads.
## NeuVector (Deprecated)
[Section titled “NeuVector (Deprecated)”](#neuvector-deprecated)
Currently, UDS Core includes [NeuVector](https://neuvector.com/) as the default runtime security solution in the `runtime-security` package layer. NeuVector provides container runtime protection, network security monitoring, vulnerability scanning, and compliance reporting.
Deprecation Notice
**NeuVector will be removed from UDS Core in a future release.** We recommend transitioning to Falco and deploying it as an optional component along side Neuvector as soon as possible.
## Falco
[Section titled “Falco”](#falco)
[Falco](https://falco.org/) is now available as an optional runtime security zarf component and is the recommended path forward. Falco is a CNCF graduated project that provides cloud-native runtime security and real-time threat detection.
### Deploying Falco
[Section titled “Deploying Falco”](#deploying-falco)
To deploy Falco, add it as an optional component in your UDS bundle:
```yaml
kind: UDSBundle
metadata:
name: my-uds-bundle
description: UDS bundle with Falco runtime security
version: x.x.x
packages:
- name: core
repository: oci://ghcr.io/defenseunicorns/packages/uds/core
ref: x.x.x-upstream
optionalComponents:
- falco # Deploys Falco as an optional component
```
-----
# How Authorization Policies Protect Your Services
In clusters running Istio Ambient Mesh, UDS Core partially enforces **ingress network security** using Istio **ALLOW** AuthorizationPolicies. These policies are automatically generated for each application package you define with a [UDS Package](https://uds.defenseunicorns.com/reference/configuration/uds-operator/package/) resource.
This document explains what this means for you as an application developer and how to take full advantage of the built-in security model.
## Key Takeaways
[Section titled “Key Takeaways”](#key-takeaways)
* **Ingress is denied by default.** UDS Core only allows what you explicitly configure using `allow` and `expose` rules.
* **AuthorizationPolicies are ALLOW-based**, which means you must write **DENY** rules separately if you want to restrict internal traffic further.
* **Use `remoteServiceAccount` wherever possible.** This provides the most secure and identity-based access control.
* **Expose rules use gateways** to control what traffic enters your application. You can choose between:
* **Tenant Gateway** (default)
* **Admin Gateway** (used for admin functions)
* **Monitoring ports are automatically secured** using rules that only allow the `monitoring` namespace to scrape metrics.
* **`PERMISSIVE` Traffic** can be allowed by adding custom **ALLOW** Authorization Policies layered on top of the default provided policies
## Best Practices for Secure Configuration
[Section titled “Best Practices for Secure Configuration”](#best-practices-for-secure-configuration)
### 1. Lock Down Ingress With `allow`
[Section titled “1. Lock Down Ingress With allow”](#1-lock-down-ingress-with-allow)
```yaml
spec:
network:
allow:
- direction: Ingress
remoteNamespace: "external-app"
remoteServiceAccount: "my-client"
port: 8080
```
> This ensures that only a workload running as this specific service account in another namespace can access your service.
### 2. Expose Your Service Safely
[Section titled “2. Expose Your Service Safely”](#2-expose-your-service-safely)
```yaml
spec:
network:
expose:
- port: 80
targetPort: 8080
gateway: Tenant
```
> This exposes your service at port 80 through the tenant gateway and maps it to your app’s port 8080.
### 3. Enable Safe Monitoring
[Section titled “3. Enable Safe Monitoring”](#3-enable-safe-monitoring)
```yaml
spec:
monitor:
- targetPort: 3000
selector:
app.kubernetes.io/name: grafana
```
> This creates a rule that allows only Prometheus (from the `monitoring` namespace) to scrape your service.
## Permissive Traffic and Traffic Outside the Mesh
[Section titled “Permissive Traffic and Traffic Outside the Mesh”](#permissive-traffic-and-traffic-outside-the-mesh)
By default UDS Core includes all ports for all workloads in the service mesh, running with `STRICT` mTLS which provides an ideal security posture. However, certain applications may need to allow `PERMISSIVE` traffic and/or exclude certain ports/workloads from the mesh entirely. In these cases you can apply more permissive policies at varying scopes. Keep in mind that UDS Core provides defense in depth so network policies will still govern/restrict traffic in most cases, however Authorization Policies are necessary to full restrict traffic on a per-port basis in Istio’s Ambient Mesh.
Below are four approaches to effectively “opt-out” from Authorization Policy enforcement patterns, with different scopes depending on your needs:
1. **Workload-Scoped Port Opt-Out (Least Permissive)** Apply an `ALLOW` rule for a specific port on a given workload:
```yaml
apiVersion: security.istio.io/v1
kind: AuthorizationPolicy
metadata:
name: permissive-ap-workload-port
namespace:
spec:
action: ALLOW
selector:
matchLabels:
selector: for-app # Your workload selector here
rules:
- to:
- operation:
ports:
- "1234"
```
2. **Workload-Scoped Opt-Out** Apply an `ALLOW` rule to all ports for a specific workload:
```yaml
apiVersion: security.istio.io/v1
kind: AuthorizationPolicy
metadata:
name: permissive-ap-workload
namespace:
spec:
action: ALLOW
selector:
matchLabels:
selector: for-app # Your workload selector here
rules:
- {}
```
3. **Namespace-Scoped Opt-Out** Apply an `ALLOW` rule to all workloads within a specific namespace:
```yaml
apiVersion: security.istio.io/v1
kind: AuthorizationPolicy
metadata:
name: permissive-ap-namespace
namespace:
spec:
action: ALLOW
rules:
- {}
```
4. **Mesh-Wide Opt-Out (Most Permissive)** Apply an `ALLOW` rule cluster-wide (in the `istio-system` namespace), effectively disabling `ALLOW` AuthorizationPolicies everywhere and relying on network policies or optional `DENY` rules:
```yaml
apiVersion: security.istio.io/v1
kind: AuthorizationPolicy
metadata:
name: permissive-ap-mesh
namespace: istio-system
spec:
action: ALLOW
rules:
- {}
```
Note
The UDS Core operator will still generate its standard AuthorizationPolicies, but these `ALLOW` rules ensure that traffic from outside the mesh is allowed without disruption. Always use the least permissive scope possible to minimize risk.
## How Istio Evaluates Policies
[Section titled “How Istio Evaluates Policies”](#how-istio-evaluates-policies)
Istio checks **DENY policies first**, then **ALLOW policies**.
* The operator creates ALLOW policies to admit approved ingress traffic.
* You should create your own DENY policies for more fine-grained control.
More info: [Istio Authorization Policy Evaluation](https://istio.io/latest/docs/concepts/security/#authorization-policy)
## Summary
[Section titled “Summary”](#summary)
* Ingress is denied by default.
* You allow ingress by defining `allow` or `expose` rules in your UDS Package resource definition.
* You can further tighten security using DENY policies.
* Use `remoteServiceAccount` for the strongest protection.
* `PERMISSIVE` traffic will require additional authorization policies.
-----
# Custom Gateways
UDS Core lets you expose services on **custom Istio gateways** beyond the standard tenant, admin, and passthrough gateways. While the standard gateways fit most use cases, you might need a custom gateway for specialized security, different access control, unique TLS settings, or custom domain routing.
This document explains how to configure and use custom gateways in your UDS Core deployment when standard gateways don’t meet your requirements.
Note
While UDS Core allows you to expose services on custom gateways, you are responsible for creating, configuring, and managing these gateways. UDS Core only handles the integration with the Package CR system.
## Creating a Custom Gateway
[Section titled “Creating a Custom Gateway”](#creating-a-custom-gateway)
UDS Core’s gateways follow a pattern of provisioning a single [Ingress Gateway](https://github.com/istio/istio/tree/master/manifests/charts/gateway) per [Istio Gateway custom resource](https://istio.io/latest/docs/reference/config/networking/gateway/). The ingress gateway provides the actual deployment and load balancer service used to route requests, while the gateway custom resource provides configuration detailing the hosts and TLS settings for requests to respond to. By ensuring these are always 1:1 you can maintain clear separation between gateways with different domains, TLS modes, and security controls.
To provision an ingress gateway you will want to use the upstream Istio helm chart in your zarf package. Then you can add additional manifests (or a copy of the UDS Core gateway config chart) to create the gateway CR and any necessary TLS credential secrets.
When constructing your Zarf package and values you will want to pick a short name for your gateway. In the example below this is “custom”. There are a few very important configuration items that you must ensure match the expected patterns for naming:
* `releaseName` for the `gateway` chart MUST match `-ingressgateway` (`custom-ingressgateway` above)
* `namespace` for BOTH charts MUST match `istio--gateway` (`istio-custom-gateway` above)
* `name` in your `uds-istio-config` chart values MUST match `` (`custom` above)
These naming conventions will ensure that you are able to properly expose a service via the gateway. Also be aware of two keywords that you can use in your gateway name to alter the behavior:
* `admin`: If present in your gateway’s name, such as `custom-admin`, the `domain` will default to the admin domain for all `expose` entries. You will still need to ensure that your gateway values properly set this domain as well.
* `passthrough`: If present in your gateway’s name, such as `custom-passthrough`, there will be an extra SNI Host match added for all `expose` entries (reference [Istio documentation](https://istio.io/latest/docs/reference/config/networking/virtual-service/#TLSRoute)).
The below example shows how to create a zarf package for a “custom” gateway:
```yaml
kind: ZarfPackageConfig
metadata:
name: custom-gateway
description: "Custom gateway for UDS Core"
components:
- name: istio-custom-gateway
required: true
charts:
# This is the Ingress Gateway from upstream Istio
- name: gateway
url: https://istio-release.storage.googleapis.com/charts
version: 1.26.2 # This should match the Istio version currently in UDS Core
releaseName: custom-ingressgateway # This should be -ingressgateway
namespace: istio-custom-gateway # This should be istio--gateway
- name: uds-istio-config
version: v0.52.0 # This should match the version of UDS Core you are deploying
url: https://github.com/defenseunicorns/uds-core.git
gitPath: src/istio/charts/uds-istio-config
namespace: istio-custom-gateway # This should be istio--gateway
valuesFiles:
- "config-custom.yaml"
```
Then for your values file (`config-custom.yaml` above) you will want to need to setup your configuration. Reference the [default values file](https://github.com/defenseunicorns/uds-core/blob/main/src/istio/charts/uds-istio-config/values.yaml) for full configuration options, but you will need to at minimum provide:
```yaml
name: custom # This should be
domain: mydomain.dev # Set domain if different from default tenant domain for this gateway
tls:
servers:
custom:
mode: # One of `SIMPLE`, `MUTUAL`, 'OPTIONAL_MUTUAL', `PASSTHROUGH`
```
Other fields may or may not apply depending on your configuration desires (specific subdomain hosts, TLS certificates, etc). If using a gateway that is not in PASSTHROUGH mode you will need to supply a TLS cert and key. Typically this should be done during deployment by exposing these values as variables in your bundle, like the below example:
```yaml
packages:
- name: custom-gateway
...
overrides:
istio-custom-gateway:
uds-istio-config:
# Set via UDS_ environment variables, `--set` at deploy time, or `uds-config.yaml`
variables:
- name: CUSTOM_TLS_CERT
description: "The TLS cert for the custom gateway (must be base64 encoded)"
path: tls.cert
- name: CUSTOM_TLS_KEY
description: "The TLS key for the custom gateway (must be base64 encoded)"
path: tls.key
# Alternatively, point to an existing secret
values:
- path: tls.credentialName
value: custom-gateway-tls-secret # Reference to the Kubernetes secret for the custom gateway's TLS certificate
```
## Exposing a Service
[Section titled “Exposing a Service”](#exposing-a-service)
The UDS Operator supports exposing services through your custom gateway as part of the normal `network.expose` config in the `Package` custom resource. This is generally no different than exposing any other service with the `Package`, you will just need to provide your custom gateway name and optionally the domain to expose your service on:
```yaml
apiVersion: uds.dev/v1alpha1
kind: Package
metadata:
name: foobar
namespace: foobar
spec:
network:
expose:
- service: foobar
selector:
app.kubernetes.io/name: foobar
gateway: custom
domain: mydomain.dev
host: foobar
port: 8080
```
Make sure that the `gateway` name lines up with the name you used in your gateway deployment (`custom` in our example). For `domain`, you will want to set this if exposing your service on a domain different from the default domain name for your environment.
* `gateway`: This is where you will want to use the name of your gateway (matching the name used in your Zarf package for the gateway - `custom` from our example).
* `domain`: If exposing your service on a domain that is different from the default domain name for your environment (or admin domain name if your gateway includes admin), ensure that you have set this to the expected domain value.
The UDS Operator will handle creating the necessary resources to ensure that your service is properly exposed through your custom gateway.
-----
# Istio Egress
UDS Core leverages Istio to route dedicated egress out of the service mesh. This document provides an overview and examples of the Istio resources that UDS Core deploys to handle egress.
## Configuring the Egress Workload
[Section titled “Configuring the Egress Workload”](#configuring-the-egress-workload)
### Ambient
[Section titled “Ambient”](#ambient)
For workloads running in ambient mode, the dedicated egress gateway is automatically included in UDS Core. It comes pre-enabled and deploys waypoint workloads to the `istio-egress-waypoint` namespace.
Additional configurations for the waypoint can be added in the form of helm overrides to the `uds-istio-egress-config` chart in the UDS Bundle, such as:
```yaml
overrides:
istio-egress-ambient:
uds-istio-egress-config:
values:
- path: "config.deployment.replicas"
value: 4
- path: "config.horizontalPodAutoscaler.minReplicas"
value: 2
```
See the [values.yaml](https://github.com/defenseunicorns/uds-core/tree/main/src/istio/charts/uds-istio-egress-config/values.yaml) for additional details and configuration options.
### Sidecar
[Section titled “Sidecar”](#sidecar)
For workloads running in sidecar mode, the dedicated egress gateway is an *optional* component of UDS Core and will need to be manually enabled. To enable it in the UDS Bundle, add it to the `optionalComponents` as follows:
```yaml
kind: UDSBundle
metadata:
name: uds-core-bundle
description: My UDS Core Bundle
version: "0.1.0"
packages:
- name: uds-core
repository: oci://ghcr.io/defenseunicorns/packages/uds/core
version: "0.39.0"
optionalComponents:
- istio-egress-gateway
```
You will also need to configure any additional ports that you’d expect to egress to. 443 and 80 are default out of the box, but in the case of modifications you should use the `packages.overrides` as follows:
```yaml
overrides:
istio-egress-gateway:
gateway:
values:
- path: "service.ports"
value:
- name: status-port
port: 15021
protocol: TCP
targetPort: 15021
- name: http2
port: 80
protocol: TCP
targetPort: 80
- name: https
port: 443
protocol: TCP
targetPort: 443
- name: custom-port
port: 9200
protocol: TCP
targetPort: 9200
```
This passes through to the upstream [Istio gateway chart](https://github.com/istio/istio/tree/master/manifests/charts/gateway), so any other overrides to that chart can follow this format.
## Specifying Egress using the Package CR
[Section titled “Specifying Egress using the Package CR”](#specifying-egress-using-the-package-cr)
The UDS Core Package Custom Resource (CR) is used to configure the egress workload. The egress routes are realized through the use of the `network.allow` - specifically the `remoteHost`, `remoteProtocol`, and `port` or `ports` parameters therein.
Note
Currently, only HTTP and TLS protocols are supported. The configuration will default to TLS if not specified.
Note
Wildcards in host names are NOT currently supported.
### Ambient Mode
[Section titled “Ambient Mode”](#ambient-mode)
The following sample Package CR shows configuring egress to a specific host, “httpbin.org”, on port 443.
```yaml
apiVersion: uds.dev/v1alpha1
kind: Package
metadata:
name: pkg-1
namespace: egress-gw-1
spec:
network:
serviceMesh:
mode: ambient
allow:
- description: "Example Curl"
direction: Egress
port: 443
remoteHost: httpbin.org
remoteProtocol: TLS
selector:
app: curl
serviceAccount: curl
```
When a Package CR specifies the `network.allow` field with, at minimum, the `remoteHost` and `port` or `ports` parameters, the UDS Operator will create the necessary Istio resources to allow traffic to egress from the mesh. For ambient, the `serviceAccount` should be specified if your workload is not using the default service account. The resources that are created include the following:
* An Istio ServiceEntry, in the package namespace, which is used to define the external service that the workload can access.
* An Istio AuthorizationPolicy, in the package namespace, which is used to enforce that only traffic from workloads using the selected service account can egress. If no `serviceAccount` is specified, the `default` service account is used.
* A shared Istio Waypoint, in the `istio-egress-ambient` namespace, which is used to route the egress traffic.
#### Limitations
[Section titled “Limitations”](#limitations)
Due to Istio limitations and the selected implementation of shared waypoint egress, if two different egress requests in different packages specify the same host (e.g., pkg1 -> example.com AND pkg2 -> example.com) but request different port or protocols (e.g., pkg1 -> example.com:443/TLS AND pkg2 -> example.com:80/HTTP), the second request will be blocked during reconciliation and the package will fail to reconcile.
### Sidecar Mode
[Section titled “Sidecar Mode”](#sidecar-mode)
The following sample Package CR shows configuring egress to a specific host, “httpbin.org”, on port 443.
```yaml
apiVersion: uds.dev/v1alpha1
kind: Package
metadata:
name: pkg-1
namespace: egress-gw-1
spec:
network:
serviceMesh:
mode: sidecar
allow:
- description: "Example Curl"
direction: Egress
port: 443
remoteHost: httpbin.org
remoteProtocol: TLS
selector:
app: curl
```
When a Package CR specifies the `network.allow` field with, at minimum, the `remoteHost` and `port` or `ports` parameters, the UDS Core operator will create the necessary Istio resources to allow traffic to egress from the mesh. These include the following:
* An Istio ServiceEntry, in the package namespace, which is used to define the external service that the workload can access.
* An Istio Sidecar, in the package namespace, which is used to enforce that only registered traffic can egress from the workload. This is only applied to the workload selected in the `network.allow`.
* A shared Istio VirtualService, in the istio egress gateway namespace, which is used to route the traffic to the egress gateway.
* A shared Istio Gateway, in the istio egress gateway namespace, which is used to expose the egress gateway to the outside world.
* A shared Istio Service Entry, in the istio egress gateway namespace, to register the hosts and the ports for the egress gateway.
#### Limitations
[Section titled “Limitations”](#limitations-1)
The configuration in Package CRs in combination with the behavior of Istio should be understood when using egress for sidecar workloads. There are a few “gotchas” that might occur while using the sidecar egress configurations.
* Specifying a port in a Package that is not exposed via the workload: This will be allowed with a warning from the operator, but the traffic will not be able to egress. An `istioctl analyze` will show an error such as: `Referenced host:port not found: "egressgateway.istio-egress-gateway.svc.cluster.local:9200"`
* Specifying a remote host that is also used in other Gateways or VirtualServices: This will be allowed with a warning from the operator, but some unexpected behavior may occur. An `istioctl analyze` will show an error such as: `The VirtualServices ... define the same host ... which can lead to unexpected behavior` and `Conflict with gateways ...`
* For all egresses defined within a single Package CR, all workloads that also have egress will have shared access to any host defined
## Security Considerations
[Section titled “Security Considerations”](#security-considerations)
Additional security considerations to keep in mind when implementing egress:
* The TLS mode is PASSTHROUGH, this means that traffic will exit the mesh as-is. Without TLS origination, details like HTTP paths cannot be inspected, restricted or logged.
* Per Istio documentation: “The cluster administrator or the cloud provider must ensure that no traffic leaves the mesh bypassing the egress gateway. Mechanisms external to Istio must enforce this requirement” - Essentially, additional work may be needed to ensure traffic is actually egressing the cluster when and where it should be.
* Some potential vulnerabilities are introduced using TLS Passthrough - you’ll need to know what’s on the other side of that domain because of [domain fronting](https://en.wikipedia.org/wiki/Domain_fronting) - Essentially, this is only a safe feature for trusted hosts, or hosts you know are not vulnerable to domain fronting
* We are not blocking DNS exfiltration
## Troubleshooting
[Section titled “Troubleshooting”](#troubleshooting)
Egress not working? Some things to try:
* `google.com` is not the same as `www.google.com` - Does your `remoteHost` match the request?
* Do your selectors and serviceAccounts match the workloads you expect?
* Check `istioctl analyze -n ` for any errors
* Check `istioctl proxy-config listeners -n ` for expected routes
-----
# Istio Ingress
UDS Core leverages Istio for ingress into the service mesh. This document provides an overview and examples of the Istio resources that UDS Core deploys to handle ingress.
## Gateways
[Section titled “Gateways”](#gateways)
UDS Core provides a few Istio [Gateway](https://istio.io/latest/docs/reference/config/networking/gateway/) resources to allow ingress into the service mesh. Each one serves a different purpose and can be used to route traffic to different services.
1. **(Required)** Tenant Gateway - This gateway provides ingress to typical end-user applications. By default, UDS Core deploys a few services on this gateway, such as the Keycloak SSO portal. This gateway is typically exposed to end users of the applications deployed on top of UDS Core.
2. **(Required)** Admin Gateway - This gateway provides ingress to admin-related applications that are not for use by the default end user. By default, UDS Core deploys a few services on this gateway, such as the Admin Keycloak interface. This gateway is typically accessible to admins of the applications deployed on top of UDS Core. *Since the Admin and Tenant Gateways are logically separated, it is possible to have different security controls on each gateway.*
3. **(Optional)** Passthrough Gateway - This gateway allows mesh ingress without TLS termination performed by Istio. This could be useful for applications that need to (or currently) handle their own TLS termination. This gateway used to be a default component of UDS Core but is no longer deployed by default. To deploy this gateway, you must specify `istio-passthrough-gateway` as an `optionalComponent` in your UDS Bundle configuration.
Tip
* The default gateways provided with UDS Core only support HTTP/HTTPS ingress. For other TCP ingress needs (e.g., SSH), see [non-HTTP ingress](/reference/configuration/service-mesh/non-http-ingress/). UDP Ingress is [not currently supported with Istio](https://github.com/istio/istio/issues/1430).
* For specialized HTTP/HTTPS use cases (security requirements, IP-based access control, or additional domains), you can create [custom gateways](/reference/configuration/service-mesh/custom-gateways) to expose your services.
### Enable Passthrough Gateway
[Section titled “Enable Passthrough Gateway”](#enable-passthrough-gateway)
In order to enable the Passthrough Gateway, you must specify `istio-passthrough-gateway` as an `optionalComponent` in your UDS Bundle configuration. Here is an example of how to do this:
```yaml
kind: UDSBundle
metadata:
name: core-with-passthrough
description: A UDS example bundle for packaging UDS core with the passthrough gateway enabled
version: "0.0.1"
packages:
- name: core
repository: oci://ghcr.io/defenseunicorns/packages/uds/core
ref: 0.23.0-upstream
# You must specify the istio-passthrough-gateway as an optionalComponent or else it will not be deployed
optionalComponents:
- istio-passthrough-gateway
```
### Configure Domain Name and TLS for Istio Gateways
[Section titled “Configure Domain Name and TLS for Istio Gateways”](#configure-domain-name-and-tls-for-istio-gateways)
By default, the UDS Core Istio Gateways are set up to use the `uds.dev` (tenant/passthrough) and `admin.uds.dev` (admin) domains with valid TLS certificates. You will need to change the domain name for your environment and provide a valid TLS certificate for your domain(s).
You can set the TLS certs via overrides in a [UDS Bundle](https://uds.defenseunicorns.com/structure/bundles/) (see below). UDS Core Istio Gateways default to only supporting TLS v1.3, but this can also be overridden per gateway if clients use TLS 1.2 (as seen in the tenant gateway example `value` below).
```yaml
kind: UDSBundle
metadata:
name: core-with-cert-override
description: A UDS example bundle for packaging UDS core with a custom TLS certificate
version: "0.0.1"
packages:
- name: core
repository: oci://ghcr.io/defenseunicorns/packages/uds/core
ref: 0.23.0-upstream
overrides:
istio-admin-gateway:
uds-istio-config:
values:
- path: tls.supportTLSV1_2
value: true # Add support for TLS 1.2 on this gateway, can be specified via variables if needed at deploy time
variables:
- name: ADMIN_TLS_CERT
description: "The TLS cert for the admin gateway (must be base64 encoded)"
path: tls.cert
- name: ADMIN_TLS_KEY
description: "The TLS key for the admin gateway (must be base64 encoded)"
path: tls.key
istio-tenant-gateway:
uds-istio-config:
variables:
- name: TENANT_TLS_CERT
description: "The TLS cert for the tenant gateway (must be base64 encoded)"
path: tls.cert
- name: TENANT_TLS_KEY
description: "The TLS key for the tenant gateway (must be base64 encoded)"
path: tls.key
```
You can then either use environment variables (`UDS_ADMIN_TLS_CERT`, `UDS_ADMIN_TLS_KEY`, `UDS_TENANT_TLS_CERT`, and `UDS_TENANT_TLS_KEY`) or a config file to configure the certs for each gateway. These values should be base64 encoded strings of the TLS certificate and key for the admin and tenant gateways respectively.
Note
The `TLS_CERT` configuration values must include your specific domain certificate (e.g. `*.uds.dev`) **and** any intermediate certificates between your certificate and a trusted root Certificate Authority (CA) (the full “[certificate chain](https://csrc.nist.gov/glossary/term/certificate_chain)”). Failing to include intermediates in the chain can result in unexpected behavior with certain applications, as some container images may not inherently trust intermediate certificates.
The order of this full chain is very important: your server certificate (e.g. `*.uds.dev`) must come **first**, followed by any intermediates in order, and finally your root CA.
Domain should be set via your [uds-config](https://uds.defenseunicorns.com/reference/cli/quickstart-and-usage/#variables-and-configuration) file using the shared key to override the Zarf Domain Variable (see example `uds-config.yaml` below). By default the `admin_domain` will be set to `admin.` but can be overridden to host admin services on a different domain.
```yaml
shared:
domain: yourawesomedomain.com # shared across all packages in a bundle
admin_domain: youradmindomain.com # optional, defaults to admin.yourawesomedomain.com
# TLS Certs/Keys if not provided via environment variables
variables:
core:
admin_tls_cert: # base64 encoded admin cert here
admin_tls_key: # base64 encoded admin key here
tenant_tls_cert: # base64 encoded tenant cert here
tenant_tls_key: # base64 encoded tenant key here
```
Note
If you are using Private PKI or self-signed certificates for your tenant certificates it is necessary to additionally configure `UDS_CA_CERT` with additional [trusted certificate authorities](/reference/configuration/single-sign-on/trusted-ca/). You may also need to configure individual UDS Core components to trust your private CA - see the [Private PKI Configuration](/reference/configuration/private-pki/) guide for details.
#### Configuring TLS from a Secret
[Section titled “Configuring TLS from a Secret”](#configuring-tls-from-a-secret)
As an alternative to specifying individual certificate, key, and CA certificate values, you can set `tls.credentialName` in the gateway configuration. This field specifies the name of a Kubernetes secret containing the TLS certificate, key, and optional CA certificate for the gateway. When `tls.credentialName` is set, it will override `tls.cert`, `tls.key`, and `tls.cacert` values, simplifying the configuration by allowing a direct reference to a Kubernetes TLS secret. This secret should be placed in the same namespace as the gateway resource. See [Gateway ServerTLSSettings](https://istio.io/latest/docs/reference/config/networking/gateway/#ServerTLSSettings) for all required and available secret keys.
This approach is useful if you already have a Kubernetes secret that holds the necessary TLS data and want to use it directly.
```yaml
kind: UDSBundle
metadata:
name: core-with-credentialName
description: A UDS example bundle for packaging UDS core with a custom TLS credentialName
version: "0.0.1"
packages:
- name: core
repository: oci://ghcr.io/defenseunicorns/packages/uds/core
ref: 0.23.0-upstream
overrides:
istio-admin-gateway:
uds-istio-config:
values:
- path: tls.credentialName
value: admin-gateway-tls-secret # Reference to the Kubernetes secret for the admin gateway's TLS certificate
istio-tenant-gateway:
uds-istio-config:
values:
- path: tls.credentialName
value: tenant-gateway-tls-secret # Reference to the Kubernetes secret for the tenant gateway's TLS certificate
```
### Root (Apex) Domain Configuration
[Section titled “Root (Apex) Domain Configuration”](#root-apex-domain-configuration)
By default, the UDS Core Gateways are configured with wildcard hosts (for example, `*.uds.dev`), which match only subdomains (such as `demo.uds.dev` or `keycloak.admin.uds.dev`). The root domain (i.e. `uds.dev`) is not covered by a wildcard. This is important if you need an application to be accessible at the root of your domain.
To support this use case, UDS Core provides an optional configuration to enable a dedicated server block for the root domain. When enabled, two additional server blocks are added to your Istio Gateway:
* **HTTP on port 80**: Redirects traffic to HTTPS.
* **HTTPS on port 443**: Terminates TLS using settings from the rootDomain.tls section.
If you want your application to be reachable at `https://uds.dev`, enable root (apex) domain configuration via a bundle override in your UDS Bundle. For example:
```yaml
- name: core
repository: oci://ghcr.io/defenseunicorns/packages/uds/core
ref: 0.23.0-upstream
overrides:
istio-tenant-gateway:
uds-istio-config:
values:
- path: rootDomain.enabled
value: true
- path: rootDomain.tls.mode
value: SIMPLE
- path: rootDomain.tls.credentialName
value: "" # Leave blank to auto-create the secret using the provided cert data.
- path: rootDomain.tls.supportTLSV1_2
value: true
variables:
- path: rootDomain.tls.cert
name: "ROOT_TLS_CERT"
- path: rootDomain.tls.key
name: "ROOT_TLS_KEY"
- path: rootDomain.tls.cacert
name: "ROOT_TLS_CACERT"
```
Note
* If you provide a non-empty value for credentialName, UDS Core assumes that you have pre-created the Kubernetes secret and will not auto-generate it using the certificate data.
* If you prefer to use an existing secret (such as when using a SAN certificate that covers both subdomains and the root) you may set the `rootDomain.tls.credentialName` field to the name of that secret (for example, `gateway-tls`). In that case, UDS Core assumes the secret exists and will not auto-create one using the certificate data.
#### Exposing a Service on the Root Domain
[Section titled “Exposing a Service on the Root Domain”](#exposing-a-service-on-the-root-domain)
Once you have deployed with a valid root domain configuration and DNS is correctly set up (i.e. an A record for `uds.dev` points to your ingress gateway), you can expose a service directly on the root domain using the reserved `.` host in your Package CR. For example, to route traffic from `https://uds.dev/` to a service in your cluster, create a Package similar to the following:
```yaml
apiVersion: uds.dev/v1alpha1
kind: Package
metadata:
name: my-app
namespace: my-namespace
spec:
network:
expose:
- service: my-app-service
selector:
app.kubernetes.io/name: my-app
host: "."
gateway: tenant
port: 80
```
This VirtualService matches requests to the root domain (`uds.dev`) and routes them to your service (`my-app-service` on port 80).
### Using an L7 Load Balancers with UDS Core Gateways
[Section titled “Using an L7 Load Balancers with UDS Core Gateways”](#using-an-l7-load-balancers-with-uds-core-gateways)
UDS Core supports external TLS termination and custom client certificate headers for environments using external load balancers (e.g., AWS Application Load Balancer or Azure Application Gateway). This is achieved by overriding default Keycloak and Istio settings in your bundle configuration.
The configuration requires disabling HTTPS redirects in Istio Gateways and setting the number of trusted proxies to the number of proxies in front of the Istio Gateways (see [Configuring Gateway Network Topology](https://istio.io/latest/docs/ops/configuration/traffic-management/network-topologies/#configuring-network-topologies) Istio documentation for details). In the example below, an ALB is acting as the trusted proxy, therefore the `meshConfig.defaultConfig.gatewayTopology.numTrustedProxies` is set to 1. Changing this setting in runtime will trigger the UDS Operator to restart Istio Gateway Pods automatically. Keycloak configuration is then adjusted by deploying an additional `EnvoyFilter` that converts the Amazon ALB client certificate into a format that Keycloak can understand. The example below outlines the configuration needed to set up the [Amazon ALB](https://docs.aws.amazon.com/elasticloadbalancing/latest/application/mutual-authentication.html) for UDS Core:
```yaml
packages:
- name: core
repository: oci://ghcr.io/defenseunicorns/packages/uds/core
ref: x.x.x
overrides:
istio-tenant-gateway:
uds-istio-config:
values:
- path: tls.servers.keycloak.enableHttpsRedirect
value: false
- path: tls.servers.tenant.enableHttpsRedirect
value: false
# # Uncomment the following settings if L7 Load Balancer is also used for the Admin Gateway
# istio-admin-gateway:
# uds-istio-config:
# values:
# - path: tls.servers.keycloak.enableHttpsRedirect
# value: false
# - path: tls.servers.tenant.enableHttpsRedirect
# value: false
istio-controlplane:
istiod:
values:
# Reminder: this should be set to the number of proxies in front of Istio, which may be more than 1 in some setups
- path: meshConfig.defaultConfig.gatewayTopology.numTrustedProxies
value: 1
keycloak:
keycloak:
values:
- path: thirdPartyIntegration.tls.tlsCertificateHeader
# This header is used by the ALB to pass the client certificate
value: "x-amzn-mtls-clientcert"
- path: thirdPartyIntegration.tls.tlsCertificateFormat
# This format is used by Keycloak to parse the client certificate.
# Supported formats are "AWS" and "PEM".
value: "AWS"
```
#### Infrastructure Requirements
[Section titled “Infrastructure Requirements”](#infrastructure-requirements)
When using an L7 Load Balancer, UDS Core completely trusts information passed through the Istio Gateways. In order to provide the necessary security guarantees, the following infrastructure requirements must be met:
* All the network components between the public internet and the Istio Gateways must be hardened against HTTP header injection and spoofing attacks.
* The Client Certificate header always needs to be sanitized and ensure a client application cannot forge it (from both outside and inside the cluster).
* All the traffic between edge and Istio Gateways must be secured (and preferably not reachable from both inside and outside the cluster).
If any of these requirements cannot be met, it is not recommended to make any authentication decisions based on the Client Certificate header. We would recommend using other MFA methods instead.
-----
# Istio Sidecar vs. Ambient Mode in UDS Core
This document outlines the key differences between Istio’s Sidecar and Ambient modes as they relate to UDS Core. Understanding these differences is crucial for choosing the right mode for your application deployments.
UDS Core leverages Istio for service mesh capabilities. Istio offers two primary modes of operation:
* **Sidecar Proxy:** The traditional Istio model where each application pod has its own dedicated Envoy proxy running as a sidecar container.
* **Ambient Mesh:** A newer, simpler model that uses node-level (ztunnel) proxies and optional waypoint proxies to provide service mesh functionality.
## Key Differences
[Section titled “Key Differences”](#key-differences)
| Feature | Sidecar Proxy | Ambient Mesh |
| ---------------- | ------------------------------------------------------- | ------------------------------------------------------------------------------------- |
| Proxy Location | Pod-level (Envoy sidecar) | Node-level (ztunnel) + optional Waypoint proxies |
| Resource Usage | Higher - Each pod has its own proxy. | Lower - Proxies are shared across pods on a node. |
| Complexity | Higher - Requires sidecar injection. | Lower - No sidecar injection required by default. |
| Isolation | Strong - Pod-level isolation. | Network-level (ztunnel), Pod-level (with Waypoint proxies) |
| Upgrade | Disruptive - Pod restarts required for sidecar updates. | Less Disruptive - ztunnel upgrades don’t require pod restarts. |
| Security | All traffic inspected at the pod level. | ztunnel handles base security; Waypoint proxies add pod-level policy when configured. |
| mTLS | Sidecars handle mTLS. | ztunnel handles mTLS. |
| HTTP L7 policies | Enforced by sidecars. | Enforced by Waypoint Proxies when needed. |
## Sidecar Proxy Mode (Default)
[Section titled “Sidecar Proxy Mode (Default)”](#sidecar-proxy-mode-default)
In Sidecar mode, an Envoy proxy runs as a sidecar container within each application pod. All traffic to and from the application is intercepted and managed by this sidecar proxy.
**Pros:**
* **Strong Isolation:** Provides strong isolation between the application and the proxy.
* **Mature Feature Set:** Has a more mature feature set compared to Ambient Mesh.
* **Granular Control:** Allows very fine-grained control over traffic management and security policies at the pod level.
**Cons:**
* **Higher Resource Overhead:** Sidecar proxies consume resources (CPU, memory) on each pod, even if the pod doesn’t require advanced mesh features.
* **Increased Complexity:** Increases the complexity of pod deployments due to sidecar injection.
* **Disruptive Upgrades:** Upgrading sidecars typically involves restarting pods.
**When to Use Sidecar Mode:**
* When you need very strong isolation between your application and the Istio proxy.
* When you require features not yet available in Ambient Mesh.
* When you have applications already designed to work with sidecar injection.
**Configuration:**
To explicitly use sidecar injection, set `spec.network.serviceMesh.mode: sidecar` in your [UDS Package](/reference/configuration/uds-operator/package/) resource definition. If you do not configure `spec.network.serviceMesh.mode` in your UDS Package, the UDS Operator will default to Sidecar mode.
## Ambient Mesh Mode
[Section titled “Ambient Mesh Mode”](#ambient-mesh-mode)
In Ambient Mesh mode, Istio uses node-level proxies (ztunnel) and optional waypoint proxies to provide service mesh functionality. Ztunnel runs on each node and intercepts traffic at the node level. [Waypoint proxies](https://istio.io/latest/docs/ambient/usage/waypoint/) are deployed alongside applications that require more fine-grained control or advanced features.
**Pros:**
* **Lower Resource Overhead:** Reduces resource consumption as proxies are shared across multiple pods on a node.
* **Simplified Deployments:** Simplifies pod deployments as no sidecar injection is required by default.
* **Less Disruptive Upgrades:** Upgrades to ztunnel are less disruptive as they don’t require pod restarts.
**Cons:**
* **Migration:** If migrating from Sidecar to Ambient, planning must be done ahead of time to ensure a smooth transition. However, the UDS Operator automatically handles Istio configuration changes for you, making the transition an easier process.
* **Less Mature than Sidecar:** Ambient is a newer feature than Sidecar, so there may be more undiscovered bugs.
* **Traffic Shift:** With the introduction of Ambient, Layer 7 Authorization features are only available via opting into an optional Envoy proxy via the Waypoint resource.
**When to Use Ambient Mesh Mode:**
* When you want to minimize resource consumption.
* When you want to simplify application deployments.
* For most applications that don’t require very fine-grained policy enforcement or features not yet supported in Ambient Mesh.
* For help deciding, [this](https://blog.howardjohn.info/posts/opinionated-istio/#ambient-mode) article is a recommended read.
**Configuration:**
You can use ambient mode by setting `spec.network.serviceMesh.mode: ambient` in your [UDS Package](/reference/configuration/uds-operator/package/). When `spec.network.serviceMesh.mode` is not configured, the UDS Operator will default your Package to Sidecar mode.
## Choosing the Right Mode
[Section titled “Choosing the Right Mode”](#choosing-the-right-mode)
While Ambient Mesh has clear benefits and growing adoption, consider the following when choosing between Sidecar and Ambient Mesh:
* **Resource Optimization:** If minimizing resource consumption is a top priority, Ambient Mesh is the better choice.
* **Security and Control:** Ambient Mesh offers the same level of security as sidecar, but waypoint proxies must be configured for each service.
* **Simplicity:** If you want to simplify application deployments and reduce operational overhead, Ambient Mesh is a good option.
* **Feature Requirements:** Evaluate whether all the features you need are supported in Ambient Mesh. If not, you’ll need to use Sidecar mode or consider using Waypoint Proxies with ambient mode when possible.
Sidecar mode remains a valuable option for specific use cases where its strengths are required. For more resource aware deployments, Ambient offers a more streamlined approach that saves CPU, Memory, and Networking overhead as your environment scales. The UDS Operator will continue to support both Sidecar and Ambient, allowing you to make the best choice for your needs.
Note
Interested in seeing how Ambient Mesh can reduce CPU and Memory utilization for your workloads that are using Sidecar? Check out the “Istio Sidecar vs Ambient Resource Comparison” Dashboard in Grafana!
See the [Istio documentation](https://istio.io/latest/docs/overview/dataplane-modes/#choosing-between-sidecar-and-ambient) for more information and resources.
-----
# Non-HTTP(s) Istio Ingress
As noted in the [Istio Ingress document](https://uds.defenseunicorns.com/reference/configuration/ingress/), UDS Core by default provides gateway configuration to handle HTTP(s) ingress traffic only. This document provides example configuration and resources to setup ingress for a non-http service (using SSH for the example below). Note that while this example uses port 22 and the SSH protocol this same process should work for an TCP port/protocol that your service is listening on.
## UDS Core Configuration
[Section titled “UDS Core Configuration”](#uds-core-configuration)
In order to allow ingress for a non-HTTP service you first need to configure the UDS Core loadbalancers to accept traffic on a different port. This can be done via an override to the configuration for the admin or tenant loadbalancers, as shown in the example below for the tenant loadbalancer to add port 22:
```yaml
- name: core
repository: ghcr.io/defenseunicorns/packages/uds/core
ref: x.x.x
overrides:
istio-tenant-gateway:
gateway:
values:
- path: "service.ports"
value:
# Default ports for status, http, and https
- name: status-port
port: 15021
protocol: TCP
targetPort: 15021
- name: http2
port: 80
protocol: TCP
targetPort: 80
- name: https
port: 443
protocol: TCP
targetPort: 443
# Any additional ports required for ingress
- name: tcp-ssh
port: 2022 # The external port that is exposed
protocol: TCP
targetPort: 22 # The port to route to on the Gateway
```
Note that you *MUST* include the default list of ports (as shown above) to ensure that HTTP traffic and liveness checks continue to function as expected. You can choose any `port` and `targetPort` for your additional configuration that you want.
## Gateway Custom Resource
[Section titled “Gateway Custom Resource”](#gateway-custom-resource)
In order to allow exposing services through the newly opened loadbalancer port you must also create an [Istio Gateway](https://istio.io/latest/docs/reference/config/networking/gateway/) custom resource that specifies the hosts and port that you want to configure the gateway to accept requests for. The below example shows how to do this for `example.uds.dev` on our SSH port of 22:
```yaml
apiVersion: networking.istio.io/v1beta1
kind: Gateway
metadata:
name: example-ssh-gateway
# This must be the namespace of the ingressgateway you configured the port for
namespace: istio-tenant-gateway
spec:
selector:
app: tenant-ingressgateway
servers:
- hosts:
# This should be the host you expect to hit with requests
- example.uds.dev
port:
name: tcp-ssh
# This must match the `targetPort` you added to the port list above
number: 22
protocol: TCP
```
## VirtualService Custom Resource
[Section titled “VirtualService Custom Resource”](#virtualservice-custom-resource)
Now that the loadbalancer and Istio Gateway are configured for the right ports and host, you will just need to add a route (`VirtualService`) to ensure traffic is directed to the right cluster service when requests come to your host and port. The example below does this for our `example.uds.dev` host:
```yaml
apiVersion: networking.istio.io/v1beta1
kind: VirtualService
metadata:
name: example-ssh
# This must be in the namespace of your application
namespace: example
spec:
gateways:
# This must match the namespace/name of the Gateway you created
- istio-tenant-gateway/example-ssh-gateway
hosts:
- example.uds.dev
tcp:
- match:
# This must match the Gateway port number you added above
- port: 22
route:
- destination:
# This should be the full cluster service address
host: example.example.svc.cluster.local
port:
# This is the port on the service you want to route to
number: 22
```
Assuming you are running with strict network policies you will also need to add a network policy to allow ingress on this same port. You can do this in the Package CR like the example below:
```yaml
spec:
network:
allow:
- direction: Ingress
selector:
app: example
# These must line up with the gateway you chose
remoteNamespace: istio-tenant-gateway
remoteSelector:
app: tenant-ingressgateway
# This must line up with the port exposed on the pod
port: 22
description: "SSH Ingress"
...
```
With these steps complete you should be able to hit your application over the port you configured on the configured host, so in our case we should be able to run:
```console
ssh -p 2022 user@example.uds.dev
```
-----
# Authservice Protection
To enable authentication for applications that do not have native OIDC configuration, UDS Core can utilize Authservice as an authentication layer.
Follow these steps to protect your application with Authservice:
* Set `enableAuthserviceSelector` with a matching label selector in the `sso` configuration of the Package.
* Ensure that the pods of the application are labeled with the corresponding selector or use an empty selector to protect all of them
```yaml
apiVersion: uds.dev/v1alpha1
kind: Package
metadata:
name: httpbin
namespace: httpbin
spec:
sso:
- name: Demo SSO httpbin
clientId: uds-core-httpbin
redirectUris:
- "https://httpbin.uds.dev/login"
enableAuthserviceSelector:
app: httpbin
```
Note
The UDS Operator uses the first `redirectUris` to populate the `match.prefix` hostname and `callback_uri` in the authservice chain.
For complete examples, see [app-ambient-authservice-tenant.yaml](https://github.com/defenseunicorns/uds-core/blob/main/src/test/app-ambient-authservice-tenant.yaml) and [app-sidecar-authservice-tenant.yaml](https://github.com/defenseunicorns/uds-core/blob/main/src/test/app-sidecar-authservice-tenant.yaml)
## Multiple Services and Selectors
[Section titled “Multiple Services and Selectors”](#multiple-services-and-selectors)
### Protecting Multiple Services
[Section titled “Protecting Multiple Services”](#protecting-multiple-services)
You can protect multiple services with a single SSO client by using a common label selector. This is useful when you want to apply the same authentication rules to multiple related services.
#### Example: Single SSO Client for Multiple Services
[Section titled “Example: Single SSO Client for Multiple Services”](#example-single-sso-client-for-multiple-services)
```yaml
# This will protect all pods with the label 'app: myapp'
sso:
- name: "My App Services"
clientId: my-app-auth
redirectUris: ["https://myapp.example.com/login"]
enableAuthserviceSelector:
app: myapp # Matches all pods with label app=myapp
groups:
anyOf: ["/MyApp/Users"]
```
### Multiple SSO Configurations
[Section titled “Multiple SSO Configurations”](#multiple-sso-configurations)
If you need different authentication rules for different services, you can define multiple SSO clients with different selectors.
#### Example: Multiple SSO Clients
[Section titled “Example: Multiple SSO Clients”](#example-multiple-sso-clients)
```yaml
sso:
- name: "Admin Services"
clientId: admin-auth
redirectUris: ["https://admin-app.example.com/login"]
enableAuthserviceSelector:
app: admin
groups:
anyOf: ["/Admin"]
- name: "User Services"
clientId: user-auth
redirectUris: ["https://app.example.com/login"]
enableAuthserviceSelector:
app: user
groups:
anyOf: ["/Users"]
```
Note
When using `network.expose` with protected services:
* Each expose entry must map to exactly one SSO client
* Multiple services behind the same expose entry must share the same SSO configuration
* This limitation applies to both ambient and non-ambient modes
## Limitations:
[Section titled “Limitations:”](#limitations)
Authservice is intended for simple, basic protection scenarios where an absolute level of protection is acceptable (such as a Web UI or dashboard). For more advanced authentication requirements, you should implement authentication directly in your application or via a more comprehensive solution.
## Ambient Mode Support
[Section titled “Ambient Mode Support”](#ambient-mode-support)
Authservice is fully supported for packages running in Istio Ambient Mesh mode (`spec.network.serviceMesh.mode: ambient`).
### How This Works
[Section titled “How This Works”](#how-this-works)
* When a Package CR specifies ambient mode and includes an SSO client with `enableAuthserviceSelector`, the UDS Operator will:
* Automatically create and manage the necessary [waypoint proxy](https://istio.io/latest/docs/ambient/usage/waypoint/) resources for your application.
* Monitor the health and readiness of the waypoint proxy before enabling Authservice protection.
* Associate the waypoint proxy with the correct services based on your selector.
* Clean up the waypoint and related configuration automatically when the package is deleted.
**Usage:**
* Set `spec.network.serviceMesh.mode: ambient` in your Package CR.
* Add your SSO configuration with `enableAuthserviceSelector` as usual.
* The operator will handle the rest.
Caution
### Important Note on Selector Matching
[Section titled “Important Note on Selector Matching”](#important-note-on-selector-matching)
When using `enableAuthserviceSelector` in ambient mode, ensure that the selector matches the labels on your pods **and** is the same selector used by any services (`spec.selector`). If the selector matches pod labels but not the selector used by the service, you may encounter incomplete Authservice protection where:
* The pod is mutated to use the waypoint
* But the service is not properly associated with the waypoint
This will “fail closed” and result in traffic through the service being blocked, rather than routing through the expected SSO login flow.
Additionally, any package `network.expose` entries should use the same selector to allow traffic to flow properly from the gateway to the waypoint.
-----
# Device Flow Clients
Some applications may not have a web UI / server component to login to and may instead grant OAuth tokens to devices. This flow is known as the [OAuth 2.0 Device Authorization Grant](https://oauth.net/2/device-flow/) and is supported in a UDS Package with the following configuration:
```yaml
apiVersion: uds.dev/v1alpha1
kind: Package
metadata:
name: fulcio
namespace: fulcio-system
spec:
sso:
- name: Sigstore Login
clientId: sigstore
standardFlowEnabled: false
publicClient: true
attributes:
oauth2.device.authorization.grant.enabled: "true"
```
This configuration does not create a secret in the cluster and instead tells the UDS Operator to create a public client (one that requires no auth secret) that enables the `oauth2.device.authorization.grant.enabled` flow and disables the standard redirect auth flow. Because this creates a public client configuration that deviates from this is limited - if your application requires both the Device Authorization Grant and the standard flow this is currently not supported without creating two separate clients.
-----
# Group Based Authorization
Group-based authorization allows to control access to a specific application based on User Group membership. UDS Core is configured to support the following Groups (see [User Groups](/reference/configuration/single-sign-on/overview/#user-groups) for more details):
| Keycloak Group | UDS Group Name | Purpose |
| -------------- | ------------------- | -------------------------- |
| `Admin` | `/UDS Core/Admin` | Defined for Administrators |
| `Auditor` | `/UDS Core/Auditor` | Defined for regular Users |
The `/` character is used to define group hierarchy in Keycloak. To include it as part of a group name, escape it with a `~`, for example: `a~/b~/c`.
Below is an example to configure authorization based on the `Admin` (`/UDS Core/Admin`) Group:
```yaml
apiVersion: uds.dev/v1alpha1
kind: Package
metadata:
name: httpbin-other
namespace: authservice-test-app
spec:
sso:
- name: Demo SSO
clientId: uds-core-httpbin
redirectUris:
- "https://protected.uds.dev/login"
enableAuthserviceSelector:
app: httpbin
groups:
anyOf:
- "/UDS Core/Admin"
```
Note
More information about the specification might be found in the [UDS Package CR](/reference/configuration/custom-resources/packages-v1alpha1-cr/#groups).
-----
# Azure Entra ID
This guide will walk you through the steps required to configure Azure Entra ID as a SAML identity provider in Keycloak.
## Prerequisites
[Section titled “Prerequisites”](#prerequisites)
* Access to your Azure Entra ID Tenant, with at least [Cloud Application Administrator](https://learn.microsoft.com/en-us/entra/identity/role-based-access-control/permissions-reference#cloud-application-administrator) Privileges.
* Existing Entra ID Groups that are designated for Administrators and Auditors of UDS Core Applications (see note below).
* **VERY IMPORTANT** Users configured in Entra are **REQUIRED** to have an email address defined, without this Keycloak will fail to create the user.
> UDS Core comes with two preconfigured user groups in Keycloak: `Admin` and `Auditor`. These groups are assigned roles to the various applications deployed by UDS Core, outlined [here](/reference/configuration/single-sign-on/overview/#user-groups). Using [Identity Provider Mappers](https://www.keycloak.org/docs/latest/server_admin/#_mappers) in Keycloak, we can map your existing Administrator and Auditor groups in Azure Entra ID to the `Admin` and `Auditor` groups in Keycloak. See [User Groups](/reference/configuration/single-sign-on/overview/#user-groups) for more details.
## Creating Application Registrations in Azure Entra ID
[Section titled “Creating Application Registrations in Azure Entra ID”](#creating-application-registrations-in-azure-entra-id)
In this section, we will configure Application Registrations for each Keycloak realm deployed with UDS Core - the default `master` realm and the `uds` realm. The two App Registrations should be nearly identical, with the main difference being their `Redirect URI`.
### Create App Registration - Master Realm
[Section titled “Create App Registration - Master Realm”](#create-app-registration---master-realm)
1. In Azure Entra ID, navigate to the “App registrations” page under “Manage”.
2. Click “New registration”.
3. Input a name for the application.
4. Under “Supported Account Types”, select “Accounts in this organizational directory ( only - Single tenant)”.
5. Under “Redirect URI”, select “Web” from the drop down menu and then input the following as the URL: `https://keycloak./realms/master/broker/azure-saml/endpoint`.
6. Click “Register” when done.

Once created, you will be directed to your application’s configuration page in Entra ID. Follow the steps below to configure the App Registration:
1. On the left-hand side, navigate to “Manage” > “Token configuration”. Here you will need to add the following as “Optional claims”:
| Claim | Token Type |
| -------- | ---------- |
| `acct` | SAML |
| `email` | SAML |
| `ipaddr` | ID |
| `upn` | SAML |
> When adding these claims, a dialogue box will appear that says “Some of these claims (email, upn) require OpenID Connect scopes to be configured through the API permissions page or by checking the box below.”. Select the checkbox that says “Turn on the Microsoft Graph email, profile permission (required for claims to appear in token). Click “Add”.
1. You will also need to add a “Groups claim” as follows:
1. Select “All groups” under “Select group types to include in Access, ID, and SAML tokens.” Accept the default values for the rest.
2. Click “Add” when done.

1. Next, Navigate to “Expose an API” under “Manage”
2. On the top of the page, you will see “Application ID URI”. Click “Add”.
3. The window that appears should automatically populate with `api://`. Note this value. You will need it for configuring the Azure SAML Identity Provider in Keycloak later.
4. Click “Save”.
### Create App Registration - UDS Realm
[Section titled “Create App Registration - UDS Realm”](#create-app-registration---uds-realm)
Repeat the steps above to create a new App Registration for the UDS Realm. Note the following caveats below:
1. When you get to step 3, ensure that you provide the Application Registration a unique name.
2. When asked to provide a “Redirect URI”, provide the following: `https://sso./realms/uds/broker/azure-saml/endpoint`
3. Continue with next steps.
## Keycloak Azure Entra Identity Provider Setup
[Section titled “Keycloak Azure Entra Identity Provider Setup”](#keycloak-azure-entra-identity-provider-setup)
* Log into Keycloak Admin UI
* `keycloak.< admin_domain >`
* The Keycloak admin username and password varies based on how UDS Core is deployed
* If deploying with the bundle override `INSECURE_ADMIN_PASSWORD_GENERATION`
* The username will be `admin` and the password will be in a Kubernetes secret called `keycloak-admin-password`
* If **not** deploying with bundle override
* An admin user will need to be registered by using `zarf connect keycloak`
* This temporary admin user is recommended to be removed later
* Both Master and UDS Realms should be created by deploying UDS Core
* Verify this in the *Top Left* dropdown
### Master Realm
[Section titled “Master Realm”](#master-realm)
1. Configure the Required Actions
1. Select `Authentication` tab from *left side nav bar* under *Configure*
2. Select `Required actions` tab from *top nav bar*
3. Now disable all required actions
* These required actions are configurations that every user registered to the Master realm will need to complete, even if they register via an Identity Provider like Entra. This can add unnecessary checks that a user will need to configure when they register. Since we are shifting all authorization to Azure Entra, these will be repetitive validations.
2. Configure User Groups and Realm Roles
1. Select `Groups` tab from *left side nav bar* under *Manage*
2. Select `Create Group` button in the *middle of the page*
3. Name that group `admin-group` and select the `Create` button
4. Select the newly created `admin-group`, this will open a `Group details` page
5. Select `Role Mapping` tab from *top nav bar*
6. Select `Assign role` button in the *middle of the page*
7. On the pop up page, Select the `Filter by clients` dropdown in the *top left* and select `Filter by realm roles`
8. This should be a much smaller list, now toggle the `admin` role and click `Assign` in the *bottom left corner*
* This creates a Master Realm specific group for admin users to be put into when they register. This group will be mapped from the Entra user into Keycloak. This group gives the admin users complete control, if the admin users should not have those controls then creating a different role with the reuiqred controls would be necessary and a group that is connected to that role.
3. Configure the SAML Identity Provider for Azure
1. Select `Identity Providers` tab from *left side nav bar* under *Manage*
2. Select `SAML v2.0` option from *middle of page* under `User-defined`
1. Should be on a new page called `Add SAML provider` now
2. Change the `Alias` field to `azure-saml`
3. Change the `Display name` field to `Azure SSO`
4. Get the `Service provider entity ID` from the Entra portal:
1. Entra - App Registrations
2. Select Application from list for master realm
3. Copy the `Application ID URI and copy that the `Service provider entity ID\` in the Keycloak Identity Provider creation
5. Get the `SAML entity descriptor` from the Entra portal:
1. Entra - App Registrataions
2. Select Application from list for master realm
3. Select the `Endpoints` tab from *top nav bar*
4. Copy the `Federation metadata document` endpoint over to the `SAML entity descriptor` in the Keycloak Identity Provider creation, make sure that it gets the green checkmark
6. Select `Add` button, should now see an Azure SSO page that has been auto populated
7. Toggle `Backchannel logout` to `On` under `SAML Settings`
8. Toggle `Trust Email` to `On` under `Advanced settings`
9. Change the `First login flow override` under `Advanced settings` to be `first broker login`
10. Select `Save`
3. Select `Mappers` tab from *top nav bar*
1. Select `Add mapper`, should now be on `Add Identity Provider Mapper` page
1. Change `Name` field to `Username Mapper`
2. Change `Sync mode override` field to `Force`
3. Change `Mapper type` field to `Attribute Importer`
4. Change `Attribute Name` field to `http://schemas.xmlsoap.org/ws/2005/05/identity/claims/emailaddress`
5. Change `User Attribute Name` in the dropdown field to `username`
6. Select `Save` and navigate back to `Provider details` via the breadcrumbs at *top of page*
2. Select the `Add mapper`
1. Change `Name` field to `First Name Mapper`
2. Change `Sync mode override` field to `Force`
3. Change `Mapper type` field to `Attribute Importer`
4. Change `Attribute Name` field to `http://schemas.xmlsoap.org/ws/2005/05/identity/claims/givenname`
5. Change `User Attribute Name` in the dropdown field to `firstName`
6. Select `Save` and navigate back to `Provider details` via the breadcrumbs at *top of page*
3. Select the `Add mapper`
1. Change `Name` field to `Last Name Mapper`
2. Change `Sync mode override` field to `Force`
3. Change `Mapper type` field to `Attribute Importer`
4. Change `Attribute Name` field to `http://schemas.xmlsoap.org/ws/2005/05/identity/claims/surname`
5. Change `User Attribute Name` in the dropdown field to `lastName`
6. Select `Save` and navigate back to `Provider details` via the breadcrumbs at *top of page*
4. Select the `Add mapper`
1. Change `Name` field to `Email Mapper`
2. Change `Sync mode override` field to `Force`
3. Change `Mapper type` field to `Attribute Importer`
4. Change `Attribute Name` field to `http://schemas.xmlsoap.org/ws/2005/05/identity/claims/emailaddress`
5. Change `User Attribute Name` in the dropdown field to `email`
6. Select `Save` and navigate back to `Provider details` via the breadcrumbs at *top of page*
5. Select the `Add mapper`
1. Change `Name` field to `Group Mapper`
2. Change `Sync mode override` field to `Force`
3. Change `Mapper type` field to `Advanced Attribute to Group`
4. Select `Add Attributes` from *middle of page*
5. Enter key `http://schemas.microsoft.com/ws/2008/06/identity/claims/groups` and value is in the Entra `Manage Groups`, Pick the admin group and copy the Group ID into the value field
6. Select `Select group` button
7. Select `admin-group` from the pop up window and click `Select`
8. Select `Save` and navigate back to `Provider details` via the breadcrumbs at *top of page*
* This creates mappers for mapping users information between Entra and Keycloak. While not absolutely necessary there is many reasons why this is a good idea. Make sure the Entra group that is for admins is very restrictive and only users that should have control of keycloak are admitted.
4. Configure Authentication Flows and default Browser Flow
1. Select `Authentication` from *left side nav bar* under *Configure*
2. Select `Create Flow` from *top nav bar*, should be on `Create flow` page now
1. Change `Name` to `browser-idp-redirect`
2. Select `Create`, should be on `browser-idp-redirect` page now, this is not in use yet
3. Select `Add an execution`
4. In the search bar enter `redirector` and select the `Identity Provider Redirector`, and click `Add`
5. Change the requirement dropdown to `REQUIRED`
6. Select the gear settings icon
7. Change `Alias` to `Browser IDP`
8. Change `Default Identity Provider` to `azure-saml`
3. Select the `Authentication` breacrumb at the *top of the page*
* We have created an Identity Provider and we have disabled the use of username passwords for admin users. So we need to disable the final route for admin users to utilize those passwords.
5. OPTIONAL but recommended - Configure a Client for service account authentication
1. Select `Clients` from *left side nav bar* under *manage*
2. Select `Create client` from *top nav bar*
3. Change `Client ID` field to `service-client`
4. Change `Name` field to `Service Client`
5. Change `Description` field to `Service Account Enabled Client`
6. Select `Next` button from *bottom of page*
7. Toggle `Client authentication` to `On`
8. Toggle `Standard flow` to `Off`
9. Toggle `Direct access grants` to `Off`
10. Toggle `Service account roles` to `On`
11. Select `Next` button from *bottom of page*
12. Select `Save` button from *bottom of page*
13. Should be on the `service-client` client details page now
14. Select the `Service accounts roles` tab from *top nav bar*
15. Select `Assign role`
16. Switch the `Filter by clients` dropdown to `Filter by realm roles`
17. Select the `admin` role and click `Assign` at *bottom of pop up*
* This step creates a Keycloak client that can only be used via service accounts. This means things like Terraform or otherwise. Instead of providing a users credentials to run terraform against keycloak, the client\_id and client\_secret could be used instead. The `client_id` can be found on the client details page and the `client_secret` can be found in the `Credentials` tab of the client. This is not necessary but can provide another avenue to manage day 2 ops for Keycloak.
6. Testing Changes
**This requires that user be setup in Entra and have the correct group defined in Entra that maps to the Keycloak admin group created earlier**
1. We would recommend testing all of these changes at this point to verify functionality of Authentication flows
2. Select the `Admin` user drop down from *top right corner of screen*
3. Select `sign out`
4. Should be redirected to a Keycloak login screen where Username/Password is enabled and an `Azure SSO` option is present
* We will disable the Username/Password Authentication Flow after we’ve tested that everything is working otherwise if anything is misconfigured, you won’t be able to get back in and will have to start this process over again.
5. Select the `Azure SSO` option
6. Should experience some redirects and land on Entra Login page
7. Enter Entra Users information
8. Should be redirected to the Admin UI again with full permissions
7. FINALLY
1. When configuration of Keycloak is complete and everything is working, do these final steps:
2. Disable Username Password Auth
1. Select `Authentication` from *left side nav bar* under *Configure*
2. Find the newly created `browser-idp-redirect` Authentication Flow
3. Select the three dots at the *far right of the row*
4. Select the `Bind flow` option
5. Select the `Browser flow` from the dropdown and click `Save`
* Since we are shifting authentication to Entra, we setup an Authentication flow that automatically redirects users to Entra when they need to login or register. This mitigates both confusion and misconfigurations.
3. Remove the admin user that was initial created
1. Select `Users` tab from *left side nav bar* under *Manage*
2. This next step will remove you from Keycloak if you’re still using the temp admin user
3. Select the three dots from the *far right of admin row*
4. Select `Delete`
* This user is a requirement for keycloak to be accessed and configured the very first time. So by default this user is a super user and should be removed so that a user cannot assume the admin users creds.
### UDS Realm
[Section titled “UDS Realm”](#uds-realm)
1. Configure the SAML Identity Provider for Azure
1. Select `Identity Providers` tab from *left side nav bar* under *Manage*
2. Select `SAML v2.0` option from *middle of page* under `User-defined`
1. Should be on a new page called `Add SAML provider` now
2. Change the `Alias` field to `azure-saml`
3. Change the `Display name` field to `Azure SSO`
4. Get the `Service provider entity ID` from the Entra portal:
1. Entra - App Registrations
2. Select Application from list for master realm
3. Copy the `Application ID URI` and copy that the `Service provider entity ID` in the Keycloak Identity Provider creation
5. Get the `SAML entity descriptor` from the Entra portal:
1. Entra - App Registrataions
2. Select Application from list for master realm
3. Select the `Endpoints` tab from *top nav bar*
4. Copy the `Federation metadata document` endpoint over to the `SAML entity descriptor` in the Keycloak Identity Provider creation, make sure that it gets the green checkmark
6. Select `Add` button, should now see an Azure SSO page that has been auto populated
7. Toggle `Backchannel logout` to `On` under `SAML Settings`
8. Toggle `Trust Email` to `On` under `Advanced settings`
9. Change the `First login flow override` under `Advanced settings` to be `first broker login`
10. Select `Save`
3. Select `Mappers` tab from *top nav bar*
1. Select `Add mapper`, should now be on `Add Identity Provider Mapper` page
1. Change `Name` field to `Username Mapper`
2. Change `Sync mode override` field to `Force`
3. Change `Mapper type` field to `Attribute Importer`
4. Change `Attribute Name` field to `http://schemas.xmlsoap.org/ws/2005/05/identity/claims/emailaddress`
5. Change `User Attribute Name` in the dropdown field to `username`
6. Select `Save` and navigate back to `Provider details` via the breadcrumbs at *top of page*
2. Select the `Add mapper`
1. Change `Name` field to `First Name Mapper`
2. Change `Sync mode override` field to `Force`
3. Change `Mapper type` field to `Attribute Importer`
4. Change `Attribute Name` field to `http://schemas.xmlsoap.org/ws/2005/05/identity/claims/givenname`
5. Change `User Attribute Name` in the dropdown field to `firstName`
6. Select `Save` and navigate back to `Provider details` via the breadcrumbs at *top of page*
3. Select the `Add mapper`
1. Change `Name` field to `Last Name Mapper`
2. Change `Sync mode override` field to `Force`
3. Change `Mapper type` field to `Attribute Importer`
4. Change `Attribute Name` field to `http://schemas.xmlsoap.org/ws/2005/05/identity/claims/surname`
5. Change `User Attribute Name` in the dropdown field to `lastName`
6. Select `Save` and navigate back to `Provider details` via the breadcrumbs at *top of page*
4. Select the `Add mapper`
1. Change `Name` field to `Email Mapper`
2. Change `Sync mode override` field to `Force`
3. Change `Mapper type` field to `Attribute Importer`
4. Change `Attribute Name` field to `http://schemas.xmlsoap.org/ws/2005/05/identity/claims/emailaddress`
5. Change `User Attribute Name` in the dropdown field to `email`
6. Select `Save` and navigate back to `Provider details` via the breadcrumbs at *top of page*
5. Select the `Add mapper`
1. Change `Name` field to `Admin Group Mapper`
2. Change `Sync mode override` field to `Force`
3. Change `Mapper type` field to `Advanced Attribute to Group`
4. Select `Add Attributes` from *middle of page*
5. Enter key `http://schemas.microsoft.com/ws/2008/06/identity/claims/groups` and value is in the Entra `Manage Groups`, Pick the admin group and copy the Group ID into the value field
6. Select `Select group` button
7. Select `/UDS Core/Admin` from the pop up window and click `Select`
8. Select `Save` and navigate back to `Provider details` via the breadcrumbs at *top of page*
6. Select the `Add mapper`
1. Change `Name` field to `Auditor Group Mapper`
2. Change `Sync mode override` field to `Force`
3. Change `Mapper type` field to `Advanced Attribute to Group`
4. Select `Add Attributes` from *middle of page*
5. Enter key `http://schemas.microsoft.com/ws/2008/06/identity/claims/groups` and value is in the Entra `Manage Groups`, Pick the auditor group and copy the Group ID into the value field
6. Select `Select group` button
7. Select `/UDS Core/Auditor` from the pop up window and click `Select`
8. Select `Save` and navigate back to `Provider details` via the breadcrumbs at *top of page*
## Testing
[Section titled “Testing”](#testing)
1. Navigate to `sso.< domain >`
2. Select the `Azure SSO`
3. Go through Entra Login
4. Should be able to access Keycloak Account UI
## References
[Section titled “References”](#references)
* [Quickstart: Register an application with the Microsoft identity platform](https://learn.microsoft.com/en-us/entra/identity-platform/quickstart-register-app?tabs=certificate)
* [Enable single sign-on for an enterprise application](https://learn.microsoft.com/en-us/entra/identity/enterprise-apps/add-application-portal-setup-sso)
-----
# Google IdP
UDS Core ships with a templated Google SAML IDP in our [realm.json](https://github.com/defenseunicorns/uds-identity-config/blob/main/src/realm.json):
```yaml
"identityProviders": [
{
"alias": "saml",
"displayName": "Google SSO",
"internalId": "123",
"providerId": "saml",
"enabled": "${REALM_GOOGLE_IDP_ENABLED:false}",
"updateProfileFirstLoginMode": "on",
"trustEmail": true,
"storeToken": false,
"addReadTokenRoleOnCreate": false,
"authenticateByDefault": false,
"linkOnly": false,
"postBrokerLoginFlowAlias": "Group Protection Authorization",
"config": {
"postBindingLogout": "false",
"postBindingResponse": "true",
"backchannelSupported": "false",
"idpEntityId": "https://accounts.google.com/o/saml2?idpid=${REALM_GOOGLE_IDP_ID}",
"loginHint": "false",
"allowCreate": "true",
"enabledFromMetadata": "true",
"singleSignOnServiceUrl": "https://accounts.google.com/o/saml2/idp?idpid=${REALM_GOOGLE_IDP_ID}",
"wantAuthnRequestsSigned": "false",
"allowedClockSkew": "0",
"validateSignature": "true",
"signingCertificate": "${REALM_GOOGLE_IDP_SIGNING_CERT}",
"nameIDPolicyFormat": "${REALM_GOOGLE_IDP_NAME_ID_FORMAT}",
"entityId": "${REALM_GOOGLE_IDP_CORE_ENTITY_ID}",
"signSpMetadata": "false",
"wantAssertionsEncrypted": "false",
"sendClientIdOnLogout": "false",
"wantAssertionsSigned": "false",
"sendIdTokenOnLogout": "true",
"postBindingAuthnRequest": "true",
"forceAuthn": "false",
"attributeConsumingServiceIndex": "0",
"addExtensionsElementWithKeyInfo": "false",
"principalType": "Subject NameID",
"syncMode": "FORCE"
}
}
],
```
In addition to the custom realm.json for the Google IDP, there is also custom `identityProviderMappers`:
```yaml
"identityProviderMappers": [
{
"id": "24c62f1a-9da4-4758-bc97-3310e04ea73b",
"name": "Email Mapper",
"identityProviderAlias": "saml",
"identityProviderMapper": "saml-user-attribute-idp-mapper",
"config": {
"syncMode": "INHERIT",
"user.attribute": "email",
"attribute.friendly.name": "email",
"attribute.name.format": "ATTRIBUTE_FORMAT_BASIC",
"attribute.name": "email"
}
},
{
"id": "ae4f9a94-5e70-4eb2-be9f-752b7401f98e",
"name": "Admin Group Mapper",
"identityProviderAlias": "saml",
"identityProviderMapper": "saml-advanced-group-idp-mapper",
"config": {
"syncMode": "INHERIT",
"attributes": "[{\"key\":\"groups\",\"value\":\"${REALM_GOOGLE_IDP_ADMIN_GROUP}\"}]",
"group": "/UDS Core/Admin"
}
},
{
"id": "ea435551-17dc-4096-8a26-e4585b48dbfa",
"name": "Auditor Group Mapper",
"identityProviderAlias": "saml",
"identityProviderMapper": "saml-advanced-group-idp-mapper",
"config": {
"syncMode": "INHERIT",
"attributes": "[{\"key\":\"groups\",\"value\":\"${REALM_GOOGLE_IDP_AUDITOR_GROUP}\"}]",
"group": "/UDS Core/Auditor"
}
},
{
"id": "9492c99f-6d42-4127-9b29-4230b69f17b0",
"name": "firstName Mapper",
"identityProviderAlias": "saml",
"identityProviderMapper": "saml-user-attribute-idp-mapper",
"config": {
"syncMode": "INHERIT",
"user.attribute": "firstName",
"attribute.name.format": "ATTRIBUTE_FORMAT_BASIC",
"attribute.name": "firstName"
}
},
{
"id": "affcb9cd-e27d-459f-8d69-c2b16ba5e5f7",
"name": "lastName Mapper",
"identityProviderAlias": "saml",
"identityProviderMapper": "saml-user-attribute-idp-mapper",
"config": {
"syncMode": "INHERIT",
"user.attribute": "lastName",
"attribute.name.format": "ATTRIBUTE_FORMAT_BASIC",
"attribute.name": "lastName"
}
}
],
```
Documentation to configure the `realmInitEnv` values in [uds-identity-config](https://uds.defenseunicorns.com/reference/uds-core/idam/customization/#customizing-realm).
Alternatively, the `realmInitEnv` can be configured via bundle overrides like in the UDS Core [k3d-standard-bundle](https://github.com/defenseunicorns/uds-core/blob/main/bundles/k3d-standard/uds-bundle.yaml):
```yaml
values:
- path: realmInitEnv
value:
GOOGLE_IDP_ENABLED: true
GOOGLE_IDP_ID: "123"
GOOGLE_IDP_SIGNING_CERT: "MIID..."
GOOGLE_IDP_NAME_ID_FORMAT: "urn:oasis:names:tc:SAML:1.1:nameid-format:unspecified"
GOOGLE_IDP_CORE_ENTITY_ID: "https://sso.uds.dev/realms/uds"
GOOGLE_IDP_ADMIN_GROUP: "uds-core-dev-admin"
GOOGLE_IDP_AUDITOR_GROUP: "uds-core-dev-auditor"
```
Configuring your own IDP can be achieved via:
* Custom uds-identity-config with a templated realm.json
* Keycloak Admin UI and click ops
* Custom realm.json for direct import in Keycloak
## References
[Section titled “References”](#references)
* [Google Cloud’s Keycloak integration documentation](https://cloud.google.com/architecture/identity/keycloak-single-sign-on)
-----
# Overview
UDS Core utilizes [Keycloak](https://www.keycloak.org/) to simplify identity brokering, enabling seamless integration with external identity providers through industry-standard protocols such as SAML, OAuth 2.0, and OpenID Connect (OIDC). This functionality allows users to authenticate using their existing credentials from third-party services.
The identity brokering process by automating provider configuration, managing dependencies, and supporting advanced customization options. For more details, refer to the [Identity Brokering documentation](https://www.keycloak.org/docs/latest/server_admin/index.html#_identity_broker).
## Identity Providers Contents
[Section titled “Identity Providers Contents”](#identity-providers-contents)
1. [Azure Entra ID](/reference/configuration/single-sign-on/identity-providers/azure-idp/)
2. [Google IdP](/reference/configuration/single-sign-on/identity-providers/google-idp/)
-----
# Keycloak Session Management
## Limiting the Number of Concurrent Sessions
[Section titled “Limiting the Number of Concurrent Sessions”](#limiting-the-number-of-concurrent-sessions)
To support operational controls around concurrent usage and to mitigate login storms, UDS Core exposes two settings:
* SSO\_SESSION\_MAX\_PER\_USER is provided via Helm values under realmInitEnv and applied during realm configuration.
* The in-flight logins limit is configured via realmConfig.maxInFlightLoginsPerUser and passed to Keycloak as a startup argument.
* `SSO_SESSION_MAX_PER_USER`: Maximum number of concurrent active sessions per user.
* Default: 0 (unlimited, the same as the default in Keycloak)
* `realmConfig.maxInFlightLoginsPerUser`: Maximum number of in-flight (ongoing) login attempts per user.
* Default: 300 (the same as the default in Keycloak)
Below is an example of how to set these values using the bundle overrides:
```yaml
overrides:
keycloak:
keycloak:
values:
- path: realmInitEnv
value:
SSO_SESSION_MAX_PER_USER: "3"
- path: realmConfig
value:
maxInFlightLoginsPerUser: 1
```
## Understanding Keycloak Session Idle Timeouts
[Section titled “Understanding Keycloak Session Idle Timeouts”](#understanding-keycloak-session-idle-timeouts)
Keycloak has two session idle timeouts: the realm session idle timeout and the client session idle timeout. These settings control session expiration differently, and their interaction determines how long a user remains authenticated across different clients.
### Setting Session Timeouts from UI
[Section titled “Setting Session Timeouts from UI”](#setting-session-timeouts-from-ui)
Realm Session Timeouts can be configured from the Realm Settings -> Sessions tab.
Client Session Timeouts can be configured universally from the Realm Settings -> Sessions tab. Or individual clients can be configured from Clients -> client-name -> Advanced -> Advanced Settings.
***
## Scenario 1: Client Session Idle Timeout is Shorter than Realm Session Idle Timeout
[Section titled “Scenario 1: Client Session Idle Timeout is Shorter than Realm Session Idle Timeout”](#scenario-1-client-session-idle-timeout-is-shorter-than-realm-session-idle-timeout)
* SSO Session Idle (Realm Session Idle Timeout) = 1 hour
* Client Session Idle = 5 minutes
* User signs into Client.
* User is inactive for 7 minutes, then reactivates Client.
* For idle timeouts, a two-minute window of time exists that the session is active. For example, when you have the timeout set to 30 minutes, it will be 32 minutes before the session expires. See docs:
### What Happens?
[Section titled “What Happens?”](#what-happens)
1. At 5 minutes of inactivity → Client’s token expires.
* The access token is now invalid, meaning it can no longer be used for authentication.
* The realm session is still active (since 1 hour hasn’t passed).
* If Client makes an API request, it will get a 401 Unauthorized error.
2. At 6 minutes, the user reactivates Client.
* Since the client session timeout controls the refresh token expiration, the refresh token has also expired.
* However, since the realm session is still active, the client/application can initiate a new authentication request to obtain fresh tokens.
* For browser-based applications that maintain an HTTP session and Keycloak session cookies, this process occurs silently without prompting the user.
* However, for applications using only bearer tokens, once the refresh token expires, a new authentication flow is required, meaning the user must actively reauthenticate to obtain new tokens.
***
## Scenario 2: Realm Session Idle Timeout is Shorter than Client Session Idle Timeout
[Section titled “Scenario 2: Realm Session Idle Timeout is Shorter than Client Session Idle Timeout”](#scenario-2-realm-session-idle-timeout-is-shorter-than-client-session-idle-timeout)
Caution
This is not a recommended configuration. The Client Session Idle timeout should be shorter than the SSO Session Idle (the realm setting). See Official Docs: .
* Realm Session Idle Timeout = 10 minutes
* Client Session Idle Timeout = 30 minutes
* User signs into Client.
* User is inactive for 15 minutes, then reactivates Client.
### What Happens?
[Section titled “What Happens?”](#what-happens-1)
1. At 10 minutes of inactivity → Realm session expires.
* The user’s overall session ends, meaning they are logged out of all clients.
* Any refresh tokens issued for the session become invalid.
* If Client makes an API request, it will get a 401 Unauthorized error.
2. At 15 minutes, the user reactivates Client.
* Since the realm session expired at 10 minutes, the user must reauthenticate.
* Even though the client session idle timeout was longer, it does not override the realm session expiration, which takes precedence.
***
## How Refresh Token Expiration Works
[Section titled “How Refresh Token Expiration Works”](#how-refresh-token-expiration-works)
* When an access token expires (default 5 minutes), the client can request a new access token using the refresh token.
* The refresh token is valid until:
1. It reaches its idle timeout (e.g., if the user is inactive for too long).
2. It reaches its max lifespan.
3. The realm session expires.
4. The user logs out.
***
## Additional Considerations
[Section titled “Additional Considerations”](#additional-considerations)
* Client session idle timeout only affects token expiration, not the realm session itself.
* If multiple clients are accessed under the same session, different client timeouts can cause token expiration at different intervals.
* A realm session timeout takes precedence, meaning once the realm session expires, all client sessions are forcibly logged out.
* Realm settings only take priority if the Clients set “Inherits from Realm settings” in the Advanced settings. Otherwise, the Client settings will take priority.
* Offline sessions allow longer session persistence beyond normal idle timeouts if configured properly.
***
## Key Takeaways
[Section titled “Key Takeaways”](#key-takeaways)
* Client session idle timeouts only affect token expiration, not the realm session itself.
* The realm session remains active for its full duration unless explicitly logged out.
* When a client session expires, it does NOT mean the user must log in again immediately.
* If a refresh token is valid, it can still obtain a new access token.
* If the refresh token is also expired, the user must reauthenticate.
* Realm-wide session settings take precedence over client settings, meaning once the realm session expires, the user is logged out from all clients.
-----
# L7 Load Balancer
UDS Core Gateways can be used with L7 Load Balancers (commonly referred as Application Load Balancers or Application Gateways) connected to one of both Istio Gateways. This allows you to leverage the ALB’s capabilities for routing, SSL termination, and other features while still using Istio for service mesh functionality. Such setups are highly dependent on the Cloud Provider configuration but usually require:
* Disabling HTTPS redirects in Istio gateways.
* Setting the number of trusted proxies to one, with the ALB acting as the trusted proxy.
* Configuring Keycloak to accept the client certificate from the L7 Load Balancer.
The most common setup has been covered in the [Using an L7 Load Balancers with UDS Core Gateways](/reference/configuration/service-mesh/ingress/) part of the documentation.
-----
# Notifications and Alerts
## Keycloak event logging
[Section titled “Keycloak event logging”](#keycloak-event-logging)
UDS Core provides built-in logging for user activity events and administrative events for the `uds` Realm.
A typical user activity event looks like the following:
```json
{
"timestamp": "2025-09-25T09:16:27.360000000Z",
"loggerName": "uds.keycloak.plugin.eventListeners.JSONLogEventListenerProvider",
"eventType": "USER",
"id": "00435000-25cf-4fda-a8ef-a53d9ebab77f",
"time": 1758791787360,
"type": "REFRESH_TOKEN",
"realmId": "1e78c15a-ac93-4014-aa2f-83bbe7ec0121",
"realmName": "uds",
"clientId": "test-client",
"userId": "cdf56084-83c7-46fa-ae4a-1a2da352071e",
"sessionId": "c3be023a-8e3d-4d84-a745-413ff3565f06",
"ipAddress": "127.0.0.1",
"error": null,
"details": {
"token_id": "onltrt:bbe5a8e9-6086-445b-2833-3245d4041557",
"grant_type": "refresh_token",
"refresh_token_type": "Refresh",
"access_token_expiration_time": "60",
"updated_refresh_token_id": "49344dc5-66bc-c1d3-0d9f-3b282c70ff54",
"scope": "openid email profile",
"age_of_refresh_token": "1689",
"refresh_token_id": "d3319e43-be42-fc6a-5da4-f43966277c6e",
"client_auth_method": "client-secret"
}
}
```
Example administrative event may look like this:
```json
{
"timestamp": "2025-09-25T08:47:33.392000000Z",
"loggerName": "uds.keycloak.plugin.eventListeners.JSONLogEventListenerProvider",
"eventType": "ADMIN",
"id": "766d8e4b-41ce-4ec6-bef9-d1573cc9c720",
"time": 1758790053392,
"realmId": "uds",
"realmName": "uds",
"authDetails": {
"realmId": "1e78c15a-ac93-4014-aa2f-83bbe7ec0121",
"realmName": "master",
"clientId": "38f60965-fc2c-4471-8351-02704a780945",
"userId": "cdf56084-83c7-46fa-ae4a-1a2da352071e",
"ipAddress": "127.0.0.1"
},
"resourceType": "CLIENT",
"operationType": "UPDATE",
"resourcePath": "clients/8e5ed10f-fde2-4ee3-990f-b3e9bf7194c6",
"representation": "{\"id\":\"8e5ed10f-fde2-4ee3-990f-b3e9bf7194c6\",\"clientId\":\"test\",\"name\":\"\",\"description\":\"\",\"rootUrl\":\"\",\"adminUrl\":\"\",\"baseUrl\":\"\",\"surrogateAuthRequired\":false,\"enabled\":true,\"alwaysDisplayInConsole\":false,\"clientAuthenticatorType\":\"client-jwt\",\"secret\":\"**********\",\"redirectUris\":[\"/*\"],\"webOrigins\":[\"/*\"],\"notBefore\":0,\"bearerOnly\":false,\"consentRequired\":false,\"standardFlowEnabled\":true,\"implicitFlowEnabled\":false,\"directAccessGrantsEnabled\":false,\"serviceAccountsEnabled\":false,\"authorizationServicesEnabled\":false,\"publicClient\":false,\"frontchannelLogout\":true,\"protocol\":\"openid-connect\",\"attributes\":{\"realm_client\":\"false\",\"oidc.ciba.grant.enabled\":\"false\",\"client.secret.creation.time\":\"1758789997\",\"backchannel.logout.session.required\":\"true\",\"standard.token.exchange.enabled\":\"false\",\"oauth2.device.authorization.grant.enabled\":\"false\",\"backchannel.logout.revoke.offline.tokens\":\"false\",\"pkce.code.challenge.method\":\"\",\"login_theme\":\"\",\"display.on.consent.screen\":\"false\",\"consent.screen.text\":\"\",\"frontchannel.logout.url\":\"\",\"frontchannel.logout.session.required\":\"true\",\"use.jwks.url\":\"false\",\"token.endpoint.auth.signing.alg\":\"\",\"token.endpoint.auth.signing.max.exp\":\"\"},\"authenticationFlowBindingOverrides\":{},\"fullScopeAllowed\":true,\"nodeReRegistrationTimeout\":-1,\"defaultClientScopes\":[\"web-origins\",\"acr\",\"profile\",\"roles\",\"email\"],\"optionalClientScopes\":[\"address\",\"phone\",\"offline_access\",\"bare-groups\",\"microprofile-jwt\"],\"access\":{\"view\":true,\"configure\":true,\"manage\":true}}",
"error": null,
"details": null,
"resourceTypeAsString": "CLIENT"
}
```
### Master realm event logging
[Section titled “Master realm event logging”](#master-realm-event-logging)
Event logging is not enabled in the `master` realm by default because this realm may not exist. To enable it:
1. In the Keycloak Admin Console, select the `master` realm.
2. Go to Realm Settings > Events.
3. Add `jsonlog-event-listener` to Event Listeners.
4. Click Save.
-----
# Overview
UDS Core leverages [Keycloak](https://www.keycloak.org/) and [Authservice](https://github.com/istio-ecosystem/authservice) to implify authentication and authorization for applications. These tools enable seamless user authentication experiences while supporting various OAuth 2.0 and OpenID Connect (OIDC) flows.
UDS Core automates Keycloak Client configuration, secret management, and advanced templating, offering scalable support for a wide range of applications and authentication scenarios. The chart below illustrates the basic logical connection between these concepts:

When a new UDS Package CR with the `sso` configuration gets deployed, the UDS Operator creates a new Keycloak Client. This process happens using the [Keycloak Admin endpoint](https://www.keycloak.org/docs-api/latest/rest-api/index.html#_clients) for managing Clients. The latter mode reads the Client Secrets from the `keycloak-client-secrets` Kubernetes Secret deployed in `keycloak` namespace. This Secret is managed automatically by the UDS Operator. Once the Keycloak Client is ready, and the `enableAuthserviceSelector` is defined in the spec, the UDS Operator deploys Istio [Request Authentication](https://istio.io/latest/docs/reference/config/security/request_authentication/) and [AuthorizationPolicy](https://istio.io/latest/docs/reference/config/security/authorization-policy/) for both JWT and Request Headers. Both actions combined, enables seamless and transparent application authentication and authorization capabilities.
Note
Keycloak provides comprehensive monitoring through Grafana dashboards. For more information, see the [Keycloak Observability Documentation](https://www.keycloak.org/observability/grafana-dashboards).
Key dashboards included:
* **Keycloak Capacity Planning Dashboard**
* Focuses on authentication request metrics and events
* Tracks authentication success/failure rates
* Monitors token issuance and validation metrics
* Helps with understanding authentication workload patterns
* **Keycloak Troubleshooting Dashboard**
* Comprehensive cluster health monitoring
* Tracks JVM metrics (memory, GC, threads)
* Monitors database connection pool and performance
* Provides system resource utilization metrics
* Helps identify and diagnose cluster-wide issues
## Rotating the UDS Operator Client Secret
[Section titled “Rotating the UDS Operator Client Secret”](#rotating-the-uds-operator-client-secret)
The UDS Operator uses a dedicated Client in Keycloak. In some cases, the Client Secret needs to be rotated. In order to do so, you need to manually modify the `keycloak-client-secrets` Kubernetes Secret in the `keycloak` namespace and delete the `uds-operator` key. The UDS Operator will automatically re-create it.
## Secret Pod Reload for SSO Clients
[Section titled “Secret Pod Reload for SSO Clients”](#secret-pod-reload-for-sso-clients)
When SSO client secrets are updated or rotated, applications using these secrets may need to be restarted to pick up the new values. UDS Core provides a Secret Pod Reload mechanism that detects changes to secrets and restarts the relevant pods or deployments.
To enable this functionality for SSO client secrets, you can add the `uds.dev/pod-reload: "true"` label to the secret via the `secretLabels` field in your Package CR. When a secret with this label is updated, UDS Core will either:
1. Restart pods matching the selector specified in the `uds.dev/pod-reload-selector` annotation (which can be added via the `secretAnnotations` field), or
2. Automatically discover and restart pods that are consuming the secret through volume mounts, environment variables, or projected volumes
For more details on configuring Secret Pod Reload, see the [Secret Pod Reload documentation](/reference/deployment/secret-pod-reload) or the [Secret Templating documentation](/reference/configuration/single-sign-on/sso-templating#secret-pod-reload).
## User Groups
[Section titled “User Groups”](#user-groups)
UDS Core deploys Keycloak which has some preconfigured groups that applications inherit from SSO and IDP configurations. More details might be found in the [Package CR](/reference/configuration/custom-resources/packages-v1alpha1-cr/#groups) spec.
### Applications
[Section titled “Applications”](#applications)
#### Grafana
[Section titled “Grafana”](#grafana)
Grafana [maps the groups](https://github.com/defenseunicorns/uds-core/blob/49cb11a058a9209cee7019fa552b8c0b2ef73368/src/grafana/values/values.yaml#L37) from Keycloak to its internal `Admin` and `Viewer` groups.
| Keycloak Group | Mapped Grafana Group |
| -------------- | -------------------- |
| `Admin` | `Admin` |
| `Auditor` | `Viewer` |
If a user doesn’t belong to either of these Keycloak groups the user will be unauthorized when accessing Grafana.
##### Overriding Grafana Groups
[Section titled “Overriding Grafana Groups”](#overriding-grafana-groups)
To override the Keycloak -> Grafana group mapping you can provide the following bundle overrides:
```yaml
grafana:
uds-grafana-config:
values:
# Allows access to Keycloak Client
- path: sso.groups
value:
- KEYCLOAK_ADMIN_GROUP # name of an existing Keycloak group
- KEYCLOAK_AUDITOR_GROUP # name of an existing Keycloak group
grafana:
values:
# Sets the role mappings in grafana
- path: grafana\.ini.role_attribute_path
value: "contains(groups[], 'KEYCLOAK_ADMIN_GROUP') && 'Admin' || contains(groups[], 'KEYCLOAK_AUDITOR_GROUP') && 'Viewer' || 'Unauthorized'"
```
#### Neuvector
[Section titled “Neuvector”](#neuvector)
Neuvector [maps the groups](https://github.com/defenseunicorns/uds-core/blob/main/src/neuvector/chart/templates/uds-package.yaml#L31-L35) from Keycloak to its internal `admin` and `reader` groups.
| Keycloak Group | Mapped Neuvector Group |
| -------------- | ---------------------- |
| `Admin` | `admin` |
| `Auditor` | `reader` |
##### Overriding Neuvector Groups
[Section titled “Overriding Neuvector Groups”](#overriding-neuvector-groups)
To override the Keycloak -> Neuvector group mapping you can provide the following bundle overrides:
```yaml
neuvector:
uds-neuvector-config:
values:
# Sets this as an allowed group for the Keycloak Client and maps to Neuvector admin group
- path: sso.adminGroups
value:
- KEYCLOAK_ADMIN_GROUP # name of an existing Keycloak group
# Sets this as an allowed group for the Keycloak Client and maps to Neuvector reader group
- path: sso.readerGroups
value:
- KEYCLOAK_AUDITOR_GROUP # name of an existing Keycloak group
```
#### Keycloak
[Section titled “Keycloak”](#keycloak)
All groups are under the `UDS Core` parent group. Frequently a group will be referred to as `UDS Core/Admin` or `UDS Core/Auditor`. In the Keycloak UI this requires an additional click to get down to the sub groups.
## Single Sign-On Contents
[Section titled “Single Sign-On Contents”](#single-sign-on-contents)
1. [Authservice Protection](/reference/configuration/single-sign-on/auth-service/)
2. [Device Flow Clients](/reference/configuration/single-sign-on/device-flow/)
3. [Group Based Authorization](/reference/configuration/single-sign-on/group-based-auth/)
4. [Keycloak Session Management](/reference/configuration/single-sign-on/keycloak-session-management/)
5. [L7 Load Balancer](/reference/configuration/single-sign-on/l7-load-balancer/)
6. [Notifications and Alerts](/reference/configuration/single-sign-on/notifications-and-alerts/)
7. [Recovering lost Keycloak credentials](/reference/configuration/single-sign-on/recoving-lost-credentials/)
8. [Service Account Roles Clients](/reference/configuration/single-sign-on/service-account/)
9. [Client Attribute Validation](/reference/configuration/single-sign-on/sso-client-validation/)
10. [Secret Templating](/reference/configuration/single-sign-on/sso-templating/)
11. [Trusted Certificate Authority](/reference/configuration/single-sign-on/trusted-ca/)
-----
# Recovering lost Keycloak credentials
This procedure describes how to recover lost Keycloak credentials for UDS Core. It leverages the [Admin bootstrap and recovery](https://www.keycloak.org/server/bootstrap-admin-recovery) feature of Keycloak.
Caution
This procedure requires at least 1.5G of memory allocated to the Keycloak container. You may need to temporarily increase the memory limit before starting the recovery process. If the `JAVA_OPTS_KC_HEAP` environment variable is used, ensure the -XX:MaxRAM setting corresponds to the container memory limits. More information might be found at Keycloak’s part of the [UDS Prerequisites manual](/reference/uds-core/prerequisites/).
Caution
If your account has been locked out after the FIPS migration, you may want to move back to non-FIPS mode and follow the [Upgrading Identity Config Versions](https://uds.defenseunicorns.com/reference/uds-core/idam/upgrading-versions/) guide. This way you won’t need to recover your administrator credentials.
The procedure involves creating a new user with administrator privileges, logging into that user, recovering the lost credentials and deleting it. First, create a new temporary admin user called `temp-admin` with a strong password:
```bash
uds zarf tools kubectl exec -it keycloak-0 -n keycloak -- /opt/keycloak/bin/kc.sh bootstrap-admin user
```
When prompted, enter the `temp-admin` password:
```bash
Enter username [temp-admin]:
Enter password:
Enter password again:
```
The command will exit with an error indicating that it can’t bootstrap the Keycloak server (this is normal as there’s already a Keycloak server running in this container). Ensure this line is present in the output:
```bash
INFO [org.keycloak.services] (main) KC-SERVICES0077: Created temporary admin user with username temp-admin
```
Navigate to and log in with the `temp-admin` user. Once logged in, reset the admin user password by navigating to the `Users` tab, selecting `admin`, going to the `Credentials` tab, and clicking on `Reset Password`. Once the `admin` password has been updated, delete the `temp-admin` user.
-----
# Service Account Roles Clients
Some applications may need to access resources / obtain OAuth tokens on behalf of *themselves* vice users. This may be needed to allow API access to Authservice protected applications (outside of a web browser). This is commonly used in machine-to-machine authentication for automated processes. This type of grant in OAuth 2.0 is known as the [Client Credentials Grant](https://oauth.net/2/grant-types/client-credentials/) and is supported in a UDS Package with the following configuration:
```yaml
apiVersion: uds.dev/v1alpha1
kind: Package
metadata:
name: client-cred
namespace: argo
spec:
sso:
- name: httpbin-api-client
clientId: httpbin-api-client
standardFlowEnabled: false
serviceAccountsEnabled: true
# By default, Keycloak will not set the audience `aud` claim for service account access token JWTs.
# You can optionally add a protocolMapper to set the audience.
# If you map the audience to the same client used for authservice, you can enable access to authservice protected apps with a service account JWT.
protocolMappers:
- name: audience
protocol: "openid-connect"
protocolMapper: "oidc-audience-mapper"
config:
included.client.audience: "uds-core-httpbin" # Set this to match the app's authservice client id
access.token.claim: "true"
introspection.token.claim: "true"
id.token.claim: "false"
lightweight.claim: "false"
userinfo.token.claim: "false"
```
Setting `serviceAccountsEnabled: true` requires `standardFlowEnabled: false` and is incompatible with `publicClient: true`.
If needed, multiple clients can be added to the same application: an AuthService client, a device flow client, and as many service account clients as required.
A keycloak service account JWT can be distinguished by a username prefix of `service-account-` and a new claim called `client_id`. Note that the `aud` field is not set by default, hence the mapper in the example.
-----
# Client Attribute Validation
The `sso.attributes` part of the [UDS Package CR](/reference/configuration/custom-resources/packages-v1alpha1-cr/#sso) supports a subset of the Keycloak attributes for clients (but not support all of them). The currently supported attributes are:
* oidc.ciba.grant.enabled
* backchannel.logout.session.required
* backchannel.logout.revoke.offline.tokens
* post.logout.redirect.uris
* oauth2.device.authorization.grant.enabled
* pkce.code.challenge.method
* client.session.idle.timeout
* client.session.max.lifespan
* access.token.lifespan
* saml.assertion.signature
* saml.client.signature
* saml\_assertion\_consumer\_url\_post
* saml\_assertion\_consumer\_url\_redirect
* saml\_single\_logout\_service\_url\_post
* saml\_single\_logout\_service\_url\_redirect
* saml\_idp\_initiated\_sso\_url\_name
* use.refresh.tokens
* saml.encrypt
* saml\_name\_id\_format
* saml.signing.certificate
-----
# Secret Templating
By default, UDS generates a secret for the Single Sign-On (SSO) client that encapsulates all client contents as an opaque secret. In this setup, each key within the secret corresponds to its own environment variable or file, based on the method used to mount the secret. If customization of the secret rendering is required, basic templating can be achieved using the `secretTemplate` property. Below are examples showing this functionality. To see how templating works, please see the [Regex website](https://regex101.com/r/e41Dsk/3).
```yaml
apiVersion: uds.dev/v1alpha1
kind: Package
metadata:
name: grafana
namespace: grafana
spec:
sso:
- name: My Keycloak Client
clientId: demo-client
redirectUris:
- "https://demo.uds.dev/login"
# Customize the name of the generated secret
secretName: my-cool-auth-client
secretTemplate:
# Raw text examples
rawTextClientId: "clientField(clientId)"
rawTextClientSecret: "clientField(secret)"
# JSON example
auth.json: |
{
"client_id": "clientField(clientId)",
"client_secret": "clientField(secret)",
"defaultScopes": clientField(defaultClientScopes).json(),
"redirect_uri": "clientField(redirectUris)[0]",
"bearerOnly": clientField(bearerOnly),
}
# Properties example
auth.properties: |
client-id=clientField(clientId)
client-secret=clientField(secret)
default-scopes=clientField(defaultClientScopes)
redirect-uri=clientField(redirectUris)[0]
# YAML example (uses JSON for the defaultScopes array)
auth.yaml: |
client_id: clientField(clientId)
client_secret: clientField(secret)
default_scopes: clientField(defaultClientScopes).json()
redirect_uri: clientField(redirectUris)[0]
bearer_only: clientField(bearerOnly)
```
## Secret Pod Reload
[Section titled “Secret Pod Reload”](#secret-pod-reload)
UDS Core provides a Secret Pod Reload mechanism that can restart pods or deployments when secrets are updated. This is useful for SSO client secrets when they need to be updated.
To enable automatic pod reload when a secret changes, add the `uds.dev/pod-reload: "true"` label to your secret.
### Example SSO Secret with Pod Reload
[Section titled “Example SSO Secret with Pod Reload”](#example-sso-secret-with-pod-reload)
```yaml
apiVersion: uds.dev/v1alpha1
kind: Package
metadata:
name: my-app
namespace: my-namespace
spec:
sso:
- name: My App
clientId: my-app-client
redirectUris:
- "https://my-app.example.com/callback"
secretName: my-app-secret
# To enable pod reload for this secret, add these labels and annotations
secretLabels:
uds.dev/pod-reload: "true"
secretAnnotations:
uds.dev/pod-reload-selector: 'app=my-app' # Target a specific pod(s) to reload
secretTemplate:
config.json: |
{
"client_id": "clientField(clientId)",
"client_secret": "clientField(secret)"
}
```
When this secret is updated (for example, when rotating the client secret), all pods with the label `app=my-app` will be automatically restarted to pick up the new secret value.
-----
# Trusted Certificate Authority
Authservice can be configured with additional trusted certificate bundle in cases where UDS Core ingress gateways are deployed with private PKI.
To configure, set `UDS_CA_CERT` as an environment variable with a Base64 encoded PEM formatted CA bundle that can be used to verify the certificates of the tenant gateway.
Alternatively you can specify the `CA_CERT` variable in your `uds-config.yaml`:
```yaml
variables:
core:
CA_CERT:
```
See [configuring Istio Ingress](https://uds.defenseunicorns.com/reference/configuration/ingress/#configure-domain-name-and-tls-for-istio-gateways) for the relevant documentation on configuring ingress certificates.
-----
# Configuring Cluster Level Data
To set and control certain cluster level configurations, UDS uses a combination of a [UDS ClusterConfig](/reference/configuration/custom-resources/clusterconfig-v1alpha1-cr) and Kubernetes secret, both deployed as templates from the `uds-operator-config` chart.
## Values
[Section titled “Values”](#values)
```yaml
operator:
AUTHSERVICE_REDIS_URI: "###ZARF_VAR_AUTHSERVICE_REDIS_URI###"
cluster:
attributes:
clusterName: ""
clusterTags: []
expose:
# Domain configuration (admin defaults to `admin.UDS_DOMAIN`)
domain: "###ZARF_VAR_DOMAIN###"
adminDomain: "###ZARF_VAR_ADMIN_DOMAIN###"
caCert: "###ZARF_VAR_CA_CERT###"
policy:
allowAllNsExemptions: "###ZARF_VAR_ALLOW_ALL_NS_EXEMPTIONS###"
networking:
kubeApiCIDR: ""
kubeNodeCIDRs: []
```
## Setting Values
[Section titled “Setting Values”](#setting-values)
Some configurations, like `clusterName`, `clusterTags`, `kubeApiCIDR`, and `kubeNodeCIDRs`, can only be set by bundle overrides. All other values can be set either by bundle overrides or by setting the corresponding Zarf variable.
### Example Bundle Overrides
[Section titled “Example Bundle Overrides”](#example-bundle-overrides)
Within your bundle you can define values/variables, for example:
```yaml
packages:
- name: core
repository: ghcr.io/defenseunicorns/packages/uds/core
ref: x.x.x
overrides:
uds-operator-config:
uds-operator-config:
values:
- path: cluster.networking.kubeNodeCIDRs
value:
- 172.28.0.2/32
- 172.28.0.3/32
- 172.28.0.4/32
variables:
- name: CLUSTER_NAME
path: cluster.attributes.clusterName
```
Then for any variables you have defined (or existing zarf variables) you can override these with a `uds-config.yaml` file:
```yaml
shared:
# DOMAIN is a zarf variable that is typically shared across packages
DOMAIN: "my.domain"
variables:
core:
# CLUSTER_NAME is defined as a variable in our bundle above
CLUSTER_NAME: "my-uds-cluster"
# ALLOW_ALL_NS_EXEMPTIONS is a zarf variable for UDS Core
ALLOW_ALL_NS_EXEMPTIONS: "true"
```
Or variables can be set at deploy time via CLI args, such as `uds deploy my-uds-bundle.tar.zst --set CLUSTER_NAME="my-cluster" --confirm`
-----
# Configuring Policy Exemptions
By default policy exemptions ([UDSExemptions](https://github.com/defenseunicorns/uds-core/blob/uds-docs/src/pepr/operator/crd/generated/exemption-v1alpha1.ts)) are only allowed in a single namespace — `uds-policy-exemptions`. We recognize this is not a conventional pattern in K8s, but believe it is ideal for UDS for the following reasons:
* highlights the fact that an exemption can reduce the overall security posture of the cluster
* makes maintaining RBAC for controlling exemptions more straightforward
* reduces the risk that an unintentional mis-configuration of RBAC allows a cluster exemption that would otherwise be denied
## Allow All Namespaces
[Section titled “Allow All Namespaces”](#allow-all-namespaces)
If you believe that the default scoping is not the right approach for your cluster, you can configure UDS-CORE at deploy time to allow exemption CRs in all namespaces.
CLI set: `zarf package deploy zarf-package-uds-core-*.zst --set ALLOW_ALL_NS_EXEMPTIONS=true`
Or via a uds bundle `uds-config.yaml` file:
```yaml
variables:
core:
ALLOW_ALL_NS_EXEMPTIONS: "true"
```
or via bundle overrides:
```yaml
packages:
- name: core
repository: ghcr.io/defenseunicorns/packages/uds/core
ref: x.x.x
overrides:
uds-operator-config:
uds-operator-config:
values:
- path: cluster.policy.allowAllNsExemptions
value: true
```
-----
# Networking Configuration
## KubeAPI Egress
[Section titled “KubeAPI Egress”](#kubeapi-egress)
The UDS operator is responsible for dynamically updating network policies that use the `remoteGenerated: KubeAPI` custom selector, in response to changes in the Kubernetes API server’s IP address. This ensures that policies remain accurate as cluster configurations evolve. However, in environments where the API server IP(s) frequently change, this behavior can lead to unnecessary overhead or instability.
To address this, the UDS operator provides an option to configure a static CIDR range. This approach eliminates the need for continuous updates by using a predefined range of IP addresses for network policies. To configure a specific CIDR range, set an override to `cluster.networking.kubeApiCIDR` in your bundle as a value or variable. For example:
```yaml
packages:
- name: uds-core
repository: ghcr.io/defenseunicorns/packages/uds/core
ref: x.x.x
overrides:
uds-operator-config:
uds-operator-config:
values:
- path: cluster.networking.kubeApiCIDR
value: "172.0.0.0/24"
```
This configuration directs the operator to use the specified CIDR range (`172.0.0.0/24` in this case) for KubeAPI network policies instead of dynamically tracking the API server’s IP(s).
When configuring a static CIDR range, it is important to make the range as restrictive as possible to limit the potential for unexpected networking access. An overly broad range could inadvertently allow egress traffic to destinations beyond the intended scope. Additionally, careful alignment with the actual IP addresses used by the Kubernetes API server is essential. A mismatch between the specified CIDR range and the cluster’s configuration can result in network policy enforcement issues or disrupted connectivity.
## KubeNodes CIDRs
[Section titled “KubeNodes CIDRs”](#kubenodes-cidrs)
The UDS operator is responsible for dynamically updating network policies that use the `remoteGenerated: KubeNodes` custom selector, in response to changes to nodes in the Kubernetes cluster. As nodes are added, updated, or removed from a cluster, the operator will ensure that policies remain accurate and include all the nodes in the cluster.
UDS operator provides an option to configure a set of static CIDR ranges in place of offering a dynamically updated list by setting an override to `cluster.networking.kubeNodeCIDRs` in your bundle as a value or variable. The value should be an array of values for the individual IP addresses, using `/32` notation. For example:
```yaml
packages:
- name: uds-core
repository: ghcr.io/defenseunicorns/packages/uds/core
ref: x.x.x
overrides:
uds-operator-config:
uds-operator-config:
values:
- path: cluster.networking.kubeNodeCIDRs
value:
- 172.28.0.2/32
- 172.28.0.3/32
- 172.28.0.4/32
```
## Additional Network Allowances
[Section titled “Additional Network Allowances”](#additional-network-allowances)
Applications deployed in UDS Core utilize [Network Policies](https://kubernetes.io/docs/concepts/services-networking/network-policies/) with a “Deny by Default” configuration to ensure network traffic is restricted to only what is necessary. Some applications in UDS Core allow for overrides to accommodate environment-specific requirements.
### Prometheus Stack
[Section titled “Prometheus Stack”](#prometheus-stack)
The Prometheus stack in UDS Core creates the necessary Network Policies (netpols) to ensure interoperability within UDS Core. However, in certain environments, you may want to allow traffic from the Prometheus stack to reach other services (potentially outside the cluster). To facilitate this, we provide a way to configure additional netpols for the Prometheus stack.
For example, you might want to allow Alertmanager to send alerts to an external service (such as a Slack or Mattermost Webhook).
To accomplish this, you can provide a bundle override as follows:
```yaml
packages:
- name: uds-core
repository: ghcr.io/defenseunicorns/packages/uds/core
ref: 0.x.x-upstream
overrides:
kube-prometheus-stack:
uds-prometheus-config:
values:
- path: additionalNetworkAllow
value:
- direction: Egress
selector:
app.kubernetes.io/name: alertmanager
remoteGenerated: Anywhere
description: "from alertmanager to anywhere"
port: 443
```
The example above allows Alertmanager to send alerts to any external destination. Alternatively, you could use the remoteNamespace key to specify another namespace within the Kubernetes cluster (i.e. Mattermost).
Reference the [spec for allow](https://uds.defenseunicorns.com/reference/configuration/custom-resources/packages-v1alpha1-cr/#allow) for all available fields.
### Vector
[Section titled “Vector”](#vector)
It may also be desired to allow Vector to send logs to an external service. To facilitate this, you can provide a bundle override as follows:
```yaml
packages:
- name: uds-core
repository: ghcr.io/defenseunicorns/packages/uds/core
ref: 0.x.x-upstream
overrides:
vector:
uds-vector-config:
values:
- path: additionalNetworkAllow
value:
- direction: Egress
selector:
app.kubernetes.io/name: vector
remoteNamespace: elastic
remoteSelector:
app.kubernetes.io/name: elastic
port: 9090
description: "Elastic Storage"
- direction: Egress
selector:
app.kubernetes.io/name: vector
remoteGenerated: Anywhere
port: 80 # or 443
description: "S3 Storage"
```
The example above allows Vector to send logs to an Elastic instance in the elastic namespace and to an S3 storage service.
Reference the [spec for allow](https://uds.defenseunicorns.com/reference/configuration/custom-resources/packages-v1alpha1-cr/#allow) for all available fields.
### Grafana
[Section titled “Grafana”](#grafana)
It may be desired to connect Grafana to additional datasources in or outside of the cluster. To facilitate this, you can provide a bundle override as follows:
```yaml
packages:
- name: uds-core
repository: ghcr.io/defenseunicorns/packages/uds/core
ref: 0.x.x-upstream
overrides:
grafana:
uds-grafana-config:
values:
- path: additionalNetworkAllow
value:
- direction: Egress
selector:
app.kubernetes.io/name: grafana
remoteNamespace: thanos
remoteSelector:
app.kubernetes.io/name: thanos
port: 9090
description: "Thanos Query"
```
The example above allows Grafana to query a remote Thanos instance in your cluster.
Reference the [spec for allow](https://uds.defenseunicorns.com/reference/configuration/custom-resources/packages-v1alpha1-cr/#allow) for all available fields.
### NeuVector
[Section titled “NeuVector”](#neuvector)
It may be desired send alerts from NeuVector to locations in or outside of the cluster. To facilitate this, you can provide a bundle override as follows:
```yaml
packages:
- name: uds-core
repository: ghcr.io/defenseunicorns/packages/uds/core
ref: 0.x.x-upstream
overrides:
neuvector:
uds-neuvector-config:
values:
- path: additionalNetworkAllow
value:
- direction: Egress
selector:
app: neuvector-manager-pod
remoteGenerated: Anywhere
description: "from neuvector to anywhere"
port: 443
```
The example above allows NeuVector to send alerts to any external destination. Alternatively, you could use the remoteNamespace key to specify another namespace within the Kubernetes cluster (i.e. Mattermost).
Reference the [spec for allow](https://uds.defenseunicorns.com/reference/configuration/custom-resources/packages-v1alpha1-cr/#allow) for all available fields.
### Keycloak
[Section titled “Keycloak”](#keycloak)
You may have a need to connect Keycloak to an external IdP or other service that the default network policies do not support. To facilitate this, you can provide a bundle override as follows:
```yaml
packages:
- name: uds-core
repository: ghcr.io/defenseunicorns/packages/uds/core
ref: 0.x.x-upstream
overrides:
keycloak:
keycloak:
values:
- path: additionalNetworkAllow
value:
- direction: Egress
selector:
app.kubernetes.io/name: keycloak
remoteCidr: 72.123.123.123
description: "IdP Connection"
port: 443
```
The example above allows Keycloak to connect to an “external IdP” at a specific remoteCidr.
Reference the [spec for allow](https://uds.defenseunicorns.com/reference/configuration/custom-resources/packages-v1alpha1-cr/#allow) for all available fields.
### Loki
[Section titled “Loki”](#loki)
You may have a need to configure Loki with egress to an additional destination, such as for [external caching](https://grafana.com/docs/loki/latest/operations/caching/) connections. To facilitate this, you can provide a bundle override as follows:
```yaml
packages:
- name: uds-core
repository: ghcr.io/defenseunicorns/packages/uds/core
ref: 0.x.x-upstream
overrides:
loki:
uds-loki-config:
values:
- path: additionalNetworkAllow
value:
- direction: Egress
selector:
app.kubernetes.io/name: loki
remoteCidr: 72.123.123.123
description: "Cache Connection"
port: 6379
```
The example above allows Loki to connect to an “external cache” at a specific remoteCidr.
Reference the [spec for allow](https://uds.defenseunicorns.com/reference/configuration/custom-resources/packages-v1alpha1-cr/#allow) for all available fields.
-----
# UDS Exemption

## Exemption
[Section titled “Exemption”](#exemption)
* **Exemption Scope:**
* Granting exemption for custom resources is restricted to the `uds-policy-exemptions` namespace by default, unless specifically configured to allow exemptions across all namespaces.
* **Policy Updates:**
* Updating the policies Pepr store with registered exemptions.
### Example UDS Exemption CR
[Section titled “Example UDS Exemption CR”](#example-uds-exemption-cr)
```yaml
apiVersion: uds.dev/v1alpha1
kind: Exemption
metadata:
name: neuvector
namespace: uds-policy-exemptions
spec:
exemptions:
- policies:
- DisallowHostNamespaces
- DisallowPrivileged
- RequireNonRootUser
- DropAllCapabilities
- RestrictHostPathWrite
- RestrictVolumeTypes
matcher:
namespace: neuvector
name: "^neuvector-enforcer-pod.*"
- policies:
- DisallowPrivileged
- RequireNonRootUser
- DropAllCapabilities
- RestrictHostPathWrite
- RestrictVolumeTypes
matcher:
namespace: neuvector
name: "^neuvector-controller-pod.*"
- policies:
- DropAllCapabilities
matcher:
namespace: neuvector
name: "^neuvector-prometheus-exporter-pod.*"
```
Note
This example may not contain all fields, the full specification for the Exemption CR is documented [here](/reference/configuration/custom-resources/exemptions-v1alpha1-cr). In addition, there is a JSON schema published [here](https://raw.githubusercontent.com/defenseunicorns/uds-core/refs/heads/main/schemas/exemption-v1alpha1.schema.json) for use in your IDE.
### Configuring UDS Core Policy Exemptions
[Section titled “Configuring UDS Core Policy Exemptions”](#configuring-uds-core-policy-exemptions)
Default [policy exemptions](https://uds.defenseunicorns.com/reference/configuration/custom-resources/exemptions-v1alpha1-cr/) and [namespace restriction/config](https://uds.defenseunicorns.com/reference/configuration/uds-configure-policy-exemptions/) are confined to a singular namespace: `uds-policy-exemptions`. We find this to be an optimal approach for UDS due to the following reasons:
* **Emphasis on Security Impact:**
* An exemption has the potential to diminish the overall security stance of the cluster. By isolating these exemptions within a designated namespace, administrators can readily recognize and assess the security implications associated with each exemption.
* **Simplified RBAC Maintenance:**
* Adopting this pattern streamlines the management of Role-Based Access Control (RBAC) for overseeing exemptions. Placing all UDS exemptions within a dedicated namespace simplifies the task of configuring and maintaining RBAC policies, enhancing overall control and transparency.
* **Mitigation of Configuration Risks:**
* By restricting exemptions to a specific namespace, the risk of unintentional misconfigurations in RBAC is significantly reduced. This ensures that cluster exemptions are only granted intentionally and within the confines of the designated namespace, minimizing the potential for security vulnerabilities resulting from misconfigured permissions.
#### Allow Exemptions In All Namespaces
[Section titled “Allow Exemptions In All Namespaces”](#allow-exemptions-in-all-namespaces)
If you find that the default scoping is not the right approach for your cluster, you have the option to configure `UDS-CORE` at deploy time to allow exemption CRs in all namespaces:
`zarf package deploy zarf-package-uds-core-*.zst --set ALLOW_ALL_NS_EXEMPTIONS=true`
You can also achieve this through the `uds-config.yaml`:
```yaml
options:
# options here
shared:
ALLOW_ALL_NS_EXEMPTIONS: "true"
variables:
# package specific variables here
```
-----
# Overview

The UDS Operator plays a pivotal role in managing the lifecycle of UDS Package Custom Resources (CRs) along with their associated resources like NetworkPolicies and Istio VirtualServices. Leveraging [Pepr](https://github.com/defenseunicorns/pepr), the operator binds watch operations to the [enqueue and reconciler](https://docs.pepr.dev/main/user-guide/actions/reconcile/), taking on several key responsibilities for UDS Packages and exemptions:
* [UDS Package Docs](https://uds.defenseunicorns.com/reference/configuration/uds-operator/package/)
* [UDS Exemption Docs](https://uds.defenseunicorns.com/reference/configuration/uds-operator/exemption/)
### Ignoring A Namespace
[Section titled “Ignoring A Namespace”](#ignoring-a-namespace)
You can ignore one or more namespaces from all operator and policy actions by adding them to Pepr’s ignored namespaces list in a bundle override, like so:
```yaml
packages:
- name: core
repository: ghcr.io/defenseunicorns/packages/uds/core
ref: x.x.x
overrides:
pepr-uds-core:
module:
values:
- path: additionalIgnoredNamespaces
value:
- foo-system
- bar-system
```
In the example above, policies would not be enforced on the `foo-system` and `bar-system` namespaces. In addition, any `Package` or `Exemption` custom resources in these namespaces would be ignored and not processed.
Caution
This should typically only be used for “system” namespaces where you do not want/expect UDS Integration. By ignoring a namespace you are incurring risk as these workloads will run without policy restrictions and likely without other security controls (service mesh, network restrictions, etc). Proper RBAC and auditing around these ignored namespaces is strongly advised.
## Key Files and Folders
[Section titled “Key Files and Folders”](#key-files-and-folders)
```txt
src/pepr/operator/
├── controllers # Core business logic called by the reconciler
│ ├── exemptions # Manages updating Pepr store with exemptions from UDS Exemption
│ ├── istio # Manages Istio VirtualServices and mesh integration for UDS Packages/Namespace
│ ├── keycloak # Manages Keycloak client syncing
│ ├── monitoring # Manages Prometheus scraping metrics endpoints
│ └── network # Manages default and generated NetworkPolicies for UDS Packages/Namespace
├── crd
│ ├── generated # Type files generated by `uds run -f src/pepr/tasks.yaml gen-crds`
│ ├── sources # CRD source files
│ ├── migrate.ts # Migrates older versions of UDS Package CRs to new version
│ ├── register.ts # Registers the UDS Package CRD with the Kubernetes API
│ └── validators # Validates Custom Resources with Pepr
├── index.ts # Entrypoint for the UDS Operator
└── reconcilers # Reconciles Custom Resources via the controllers
```
-----
# UDS Package

## Package
[Section titled “Package”](#package)
Note
Only one UDS Package Custom Resource can exist in a namespace. This pattern was chosen by design to better enable workload isolation and to reduce complexity.
Namespaces are a common boundary for isolating workloads in multi-tenant clusters. When defining a UDS Package resource, consider the implications for all workloads that exist in the target namespace. If the UDS Package that you are defining has configurations that conflict with each other or would be simplified by using a separate UDS Package definition, consider using a separate Kubernetes namespace. Read more about namespaces and mulitenancy [here](https://kubernetes.io/docs/concepts/security/multi-tenancy/).
The UDS Operator seamlessly enables the following enhancements and protections for your workloads:
* **Enabling Istio Sidecar Injection:**
* The operator facilitates the activation of Istio sidecar injection within namespaces where the CR is deployed.
* **Support for Istio Ambient Mode:**
* Packages can now opt into Istio’s Ambient mode by setting `spec.network.serviceMesh.mode: ambient`. This provides service mesh capabilities and security without sidecars, reducing resource overhead.
* **Establishing Default-Deny Ingress/Egress Network Policies:**
* It sets up default-deny network policies for both ingress and egress, creating a foundational security posture.
* **Implementing Layered Allow-List Approach:**
* A layered allow-list approach is applied on top of default-deny network policies. This includes essential defaults like Istio requirements and DNS egress.
* **Providing Targeted Remote Endpoints Network Policies:**
* The operator creates targeted network policies for remote endpoints, such as `KubeAPI` and `CloudMetadata`. This approach aims to enhance policy management by reducing redundancy (DRY) and facilitating dynamic bindings in scenarios where static definitions are impractical.
* **Creating Istio Virtual Services and Related Ingress Gateway Network Policies:**
* In addition, the operator is responsible for generating Istio Virtual Services and the associated network policies for the ingress gateway.
* **SSO Group Authentication:**
* Group authentication determines who can access the application based on keycloak group membership.
* At this time `anyOf` allows defining a list of groups, a user must belong to at least one of them.
* Custom client `protocolMapper`’s that will be created alongside the client and added to the client’s dedicated scope.
* **Authservice Protection:**
* Authservice authentication provides application agnostic SSO for applications that opt-in.
### Example UDS Package CR
[Section titled “Example UDS Package CR”](#example-uds-package-cr)
```yaml
apiVersion: uds.dev/v1alpha1
kind: Package
metadata:
name: grafana
namespace: grafana
spec:
network:
# Configure Istio Mode: sidecar or ambient
serviceMesh:
mode: ambient
# Expose rules generate Istio VirtualServices and related network policies
expose:
- service: grafana
selector:
app.kubernetes.io/name: grafana
host: grafana
gateway: admin
port: 80
targetPort: 3000
# Allow rules generate NetworkPolicies
allow:
- direction: Egress
selector:
app.kubernetes.io/name: grafana
remoteGenerated: Anywhere
- direction: Egress
remoteNamespace: monitoring
remoteSelector:
app.kubernetes.io/name: alertmanager
port: 9093
description: "Alertmanager Datasource"
# SSO allows for the creation of Keycloak clients and with automatic secret generation and protocolMappers
sso:
- name: Grafana Dashboard
clientId: uds-core-admin-grafana
redirectUris:
- "https://grafana.admin.{{ .Values.domain }}/login/generic_oauth"
groups:
anyOf:
- /UDS Core/Admin
# Define protocolMappers to be created as dedicated scopes for the client
protocolMappers:
- name: username
protocol: "openid-connect"
protocolMapper: "oidc-usermodel-property-mapper"
config:
user.attribute: "username"
claim.name: "username"
userinfo.token.claim: "true"
- name: email
protocol: "openid-connect"
protocolMapper: "oidc-usermodel-property-mapper"
config:
user.attribute: "email"
claim.name: "email"
userinfo.token.claim: "true"
```
This example may not contain all fields, the full specification for the Package CR is documented [here](/reference/configuration/custom-resources/packages-v1alpha1-cr). In addition, there is a JSON schema published [here](https://raw.githubusercontent.com/defenseunicorns/uds-core/refs/heads/main/schemas/package-v1alpha1.schema.json) for use in your IDE.
Note
More SSO Package examples might be found [here](/reference/configuration/single-sign-on/overview/).
-----
# UDS Package Resource Tree
This diagram illustrates the relationship between the Package CR spec fields and the Kubernetes resources created during reconciliation.

## Understanding the Resource Tree
[Section titled “Understanding the Resource Tree”](#understanding-the-resource-tree)
### Default Resources
[Section titled “Default Resources”](#default-resources)
* **Default-Deny Policy**: Created for every Package to establish a baseline zero-trust posture
* **DNS Egress Policy**: Allows DNS resolution for all workloads in the namespace
* **Service Mesh Configuration**: Based on the `serviceMesh.mode` setting (defaults to `sidecar` if not specified):
* **Sidecar Mode**: Adds namespace labels for sidecar injection and NetworkPolicies for Istiod communication and sidecar monitoring
* **Ambient Mode**: Adds namespace labels for ambient mode and NetworkPolicies for ambient node healthprobes
### Network Resources
[Section titled “Network Resources”](#network-resources)
* **NetworkPolicies**: Created from `allow` entries to permit specified traffic patterns
* **Authorization Policies**: Created for ingress rules defined in `allow` entries
* **Remote Host Resources**: When `remoteHost` is specified in `allow` entries:
* **ServiceEntries**: Define external services for the service mesh
* **Sidecar Config**: Configure egress traffic rules for sidecars
### Identity Resources
[Section titled “Identity Resources”](#identity-resources)
* **Keycloak Clients**: Created from `sso` entries based on provided configuration
* **Authservice Resources**: When `enableAuthserviceSelector` is enabled:
* **Authservice Config**: Configure Authservice chains
* **NetworkPolicies**: Allow egress to Authservice and Keycloak
* **Authorization Policies and Request Authentication**: Provide protection on the workload with Istio custom resources
### Ingress Resources
[Section titled “Ingress Resources”](#ingress-resources)
* **NetworkPolicies**: Allow ingress traffic from gateways based on `expose` entries
* **Authorization Policies**: Permit traffic from gateways to exposed services
* **VirtualServices**: Route traffic from gateways to internal services
* **ServiceEntries**: Define routes for in-cluster traffic to the gateway for exposed hosts
### Monitoring Resources
[Section titled “Monitoring Resources”](#monitoring-resources)
* **NetworkPolicies**: Allow Prometheus to scrape metrics endpoints
* **Authorization Policies**: Permit Prometheus traffic to monitoring targets
* **ServiceMonitors/PodMonitors**: Created based on the `kind` field in `monitor` entries (defaults to `ServiceMonitor` if not specified)
## How Resources Connect
[Section titled “How Resources Connect”](#how-resources-connect)
The Package reconciliation process establishes connections between resources through:
1. **Owner References**: Created resources have the Package CR as their owner, ensuring cleanup when the Package is deleted
2. **Matching Selectors**: NetworkPolicies and AuthorizationPolicies use selectors from the Package spec to target specific workloads
3. **Shared Labels**: Resources share common labels like `uds/package` and `uds/generation` for tracking and management
-----
# Optional Features
UDS Core adds features to support specific needs that we commonly see across deployments and/or to meet the constraints and controls required by environments. This document contains features we have identified that are conditionally required or requested in environments that are present in core, but must be opted-into to use.
## Classification Banner (*EXPERIMENTAL*)
[Section titled “Classification Banner (EXPERIMENTAL)”](#classification-banner-experimental)
UDS Core includes a configurable [EnvoyFilter](https://istio.io/latest/docs/reference/config/networking/envoy-filter/) that will add/inject classification banners into user interfaces exposed via the Istio gateways. This is fully configurable to any classification level and can be applied to a set of hosts that you specify. The classification level set via values will also determine the color of the banner background and text, corresponding with the [standard colors](https://www.astrouxds.com/components/classification-markings) required for these markings.
Due to the wide variety of ways that user interfaces can be architected, this approach may not work for all applications and should be validated in a development or staging environment before adoption. For custom built applications, native handling of the banner within the application is often a better path. You can configure the classification banner with bundle overrides, such as the example below:
```yaml
packages:
- name: uds-core
repository: ghcr.io/defenseunicorns/packages/uds/core
ref: x.x.x
overrides:
istio-controlplane:
uds-global-istio-config:
values:
- path: classificationBanner.text
value: "UNCLASSIFIED" # Possible values: UNCLASSIFIED, CUI, CONFIDENTIAL, SECRET, TOP SECRET, TOP SECRET//SCI, UNKNOWN
- path: classificationBanner.addFooter
value: true
- path: classificationBanner.enabledHosts # Opt-in for specific hosts
value:
- keycloak.admin.{{ .Values.domain }} # Note the support for helm templating
- sso.{{ .Values.domain }}
- grafana.admin.uds.dev
```
-----
# Published Flavors
UDS Core is published with multiple variations (Zarf flavors). Each flavor uses a separate source registry for the images. Each flavor is used as the suffix on the OCI tags for packages. For production use cases we recommend the `registry1` or `unicorn` flavors as these images tend to be more secure than their `upstream` counterparts.
Note
Demo and dev bundles (`k3d-core-demo` and `k3d-core-slim-dev`) are only published from the upstream flavor.
### Flavors
[Section titled “Flavors”](#flavors)
| Flavor | GHCR Location | Image Source |
| ----------- | ---------------------------------------------- | ------------------------------------------------------------------------------------------------ |
| `registry1` | `ghcr.io/defenseunicorns/packages/uds` | [Ironbank](https://p1.dso.mil/services/iron-bank) - DoD hardened images |
| `upstream` | `ghcr.io/defenseunicorns/packages/uds` | Various sources, typically DockerHub/GHCR/Quay, these are the default images used by helm charts |
| `unicorn` | `ghcr.io/defenseunicorns/packages/private/uds` | Industry best images designed with security and minimalism in mind |
Note
The `unicorn` flavored packages are only available in a private repository. These packages are available for all members of the Defense Unicorns organization/company, if you are outside the organization [contact us](https://www.defenseunicorns.com/contactus) if you are interested in using this flavor for your mission.
-----
# Secret Pod Reload
UDS Core provides a Secret Pod Reload mechanism that automatically reloads pods when secrets are updated. This feature is particularly useful for credentials, certificates, and configuration data that applications need to refresh without manual intervention.
## How It Works
[Section titled “How It Works”](#how-it-works)
The secret pod reload controller watches for changes to Kubernetes secrets labeled with `uds.dev/pod-reload: "true"`. When such a secret is updated, the controller will:
1. Identify which pods or deployments should be restarted
2. For pods managed by standard controllers (Deployments, ReplicaSets, StatefulSets, DaemonSets), restart by patching the controller’s pod template annotations
3. For standalone pods or other cases, use pod eviction to trigger recreation
4. Generate Kubernetes events to track the restart operations
## Configuration
[Section titled “Configuration”](#configuration)
### Enabling Secret Pod Reload
[Section titled “Enabling Secret Pod Reload”](#enabling-secret-pod-reload)
To enable automatic pod reload when a secret changes, add the following label to your secret:
```yaml
metadata:
labels:
uds.dev/pod-reload: "true"
```
### Targeting Pods for Restart
[Section titled “Targeting Pods for Restart”](#targeting-pods-for-restart)
There are two ways to specify which pods should be restarted when a secret changes:
#### 1. Explicit Pod Selector
[Section titled “1. Explicit Pod Selector”](#1-explicit-pod-selector)
You can explicitly specify which pods should be restarted using the `uds.dev/pod-reload-selector` annotation:
```yaml
metadata:
annotations:
uds.dev/pod-reload-selector: 'app=my-app,tier=frontend'
```
This will restart all pods matching the specified label selector when the secret changes.
#### 2. Auto-Discovery (Default)
[Section titled “2. Auto-Discovery (Default)”](#2-auto-discovery-default)
If you don’t specify a pod selector, UDS Core will automatically discover and restart pods that are consuming the secret through:
* Volume mounts (secret volumes)
* Environment variables (env or envFrom)
* Projected volumes using the secret
This auto-discovery approach ensures that only pods actually using the secret are restarted.
## Example
[Section titled “Example”](#example)
Here’s an example of a secret with pod reload enabled:
```yaml
apiVersion: v1
kind: Secret
metadata:
name: my-database-credentials
namespace: my-app
labels:
uds.dev/pod-reload: "true"
annotations:
uds.dev/pod-reload-selector: 'app=my-app,component=database'
type: Opaque
data:
username: YWRtaW4= # base64 encoded "admin"
password: cGFzc3dvcmQxMjM= # base64 encoded "password123"
```
When this secret is updated (for example, when rotating the database password), all pods with the labels `app=my-app` and `component=database` will be automatically reloaded to pick up the new credentials.
## Integration with SSO
[Section titled “Integration with SSO”](#integration-with-sso)
The Secret Pod Reload functionality can be used with SSO client secrets. You can enable this by adding the `uds.dev/pod-reload: "true"` label to your SSO client secrets through the `secretLabels` field in your Package CR.
For more details on configuring Secret Pod Reload for SSO clients, see the [Secret Templating documentation](/reference/configuration/single-sign-on/sso-templating#secret-pod-reload).
## Monitoring and Troubleshooting
[Section titled “Monitoring and Troubleshooting”](#monitoring-and-troubleshooting)
When a secret is updated and triggers a restart, the controller generates Kubernetes events with the reason `SecretChanged`. You can view these events using:
```bash
kubectl get events -n --field-selector reason=SecretChanged
```
Additionally, when deployments are restarted, you’ll see `ScalingReplicaSet` events for the affected deployments.
The controller adds an annotation `uds.dev/restartedAt` to deployment pod templates when they’re restarted, which can be used to track when the last restart occurred.
-----
# Upgrading UDS Core
This guide provides instructions and best practices for upgrading UDS Core installations. Following these guidelines will help ensure a smooth upgrade process and minimize potential disruptions to your environment.
## Importance of Upgrades
[Section titled “Importance of Upgrades”](#importance-of-upgrades)
Regularly upgrading UDS Core is essential for several reasons:
* **Security Patches**: Critical CVE fixes for both UDS Core components and underlying open source tooling
* **Bug Fixes**: Resolving issues in UDS Core and integrated open source components
* **New Features**: Access to new capabilities and improvements
* **Compatibility**: Ensuring continued compatibility with the broader UDS ecosystem
Staying current with UDS Core releases helps maintain the security posture and functionality of your environment.
## Upgrade Strategies
[Section titled “Upgrade Strategies”](#upgrade-strategies)
### Sequential Minor Version Upgrades
[Section titled “Sequential Minor Version Upgrades”](#sequential-minor-version-upgrades)
UDS Core is designed and tested for sequential minor version upgrades (e.g., 0.9.0 → 0.10.0 → 0.11.0). This approach:
* Follows the tested upgrade path
* Allows for incremental validation of each upgrade step
* Reduces complexity during troubleshooting
### Direct Version Jumps
[Section titled “Direct Version Jumps”](#direct-version-jumps)
Jumping multiple minor versions (e.g., 0.9.0 → 0.12.0) is **not directly tested** and requires additional caution:
* May encounter unforeseen compatibility issues
* Complicates troubleshooting as multiple changes are applied at once
* Requires more extensive testing in a staging environment
Caution
If you must jump multiple versions, thoroughly review all release notes for intermediate versions and perform comprehensive testing in a staging environment before upgrading production.
## Pre-Upgrade Checklist
[Section titled “Pre-Upgrade Checklist”](#pre-upgrade-checklist)
Before upgrading UDS Core, complete the following preparation steps:
### Review Release Notes
[Section titled “Review Release Notes”](#review-release-notes)
Read the [release notes](https://github.com/defenseunicorns/uds-core/releases) for all versions between your current version and the target version. Pay special attention to:
* Breaking changes
* Keycloak / Identity Config specific upgrade steps (documented [here](/reference/uds-core/idam/upgrading-versions))
* Deprecated features
* Configuration changes
* New security policies and restrictions
### Test in Staging Environment
[Section titled “Test in Staging Environment”](#test-in-staging-environment)
Testing in a staging environment that mirrors production is **strongly recommended**:
* Create or update a staging environment that closely resembles your production setup
* Perform the upgrade in staging first
* Validate all functionality before proceeding to production
* Document any issues encountered and their resolutions
The value of a staging environment cannot be overstated. It provides a safe space to identify and resolve issues before they impact production workloads.
### Verify High Availability
[Section titled “Verify High Availability”](#verify-high-availability)
If you require minimal downtime during upgrades:
* Ensure your applications are deployed with proper HA configurations
* Understand which UDS Core components may experience brief unavailability during upgrades
* Plan maintenance windows accordingly for components that cannot be upgraded without interruption
## Upgrade Process
[Section titled “Upgrade Process”](#upgrade-process)
### Update the UDS Core Bundle
[Section titled “Update the UDS Core Bundle”](#update-the-uds-core-bundle)
Typically the actual version update is as easy as updating your version reference in a `uds-bundle.yaml`. For example if you had a bundle like the below:
```yaml
packages:
- name: core
repository: ghcr.io/defenseunicorns/packages/uds/core
ref: 0.9.0-upstream
```
Upgrading to 0.10.0 would be as easy as updating this to:
```yaml
packages:
- name: core
repository: ghcr.io/defenseunicorns/packages/uds/core
ref: 0.10.0-upstream
```
Try to avoid other concurrent package upgrades (e.g., zarf init or other UDS packages) or larger changes, such as switching between flavors, unless you have restrictive maintenance windows. Where possible, it is often better to perform these upgrades independently to simplify troubleshooting if issues occur.
### Update Configurations
[Section titled “Update Configurations”](#update-configurations)
Before creating the new bundle, update configuration as needed:
1. **UDS Core Configuration Changes**:
* Review any changes required for UDS Core custom resources
* Review any values changes to UDS Core helm charts and zarf variables
2. **Upstream Tool Configuration Changes**:
* Review the release notes for upstream tools, especially if major version updates are included
* Where necessary update bundle overrides based on any helm chart values changes
### Build and Deploy Bundle
[Section titled “Build and Deploy Bundle”](#build-and-deploy-bundle)
Once you have updated the version reference for UDS Core and made any necessary configuration changes, create the updated bundle and deploy it. The example below is the bare minimum to create and deploy:
```console
# Create the bundle
uds create --confirm
# Deploy the bundle
uds deploy --confirm
```
Depending on your configuration and process this may have additional steps with variables, dynamic environment configuration, etc.
## Post-Upgrade Verification
[Section titled “Post-Upgrade Verification”](#post-upgrade-verification)
After the bundle deployment completes, verify the health and functionality of your environment:
1. **Verify UDS Core Components**:
* The UDS Core deployment performs basic health checks automatically
* Additionally confirm all UDS Core components are accessible at their endpoints, with SSO login
2. **Verify Mission Applications**:
* Check that your mission apps are still running and healthy
* Validate endpoint accessibility and proper configuration (i.e. monitoring, SSO working as expected)
## Upgrade Troubleshooting and Rollbacks
[Section titled “Upgrade Troubleshooting and Rollbacks”](#upgrade-troubleshooting-and-rollbacks)
UDS Core does not officially test or support rollback procedures. Individual opensource applications included in the UDS Core platform may not behave well during a rollback.
Rather than attempting a rollback we recommend the following approaches:
1. **Roll Forward**: Address issues by applying fixes or configuration changes to the current version.
2. **Manual Intervention**: Where necessary perform manual “one-time” upgrade fixes to restore access. If there are persistent issues, these should be reported as [GitHub Issues](https://github.com/defenseunicorns/uds-core/issues) for the team to address going forward.
3. **Restore from Backup**: In critical situations, consider restoring from backups rather than attempting a version rollback.
If you encounter upgrade issues, it’s important to:
* Re-review release notes to check if any known issues have been identified
* Check the [UDS Core GitHub Issues](https://github.com/defenseunicorns/uds-core/issues) for similar problems and solutions
* Open a new issue with detailed information about your environment and the problem
-----
# Exemption and Package Updates
## Exemptions and Package Updates in the Cluster
[Section titled “Exemptions and Package Updates in the Cluster”](#exemptions-and-package-updates-in-the-cluster)
This guide provides steps to debug issues with `Exemptions` and `Packages` not being applied or updated in your Kubernetes cluster. Common symptoms include:
* Changes to Exemptions or Packages are not reflected in the cluster.
* Expected behavior in workloads remains unaffected.
* Logs indicate potential Kubernetes Watch failures.
Follow this guide to identify and resolve these issues.
## Initial Checklist
[Section titled “Initial Checklist”](#initial-checklist)
Before diving into detailed debugging, ensure the following:
* **Verify Configuration**:
* Ensure that Exemptions and Packages are defined correctly in your manifests.
* Refer to the specification documents for correct schema and examples:
* [Packages Specification](/reference/configuration/custom-resources/packages-v1alpha1-cr)
* [Exemptions Specification](/reference/configuration/custom-resources/exemptions-v1alpha1-cr)
* **Namespace for Exemptions**:
* Ensure Exemptions are applied in the `uds-policy-exemptions` namespace, unless you are using an [override](/reference/configuration/uds-configure-policy-exemptions).
* **Cluster and Deployment Status**:
* Confirm the cluster and relevant controller deployments are running without errors:
```bash
kubectl get pods -n pepr-system
```
## Troubleshooting Kubernetes Watch
[Section titled “Troubleshooting Kubernetes Watch”](#troubleshooting-kubernetes-watch)
Kubernetes Watch is a mechanism used to monitor resource changes in real-time. Failures in Watch can cause Exemptions and Package updates to not propagate.
### Steps to Check Watch Logs
[Section titled “Steps to Check Watch Logs”](#steps-to-check-watch-logs)
1. **Identify the Controller Pod**:
* Check the logs of the controller managing Exemptions using the following command:
```bash
kubectl logs -n pepr-system deploy/pepr-uds-core | grep "Processing exemption"
```
* If the logs **do not show entries similar to the following**, it may indicate that the Watch missed the event:
```json
{"...":"...", "msg":"Processing exemption nvidia-gpu-operator, watch phase: MODIFIED"}
```
2. **Verify Package Processing**:
* Use the following command to check logs for Package processing:
```bash
kubectl logs -n pepr-system deploy/pepr-uds-core-watcher -f | egrep "Processing Package"
```
* If the logs **do not show entries similar to the following**, it may indicate an issue with the Watch:
```json
{"...":"...","msg":"Processing Package authservice-test-app/mouse, status.phase: Pending, observedGeneration: undefined, retryAttempt: undefined"}
{"...":"...","msg":"Processing Package authservice-test-app/mouse, status.phase: Ready, observedGeneration: 1, retryAttempt: 0"}
```
### Reporting Watch Issues
[Section titled “Reporting Watch Issues”](#reporting-watch-issues)
If you are experiencing issues with the watch functionality, please provide the necessary logs and metrics to help us investigate. Follow these steps:
* **Open an Issue**\
Visit the [Pepr GitHub Issues](https://github.com/defenseunicorns/pepr/issues/new?template=watch_failure.md) page and create a new issue using the **Watch Failure** template and attach the logs and metrics.
* **Collect Metrics from the Watcher**\
Use the following command based on the image you are using to retrieve metrics from the watcher service, store them in `metrics.txt`:
**Non-Airgap Environment** (all-images):
```bash
kubectl run curler --image=nginx:alpine --rm -it --restart=Never -n pepr-system --labels=zarf.dev/agent=ignore -- curl -k https://pepr-uds-core-watcher/metrics
```
**Upstream Image** `ghcr.io/defenseunicorns/pepr/controller`:
```bash
kubectl exec -it -n pepr-system deploy/pepr-uds-core-watcher -- /nodejs/bin/node -e "process.env.NODE_TLS_REJECT_UNAUTHORIZED = \"0\"; fetch(\"https://pepr-uds-core-watcher/metrics\").then(res => res.text()).then(body => console.log(body)).catch(err => console.error(JSON.stringify(err)))"
```
**Unicorn Image** `ghcr.io/defenseunicorns/pepr/private/controller`:
```bash
kubectl exec -it -n pepr-system deploy/pepr-uds-core-watcher -- node -e "process.env.NODE_TLS_REJECT_UNAUTHORIZED = \"0\"; fetch(\"https://pepr-uds-core-watcher/metrics\").then(res => res.text()).then(body => console.log(body)).catch(err => console.error(err))"
```
**Registry1 Image** `registry1.dso.mil/ironbank/opensource/defenseunicorns/pepr/controller`:
```bash
kubectl exec -it -n pepr-system deploy/pepr-uds-core-watcher -- node -e "process.env.NODE_TLS_REJECT_UNAUTHORIZED = \"0\"; fetch(\"https://pepr-uds-core-watcher/metrics\").then(res => res.text()).then(body => console.log(body)).catch(err => console.error(err))"
```
* **Provide Watch Logs**\
Include the logs from the controller and watch pod in the issue, store them in `watcher.log`.
```bash
kubectl logs -n pepr-system deploy/pepr-uds-core-watcher
```
* **Provide Controller Logs**\
Include the logs from the controller pods in the issue, store them in `admission.log`.
```bash
kubectl logs -n pepr-system deploy/pepr-uds-core
```
## Related Links
[Section titled “Related Links”](#related-links)
* [Packages Specification](/reference/configuration/custom-resources/packages-v1alpha1-cr)
* [Exemptions Specification](/reference/configuration/custom-resources/exemptions-v1alpha1-cr)
* [Kubernetes Watch](https://kubernetes.io/docs/reference/using-api/api-concepts/#efficient-detection-of-changes)
-----
# Istiod and Pepr Startup Failures Due to Webhook Dependencies
Note
The following issue should not occur in UDS Core 0.50.0+ due to changes in default webhook configuration. This troubleshooting guide is provided as a reference for older versions of UDS Core.
## Overview
[Section titled “Overview”](#overview)
During cluster restarts or after upgrades, Istiod and Pepr pods may fail to start properly due to a circular dependency between their admission webhooks.
Both Istiod and Pepr depend on each other’s webhooks being available, which can cause a deadlock if one cannot admit the other’s workloads.
This document explains how to manually resolve the deadlock.
## Symptoms
[Section titled “Symptoms”](#symptoms)
* Pepr pods are stuck in CrashLoopBackOff or Pending state.
* Istiod pods are stuck in CrashLoopBackOff or Pending state.
* Cluster replicaset events show webhook admission errors like:
```plaintext
Failed to call webhook: error calling webhook "pepr-uds-core"
Failed to call webhook: error calling webhook "istiod-istio-system"
```
## Why This Happens
[Section titled “Why This Happens”](#why-this-happens)
Both Pepr and Istiod register Kubernetes admission webhooks. When a cluster restarts, if the webhook targets (pods) aren’t available yet, admission fails, blocking the pods from being recreated — a chicken-and-egg problem.
## Manual Recovery Procedure
[Section titled “Manual Recovery Procedure”](#manual-recovery-procedure)
Temporarily modify the Pepr mutating and validating webhooks to exclude each other:
### 1. Patch the Pepr Webhooks to Exclude Itself and Istio
[Section titled “1. Patch the Pepr Webhooks to Exclude Itself and Istio”](#1-patch-the-pepr-webhooks-to-exclude-itself-and-istio)
```bash
kubectl patch mutatingwebhookconfiguration pepr-uds-core --type='json' \
-p='[{
"op": "add",
"path": "/webhooks/0/namespaceSelector/matchExpressions/0/values/-",
"value": "istio-system"
}]'
kubectl patch validatingwebhookconfiguration pepr-uds-core --type='json' \
-p='[{
"op": "add",
"path": "/webhooks/0/namespaceSelector/matchExpressions/0/values/-",
"value": "istio-system"
}]'
```
### 2. Restart the Pepr and Istiod Pods
[Section titled “2. Restart the Pepr and Istiod Pods”](#2-restart-the-pepr-and-istiod-pods)
This isn’t always required — typically the pods will retry and succeed once Istiod is healthy.
```bash
kubectl rollout restart deployment pepr-uds-core -n pepr-system
kubectl rollout restart deployment istiod -n istio-system
```
This forces Kubernetes to recreate them.
### 3. Restore the Webhook Policies
[Section titled “3. Restore the Webhook Policies”](#3-restore-the-webhook-policies)
Caution
VERY IMPORTANT: After both Pepr and Istiod pods are running and healthy, revert your webhook configurations by removing the namespace selectors to restore full admission enforcement.
```bash
kubectl get mutatingwebhookconfiguration pepr-uds-core -o json | \
uds zarf tools yq -p json -o json '.webhooks[0].namespaceSelector.matchExpressions[0].values |= map(select(. != "istio-system"))' | \
kubectl apply -f -
kubectl get validatingwebhookconfiguration pepr-uds-core -o json | \
uds zarf tools yq -p json -o json '.webhooks[0].namespaceSelector.matchExpressions[0].values |= map(select(. != "istio-system"))' | \
kubectl apply -f -
```
This restores strict security enforcement in admission control.
Caution
While the Pepr webhooks are excluding `istio-system`, any newly created resources in the `istio-system` namespace (e.g., pods/services) will bypass Pepr policy enforcement. It is important to audit any new/unexpected resources during this time.
-----
# Distribution Support
UDS Core is a versatile platform designed to operate across any [CNCF conformant](https://www.cncf.io/training/certification/software-conformance/) Kubernetes distribution. This documentation provides an overview of UDS Core’s testing with different distributions as well as expectations and support provided for other distributions.
### Tested Distributions
[Section titled “Tested Distributions”](#tested-distributions)
| Distribution | Status (latest pipeline) | Testing Schedule |
| ------------------------------------------------------------------------------- | --------------------------------------------------------------------------------------------------------------------------------------------------------------------------------------------------------------------------------------------------------- | ------------------------------- |
| [K3s](https://k3s.io/) (run with [k3d](https://k3d.io/stable/)) | [](https://github.com/defenseunicorns/uds-core/actions/workflows/upgrade-ha.yaml?query=event%3Aschedule+branch%3Amain) | Nightly and before each release |
| [Amazon EKS](https://aws.amazon.com/eks/) | [](https://github.com/defenseunicorns/uds-core/actions/workflows/test-eks.yaml?query=event%3Aschedule+branch%3Amain) | Weekly and before each release |
| [Azure AKS](https://azure.microsoft.com/en-us/products/kubernetes-service) | [](https://github.com/defenseunicorns/uds-core/actions/workflows/test-aks.yaml?query=event%3Aschedule+branch%3Amain) | Weekly and before each release |
| [RKE2](https://github.com/rancher/rke2) (run on [AWS](https://aws.amazon.com/)) | [](https://github.com/defenseunicorns/uds-core/actions/workflows/test-rke2.yaml?query=event%3Aschedule+branch%3Amain) | Weekly and before each release |
Note
Unless otherwise indicated, the Kubernetes version used for testing is typically one minor version back from the [latest release](https://kubernetes.io/releases/) (“n-1”). If the latest Kubernetes version were 1.33, testing would be performed on 1.32, on the latest patch version where possible.
### Other Distributions
[Section titled “Other Distributions”](#other-distributions)
UDS Core is typically compatible with other CNCF-conformant Kubernetes distributions that have not reached their end of life. While these distributions are not part of our regular testing pipeline, we welcome and will review bug reports and contributions related to compatibility issues. When reporting issues, please include details about your environment and any relevant logs.
-----
# DNS Configuration
UDS Core deploys two Gateways by default - a Tenant Gateway for end-user applications and an Admin Gateway for administrative applications. You can read more about Istio configuration in UDS Core [here](https://uds.defenseunicorns.com/reference/configuration/ingress/). This section covers how to configure DNS for these Gateways.
### Domain Configuration
[Section titled “Domain Configuration”](#domain-configuration)
Each Gateway requires a wildcard DNS entry corresponding with the chosen `DOMAIN` and `ADMIN_DOMAIN` [variables](https://github.com/defenseunicorns/uds-core/blob/f6b0b59060a14febd11b0cdc7480f853a57f8520/src/istio/zarf.yaml#L10-L16) (or `admin.` if not specifying a separate admin domain). When deploying UDS Core, you can expect two Gateways to be created that match the following domain names:
* `*.` / Tenant Gateway
* `*.` / Admin Gateway if setting `ADMIN_DOMAIN`
* `*.admin.` / Admin Gateway if NOT setting `ADMIN_DOMAIN`
Note
Wildcard records do not cover the root (apex) domain itself. If you need to serve applications directly on the root (for example, `uds.dev`), see [Istio Ingress docs](https://uds.defenseunicorns.com/reference/configuration/ingress/).
Note
The default value for `DOMAIN` is `uds.dev`, which is intended for development purposes only. For non-development purposes, you should override this value by specifying a value for `domain` in your `uds-config.yaml`. You can find instructions on how to do so [here](https://uds.defenseunicorns.com/reference/configuration/ingress/#configure-domain-name-and-tls-for-istio-gateways).
### Bundle Configuration
[Section titled “Bundle Configuration”](#bundle-configuration)
Note
UDS Core does not include any cloud provider specific configuration by default. Additional overrides are required to deploy UDS Core on a given provider. This section will refer to AWS, but values can be substituted as needed for other providers.
The Admin and Tenant Gateways will be each be bound to an external Load Balancer that is exposed on TCP ports 80 and 443 by default. The Admin Gateway should be configured to use an internal facing Load Balancer and the Tenant Gateway should be configured to use an external facing Load Balancer. Below is an example of overrides that would accomplish this:
```yaml
kind: UDSBundle
metadata:
name: core-with-lb-config
description: A UDS example bundle for deploying UDS Core with external Load Balancer configuration
version: "0.0.1"
packages:
- name: core
repository: oci://ghcr.io/defenseunicorns/packages/uds/core
ref: 0.27.0-upstream
overrides:
istio-admin-gateway:
gateway:
values:
- path: service.annotations.service\.beta\.kubernetes\.io/aws-load-balancer-type
value: "external"
- path: service.annotations.service\.beta\.kubernetes\.io/aws-load-balancer-scheme
value: "internal"
- path: service.annotations.service\.beta\.kubernetes\.io/aws-load-balancer-attributes
value: "load_balancing.cross_zone.enabled=true"
istio-tenant-gateway:
gateway:
values:
- path: service.annotations.service\.beta\.kubernetes\.io/aws-load-balancer-type
value: "external"
- path: service.annotations.service\.beta\.kubernetes\.io/aws-load-balancer-scheme
value: "internet-facing"
- path: service.annotations.service\.beta\.kubernetes\.io/aws-load-balancer-attributes
value: "load_balancing.cross_zone.enabled=true"
```
### Istio Gateways
[Section titled “Istio Gateways”](#istio-gateways)
Once UDS Core is deployed, there will be Istio Gateway resources in your cluster. You can find each Gateway in a dedicated namespace:
```console
$ kubectl get gateway -A
NAMESPACE NAME AGE
istio-admin-gateway admin-gateway 1h
istio-tenant-gateway tenant-gateway 1h
```
Each Gateway will have a Kubernetes Service of type Load Balancer:
```console
$ kubectl get svc -A | grep LoadBalancer
NAMESPACE NAME TYPE CLUSTER-IP EXTERNAL-IP PORT(S) AGE
istio-admin-gateway admin-ingressgateway LoadBalancer 10.43.82.84 k8s-istioadm-admin...elb.us-east-1.amazonaws.com 15021:30842/TCP,80:31304/TCP,443:31518/TCP 1h
istio-tenant-gateway tenant-ingressgateway LoadBalancer 10.43.47.182 k8s-istioten-tenant...elb.us-east-1.amazonaws.com 15021:31222/TCP,80:30456/TCP,443:32508/TCP 1h
```
From here, you can register your domain and/or create DNS records for your environment that point to the appropriate Gateways/Load Balancers. Refer to your DNS provider’s documentation.
-----
# Flavor Specific Development Notes
> This document describes various flavors of UDS Core.
Specific flavors of UDS Core have access and architecture restrictions when used for development work. The `upstream` flavor is generally recommended for development as it does not have any restrictions or requirements.
### Registry1
[Section titled “Registry1”](#registry1)
The `registry1` flavor uses images from [Ironbank](https://p1.dso.mil/services/iron-bank) which can only be pulled with authentication. Developers can self-register on [P1 SSO](https://login.dso.mil/) and retrieve a pull token for auth from [registry1’s Harbor](https://registry1.dso.mil/). (In upper right corner, click —> User Profile, then click the Copy icon next to CLI secret, and use this for `docker login`.)
Images in `registry1` historically only supported `amd64` architectures. While some images do now support `arm64` architecture, uds-core only supports `amd64` for the `registry1` flavor. If developing on an `arm64` machine you will need to use a virtualization layer or an external dev box.
### Unicorn
[Section titled “Unicorn”](#unicorn)
The `unicorn` flavor uses images primarily from a private repository. These images can be pulled by any developer in the Defense Unicorns organization.
Developers outside the Defense Unicorns organization/company will be unable to pull these images directly and should rely on CI testing for validation of this flavor. [Contact us](https://www.defenseunicorns.com/contactus) if you have a need to pull these images and develop on this flavor in particular.
-----
# Functional Layers
## Background
[Section titled “Background”](#background)
Context on the inclusion of “functional layers” can be viewed in our [ADR](https://github.com/defenseunicorns/uds-core/blob/main/adrs/0002-uds-core-functional-layers.md). In short, UDS Core publishes smaller Zarf packages that contain subsets of core’s capabilities, grouped by their function (such as monitoring, logging, backup/restore, etc) to allow more flexibility in deployment. This helps to support resource constrained environments (edge deployments) and other situations where an environment has different needs than the default core stack.
Each layer is published as an individual OCI Zarf package. Package sources can be viewed under the [`packages` directory](https://github.com/defenseunicorns/uds-core/tree/main/packages), with each folder containing a readme detailing the contents and any dependencies. All layers assume the requirement of the base layer which provides Istio, the UDS Operator, and UDS Policy Engine.
Caution
By removing pieces of core from your deployment you may affect your security and compliance posture as well as reduce functionality of the stack. Deploying core using these layers should be the exception in most cases and only done after carefully weighing needs for your environment.
## Example Usage
[Section titled “Example Usage”](#example-usage)
Functional layers are designed to be combined into a UDS bundle for deployment. The example below shows all layers in the correct order. Keep in mind that ‘base’ must always be the first layer, and any other layers should follow based on their dependency order. When building your bundle, you can skip layers that don’t fit your deployment needs and apply overrides to individual layers as needed. Ensure all layers are using the same version for compatibility.
```yaml
kind: UDSBundle
metadata:
name: functional-layer-core-bundle
description: An example bundle for deploying all of core using functional layers
version: "0.1.0"
packages:
- name: core-base
repository: ghcr.io/defenseunicorns/packages/uds/core-base
ref: 0.29.0-upstream
- name: core-identity-authorization
repository: ghcr.io/defenseunicorns/packages/uds/core-identity-authorization
ref: 0.29.0-upstream
- name: core-metrics-server
repository: ghcr.io/defenseunicorns/packages/uds/core-metrics-server
ref: 0.29.0-upstream
- name: core-runtime-security
repository: ghcr.io/defenseunicorns/packages/uds/core-runtime-security
ref: 0.29.0-upstream
- name: core-logging
repository: ghcr.io/defenseunicorns/packages/uds/core-logging
ref: 0.29.0-upstream
- name: core-monitoring
repository: ghcr.io/defenseunicorns/packages/uds/core-monitoring
ref: 0.29.0-upstream
- name: core-backup-restore
repository: ghcr.io/defenseunicorns/packages/uds/core-backup-restore
ref: 0.29.0-upstream
```
## Layer Selection
[Section titled “Layer Selection”](#layer-selection)
Layer selection will always be deployment-specific but below are guidelines for what layers to consider for your deployment. The layers marked with a cross (†) are those needed to follow the [Big Bang Conformant Stack](https://repo1.dso.mil/big-bang/product/bbtoc/-/blob/master/policy/conformance.md?ref_type=heads) though if you are not bound by that document, UDS Core Base is the only *technical* layer required to install most UDS Packages.
| UDS Core Layers | Selection Criteria |
| --------------------------- | ------------------------------------------------------------------------------------------------------------------------------------- |
| Runtime Security†\* | Provides more advanced security with runtime inspection *(install if resources allow and more advanced security is desired)* |
| Monitoring†\* | Provides frontend log / metrics monitoring and alerting *(install if resources allow and more advanced debugging is desired)* |
| Backup and Restore | Allows volumes and k8s objects to be backed up and restored *(install if deployment provides critical data or must maintain state)* |
| Identity and Authorization† | Provides authentication and authorization functionality *(install if deployment requires an auth mechanism (i.e. direct user login))* |
| Logging† | Provides backend log storage and log shipping capabilities *(install if the deployment requires log aggregation and shipping)* |
| Metrics Server†\*\* | Provides metrics collection capabilities (req of UDS Runtime) *(install if the cluster does not provide its own metrics server)* |
| Base† | Provides the base for all other functional layers *(required for all “UDS” deployments and all other functional layers)* |
Note
\*The Monitoring and Runtime Security layers provide user login and therefore require the Identity and Authorization layer.
Note
\*\*The Metrics Server layer provides a metrics server if your cluster does not deploy metrics server itself. If your cluster does provide its own metrics server deployment ensure that you do NOT enable this layer.
| UDS Add-ons\* | Selection Criteria |
| ---------------- | ------------------------------------------------------------------------------------------------------------------------------------------------------------------------------------ |
| UDS UI | Provides a common operating picture for a Kubernetes cluster and UDS deployments *(install if you would like to have an easy-to-use window into your cluster/deployments)* |
| UDS Registry | Provides a storage location for UDS components and mission applications *(install if you would like to be able to easily store and view the software available in your environment)* |
| UDS Remote Agent | Allows for more advanced remote cluster management / deployment *(install if you would like to manage UDS deployments from more advanced clients than UDS CLI)* |
Note
\*UDS Add-ons are not part of the open-source platform but are also not required to maintain / operate a UDS deployment. They provide additional functionality to streamline the deployment, monitoring, and management of the deployment for the given organization.
| UDS Core Pre-Requisites\* | Selection Criteria |
| -------------------------- | -------------------------------------------------------------------------------------------------------------------------------------------- |
| UDS Package Minio Operator | Provides storage for the Logging and Backup and Restore layers *(install after core base but before logging/backup and restore if selected)* |
| UDS Package MetalLB | Provides a simple LoadBalancer implementation *(install after Zarf init and before UDS Core Base)* |
Note
\*You may need to deploy pre-requisite packages that are not a part of UDS Core’s layers if you are on prem or in an edge scenario - usually cloud deployments will have their own offerings to provide these services which we recommend to use instead.
-----
# Authentication Flow Customization
## Authentication Flow Options
[Section titled “Authentication Flow Options”](#authentication-flow-options)
UDS Core comes equipped with a robust authentication framework that supports multiple authentication methods to meet diverse security requirements and user preferences. Here’s a breakdown of the authentication options available:
***
1. Username and Password
The most traditional form of authentication involves users providing a username and password that must match the credentials stored in the system. This method is widely used due to its simplicity and direct control over access credentials.
***
2. SSO (Single Sign-On)
Single Sign-On (SSO) allows users to authenticate with one set of credentials to access multiple applications. UDS Core can be configured to integrate with various SSO providers, such as Google SSO, Microsoft Entra, and others, streamlining the login process and reducing the burden of managing multiple usernames and passwords.
***
3. x509 Certificate
x509 certificates provide a way to authenticate using digital certificates. It is commonly used in environments that require higher security, such as corporate or governmental networks. This method uses public key infrastructure (PKI) to verify the user’s identity through a trusted certificate authority.
> **Air-Gapped Note**: In environments without reliable internet access, **OCSP revocation checks** may fail if the designated OCSP responder cannot be reached. As a short-term workaround, you can configure “fail-open” or disable OCSP checks entirely. However, these approaches carry **security risks** (e.g., potentially allowing revoked certificates).
***

## MFA Authentication
[Section titled “MFA Authentication”](#mfa-authentication)
UDS Core comes with two different options for MFA requirements. One time password (OTP) and WebAuthn options can be configured. These options are available for both `Username and Password` and `x509` authentication flows. They are controlled individually, to provide the most amount of configurability.
```yaml
- path: realmAuthFlows
value:
USERNAME_PASSWORD_AUTH_ENABLED: true
X509_AUTH_ENABLED: true
SOCIAL_AUTH_ENABLED: true
OTP_ENABLED: true
WEBAUTHN_ENABLED: false
X509_MFA_ENABLED: false
```
Above is the complete list of authentication configurations from a bundle override. Below is the description of what each of those do:
| Name | Description | Default Value |
| -------------------------------- | ----------------------------------------------------------------------------------------------------------------------------------------------------- | ------------------------ |
| `USERNAME_PASSWORD_AUTH_ENABLED` | Controls whether the `Username and Password` authentication flow is allowed and present on the login page. | `true`(default), `false` |
| `X509_AUTH_ENABLED` | Controls whether the `X509` authentication is allowed and present (when a proper certificate is present) on the login page. | `true`(default), `false` |
| `SOCIAL_AUTH_ENABLED` | Controls whether the `Social` authentication is allowed and present on the login page. This requires that an Identity Provider be configured as well. | `true`(default), `false` |
| `OTP_ENABLED` | Control whether `OTP` MFA is enabled, making it required for `Username and Password` authentication. | `true`(default), `false` |
| `WEBAUTHN_ENABLED` | Control whether `WebAuthn` MFA is enabled, making it required for `Username and Password` authentication. | `true`, `false`(default) |
| `X509_MFA_ENABLED` | Control whether `X509` authentication flow should also include MFA. Enabling this requires `OTP_ENABLED` or `WEBAUTHN_ENABLED` as well. | `true`, `false`(default) |
Caution
We shift all authn and authz responsibilies to the Identity Provider if choosing to use SSO, this means that MFA is not configurable for SSO options.
## Authentication Flows in UDS Core
[Section titled “Authentication Flows in UDS Core”](#authentication-flows-in-uds-core)
UDS Core is shipped with a basic authentication flow that includes all three options out of the box. The following diagram shows the basic authentication flows that are deployed with standard UDS Core:

### Customizing Authentication Flows
[Section titled “Customizing Authentication Flows”](#customizing-authentication-flows)
Different operational environments may necessitate distinct authentication flows to comply with specific security policies, regulatory demands, or demographic requirements. UDS Core facilitates the customization of these flows, allowing for tailored security measures and user interfaces. The diagram below illustrates various combinations of the three authentication methods that can be adapted to meet unique operational needs:

These customizations not only ensure appropriate security configurations by enabling or disabling specific flows but also maintain a seamless user experience by adjusting the Keycloak theme accordingly.
The following sections provide a step-by-step guide on how to customize UDS Core to deploy specific authentication flows, catering to the particular needs and guidelines of your environment.
## Authentication Flow Customization
[Section titled “Authentication Flow Customization”](#authentication-flow-customization)
Note
Environment variables configured in the [uds-core Keycloak values.yaml file](https://github.com/defenseunicorns/uds-core/blob/main/src/keycloak/chart/values.yaml#L30-32) have `REALM_` appended to them during creation. See [Customization docs](https://uds.defenseunicorns.com/reference/uds-core/idam/customization/) for more information.
Caution
If upgrading uds-core, be aware that Keycloak Admin manual configuration will probably be required to set new Realm values. See the manual configuration section below for how to do this.
### Bundle Overrides
[Section titled “Bundle Overrides”](#bundle-overrides)
To simplify the configuration of the available authentication flows, the following three environment variables have been exposed. These variables default to `true` in UDS Core, override their values in a bundle to disable.
Note
These settings allow for enabling/disabling one or more of the Auth flows. Be aware that disabling `USERNAME_PASSWORD_AUTH_ENABLED`, `X509_AUTH_ENABLED` and `SOCIAL_AUTH_ENABLED` will result in no options for registration and authentication (login). At the same time disabling both `USERNAME_PASSWORD_AUTH_ENABLED` and `X509_AUTH_ENABLED` also disables the User Registration feature.
| Setting | Description | Options |
| ----------------------------------------------------------------------------------------------------------------------------- | ------------------------------------------------------------------------------------------------------------------------------------------------------------------------------------------------------------------------------------ | ------------------------ |
| [USERNAME\_PASSWORD\_AUTH\_ENABLED](https://github.com/defenseunicorns/uds-core/blob/main/src/keycloak/chart/values.yaml#L30) | Toggle on/off the Username and Password Authentication flow. When disabled there will be no username password login, password / password confirm registration fields, no credential reset, and no update password options available. | `true`(default), `false` |
| [X509\_AUTH\_ENABLED](https://github.com/defenseunicorns/uds-core/blob/main/src/keycloak/chart/values.yaml#L31) | Toggle on/off X509 (CAC) Authentication flow. | `true`(default), `false` |
| [SOCIAL\_AUTH\_ENABLED](https://github.com/defenseunicorns/uds-core/blob/main/src/keycloak/chart/values.yaml#L32) | Toggle on/off Social (Google SSO, Azure AD, etc. ) Authentication flows. | `true`(default), `false` |
| [X509\_MFA\_ENABLED](https://github.com/defenseunicorns/uds-core/blob/main/src/keycloak/chart/values.yaml#L32) | Toggle on/off X509 to require additional MFA options (OTP, WebAuthn, etc). | `true`, `false`(default) |
These three variables handle the complexities of configuring the following environment variables, which are responsible for both visual (theme) and security (realm). The following variables are not exposed for overriding.
### Manual Configuration
[Section titled “Manual Configuration”](#manual-configuration)
#### Theme Configurations
[Section titled “Theme Configurations”](#theme-configurations)
Theme’s cannot be clickops’ed, for these changes to take affect an upgrade or fresh deployment will be required. Another option is exec-ing into the the keycloak pod and copying in the new themes to the `/opt/keycloak/theme/themes/login/` directory. After copying in the theme changes, the theme changes depend on environment variables being defined in the [theme.properties file](https://github.com/defenseunicorns/uds-identity-config/blob/main/src/theme/login/theme.properties). The above table demonstrates the different environment variables for the `theme.properties` file.
#### Realm Configurations
[Section titled “Realm Configurations”](#realm-configurations)
All Realm Configurations require access to the Keycloak admin portal.
| Configuration | How to Configure |
| -------------------------------- | ------------------------------------------------------------------------------------------------------------------------------------------------------------------------------------------------------------------------------------------------------------------------------------------------------------------------------------------------------------------------------------------------------------- |
| `DENY_USERNAME_PASSWORD_ENABLED` | 1. Realm Authentication tab 2. Select the `UDS Authentication` Authentication Flow 3. `DISABLE` the `Deny Access` step that is below the `Username Password Form` |
| `RESET_CREDENTIAL_FLOW_ENABLED` | 1. Realm Authentication tab 2. Select the `UDS Reset Credentials` Authentication Flow 3. `DISABLE` the `Reset Password` step |
| `REGISTRATION_FORM_ENABLED` | 1. Realm Authentication tab 2. Select the `UDS Registration` Authentication Flow 3. `DISABLE` the `UDS Registration form` step |
| `OTP_ENABLED` | 1. Realm Authentication tab 2. Select the `Required Action` tab at the top of the Authentication view 3. Toggle off the `Configure OTP` |
| `WEBAUTHN_ENABLED` | 1. Realm Authentication tab 2. Select the `Required Action` tab at the top of the Authentication view 3. Toggle on the `Webauthn Register Passwordless` `Enabled` column 4. Select the `Flows` tab at the top of the Authentication view 5. Select the `UDS Authentication` flow 6. Set the `MFA` sub-flow to `Required` 7. Set the `WebAuthn Passwordless Authenticator` in the `MFA` sub-flow to `Required` |
-----
# Image Customizations
## Add additional jars
[Section titled “Add additional jars”](#add-additional-jars)
Adding additional jars to Keycloak’s deployment is as simple as adding that jar to the [src/extra-jars directory](https://github.com/defenseunicorns/uds-identity-config/tree/main/src/extra-jars).
Adding new jars will require building a new identity-config image for [uds-core](https://github.com/defenseunicorns/uds-core).
See [Testing custom image in UDS Core](https://uds.defenseunicorns.com/reference/uds-core/idam/testing-deployment-customizations/) for building, publishing, and using the new image with `uds-core`.
Once `uds-core` has sucessfully deployed with your new image, viewing the Keycloak pod can provide insight into a successful deployment or not. Also describing the Keycloak pod, should display your new image being pulled instead of the default image defined [here](https://github.com/defenseunicorns/uds-core/blob/main/src/keycloak/chart/values.yaml#L10) in the events section.
## Customizing Theme
[Section titled “Customizing Theme”](#customizing-theme)
**Official Theming Docs**
* [Official Keycloak Theme Docs](https://www.keycloak.org/docs/latest/server_development/#_themes)
* [Official Keycloak Theme Github](https://github.com/keycloak/keycloak/tree/b066c59a83c99d757d501d8f5e6061372706d24d/themes/src/main/resources/theme)
For other changes beyond these images you will need to build a custom theme and identity-config image. Changes can be made to the [src/theme](https://github.com/defenseunicorns/uds-identity-config/tree/main/src/theme) directory. At this time only Account and Login themes are included, but email, admin, and welcome themes could be added as well.
### Branding Customizations
[Section titled “Branding Customizations”](#branding-customizations)
The UDS Identity Config supports a limited and opinionated set of branding customizations. This includes:
* Changing the logo
* Changing the footer image
* Changing the favicon
* Changing the background image
These customizations require overriding the Keycloak Helm Chart provided by the UDS Core. Here’s an example:
```yaml
packages:
- name: core
repository: oci://ghcr.io/defenseunicorns/packages/uds/core
ref: x.x.x
overrides:
keycloak:
keycloak:
values:
- path: themeCustomizations
value:
resources:
images:
- name: background.png
configmap:
name: keycloak-theme-overrides
- name: logo.png
configmap:
name: keycloak-theme-overrides
- name: footer.png
configmap:
name: keycloak-theme-overrides
- name: favicon.png
configmap:
name: keycloak-theme-overrides
```
The configuration supports four keys for different images: `background.png`, `logo.png`, `footer.png`, and `favicon.png`. You can set any or all of these images (you do not have to override all of them), and the corresponding key(s) must exist in your designated ConfigMap(s). Note that you must pre-create this ConfigMap in the `keycloak` namespace before deploying/upgrading Core with these overrides. In the above example all images are in the same ConfigMap named `keycloak-theme-overrides`. An easy way to generate the ConfigMap manifest is using the following command (including whichever images you need and specifying the correct paths to your local images):
```bash
kubectl create configmap keycloak-theme-overrides \
--from-file=background.png=path/to/local/directory/background.png \
--from-file=logo.png=path/to/local/directory/logo.png \
--from-file=footer.png=path/to/local/directory/footer.png \
--from-file=favicon.png=path/to/local/directory/favicon.png \
-n keycloak --dry-run=client -o=yaml > theme-image-cm.yaml
```
To deploy this it is easiest to make a small zarf package referencing the manifest you just created:
```yaml
kind: ZarfPackageConfig
metadata:
name: keycloak-theme-overrides
version: 0.1.0
components:
- name: keycloak-theme-overrides
required: true
manifests:
- name: configmap
namespace: keycloak # Ensure this is in the Keycloak namespace
files:
- theme-image-cm.yaml # Update to the manifest you have locally
```
Then create and deploy this zarf package *prior* to deploying/upgrading UDS Core/Keycloak.
### Terms and Conditions Customizations
[Section titled “Terms and Conditions Customizations”](#terms-and-conditions-customizations)
In a similar theme to Branding customizations, the UDS Identity Config supports adjusting the Terms and Conditions (if enabled).
These customizations similarly require overriding the Keycloak Helm Chart provided by the UDS Core. Here’s an example:
```yaml
packages:
- name: core
repository: oci://ghcr.io/defenseunicorns/packages/uds/core
ref: x.x.x
overrides:
keycloak:
keycloak:
values:
- path: themeCustomizations
value:
termsAndConditions:
text:
configmap:
key: text
name: keycloak-theme-overrides
```
The configuration supports a single key (named however you want) which must exist in the corresponding ConfigMap(s). Note that you must pre-create this ConfigMap in the `keycloak` namespace before deploying/upgrading Core with these overrides. The contents of this key must be your custom Terms and Conditions content, formatted as a single line HTML string. As a basic example you might want some terms and conditions like the following HTML:
```html
By logging in you agree to the following:
```
In order to properly format this you will need to replace any newlines with the literal newline character (`\n`), converting your HTML to a single line. Using the above example that would look like this (again note the use of `\n` in place of the newlines):
```plaintext
By logging in you agree to the following:
\n\n- Terms
\n- And
\n- Conditions
\n
```
Tip
This replacement process can easily be done with a tool like `sed`:
```bash
# This will require GNU sed
cat terms.html | sed ':a;N;$!ba;s/\n/\\n/g' > single-line.html
```
Your new single-line HTML file can be used to generate a properly formatted ConfigMap with the following command:
```bash
kubectl create configmap keycloak-theme-overrides \
--from-file=text=path/to/local/directory/single-line.html \
-n keycloak --dry-run=client -o=yaml > terms-and-confitions-cm.yaml
```
To deploy this it is easiest to make a small zarf package referencing the manifest you just created:
```yaml
kind: ZarfPackageConfig
metadata:
name: keycloak-terms-and-conditions
version: 0.1.0
components:
- name: keycloak-terms-and-conditions
required: true
manifests:
- name: configmap
namespace: keycloak # Ensure this is in the Keycloak namespace
files:
- terms-and-confitions-cm.yaml # Update to the manifest you have locally
```
Then create and deploy this zarf package *prior* to deploying/upgrading UDS Core/Keycloak.
Tip
In order to speed up the development process of the Customized Terms and Conditions, you can edit the ConfigMap in your cluster and then cycle the Keycloak pod to reload your updated Terms and Conditions. This will allow you to see the changes quicker without needing to rebuild/redeploy each time.
Note
The default terms and conditions provided are based on the standard DoD Notice and Consent Banner. The source HTML for these terms is in the identity-config repository [here](hhttps://github.com/defenseunicorns/uds-identity-config/blob/v0.15.0/src/theme/login/terms.ftl#L25-L79) and could be used as a starting point for customizing. Note that you will need to follow the above steps to properly format this as single-line HTML and create a ConfigMap with its contents. There are some limitations and you won’t be able to dynamically lookup resources (i.e. `${url.resourcesPath}`) due to the way this input is dynamically injected into the terms template so keep this in mind if trying to reference external images.
### Registration Form Fields
[Section titled “Registration Form Fields”](#registration-form-fields)
Registration Form Fields, which by default are enabled, can be disabled to minimize the steps to register a new user. See [this section](https://uds.defenseunicorns.com/reference/uds-core/idam/customization/#templated-realm-values) for the example of disabling the registration form fields with the `themeCustomizations.settings.enableRegistrationFields` environment variable.
When disabled, the following fields will not be present during registration:
* Affiliation
* Pay Grade
* Unit, Organization or Company Name
### Testing Changes
[Section titled “Testing Changes”](#testing-changes)
To test the `identity-config` theme changes, a local running Keycloak instance is required.
Don’t have a local Keycloak instance? The simplest testing path is utilizing [uds-core](https://github.com/defenseunicorns/uds-core), specifically the `dev-identity` task. This will create a k3d cluster with Istio, Pepr, Keycloak, and Authservice.
Once that cluster is up and healthy and after making theme changes, utilize this task to :
1. Execute this command:
```bash
uds run dev-theme
```
2. View the changes in the browser
## Customizing Realm
[Section titled “Customizing Realm”](#customizing-realm)
The `UDS Identity` realm is defined in the realm.json found in [src/realm.json](https://github.com/defenseunicorns/uds-identity-config/blob/main/src/realm.json5). This can be modified and will require a new `uds-identity-config` image for `uds-core`.
Note
Be aware that changing values in the realm may also need to be updated throughout the configuration of Keycloak and Authservice in `uds-core`. For example, changing the realm name will break a few different things within Keycloak unless those values are changed in `uds-core` as well.
See the [Testing custom image in UDS Core](https://uds.defenseunicorns.com/reference/uds-core/idam/testing-deployment-customizations/) for building, publishing, and using the new image with `uds-core`.
### Templated Realm Values
[Section titled “Templated Realm Values”](#templated-realm-values)
Keycloak supports using environment variables within the realm configuration, see [docs](https://www.keycloak.org/server/importExport).
These environment variables have default values set in the realm.json that uses the following syntax:
```yaml
${REALM_GOOGLE_IDP_ENABLED:false}
```
In the uds-core keycloak [values.yaml](https://github.com/defenseunicorns/uds-core/blob/main/src/keycloak/chart/values.yaml), the `realmInitEnv` defines set of environment variables that can be used to configure the realm different from default values.
These environment variables will be created with a prefix `REALM_` to avoid collisions with keycloak environment variables. If necessary to add additional template variables within the realm.json must be prefixed with `REALM_`.
For example, this bundle override contains all the available overrides:
```yaml
overrides:
keycloak:
keycloak:
values:
- path: realmInitEnv
value:
GOOGLE_IDP_ENABLED: true
GOOGLE_IDP_ID:
GOOGLE_IDP_SIGNING_CERT:
GOOGLE_IDP_NAME_ID_FORMAT:
GOOGLE_IDP_CORE_ENTITY_ID:
GOOGLE_IDP_ADMIN_GROUP:
GOOGLE_IDP_AUDITOR_GROUP:
EMAIL_VERIFICATION_ENABLED: true
TERMS_AND_CONDITIONS_ENABLED: true
PASSWORD_POLICY:
X509_OCSP_FAIL_OPEN: true
ACCESS_TOKEN_LIFESPAN: 600
SSO_SESSION_LIFESPAN_TIMEOUT: 1200
SSO_SESSION_MAX_LIFESPAN: 36000
SSO_SESSION_MAX_PER_USER: 10
- path: realmAuthFlows
value:
USERNAME_PASSWORD_AUTH_ENABLED: true
X509_AUTH_ENABLED: true
SOCIAL_AUTH_ENABLED: true
OTP_ENABLED: true
WEBAUTHN_ENABLED: true
X509_MFA_ENABLED: true
- path: themeCustomizations.settings
value:
enableRegistrationFields: true
- path: realmConfig.maxInFlightLoginsPerUser
value: 10
```
> These environment variables can be found in the [realm.json](https://github.com/defenseunicorns/uds-identity-config/blob/main/src/realm.json5).
Note
**Important**: By allowing certificates to pass when no revocation check is performed, you accept the **risk** of potentially allowing revoked certificates to authenticate. This can pose a significant security threat depending on your organization’s compliance requirements and threat model.
* **Fail-Closed (`X509_OCSP_FAIL_OPEN:false`)**: More secure (no unchecked certificates) but can disrupt logins if the OCSP responder is unreachable.
* **Fail-Open (`X509_OCSP_FAIL_OPEN:true`)**: More forgiving (users still log in if checks fail) but can allow revoked certificates if the OCSP server is down.
Values set in both `realmInitEnv` and `realmAuthFlows` are applied only during the initial import of the `uds` Keycloak Realm. Updating these values at runtime will not affect the running Keycloak instance; to apply changes, you must redeploy the Keycloak package. In contrast, values provided in `themeCustomizations.settings` and `realmConfig` are designed to be updated at runtime and do not require redeployment of the Keycloak package.
### Customizing Session and Access Token Timeouts and limits
[Section titled “Customizing Session and Access Token Timeouts and limits”](#customizing-session-and-access-token-timeouts-and-limits)
The `SSO_SESSION_IDLE_TIMEOUT` specifies how long a session remains active without user activity, while the `ACCESS_TOKEN_LIFESPAN` defines the validity duration of an access token before it requires refreshing. The `SSO_SESSION_MAX_LIFESPAN` determines the maximum duration a session can remain active, regardless of user activity.
To ensure smooth session management, configure the idle timeout to be longer than the access token lifespan (e.g., 10 minutes idle, 5 minutes lifespan) so tokens can be refreshed before the session expires, and ensure the max lifespan is set appropriately (e.g., 8 hours) to enforce session limits. Misalignment, such as setting a longer token lifespan than the idle timeout or not aligning the max lifespan with session requirements, can result in sessions ending unexpectedly or persisting longer than intended.
The `SSO_SESSION_MAX_PER_USER` provides a limit on the number of active sessions a user can use. You can specify 0 to allow unlimited sessions per user, or set a specific number to limit concurrent sessions. This is useful for controlling resource usage and ensuring that users do not have an excessive number of active sessions at once.
### OpenTofu Keycloak Client Configuration
[Section titled “OpenTofu Keycloak Client Configuration”](#opentofu-keycloak-client-configuration)
The UDS Identity Config includes a Keycloak client that can be used by OpenTofu to manage Keycloak resources programmatically. This client is disabled by default for security reasons.
Caution
**Critical Security Requirements**
1. **Pre-Deployment Configuration**
* **You must configure authentication flows before deploying UDS Core**
* UDS Core will apply default authentication flows if not configured first
* This is a critical security step to prevent unauthorized access
2. **Deployment Options**:
**Option 1: Disable All Flows (Recommended)** This approach starts with maximum security by disabling all authentication methods:
```yaml
overrides:
keycloak:
keycloak:
values:
- path: realmInitEnv
value:
OPENTOFU_CLIENT_ENABLED: true
- path: realmAuthFlows
value:
USERNAME_PASSWORD_AUTH_ENABLED: false
X509_AUTH_ENABLED: false
SOCIAL_AUTH_ENABLED: false
OTP_ENABLED: false
WEBAUTHN_ENABLED: false
X509_MFA_ENABLED: false
```
This is the most secure approach but requires OpenTofu to enable specific authentication methods after deployment.
**Option 2: Configure Final Flows Upfront** If you know your exact authentication requirements, you can configure them directly. For example, to enable Username/Password + OTP authentication only:
```yaml
overrides:
keycloak:
keycloak:
values:
- path: realmInitEnv
value:
OPENTOFU_CLIENT_ENABLED: true
- path: realmAuthFlows
value:
USERNAME_PASSWORD_AUTH_ENABLED: true
X509_AUTH_ENABLED: false
SOCIAL_AUTH_ENABLED: false
OTP_ENABLED: true
WEBAUTHN_ENABLED: false
X509_MFA_ENABLED: false
```
This approach is simpler initially but may require manual steps if your requirements change.
3. **Security Considerations**
* The `uds-opentofu-client` has elevated permissions - protect its credentials
* Never modify or delete the `uds-operator` clients as they are critical for system operation
* Monitor authentication logs after deployment for any unexpected access attempts
4. **Verification**
* Test authentication in a non-production environment first
* For detailed information on available authentication flows, see [Authentication Flow Documentation](/reference/uds-core/idam/authentication-flows)
#### OpenTofu Provider Configuration
[Section titled “OpenTofu Provider Configuration”](#opentofu-provider-configuration)
To use the OpenTofu Keycloak client, you’ll need to configure the [Keycloak provider](https://registry.terraform.io/providers/keycloak/keycloak/latest/docs) to use the OpenTofu client’s `Client Secret`.
The OpenTofu Keycloak client’s secret can be retrieved via the Admin UI, navigate to the `UDS` Realm and select the `Clients` tab from the left sidebar, select the `uds-opentofu-client`, and click the `Credentials` tab to copy the secret value.
Here’s an example configuration that would create a new client called `example-client`:
```hcl
terraform {
required_providers {
keycloak = {
source = "keycloak/keycloak"
version = "5.2.0"
}
}
required_version = ">= 1.0.0"
}
variable "keycloak_client_secret" {
type = string
description = "Client secret for the Keycloak provider"
sensitive = true
}
provider "keycloak" {
client_id = "uds-opentofu-client"
client_secret = var.keycloak_client_secret
url = "https://keycloak.admin.uds.dev"
realm = "uds"
}
# Create a new group in Keycloak
resource "keycloak_group" "example_group" {
realm_id = "uds"
name = "example-group"
# Optional attributes
attributes = {
description = "Example group created via Terraform"
created_by = "terraform"
}
}
# Create a nested group under example-group
resource "keycloak_group" "nested_group" {
realm_id = "uds"
name = "nested-example-group"
parent_id = keycloak_group.example_group.id # This makes it a child of example-group
attributes = {
description = "Nested group under example-group"
created_by = "terraform"
}
lifecycle {
prevent_destroy = false # Set to true in production after testing
}
}
# Output the group IDs for reference
output "example_group_id" {
value = keycloak_group.example_group.id
description = "The ID of the example group"
}
output "nested_group_id" {
value = keycloak_group.nested_group.id
description = "The ID of the nested group"
}
```
Note
**Security Note:** Passing sensitive values (such as `keycloak_client_secret`) via command line arguments can expose secrets in shell history and process lists. Instead, use a `.tfvars` file (e.g., `secrets.auto.tfvars`) to securely provide sensitive variables to Tofu.
Create a file named `secrets.auto.tfvars` with the following content:
```hcl
keycloak_client_secret = "your-actual-client-secret-here"
```
Then run Tofu without passing the secret on the command line:
```bash
# Use this tofu command to plan the Tofu
tofu plan
# Use this tofu command to apply the Tofu
tofu apply -auto-approve
```
#### Enabling the OpenTofu Client via Keycloak Admin UI
[Section titled “Enabling the OpenTofu Client via Keycloak Admin UI”](#enabling-the-opentofu-client-via-keycloak-admin-ui)
If you need to enable the OpenTofu client after deployment or verify its configuration, follow these steps in the Keycloak Admin Console:
1. **Log in to Keycloak Admin Console**
* Navigate to your Keycloak admin URL (typically `https:///admin/`)
* Log in with administrative credentials
* **Important**: Ensure you’re in the `UDS` realm (not the `master` realm)
* In the left sidecar, select `Manage Realms`
* Select `uds` from the `Manage Realms` page
2. **Enable the Tofu Client**
* In the left sidebar, click on “Clients”
* Find the `uds-opentofu-client` client
* Click on the client to open its settings
* Toggle the “Enabled” switch to ON in the top right of the page
* Click “Save” at the bottom of the page
#### Configure OpenTofu Client via Keycloak Admin UI
[Section titled “Configure OpenTofu Client via Keycloak Admin UI”](#configure-opentofu-client-via-keycloak-admin-ui)
If you need to setup the OpenTofu client manually, the following steps will provide the steps to do this:
1. **Log in to Keycloak Admin Console**
* Navigate to your Keycloak admin URL (typically `https:///admin/`)
* Log in with administrative credentials
* **Important**: Ensure you’re in the `UDS` realm (not the `master` realm)
* In the left sidecar, select `Manage Realms`
* Select `uds` from the `Manage Realms` page
2. **Create new Client**
* In the left sidebar, click on “Clients”
* Click `Create client`
* `Client ID` = `uds-opentofu-client`
* `Name` = `uds-opentofu-client`
* `Description` = `A client used for managing Keycloak via Tofu`
* Click `Next`
* Enable `Client authentication`
* Disable `Standard flow`
* Enable `Service account roles`
* Click `Next`
* Click `Save`
* Click `Service account roles`
* Click `Assign role`
* Select `Client Roles`
* Seach for `realm-admin` and check the box
* `Assign`
* Click `Credentials`
* Copy the `Client Secret` and start applying Tofu
-----
# Integration Testing
## Integration Testing For UDS Identity Config + UDS Core
[Section titled “Integration Testing For UDS Identity Config + UDS Core”](#integration-testing-for-uds-identity-config--uds-core)
[Cypress Web Flow/Integration Testing Docs](https://docs.cypress.io/guides/overview/why-cypress)
## Implemented Tests
[Section titled “Implemented Tests”](#implemented-tests)
| Test Name (link) | Test Description |
| ------------------------------------------------------------------------------------------------------------------------------------------------- | ----------------------------------------------------------------------------------------------------------------------------------------------------------------- |
| [Login Existing User](https://github.com/defenseunicorns/uds-identity-config/blob/main/src/test/cypress/e2e/login.cy.ts) | Login in existing user that is created in the testing [realm.json](https://github.com/defenseunicorns/uds-identity-config/blob/main/src/test/cypress/realm.json5) |
| [Login Nonexistant User / Incorrect creds](https://github.com/defenseunicorns/uds-identity-config/blob/main/src/test/cypress/e2e/login.cy.ts) | User cannot login / authenticate with incorrect creds or without account |
| [Successfuly CAC Registration](https://github.com/defenseunicorns/uds-identity-config/blob/main/src/test/cypress/e2e/registration.cy.ts) | New user can successfully register with CAC |
| [CAC User Login](https://github.com/defenseunicorns/uds-identity-config/blob/main/src/test/cypress/e2e/registration.cy.ts) | New user can successfully login with CAC |
| [Duplicate User Registration](https://github.com/defenseunicorns/uds-identity-config/blob/main/src/test/cypress/e2e/registration.cy.ts) | User cannot register more than once |
| [Password check for special characters](https://github.com/defenseunicorns/uds-identity-config/blob/main/src/test/cypress/e2e/registration.cy.ts) | User registration requires password special characters |
| [Password check for length](https://github.com/defenseunicorns/uds-identity-config/blob/main/src/test/cypress/e2e/registration.cy.ts) | User registration requires password length check |
| [Group Authorization](https://github.com/defenseunicorns/uds-identity-config/blob/main/src/test/cypress/e2e/group-authz.cy.ts) | Grafana is deployed to required admin group to authorize |
## Cypress Testing
[Section titled “Cypress Testing”](#cypress-testing)
Using uds-cli task [`uds-core-integration-tests`](https://github.com/defenseunicorns/uds-identity-config/blob/main/tasks.yaml).
Task explanation:
* Cleanup an existing uds-core directory ( mainly for local testing )
* Create docker image that uses the new certs
* Clone [`uds-core`](https://github.com/defenseunicorns/uds-core) necessary for setting up k3d cluster to test against
* Use that cacert in deploying `uds-core` [istio gateways](https://github.com/defenseunicorns/uds-core/tree/main/src/istio/values)
* Create zarf package that combines uds-core and identity-config
* Setup k3d cluster by utilizing `uds-core` (istio, keycloak, pepr, zarf)
* Deploy zarf package that was created earlier
* Run cypress tests against deployed cluster
## Updating Cypress Certs
[Section titled “Updating Cypress Certs”](#updating-cypress-certs)
Cypress testing requires that a ca.cer be created and put into an authorized\_certs.zip, done by using the `regenerate-test-pki` uds task, which is then utilized by the [Dockerfile](https://github.com/defenseunicorns/uds-identity-config/blob/main/src/Dockerfile). Once a docker image has been created another command is used for pulling that cacert, uds task `cacert`, from the image using it’s value to configure uds-core’s gateways, `uds-core-gateway-cacert` uds task . Eventually cypress will require a [pfx cert](https://github.com/defenseunicorns/uds-identity-config/blob/main/src/test/cypress/cypress.config.ts) for its CAC testing.
Our cypress testing utilizes [static certs](https://github.com/defenseunicorns/uds-identity-config/tree/main/src/test/cypress/certs) that are created and saved to limit the need for constantly rebuilding and importing those certs.
Follow these steps to update the certs for cypress:
1. Run `uds run regenerate-test-pki` to regenerate the necessary certs and authorized\_certs.zip
2. Run `docker build --build-arg CA_ZIP_URL="authorized_certs.zip" -t uds-core-config:keycloak --no-cache src` to create docker image
3. Run `uds run cacert` to extract cacert from docker image for the tls\_cacert.yaml file
4. Copy the authorized\_certs.zip, test.pfx, and tls\_cacert.yaml into the [certs directory](https://github.com/defenseunicorns/uds-identity-config/tree/main/src/test/cypress/certs)
* `mv test.pfx tls_cacert.yaml src/authorized_certs.zip src/cypress/certs/`
5. Will need to add license headers to generated `tls_cacert.yaml` to pass linting
-----
# Custom Keycloak Plugins
> This documentation discusses the Keycloak plugin and the additional logic it provides.
A Keycloak plugin provides additional custom logic to our Keycloak deployment. Below is a table of the current implemented Custom Keycloak Implementations and how to interact with them.
## Current Custom Implementations
[Section titled “Current Custom Implementations”](#current-custom-implementations)
| Name | Type | Description |
| ---------------------------------------------------------------------------------------------------------------------------------------------------------------------------------------------------------------------------------------------------------------- | ------------------------------------------------------------------------------------------------------------------------------------------------------ | ------------------------------------------------------------------------------------------------------------------------------------------------------------------------------------------------------------------------------------------------------------------------------------------------------------------------------------------------------------------ |
| [Group Authentication](https://github.com/defenseunicorns/uds-identity-config/blob/main/src/plugin/src/main/java/com/defenseunicorns/uds/keycloak/plugin/authentication/RequireGroupAuthenticator.java) | [Authenticator](https://www.keycloak.org/docs-api/latest/javadocs/org/keycloak/authentication/Authenticator.html) | Requires Keycloak group membership to access an application. Controls when Terms and Conditions are displayed. [More info](https://github.com/defenseunicorns/uds-core/blob/v0.23.0/docs/configuration/uds-operator.md?plain=1#L23-L26) and [E2E test](https://github.com/defenseunicorns/uds-identity-config/blob/v0.5.2/src/test/cypress/e2e/group-authz.cy.ts). |
| [Register Event Listener](https://github.com/defenseunicorns/uds-identity-config/blob/main/src/plugin/src/main/java/com/defenseunicorns/uds/keycloak/plugin/eventListeners/RegisterEventListenerProvider.java) | [EventListener](https://www.keycloak.org/docs-api/latest/javadocs/org/keycloak/events/EventListenerProvider.html) | Generates a unique `mattermostId` for each user during registration. [E2E test](https://github.com/defenseunicorns/uds-identity-config/blob/v0.5.2/src/test/cypress/e2e/registration.cy.ts#L49-L61). |
| [JSON Log Event Listener](https://github.com/defenseunicorns/uds-identity-config/blob/main/src/plugin/src/main/java/com/defenseunicorns/uds/keycloak/plugin/eventListeners/JSONLogEventListenerProvider.java) | [EventListener](https://www.keycloak.org/docs-api/latest/javadocs/org/keycloak/events/EventListenerProvider.html) | Converts Keycloak event logs into JSON strings for logging applications like Grafana. |
| [User Group Path Mapper](https://github.com/defenseunicorns/uds-identity-config/blob/main/src/plugin/src/main/java/com/defenseunicorns/uds/keycloak/plugin/CustomGroupPathMapper.java) | [OpenID Mapper](https://www.keycloak.org/docs-api/latest/javadocs/org/keycloak/protocol/oidc/mappers/AbstractOIDCProtocolMapper.html) | Removes leading slash from group names and creates a new `bare-groups` claim. |
| [User AWS SAML Group Mapper](https://github.com/defenseunicorns/uds-identity-config/blob/main/src/plugin/src/main/java/com/defenseunicorns/uds/keycloak/plugin/CustomAWSSAMLGroupMapper.java) | [SAML Mapper](https://www.keycloak.org/docs-api/latest/javadocs/org/keycloak/protocol/saml/mappers/AbstractSAMLProtocolMapper.html) | Filters user groups to include only those with `-aws-` and concatenates them into a colon-separated string for SAML attribute. |
| [ClientIdAndKubernetesSecretAuthenticator](https://github.com/defenseunicorns/uds-identity-config/blob/main/src/plugin/src/main/java/com/defenseunicorns/uds/keycloak/plugin/authentication/authenticators/client/ClientIdAndKubernetesSecretAuthenticator.java) | [ClientAuthenticator](https://www.keycloak.org/docs-api/latest/javadocs/org/keycloak/authentication/ClientAuthenticator.html) | Authenticates a client using a Kubernetes secret. Used in the `ClientIdAndKubernetesSecret` authentication flow. |
| [UDSClientPolicyPermissionsExecutor](https://github.com/defenseunicorns/uds-identity-config/blob/main/src/plugin/src/main/java/com/defenseunicorns/uds/keycloak/plugin/clientpolicy/executor/UDSClientPolicyPermissionsExecutor.java) | [ClientPolicyExecutorProvider](https://www.keycloak.org/docs-api/latest/javadocs/org/keycloak/clientpolicy/executor/ClientPolicyExecutorProvider.html) | Checks if a client has the necessary permissions to access a resource. Used in the `UDSClientPolicyPermissions` client policy. |
### Security hardening
[Section titled “Security hardening”](#security-hardening)
The UDS Keycloak Plugin leverages [Keycloak Client Policies](https://www.keycloak.org/docs/latest/server_admin/index.html#_client_policies) to enforce security hardening for clients created by the UDS Operator. The configuration can be accessed under “Realm Settings” > “Client Policies” > “UDS Client Profile” > “uds-operator-permissions” and includes the following options:
* `Additional Allowed Protocol Mappers` - Specifies additional Protocol Mappers permitted for use by the packages.
* `Use UDS Default Allowed Protocol Mappers` - When enabled, applies a predefined list of Protocol Mappers. Additional Protocol Mappers can be added using the `Additional Allowed Protocol Mappers` option.
* `Additional Allowed Client Scopes` - Specifies additional Client Scopes permitted for use by the packages.
* `Use UDS Default Client Scopes` - When enabled, applies a predefined list of Client Scopes. Additional Client Scopes can be added using the `Additional Allowed Client Scopes` option.
### Terms and Conditions behavior
[Section titled “Terms and Conditions behavior”](#terms-and-conditions-behavior)
The [Group Authentication](https://github.com/defenseunicorns/uds-identity-config/blob/main/src/plugin/src/main/java/com/defenseunicorns/uds/keycloak/plugin/authentication/RequireGroupAuthenticator.java) plugin controls when the Terms and Conditions are displayed to the user. By default, users are required to accept the Terms and Conditions once per session, meaning that if a user logs in with multiple Keycloak Clients, the Terms and Conditions are displayed only once. This behavior can be modified by adjusting the Authentication Flows in the Keycloak Admin Console and changing the “UDS Operator Group Authentication Validation” step settings. The plugin allows UDS Administrators to change the “Display Terms and Conditions only per user session” setting. Setting it to “false” will force users to accept the Terms and Conditions every time they log in.
### Warnings
[Section titled “Warnings”](#warnings)
Note
When creating a user via ADMIN API or ADMIN UI, the `REGISTER` event is not triggered, resulting in no Mattermost ID attribute generation. This will need to be done manually via click ops or the api. An example of how the attribute can be set via api can be seen [here](https://github.com/defenseunicorns/uds-common/blob/b2e8b25930c953ef893e7c787fe350f0d8679ee2/tasks/setup.yaml#L46).
Caution
Please use this scope only if you understand the implications of excluding full path information from group data. It is highly important to not use the `bare-groups` claim for protecting an application due to security vulnerabilities.
## Requirements
[Section titled “Requirements”](#requirements)
Working on the plugin requires JDK17+ and Maven 3.5+.
```bash
# local java version
java -version
# loval maven version
mvn -version
```
## Plugin Testing with Keycloak
[Section titled “Plugin Testing with Keycloak”](#plugin-testing-with-keycloak)
After making changes to the plugin code and verifying that unit tests are passing ( and hopefully writing some more ), test against Keycloak.
See the `New uds-identity-config Image` [section](https://uds.defenseunicorns.com/reference/uds-core/idam/testing-deployment-customizations/#build-a-new-image) for building, publishing, and using the new image with `uds-core`.
## Plugin Unit Testing / Code Coverage
[Section titled “Plugin Unit Testing / Code Coverage”](#plugin-unit-testing--code-coverage)
The maven surefire and jacoco plugins are configured in the [pom.xml](https://github.com/defenseunicorns/uds-identity-config/blob/main/src/plugin/pom.xml).
Note
`mvn` commands will need to be executed from inside of the `src/plugin` directory
Note
There is a uds-cli task for running the `mvn clean verify` command: `uds run dev-plugin`.
Some important commands that can be used when developing/testing on the plugin:
| Command | Description |
| ----------------------------------------------------------------------------- | ------------------------------------------------------------------------------------------------------------- |
| `mvn clean install` | Cleans up build artifacts and then builds and installs project into local maven repository. |
| `mvn clean test` | Cleans up build artifacts and then compiles the source code and runs all tests in the project. |
| `mvn clean test -Dtest=com.defenseunicorns.uds.keycloak.plugin.X509ToolsTest` | Same as `mvn clean test` but instead of running all tests in project, only runs the tests in designated file. |
| `mvn surefire-report:report` | This command will run the `mvn clean test` and then generate the surefire-report.html file in `target/site` |
| `mvn clean verify` | Clean project, run tests, and generate both surefire and jacoco reports |
### Viewing the Test Reports
[Section titled “Viewing the Test Reports”](#viewing-the-test-reports)
```bash
# maven command from src/plugin directory
mvn clean verify
```
Open the `src/plugin/target/site/surefire-report.html` file in your browser to view the surefire test report.
Open the `src/plugin/target/site/jacoco/index.html` file in your browser to view the unit test coverage report generated by jacoco.
Both reports will hot reload each time they are regenerated, no need to open each time.
## New Custom Plugin Development
[Section titled “New Custom Plugin Development”](#new-custom-plugin-development)
Caution
This isn’t recommended, however can be achieved if necessary
Note
Making these changes iteratively and importing into Keycloak to create a new realm can help to alleviate typo’s and mis-configurations. This is also the quickest solution for testing without having to create,build,deploy with new images each time.
The plugin provides the auth flows that keycloak uses for x509 (CAC) authentication as well as some of the surrounding registration flows.
One nuanced auth flow is the creation of a Mattermost ID attribute for users. [CustomEventListener](https://github.com/defenseunicorns/uds-identity-config/blob/main/src/plugin/src/main/java/com/defenseunicorns/uds/keycloak/plugin/eventListeners/RegisterEventListenerProvider.java) is responsible for generating the unique ID.
Note
When creating a user via ADMIN API or ADMIN UI, the ‘REGISTER’ event is not triggered, resulting in no Mattermost ID attribute generation. This will need to be done manually via click ops or the api. An example of how the attribute can be set via api can be seen [here](https://github.com/defenseunicorns/uds-common/blob/b2e8b25930c953ef893e7c787fe350f0d8679ee2/tasks/setup.yaml#L46).
### Configuration
[Section titled “Configuration”](#configuration)
In addition, modify the realm for keycloak, otherwise the realm will require plugin capabilities for registering and authenticating users. In the current [realm.json](https://github.com/defenseunicorns/uds-identity-config/blob/main/src/realm.json) there is a few sections specifically using the plugin capabilities. Here is the following changes necessary:
* Remove all of the `UDS ...` authenticationFlows:
* `UDS Authentication`
* `UDS Authentication Browser - Conditional OTP`
* `UDS Registration`
* `UDS Reset Credentials`
* `UDS registration form`
* `UDS Client Credentials`
* Make changes to authenticationExecutions from the `browser` authenticationFlow:
* Remove `auth-cookie`
* Remove `auth-spnego`
* Remove `identity-provider-redirector`
* Update the remaining authenticationFlow
* `"requirement": "REQUIRED"`
* `"flowAlias": "Authentication"`
* Remove `registration-profile-action` authenticationExecution from the `registration form` authenticationFlow
* Update the realm flows:
* `"browserFlow": "browser"`
* `"registrationFlow": "registration"`
* `"resetCredentialsFlow": "reset credentials"`
* `"clientAuthenticationFlow": "clients"`
### Disabling
[Section titled “Disabling”](#disabling)
If desired the Plugin can be removed from the identity-config image by commenting out these lines in the [Dockerfile](https://github.com/defenseunicorns/uds-identity-config/blob/main/src/Dockerfile):
```bash
COPY plugin/pom.xml .
COPY plugin/src ../src
RUN mvn clean package
```
-----
# Testing and Deployment Customizations
## Image Management
[Section titled “Image Management”](#image-management)
This document provides comprehensive guidelines for managing custom images within the UDS Core system, from creation and testing to deployment and transportation, particularly in restricted environments like air-gapped systems.
### Building and Testing Custom Images
[Section titled “Building and Testing Custom Images”](#building-and-testing-custom-images)
#### Build a new image
[Section titled “Build a new image”](#build-a-new-image)
Build a custom development image for UDS Core using the following commands:
```bash
# create a dev image uds-core-config:keycloak
uds run dev-build
# optionally, retag and publish to temporary registry for testing
docker tag uds-core-config:keycloak ttl.sh/uds-core-config:keycloak
docker push ttl.sh/uds-core-config:keycloak
```
#### Update UDS Core references
[Section titled “Update UDS Core references”](#update-uds-core-references)
Update the custom image references in the `uds-core` repository:
* Update zarf.yaml to include updated image.
* Specify configImage in Keycloak values.yaml.
* For truststore updates, see gateway configuration instructions.
Alternatively, to override the existing Identity-Config image found in the Keycloak [values.yaml](https://github.com/defenseunicorns/uds-core/blob/main/src/keycloak/chart/values.yaml), use the following:
```yaml
overrides:
keycloak:
keycloak:
values:
- path: configImage
value: ttl.sh/uds-core-config:keycloak
```
#### Deploy UDS Core
[Section titled “Deploy UDS Core”](#deploy-uds-core)
Deploy UDS Core with the new custom image:
```bash
# build and deploy uds-core
uds run test-uds-core
```
See [UDS Core](https://github.com/defenseunicorns/uds-core/blob/main/README.md) for further details
## Building New Image with Updates
[Section titled “Building New Image with Updates”](#building-new-image-with-updates)
For convenience, a Zarf package definition has been included to simplify custom image transport and install in air-gapped systems.
Use the included UDS task to build the custom image and package it with Zarf:
```bash
uds run build-zarf-pkg
```
-----
# Truststore Customization
## Customizing Truststore
[Section titled “Customizing Truststore”](#customizing-truststore)
The default truststore is configured in a [script](https://github.com/defenseunicorns/uds-identity-config/blob/main/src/truststore/ca-to-jks.sh) and excuted in the [Dockerfile](https://github.com/defenseunicorns/uds-identity-config/blob/main/src/Dockerfile). There is a few different ways the script could be customized.
* [Change where the DoD CA zip file are pulled from.](https://github.com/defenseunicorns/uds-identity-config/blob/main/src/Dockerfile#L31), defualting to DOD UNCLASS certs but could be updated for local or another source.
* [Change the Regex Exclusion Filter](https://github.com/defenseunicorns/uds-identity-config/blob/main/src/Dockerfile#30), used by the ca-to-jks script to exclude certain certs from being added to the final truststore.
* [Change the truststore password](https://github.com/defenseunicorns/uds-identity-config/blob/main/src/truststore/ca-to-jks.sh#L29)
### Build test `authorized_certs.zip`
[Section titled “Build test authorized\_certs.zip”](#build-test-authorized_certszip)
Utilizing the [`regenerate-test-pki` task](https://github.com/defenseunicorns/uds-identity-config/blob/main/tasks.yaml), you can create a test `authorized_certs.zip` to use for the truststore.
To use the `regenerate-test-pki` task:
* Create `csr.conf`
```bash
[req]
default_bits = 2048
default_keyfile = key.pem
distinguished_name = req_distinguished_name
req_extensions = req_ext
x509_extensions = v3_ext
[req_distinguished_name]
countryName = Country Name (2 letter code)
countryName_default = US
stateOrProvinceName = State or Province Name (full name)
stateOrProvinceName_default = Colorado
localityName = Locality Name (eg, city)
localityName_default = Colorado Springs
organizationName = Organization Name (eg, company)
organizationName_default = Defense Unicorns
commonName = Common Name (e.g. server FQDN or YOUR name)
commonName_default = uds.dev
[req_ext]
subjectAltName = @alt_names
[v3_ext]
subjectAltName = @alt_names
[alt_names]
DNS.0 = *.uds.dev
```
* ```bash
# Generates new authorized_certs.zip
uds run regenerate-test-pki
```
### Update Dockerfile and build image
[Section titled “Update Dockerfile and build image”](#update-dockerfile-and-build-image)
Update `CA_ZIP_URL` in [Dockerfile](https://github.com/defenseunicorns/uds-identity-config/blob/main/src/Dockerfile) to refer to the generated `authorized_certs.zip`
```bash
ARG CA_ZIP_URL=authorized_certs.zip
```
Build config image
```bash
# build image
uds run dev-build
```
Note
If you’re getting errors from the ca-to-jks.sh script, verify your zip folder is in the correct directory.
### Configure Istio Gateways CACERT in UDS Core
[Section titled “Configure Istio Gateways CACERT in UDS Core”](#configure-istio-gateways-cacert-in-uds-core)
In order to ensure your client certs are requested when deploying UDS Core you will need to override the `tls.cacert` value for the gateway(s) where you expect client certs to be provided. A values file can be generated from your local image build using the `dev-cacert` task:
```bash
uds run dev-cacert
```
This task can also be modified locally to point to a different image if you have published a custom build somewhere else. The output of this task will be a values file locally, `tls_cacert.yaml`, that can be used in your bundle or copied out as needed.
### Deploy UDS Core with new uds-identity-config
[Section titled “Deploy UDS Core with new uds-identity-config”](#deploy-uds-core-with-new-uds-identity-config)
See [Testing custom image in UDS Core](https://uds.defenseunicorns.com/reference/uds-core/idam/testing-deployment-customizations/)
### Verify Istio Gateway configuration
[Section titled “Verify Istio Gateway configuration”](#verify-istio-gateway-configuration)
```bash
# Verify the "Acceptable client certificate CA names"
openssl s_client -connect sso.uds.dev:443
```
-----
# Overview
## What is IdAM?
[Section titled “What is IdAM?”](#what-is-idam)
Identity and Access Management (IdAM) refers to a framework of policies and technologies that ensure the proper people in an enterprise have the appropriate access to technology resources. IdAM systems provide tools and technologies for controlling user access to critical information within an organization through a set of business processes and by managing identities and access rights. The technology typically helps IT managers control user access to critical information within an organization by using a digital identity—which is considered unique in the system—and setting up roles, permissions, and policies. IdAM solutions ensure that users are who they claim to be (authentication) and that they can access the applications and resources they are allowed to use (authorization).
## What is UDS Identity Config?
[Section titled “What is UDS Identity Config?”](#what-is-uds-identity-config)
UDS Identity Config is a component of the UDS Core that supplies the necessary configuration for Keycloak, an open-source Identity and Access Management solution. This configuration includes setting up realms, clients, roles, and other Keycloak settings tailored specifically for the UDS environment. By managing these configurations, UDS Identity Config facilitates the seamless integration of authentication and authorization functionalities into various services within the UDS ecosystem, ensuring that security protocols are consistently applied across platforms.
### Main Responsibilities
[Section titled “Main Responsibilities”](#main-responsibilities)
UDS Identity Config is responsible for managing several key aspects of Keycloak’s configuration within the UDS ecosystem, including:
1. Realm Configuration – Defines realms, clients, roles, and authentication flows.
2. Theme Configuration – Manages custom branding and UI elements for authentication pages.
3. Truststore Management – Ensures secure communication by handling trusted certificates and keys.
4. Custom Plugins – Supports additional functionality through custom Keycloak extensions and providers.
### Air-Gapped Limitations
[Section titled “Air-Gapped Limitations”](#air-gapped-limitations)
When Keycloak is configured for X.509 certificate authentication and OCSP checking (x509-cert-auth.ocsp-checking-enabled) is enabled, it attempts to contact the OCSP responder specified in the certificate or a manually configured URL. In air-gapped or otherwise restricted environments, this external endpoint may be unreachable.
See this [bundle override](https://uds.defenseunicorns.com/reference/uds-core/idam/customization/#templated-realm-values) for an example of disabling OCSP checking but note the risks of doing so. By allowing certificates to pass when the revocation check fails, the door is open to revoked certificates being considered valid, which can pose a serious security threat depending on your organization’s compliance requirements and threat model.
### FIPS Mode
[Section titled “FIPS Mode”](#fips-mode)
UDS Core supports running Keycloak in [FIPS 140-2 Strict Mode](https://www.keycloak.org/server/fips) by enabling the `fips` Helm Chart override. When set to `true`, the UDS Identity Config Init Container automatically copies the required Bouncy Castle JAR files into the Keycloak Providers directory.
To verify that FIPS mode is active, set the `debugMode` Helm Chart override to `true` and review the Keycloak bootstrap logs. Look for the following line:
```bash
KC(BCFIPS version 2.0 Approved Mode, FIPS-JVM: disabled)
```
The `BCFIPS version 2.0 Approved Mode` confirms that Keycloak is operating in FIPS Strict Mode. The `FIPS-JVM` setting indicates whether the underlying JVM is also running in FIPS mode. If this setting is disabled, it likely means the Keycloak container is not hosted on a system with a FIPS-enabled kernel.
Caution
If you’re planning on migrating to FIPS mode, please ensure you followed [Upgrading Identity Config Versions](https://uds.defenseunicorns.com/reference/uds-core/idam/upgrading-versions/) guide. Otherwise, you might lock yourself out of the Keycloak admin console.
### Upgrading UDS Identity Config
[Section titled “Upgrading UDS Identity Config”](#upgrading-uds-identity-config)
When upgrading UDS Identity Config, changes to the realm configuration do not propagate automatically. This is because Keycloak persists its realm settings across upgrades to prevent breaking existing functionality. To apply updates to the realm configuration, follow the manual steps outlined in [Upgrading Identity Config Versions](https://uds.defenseunicorns.com/reference/uds-core/idam/upgrading-versions/) .
However, updates to the following components are automatically applied upon upgrade, as they are not persisted between versions:
* Themes (branding and UI customizations)
* Truststore (certificate and key management)
* Custom Plugins (additional Keycloak extensions)
This ensures that realm configurations remain unchanged during upgrades, while other non-persistent settings are automatically refreshed.
## IdAM Contents
[Section titled “IdAM Contents”](#idam-contents)
1. [Custom Image Testing and Deployment](https://uds.defenseunicorns.com/reference/uds-core/idam/testing-deployment-customizations/)
2. [Image Customizations](https://uds.defenseunicorns.com/reference/uds-core/idam/customization/)
3. [Image Truststore Customization](https://uds.defenseunicorns.com/reference/uds-core/idam/truststore-customization/)
4. [Authentication Flows Customization](https://uds.defenseunicorns.com/reference/uds-core/idam/authentication-flows/)
5. [UDS Core Integration Testing](https://uds.defenseunicorns.com/reference/uds-core/idam/integration/)
6. [Custom Keycloak Plugins](https://uds.defenseunicorns.com/reference/uds-core/idam/plugin/)
7. [Upgrading Identity Config Versions](https://uds.defenseunicorns.com/reference/uds-core/idam/upgrading-versions/)
-----
# Upgrading Versions
This doc contains important information for upgrading uds-identity-config versions. It is not meant to be an exhaustive list of changes between versions, rather information and steps required to manually upgrade versions without a full redeploy of keycloak.
## v0.17.0
[Section titled “v0.17.0”](#v0170)
Upgrade Details
UDS Identity Config introduced the OpenTofu client that can be used for managing Keycloak with OpenTofu. This new client is included in the realm.json, however if unable to re-initialize Keycloak in UDS Core you can find steps [here to manually configure the OpenTofu client](/reference/uds-core/idam/customization#configure-opentofu-client-via-keycloak-admin-ui).
UDS Core v0.51.0 introduced a mechanism to limit the number of concurrent SSO sessions per user in the UDS Realm. To manually configure this:
* Navigate to the `UDS` realm
* Go to `Authentication` > `Flows` > `UDS Authentication`
* Click `Add execution`
* Select `User Session Count Limiter` :
* Select the gear icon next to the new `User Session Count Limiter` to configure the following:
* `Maximum concurrent sessions for each user within this realm`: Set to the desired maximum number of concurrent sessions per user. The value should be the same as the `SSO_SESSION_MAX_PER_USER` value in the `realmInitEnv`.
## v0.14.1+
[Section titled “v0.14.1+”](#v0141)
Upgrade Details
UDS Core v0.42.0 switched Keycloak to run in Ambient Mode. In some cases, specifically in AWS environment that uses “Shared Address Space” (see RFC6598), this may result in HTTP 403 errors. In order to resolve this, uds-identity-config v0.14.1 requires setting “Require SSL” option to “None”. To manually configure this:
* Navigate to the `UDS` realm
* Go to `Realm Settings` > `General` tab
* Switch `Require SSL` to `None`
## v0.14.0+
[Section titled “v0.14.0+”](#v0140)
Upgrade Details
In uds-identity-config versions v0.14.0+, the UDS Identity Config has removed `Dynamic Client Registration`. Part of this means that we need to remove a couple of the `Trusted Hosts` configured in uds-identity-config. To manually configure this:
* Navigate to the `UDS` realm (be aware that in KC v26.2 the UI/UX of navigating realms has changed)
* Go to `Clients` > `Client Registration` > `Trusted Hosts`
* Remove the following Trusted Hosts:
* `*.keycloak.svc.cluster.local`
* `*.pepr-uds-core-watcher.pepr-system.svc.cluster.local`
* `127.0.0.6`
* Click the `Save` button
* Go to `Clients` > `Client Registration`
* Click `Create client policy`
* Click the `max-clients` option
* Name the `max-clients` policy `max number of clients`
* Set `Max Clients Per Realm` to `0`
* Click the `Save` button
UDS Core v0.41.0+ resolves a critical issue with enabling FIPS mode in Keycloak. Previously, due to missing Bouncy Castle FIPS libraries, Keycloak would start in normal mode without FIPS restrictions.
Enabling FIPS mode introduces two significant changes:
* Passwords must be at least 14 characters long. Keycloak will reject shorter passwords, including database credentials and user passwords.
* The `argon2` hashing algorithm is unavailable in FIPS mode. Existing systems must first migrate to the `pbkdf2-sha512` algorithm for hashing user credentials before enabling FIPS mode in the `master` realm. Failing to do so will lock the administrator password.
To prevent locking the administrator password, follow these steps:
* Log in to Keycloak with the administrator account (you may need to use `uds zarf connect keycloak`).
* In the `master` Realm, navigate to `Authentication` > `Policies` > `Password Policy` and click `Add Policy`.
* Select `Hashing Algorithm` and enter `pbkdf2-sha512`.
* Click `Save`.
* Go to `Users` and select your administrator account.
* Open the `Credentials` tab and click `Reset Password`.
* Enter a new password of at least 14 characters. You can reuse your existing password if desired.
* Set `Temporary` to `Off` and click `Save`.
* Return to your user’s details, open the `Credentials` tab, and click `Show data`. Ensure the `algorithm` is set to `pbkdf2-sha512`.
* You are now ready to enable FIPS mode in Keycloak.
For more details on FIPS limitations, refer to the [Keycloak FIPS 140-2 support](https://www.keycloak.org/server/fips) page.
## v0.11.0+
[Section titled “v0.11.0+”](#v0110)
Upgrade Details
In uds-identity-config versions v0.11.0+, the UDS Operator can automatically switch to Client Credentials Grant from using the Dynamic Client Registration. The new method works faster, is more reliable and doesn’t require storing Registration Tokens in the Pepr Store. It is highly recommended to switch to it, which requires the following steps:
* Create the `uds-operator` Client:
* Go to `Clients` > `Create`
* Client type: `openid-connect`
* Client ID: `uds-operator`
* Client Name: `uds-operator`
* Click `Next`
* Client authentication: on
* Uncheck all Authentications flows except from `Service account roles`
* Click `Next`
* Click `Save`
* Go to `Clients` > `uds-operator` > `Credentials` tab
* Set `Client Authenticator` to `Client Id and Kubernetes Secret`
* Click `Save`
* Go to `Clients` > `uds-operator` > `Service accounts roles` tab
* Should see the Role `default-roles-uds` > click the three dots on the right and `unassign` > `Remove`
* Click `Assign role`
* Make sure the filter is on `Filter by clients`
* Check the box next to `realm-management: manage-clients`
* Click `Assign`
* Configure the UDS Client Policy
* Go to `Realm Settings` > `Client Policies` > `Profiles`
* Click `Create Client Profile` - Name: `uds-client-profile` - Description: `UDS Client Profile` - Click `Save`
* Click `Add Executor` - Select `uds-operator-permissions` - Click `Add`
* Go to `Realm Settings` > `Client Policies` > `Policies`
* Click `Create client policy` - Name: `uds-client-policy` - Description: `UDS Client Policy`
* Click `Save`
* Click `Add condition`
* Select `any-client`
* Click `Add`
* Click `Add client profile`
* Select `uds-client-profile`
* Click `Add` (there is a glitch in the UI where it seems all the profiles are selected, but only the selected one is actually chosen)
* Configure the Client Credentials Authentication Flow
* Go to `Authentication` > `Flows`
* Click `clients` - Click `Actions` > `Duplicate` - Name: `UDS Client Credentials` - Description `UDS Client Credentials` - Click `Duplicate`
* Go to `Authentication` > `UDS Client Credentials` - Click `Add Step` (pre uds-core v0.40.0) or `Add Execution` (uds-core v0.40.0+) - Select `Client Id and Kubernetes Secret` - Click `Add` - Select `Requirement` and set it to `Alternative`
* Go to `Authentication`, select three dots on the right side of the panel for `UDS Client Credentials` and select `Bind flows` - Select `Client authentication flow` - Click `Save`
* Verify that everything is configured correctly
* Deploy a new uds package or update the existing ones
* Check UDS Operator logs and verify if there are no errors
* Use `uds zarf tools kubectl logs deploy/pepr-uds-core-watcher -n pepr-system | grep "Client Credentials Keycloak Client is available"` command to verify if the UDS Operator uses the Client Credentials flow.
After introducing the changes above, ensure that all packages reconcile correctly and that no errors appear. If the UDS Operator displays the error `The client doesn’t have the created-by=uds-operator attribute. Rejecting request`, disable `UDS Client Policy` and give the system a bit more time to process every package. Some users have reported that they needed to disable `UDS Client Policy`, cycle the Pepr Watcher pod (this will force reconciliation of **all** Packages), wait for all Package CRs to be ready, and finally enable the `UDS Client Policy`.
[Additional information if you need to add protocol mappers that UDS Core does not include out of the box.](https://uds.defenseunicorns.com/reference/uds-core/idam/plugin/#security-hardening)
***
In uds-identity-config version 0.11.0 we incorporated some big changes around MFA.
* Previous versions didn’t allow for MFA on the X509 Authentication flow. Now that can be configured to required additional factors of authentication. By default this is disabled and will need to be enabled.
* Additionally, we’ve added support of WebAuthn MFA. This can assume many different forms such as biometrics, passkeys, etc. This also is disabled by default and is only used as an MFA option.
If wanting to configure the MFA everywhere with both OTP and WebAuthn options, the following steps will help to manually configure these options on an upgrade:
1. There is a [new theme for webauthn-authentication](https://github.com/defenseunicorns/uds-identity-config/blob/main/src/theme/login/webauthn-authenticate.ftl) that conditionally removes the register button. This is removed because we assume that since you are doing MFA you have already provided enough details to be identified by Keycloak and don’t need to register.
2. The Authentication `Required Actions` have a few changes as well:
* Click `Authentication` tab from left side menu
* Click `Required Actions` tab from Authentication page menu
* Enable the following `Required Actions`, only toggle the `Enabled` **DO NOT TOGGLE** `Set as default action`:
* `Configure OTP`
* `Webauthn Register`
* `Delete Credential`
* Disable the `WebAuthn Register Passwordless`, make sure this is **not** the `WebAuthn Register` option ( this one should be enabled )
3. The `UDS Authentication` authentication flow has undergone significant changes.
* Click `Authentication` tab from left side menu
* Click `UDS Authentication` flow option
* **This can be very dangerous to modify so make sure you know what you’re doing before making changes here**
* In the `Authentication` top level sub-flow of the `UDS Authentication` flow
* Click the `+` icon and add a `sub-flow`
* Name that sub-flow `X509 Authentication`
* Drag that new sub-flow up and drop below the `Cookie` and the `IDP Redirector` step
* Set the flow to `Alternative`
* in the new `X509 Authentication` sub-flow select the `+` icon and add a sub-flow called `X509 Conditional OTP`
* Set the `X509 Conditional OTP` to `Required`
* Click the `+` and add the `Condition` called `Condition - user configured`
* set this to be `Required`
* Click the `+` and add the step called `OTP Form`
* set this to be `Required`
* Click the `+` and add the step called `WebAuthn Authenticator`
* Drag the existing `X509/Validate Username Form` step into the `X509 Authentication` sub-flow, should be above the `X509 Conditional OTP`
* May have to drag this twice, make sure this is `Required`
***
To add an `IDP Redirector` option to the `UDS Authentication`, which enables bypassing the login page and jumping directly to the IDP login when using the `kc_idp_hint` URL parameter, do the following steps:
* Click `Authentication` from the left sidebar under `Configure`
* Select the `UDS Authentication` auth flow
* Under the `Authentication` sub-flow in `UDS Authentication`, click the `+` and add a new `sub-flow`
* Name that sub-flow `idp redirector`
* click `Add`
* Drag that new `idp redirector` sub-flow from the bottom of the `Authentication` sub-flow to be directly below the `Cookie` step
* Set the `idp redirector` sub-flow to be `Alternative`
* Click the `+` on the `idp redirector` sub-flow and add a new step
* Select the `Identity Provider Redirector`
* Click `Add`
* Set that `Identity Provider Redirector` step to `Required`
## v0.10.0+
[Section titled “v0.10.0+”](#v0100)
Upgrade Details
In uds-identity-config versions 0.10.0+, the version of Keycloak was upgraded to Keycloak 26.1.0. In this release of Keycloak an unmentioned breaking change that added case sensitivity to the Client SAML Mappers. This resulted in breaking SAML Auth flows due to users IDP data not being correctly mapped into applications ( ex. Sonarqube, Gitlab, etc ). Manual steps to fix this issue:
* Click `Client scopes`
* For each of the following mappers:
* `mapper-saml-email-email`
* `mapper-saml-firstname-first_name`
* `mapper-saml-lastname-last_name`
* `mapper-saml-username-login`
* `mapper-saml-username-name`
* Select the mapper, should now be on the `Client scope details` page
* Select the `Mappers` tab
* Select the available mapper
* Manually change the `Property` field dropdown to match the designated mapper property
* `mapper-saml-email-email` had a value of `Email`, that needs to be changed to select the `email` option from the drop down.
* `mapper-saml-firstname-first_name` had a value of `FirstName`, that needs to be changed to select the `firstName` option from the drop down.
* `mapper-saml-lastname-last_name` had a value of `LastName`, that needs to be changed to select the `lastName` option from the drop down.
* `mapper-saml-username-login` had a value of `Username`, that needs to be changed to select the `username` option from the drop down.
* `mapper-saml-username-name` had a value of `Username`, that needs to be changed to select the `username` option from the drop down.
* Make sure and click `Save` after updating the property field
## v0.9.1 to v0.10.0
[Section titled “v0.9.1 to v0.10.0”](#v091-to-v0100)
Upgrade Details
* For running Istio with Ambient Mesh, it is required to add two new entries to the trusted hosts list: `*.pepr-uds-core-watcher.pepr-system.svc.cluster.local` and `*.keycloak.svc.cluster.local`. This is done automatically for new deployments but when upgrading it is required to perform these extra steps:
* Click `Clients` > `Client registration` > `Client details`
* Add `*.pepr-uds-core-watcher.pepr-system.svc.cluster.local` and `*.keycloak.svc.cluster.local` to the `Trusted Hosts` list
* Click `Save`
* Keycloak 26.1.1 introduces a new option to force re-login after resetting credentials ([Keycloak Release Notes](https://www.keycloak.org/docs/latest/release_notes/index.html#new-option-in-send-reset-email-to-force-a-login-after-reset-credentials)). This option has been enabled for new deployments but the existing ones, it needs to be turned on manually:
* Click `Authentication` > `UDS Reset Credentials` and find `Send Reset Email` Step of the Authentication Flow.
* Click `Settings`, enter a new alias name, for example `reset-credentials-email` and turn the `Force login after reset` option on.
* Click `Save`
## v0.5.1 to v0.5.2
[Section titled “v0.5.1 to v0.5.2”](#v051-to-v052)
Upgrade Details
* An custom Keycloak event logger that replaces the default event logger is [included in this release](https://github.com/defenseunicorns/uds-identity-config/blob/v0.5.2/src/realm.json#L1669), if you wish to enable manually as part of an upgrade do the following (in the `Unicorn Delivery Service` realm):
* Click on the `Realm Settings` > `Events` and add `jsonlog-event-listener`.
* Remove the built in `jboss-logging` event listener.
* Click `Save`
* The custom registration event listener was [renamed](https://github.com/defenseunicorns/uds-identity-config/blob/v0.5.2/src/realm.json#L1670) from `custom-registration-listener` to `registration-event-listener`. To manually update this event listener (in the `Unicorn Delivery Service` realm):
* Click on the `Realm Settings` > `Events` and add `registration-event-listener`.
* Remove `custom-registration-listener`.
* Click `Save`
* An additional scope (`bare-groups`) was included in the uds [realm.json](https://github.com/defenseunicorns/uds-identity-config/blob/v0.5.2/src/realm.json#L1608-L1636). To add this scope manually do the following (in the `Unicorn Delivery Service` realm):
* Click on `Client Scopes` > `Create client scope`.
* Name the scope `bare-groups`, and configure it to be
* Type: `Optional`
* Include in token scope: `On`
* Click `Save`
* Click `Mappers` > `Create a new mapper`
* Select `Custom Group Path Mapper` and name it `bare groups`
* To enable this scope to be added as a `defaultClientScope` for your clients, navigate to the top level `Clients` > `Client registration` tab.
* Click `Allowed Client Scopes`
* Add `bare-groups` to the list of `Allowed Client Scopes`
* Click `Save`
## v0.5.0 to v0.5.1
[Section titled “v0.5.0 to v0.5.1”](#v050-to-v051)
Upgrade Details
This version upgrade utilizes built in Keycloak functionality for User Managed Attributes.
Note
User managed attributes are only available in Keycloak 24+
If upgrading without a full redeploy of keycloak the following changes will be needed:
1. The `realm.json` will need to be updated to contain the correct User Managed Attributes definition, [User Managed Attributes Configuration](https://github.com/defenseunicorns/uds-identity-config/blob/v0.5.1/src/realm.json#L1884-L1895). The following steps can be used to do this with clickops:
1. In `Realm Settings` tab and on the `General` page
1. toggle off `User-managed access`
2. `Unmanaged Attributes` set to `Only administrators can write`
2. On `User profile` page
1. select the `JSON Editor` tab
2. Copy and Paste the value of [the User Attribute Definition from the realm.json](https://github.com/defenseunicorns/uds-identity-config/blob/v0.5.1/src/realm.json#L1891)
3. `Save`
2. Incorporate STIG password rules, in accordance with these two hardening guides:
* [Elasticsearch 8.0 Application Server](https://github.com/user-attachments/files/16178987/Elasticsearch.8.0.Hardening.Guide.Application.Server.SRG.V3R1.pdf)
* [Elasticsearch 8.0 Central Log Server](https://github.com/user-attachments/files/16178988/Elasticsearch.8.0.Hardening.Guide.Central.Log.Server.SRG.V2R1.pdf)
* Changes:
1. Passwords expire in 60 days
2. Passwords complexity: 2 special characters, 1 digit, 1 lowercase, 1 uppercase, and 15 character minimum length
3. IDP session idle timeout is now 10 minutes
4. Maximum login attempts is now 3
## v0.4.5 to v0.5.0
[Section titled “v0.4.5 to v0.5.0”](#v045-to-v050)
Upgrade Details
This version upgrade brings in a new Authentication Flow for group authorization.
If upgrading without a full redeploy of keycloak the following steps will be necessary to create and use group authorization:
1. In keycloak admin portal, in `UDS` realm, navigate to `Authentication` sidebar tab
2. In `Authentication` tab add the `Authorization` flow to `UDS Authentication`, `UDS Registration`, `UDS Reset Credentials`
1. In each `Authentication` flow
1. `Add step` -> `UDS Operator Group Authentication Validation`
* Make sure that the step is at the base level and bottom of the Authentication flow
3. Finally if using `SAML` IDP
1. In the `Authentication` tab
1. `Create Flow`
2. `Name` -> `Authorization`
3. `Description` -> `UDS Operator Group Authentication Validation`
4. `Basic Flow`
5. `Create`
6. `Add execution`
7. `Add` the `UDS Operator Group Authentication Validation`
2. In the `Identity Providers` tab, select the `SAML` Provider
1. Add the `Authorization` flow to the `Post login flow` in the `Advanced settings` section
-----
# Istio Transition and Support Policy
This policy outlines the transition of **UDS Core services** from the traditional **Istio sidecar model** to **Istio Ambient Mode**.
**Purpose of the transition:**
* Lower resource requirements
* Simplified operations
* Improved latency
These benefits are particularly important as UDS expands its **edge capabilities**.
***
## Scope
[Section titled “Scope”](#scope)
**Applies to:**
* All UDS Core services (e.g., logging, monitoring, SSO)
* All users deploying apps within UDS-managed environments
**Does NOT apply to:**
* Applications not managed by UDS Core
* Third-party infrastructure not provisioned through UDS tooling
***
## Transition Details
[Section titled “Transition Details”](#transition-details)
| Component | Transition Path |
| ------------------------ | -------------------------------------------------------------------------------- |
| **UDS Core Services** | All deployments will use Istio Ambient Mode by default starting **0.43.0**. |
| **Mission Applications** | Both sidecar and ambient modes supported. Ambient is **opt-in** and recommended. |
Note
Mission Application = Any application outside of UDS Core
Note
**Existing Deployments** When upgrading to **0.43.0+** UDS Core will auto-transition Core services to Ambient Mode. No opt-out is available.
***
## Support Policy
[Section titled “Support Policy”](#support-policy)
| Deployment Type | Istio Ambient | Istio Sidecar |
| ------------------------ | ----------------------- | ---------------------------- |
| **UDS Core Services** | Fully supported | Not supported |
| **Mission Applications** | Supported & recommended | Supported |
| **New Features** | Prioritized for ambient | Evaluated case-by-case |
| **Security & Patching** | Provided | Provided (shared components) |
| **Deprecation Plan** | Active development | No planned deprecation |
***
## Technical Guidance
[Section titled “Technical Guidance”](#technical-guidance)
See this [doc for additional Technical Guidance](https://uds.defenseunicorns.com/reference/configuration/service-mesh/istio-sidecar-vs-ambient/).
***
## Frequently Asked Questions
[Section titled “Frequently Asked Questions”](#frequently-asked-questions)
**Q: Do I need to switch my app to Ambient Mode?** **A:** No. Sidecar mode is still supported, but Ambient is recommended.
**Q: Will sidecar mode be deprecated for mission apps?** **A:** No. It remains supported. Hybrid mesh (ambient + sidecar) is low-maintenance and will remain supported.
**Q: What happens when I update UDS Core?** **A:** UDS Core services will automatically use Ambient Mode. Mission apps are unaffected unless they explicitly opt in.
**Q: Will Istio updates still apply to sidecar mode?** **A:** Yes. Istio components are shared and continue to serve both Ambient and Sidecar modes with updates and patches.
**Q: Does switching to ambient require replacing Istio?** **A:** No. Ambient is an alternate data plane within Istio. The core control plane remains unchanged.
**Q: How can I test or migrate to Ambient Mode?** **A:** By upgrading to 0.43.0+ UDS Core services will automatically migrate to ambient mode. Mission apps can be switched to ambient by opting-in.
-----
# Overview
## What is UDS Core?
[Section titled “What is UDS Core?”](#what-is-uds-core)
UDS Core is a collection of several individual applications combined into a single Zarf Package, that establishes a secure baseline for secure cloud-native systems. It comes equipped with comprehensive compliance documentation and prioritizes seamless support for highly regulated and egress-limited environments. Building upon the achievements of Platform One, UDS Core enhances the security stance introduced by Big Bang. It introduces advanced automation through the UDS Operator and UDS Policy Engine.
UDS Core enables your team to:
* Deploy full mission environments and applications efficiently and securely.
* Leverage specific functional applications to deliver a versatile platform that caters to diverse mission objectives.
* Enhance the efficiency, security, and success of software delivery and operations process.

Note
The above diagram captures an overview of the UDS Core architecture, primarily focusing on Kubernetes pod communications and namespace separation. In some cases this diagram omits some more complex connections for the sake of simplicity, for example:
* Prometheus scraping is occurring with all available metrics endpoints in the cluster.
* All pod communications in Istio ambient mode involve its CNI plugin and the node level Ztunnel proxy (additional information and diagrams of this architecture can be found [upstream](https://istio.io/latest/docs/ambient/architecture/)).
### Accomplishing Mission Objectives with Functional Applications
[Section titled “Accomplishing Mission Objectives with Functional Applications”](#accomplishing-mission-objectives-with-functional-applications)
UDS leverages functional applications that are well-suited to perform the specific tasks required. These tools are carefully selected to ensure optimal performance and compatibility within the UDS landscape. By integrating functional tools into the platform, UDS ensures that Mission Heroes have access to cutting-edge technologies and best-in-class solutions for their missions.
### Leveraging UDS Applications
[Section titled “Leveraging UDS Applications”](#leveraging-uds-applications)
Mission Heroes can leverage UDS Core Applications to tailor their mission environment and meet their unique requirements. By selecting and integrating specific tools into their deployments, your team can achieve a streamlined and secure software delivery process. Ranging from setting up a DevSecOps pipeline, enforcing security policies, or managing user identities, UDS Applications provide the necessary tools to accomplish mission objectives effectively.
### UDS Core Dependency
[Section titled “UDS Core Dependency”](#uds-core-dependency)
A UDS Core dependency refers to the specific prerequisites and external elements required for the smooth operation of bundled tools. While UDS Applications are designed to offer distinct functionalities, some may necessitate external resources, services, or configurations to seamlessly integrate within a particular environment. These dependencies can include a wide range of components such as databases, security services, and networking tools.
-----
# Prerequisites
`UDS Core` can run in any [CNCF conformant Kubernetes distribution](https://www.cncf.io/training/certification/software-conformance/) that has not reached [End-of-Life (EOL)](https://kubernetes.io/releases/#release-history). This documentation aims to provide guidance and links to relevant information to help configure your Kubernetes environment and hosts for a successful installation of `UDS Core`. Note that customizations may be required depending on the specific environment.
### Cluster Requirements
[Section titled “Cluster Requirements”](#cluster-requirements)
When running Kubernetes on any type of host it is important to ensure you are following the upstream documentation from the Kubernetes distribution regarding prerequisites. A few links to upstream documentation are provided below for convenience.
#### RKE2
[Section titled “RKE2”](#rke2)
* [General installation requirements](https://docs.rke2.io/install/requirements)
* [Disabling Firewalld to prevent networking conflicts](https://docs.rke2.io/known_issues#firewalld-conflicts-with-default-networking)
* [Modifying NetworkManager to prevent CNI conflicts](https://docs.rke2.io/known_issues#networkmanager)
* [Known Issues](https://docs.rke2.io/known_issues)
##### Control Plane Metrics Configuration
[Section titled “Control Plane Metrics Configuration”](#control-plane-metrics-configuration)
In hardened RKE2 setups (using the CIS profile), control plane components (etcd, kube-scheduler, kube-controller-manager) bind to 127.0.0.1 by default, which prevents Prometheus from scraping them.
To fix this, add the following settings to your control plane node’s config file (`/etc/rancher/rke2/config.yaml`):
```yaml
kube-controller-manager-arg:
- bind-address=0.0.0.0
kube-scheduler-arg:
- bind-address=0.0.0.0
etcd-arg:
- listen-metrics-urls=http://0.0.0.0:2381
```
These changes require restarting RKE2 to take effect.
##### CoreDNS Metrics Configuration
[Section titled “CoreDNS Metrics Configuration”](#coredns-metrics-configuration)
In hardened RKE2 setups (using the CIS profile), RKE2 applies some default network policies that [block ingress to the kube-system namespace](https://docs.rke2.io/security/hardening_guide#network-policies). In order to enable CoreDNS metrics scraping you will need to enable an additional network policy. UDS Core includes an option to deploy a network policy for CoreDNS metrics scraping.
To enable this policy, set the value `rke2CorednsNetpol.enabled` to `true` in the `uds-prometheus-config` helm chart with the following override:
```yaml
- name: uds-core
...
overrides:
kube-prometheus-stack:
uds-prometheus-config:
values:
- path: rke2CorednsNetpol.enabled
value: true
```
#### K3S
[Section titled “K3S”](#k3s)
* [General installation requirements](https://docs.k3s.io/installation/requirements)
* [Known Issues](https://docs.k3s.io/known-issues)
#### EKS
[Section titled “EKS”](#eks)
* [General installation requirements](https://docs.aws.amazon.com/eks/latest/userguide/create-cluster.html)
* [Troubleshooting Guide](https://docs.aws.amazon.com/eks/latest/userguide/troubleshooting.html)
#### AKS
[Section titled “AKS”](#aks)
* [General installation requirements](https://learn.microsoft.com/en-us/azure/well-architected/service-guides/azure-kubernetes-service)
* [Troubleshooting Guide](https://learn.microsoft.com/en-us/troubleshoot/azure/azure-kubernetes/welcome-azure-kubernetes)
### UDS Core Requirements
[Section titled “UDS Core Requirements”](#uds-core-requirements)
The below are specific requirements for running UDS Core. Some of them are tied to the entire stack of UDS Core and some are more specific to certain components. If you encounter issues with a particular component of core, this can be a good list to check to validate you met all the prerequisite requirements for that specific application.
#### Default Storage Class
[Section titled “Default Storage Class”](#default-storage-class)
Several UDS Core components require persistent volumes that will be provisioned using the default storage class via dynamic volume provisioning. Ensure that your cluster includes a default storage class prior to deploying. You can validate by running the below command (see example output which includes `(default)` next to the `local-path` storage class):
```console
❯ kubectl get storageclass
NAME PROVISIONER RECLAIMPOLICY VOLUMEBINDINGMODE ALLOWVOLUMEEXPANSION AGE
local-path (default) rancher.io/local-path Delete WaitForFirstConsumer true 55s
```
It’s generally beneficial if your storage class supports volume expansion (set `allowVolumeExpansion: true`, provided your provisioner allows it). This enables you to resize volumes when needed. Additionally, be mindful of any size restrictions imposed by your provisioner. For instance, EBS volumes have a minimum size of 1Gi, which could lead to unexpected behavior, especially during Velero’s CSI backup and restore process. These constraints may also necessitate adjustments to default PVC sizes, such as Keycloak’s PVCs, which default to 512Mi in `devMode`.
Caution
If you are deploying stateful applications, including but not limited to critical UDS Core services such as [Velero](#velero) or [Loki](#loki), ensure you understand where their data is stored and that the underlying volumes are properly backed up and stored safely.
Cluster or deployment issues may result in data loss, particularly when these services rely on in-cluster storage such as the [Minio Operator UDS Package](https://github.com/defenseunicorns/uds-package-minio-operator).
#### Network Policy Support
[Section titled “Network Policy Support”](#network-policy-support)
The UDS Operator will dynamically provision network policies to secure traffic between components in UDS Core. To ensure these are effective, validate that your CNI supports enforcing network policies. In addition, UDS Core makes use of some CIDR based policies for communication with the KubeAPI server. If you are using Cilium, support for node addressability with CIDR based policies must be enabled with a [feature flag](https://docs.cilium.io/en/stable/security/policy/language/#selecting-nodes-with-cidr-ipblock).
#### Istio
[Section titled “Istio”](#istio)
Istio requires a number of kernel modules to be loaded for full functionality. The below is a script that will ensure these modules are loaded and persisted across reboots (see also Istio’s [upstream requirements list](https://istio.io/latest/docs/ops/deployment/platform-requirements/)). Ideally this script is used as part of an image build or cloud-init process on each node.
```console
modules=("br_netfilter" "xt_REDIRECT" "xt_owner" "xt_statistic" "iptable_mangle" "iptable_nat" "xt_conntrack" "xt_tcpudp" "xt_connmark" "xt_mark" "ip_set")
for module in "${modules[@]}"; do
modprobe "$module"
echo "$module" >> "/etc/modules-load.d/istio-modules.conf"
done
```
In addition, to run Istio ingress gateways (part of Core) you will need to ensure your cluster supports dynamic load balancer provisioning when services of type LoadBalancer are created. Typically in cloud environments this is handled using a cloud provider’s controller (example: [AWS LB Controller](https://github.com/kubernetes-sigs/aws-load-balancer-controller)). When deploying on-prem, this is commonly done by using a “bare metal” load balancer provisioner like [MetalLB](https://metallb.universe.tf/) or [kube-vip](https://kube-vip.io/). Certain distributions may also include ingress controllers that you will want to disable as they may conflict with Istio (example: RKE2 includes ingress-nginx).
Note
If you would like to use MetalLB as your load balancer provisioner there is a UDS Package available for MetalLB from the [UDS Package MetalLB GitHub repository](https://github.com/uds-packages/metallb)
##### Ambient Mode
[Section titled “Ambient Mode”](#ambient-mode)
[Ambient Mode](https://istio.io/latest/docs/ambient/overview/) in Istio is now integrated directly into the `istio-controlplane` component and enabled by default. Also note that only the `unicorn` and `registry1` flavors of core contain `FIPS` compliant images.
When using ambient mode with UDS Packages, you can benefit from:
* Reduced resource overhead compared to sidecar mode, as workloads don’t require an injected sidecar container
* Simplified deployment and operations for service mesh capabilities
* Faster pod startup times since there’s no need to wait for sidecar initialization
The `istio-controlplane` component installs the Istio CNI plugin which requires specifying the `CNI_CONF_DIR` and `CNI_BIN_DIR` variables. These values can change based on the environment Istio is being deployed into. By default the package will attempt to auto-detect these values and will use the following values if not specified:
```yaml
# K3d cluster
cniConfDir: /var/lib/rancher/k3s/agent/etc/cni/net.d
cniBinDir: /opt/cni/bin/ # Historically this was `/bin/`
# K3s cluster
cniConfDir: /var/lib/rancher/k3s/agent/etc/cni/net.d
cniBinDir: /opt/cni/bin/
# All other clusters
cniConfDir: /etc/cni/net.d
cniBinDir: /opt/cni/bin/
```
These values can be overwritten when installing core by setting the `cniConfDir` and `cniBinDir` values in the `istio-controlplane` component.
To set these values add the following to the `uds-config.yaml` file:
```yaml
variables:
core-base:
cni_conf_dir: "foo"
cni_bin_dir: "bar"
```
or via `--set` if deploying the package via `zarf`:
```console
uds zarf package deploy uds-core --set CNI_CONF_DIR=/etc/cni/net.d --set CNI_BIN_DIR=/opt/cni/bin
```
If you are using Cilium you will also need to make some additional configuration changes and add a cluster wide network policy to prevent Cilium’s CNI from interfering with the Istio CNI plugin (part of the ambient stack). See the [upstream documentation](https://istio.io/latest/docs/ambient/install/platform-prerequisites/#cilium) for these required changes.
#### NeuVector
[Section titled “NeuVector”](#neuvector)
NeuVector historically has functioned best when the host is using cgroup v2. Cgroup v2 is enabled by default on many modern Linux distributions, but you may need to enable it depending on your operating system. Enabling this tends to be OS specific, so you will need to evaluate this for your specific hosts.
#### Vector
[Section titled “Vector”](#vector)
In order to ensure that Vector is able to scrape the necessary logs concurrently you may need to adjust some kernel parameters for your hosts. The below is a script that can be used to adjust these parameters to suitable values and ensure they are persisted across reboots. Ideally this script is used as part of an image build or cloud-init process on each node.
```console
declare -A sysctl_settings
sysctl_settings["fs.nr_open"]=13181250
sysctl_settings["fs.inotify.max_user_instances"]=1024
sysctl_settings["fs.inotify.max_user_watches"]=1048576
sysctl_settings["fs.file-max"]=13181250
for key in "${!sysctl_settings[@]}"; do
value="${sysctl_settings[$key]}"
sysctl -w "$key=$value"
echo "$key=$value" > "/etc/sysctl.d/$key.conf"
done
sysctl -p
```
#### Metrics Server
[Section titled “Metrics Server”](#metrics-server)
Metrics server is provided as an optional component in UDS Core and can be enabled if needed. For distros where metrics-server is already provided, ensure that you do NOT enable metrics-server. See the below as an example for enabling metrics-server if your cluster does not include it.
```yaml
- name: uds-core
repository: ghcr.io/defenseunicorns/packages/private/uds/core
ref: 0.25.2-unicorn
optionalComponents:
- metrics-server
```
#### Loki
[Section titled “Loki”](#loki)
The Loki deployment is (by default) backed by an object storage provider for log retention. For cloud environments you can wire this into the environment’s storage provider with the following overrides:
```yaml
- name: uds-core
...
overrides:
loki:
loki:
values:
- path: loki.storage.s3.endpoint
value: ""
- path: loki.storage.s3.secretAccessKey
value: ""
- path: loki.storage.s3.accessKeyId
value: ""
- path: loki.storage.bucketNames.chunks
value: ""
- path: loki.storage.bucketNames.ruler
value: ""
- path: loki.storage.bucketNames.admin
value: ""
- path: loki.storage.bucketNames.region
value: ""
```
You can also use the [Minio Operator UDS Package](https://github.com/defenseunicorns/uds-package-minio-operator) to back Loki with the following overrides:
```yaml
- name: minio-operator
...
overrides:
minio-operator:
uds-minio-config:
values:
- path: apps
value:
- name: loki
namespace: loki
remoteSelector:
app.kubernetes.io/name: loki
bucketNames:
- uds-loki-chunks
- uds-loki-ruler
- uds-loki-admin
copyPassword:
enabled: true
- name: core-logging
...
overrides:
loki:
uds-loki-config:
values:
- path: storage.internal
value:
enabled: true
remoteSelector:
v1.min.io/tenant: loki
remoteNamespace: minio
loki:
values:
- path: loki.storage.bucketNames.chunks
value: "uds-loki-chunks"
- path: loki.storage.bucketNames.ruler
value: "uds-loki-ruler"
- path: loki.storage.bucketNames.admin
value: "uds-loki-admin"
- path: loki.storage.s3.endpoint
value: http://uds-minio-hl.minio.svc.cluster.local:9000/
- path: loki.storage.s3.region
value: ""
- path: loki.storage.s3.accessKeyId
value: ${LOKI_ACCESS_KEY_ID}
- path: loki.storage.s3.secretAccessKey
value: ${LOKI_SECRET_ACCESS_KEY}
- path: loki.storage.s3.s3ForcePathStyle
value: true
- path: loki.storage.s3.signatureVersion
value: "v4"
- path: write.extraArgs
value:
- "-config.expand-env=true"
- path: write.extraEnv
value:
- name: LOKI_ACCESS_KEY_ID
valueFrom:
secretKeyRef:
name: minio-loki
key: accessKey
- name: LOKI_SECRET_ACCESS_KEY
valueFrom:
secretKeyRef:
name: minio-loki
key: secretKey
- path: read.extraArgs
value:
- "-config.expand-env=true"
- path: read.extraEnv
value:
- name: LOKI_ACCESS_KEY_ID
valueFrom:
secretKeyRef:
name: minio-loki
key: accessKey
- name: LOKI_SECRET_ACCESS_KEY
valueFrom:
secretKeyRef:
name: minio-loki
key: secretKey
```
#### Velero
[Section titled “Velero”](#velero)
The Velero deployment is (by default) backed by an object storage provider for backup retention. For cloud environments you can wire this into the environment’s storage provider with the following overrides:
```yaml
- name: uds-core
...
overrides:
velero:
velero:
values:
- path: credentials.secretContents.cloud
value: |
[default]
aws_access_key_id=
aws_secret_access_key=
- path: "configuration.backupStorageLocation"
value:
- name: default
provider: aws
bucket: ""
config:
region: ""
s3ForcePathStyle: true
s3Url: ""
credential:
name: "velero-bucket-credentials"
key: "cloud"
```
You can also use the [Minio Operator UDS Package](https://github.com/defenseunicorns/uds-package-minio-operator) to back Velero with the following overrides:
```yaml
- name: minio-operator
...
overrides:
minio-operator:
uds-minio-config:
values:
- path: apps
value:
- name: velero
namespace: velero
remoteSelector:
app.kubernetes.io/name: velero
bucketNames:
- uds-velero
copyPassword:
enabled: true
secretIDKey: AWS_ACCESS_KEY_ID
secretPasswordKey: AWS_SECRET_ACCESS_KEY
- name: core-backup-restore
...
overrides:
velero:
uds-velero-config:
values:
- path: storage.internal
value:
enabled: true
remoteSelector:
v1.min.io/tenant: velero
remoteNamespace: minio
velero:
values:
- path: "credentials"
value:
useSecret: true
existingSecret: "minio-velero"
extraEnvVars:
AWS_ACCESS_KEY_ID: dummy
AWS_SECRET_ACCESS_KEY: dummy
- path: "configuration.backupStorageLocation"
value:
- name: default
provider: aws
bucket: "uds-velero"
config:
region: ""
s3ForcePathStyle: true
s3Url: "http://uds-minio-hl.minio.svc.cluster.local:9000/"
```
-----
# Release Overview
This document outlines how UDS Core is versioned, released, tested, and maintained.
## Release Cadence
[Section titled “Release Cadence”](#release-cadence)
UDS Core follows a predictable release schedule to provide regular updates and improvements:
* **Regular Releases**: New versions are published every 2 weeks (typically on Tuesdays)
* **Hotfix Releases**: Critical bug fixes may be released outside the regular cycle when necessary
### Hotfix Policy
[Section titled “Hotfix Policy”](#hotfix-policy)
Hotfix releases are created for critical issues that cannot wait for the next regular release cycle. We typically cut hotfix releases for:
* Bugs preventing installation or upgrade (even if only affecting specific configurations)
* Issues limiting access to core services (UIs/APIs) or ability to configure/communicate with external dependencies
* Significant regressions in functionality or behavior
* Security vulnerabilities requiring immediate attention
We reserve the right to cut releases outside the normal schedule whenever we deem necessary to address important issues.
## Versioning Strategy
[Section titled “Versioning Strategy”](#versioning-strategy)
UDS Core follows [Semantic Versioning 2.0.0](https://semver.org/).
For a more detailed review of how UDS Core applies Semantic Versioning, see the [versioning](https://github.com/defenseunicorns/uds-core/blob/main/VERSIONING.md) document in our repository.
### Breaking Changes
[Section titled “Breaking Changes”](#breaking-changes)
Breaking changes are clearly documented in the [CHANGELOG.md](https://github.com/defenseunicorns/uds-core/blob/main/CHANGELOG.md) with the `⚠ BREAKING CHANGES` header (and in the [GitHub release notes](https://github.com/defenseunicorns/uds-core/releases)). Each breaking change includes specific upgrade steps required when applicable.
### Current Stability Status
[Section titled “Current Stability Status”](#current-stability-status)
While UDS Core has not yet reached version 1.0, it is considered production-ready and stable. The pre-1.0 versioning reflects our commitment to maintaining flexibility as we continue to enhance our security posture.
## Release Process
[Section titled “Release Process”](#release-process)
### Official Releases
[Section titled “Official Releases”](#official-releases)
The release process is automated using [release-please](https://github.com/googleapis/release-please) and GitHub workflows:
1. Changes are merged to the `main` branch through pull requests
2. Release-please automatically determines the next version based on conventional commits
3. A release PR is created with updated version numbers and CHANGELOG entries
4. Once merged, a new version tag is created and the release workflow is triggered
5. Release artifacts are built, tested, and published
6. CVE scans are performed on the released artifacts
7. Release notes are automatically generated from the CHANGELOG
### Release Artifacts
[Section titled “Release Artifacts”](#release-artifacts)
Each release includes:
* Zarf packages for all UDS Core components
* Pre-configured UDS bundles for demos and development (with [`uds-k3d`](https://github.com/defenseunicorns/uds-k3d))
* Documentation updates as necessary
## Testing Strategy
[Section titled “Testing Strategy”](#testing-strategy)
UDS Core undergoes rigorous testing before each release.
### Functionality Testing
[Section titled “Functionality Testing”](#functionality-testing)
* **Operator Logic Tests**: Validate UDS Operator functionality and reconciliation logic
* **UI Journey Tests**: End-to-end testing of user workflows across application interfaces
* **API Validation Tests**: Verify API endpoints and responses function correctly
* **Cross-Distribution Tests**: Validate compatibility with [supported Kubernetes distributions](/reference/uds-core/distribution-support)
* **Upgrade Tests**: Verify smooth upgrades from previous versions
### Security Testing
[Section titled “Security Testing”](#security-testing)
* **Static Analysis**: CodeQL scans for code vulnerabilities
* **Dependency Scanning**: Checks for vulnerabilities in dependencies
* **Container Scanning**: Analyzes container images for security issues
* **Policy Compliance**: Validates adherence to security policies
### Production Validation
[Section titled “Production Validation”](#production-validation)
Defense Unicorns maintains several environments running UDS Core that are updated shortly after each release, providing additional real-world validation.
## Development Builds
[Section titled “Development Builds”](#development-builds)
### Nightly Snapshots
[Section titled “Nightly Snapshots”](#nightly-snapshots)
Automated builds from the latest `main` branch are created daily at 10:00 UTC:
* Tagged as `snapshot-latest` on GitHub
* Available as Zarf packages and UDS bundles in the [GitHub Packages repository](https://github.com/orgs/defenseunicorns/packages?tab=packages\&q=uds%2Fsnapshots+repo%3Adefenseunicorns%2Fuds-core)
* Each snapshot is tagged with a unique identifier combining date string + commit hash (for immutable, pinned references), while the most recent snapshots are also tagged with `latest` (a mutable tag that always points to the newest snapshot)
* Useful for testing new features before official releases
* **Not recommended for production use**
### Feature Previews
[Section titled “Feature Previews”](#feature-previews)
For significant new features or architectural changes, special snapshot builds may be created:
* Available from feature branches or `main`
* Provided for early feedback and validation
## Upgrade Recommendations
[Section titled “Upgrade Recommendations”](#upgrade-recommendations)
When upgrading UDS Core:
1. Always review the [CHANGELOG](https://github.com/defenseunicorns/uds-core/blob/main/CHANGELOG.md) for breaking changes and new features.
2. Ensure you have reviewed and performed any [Keycloak / Identity Config upgrade steps](/reference/uds-core/idam/upgrading-versions).
3. Test upgrades in a staging environment before upgrading production
4. Follow the detailed [upgrade documentation](/reference/deployment/upgrades)
5. Consider the impact on any mission applications running on UDS Core
For mission-critical deployments, we recommend maintaining a staging environment that mirrors production for validating upgrades before deployment.
-----
# Configuration Guide
This document provides a comprehensive overview of all configuration options available in the UDS Registry Helm chart.
Tip
UDS Registry uses sensible defaults, most deployments will need to only require a minimal set of configuration.
## Table of Contents
[Section titled “Table of Contents”](#table-of-contents)
* [Configuration Parameters](#configuration-parameters)
* [Configuration Examples](#configuration-examples)
## Configuration Parameters
[Section titled “Configuration Parameters”](#configuration-parameters)
### Basic Configuration [(example)](#basic-development-setup)
[Section titled “Basic Configuration (example)”](#basic-configuration-example)
| Parameter | Default | Description |
| -------------- | ------- | ------------------------------------- |
| `replicaCount` | `1` | Number of registry replicas to deploy |
### Image Configuration
[Section titled “Image Configuration”](#image-configuration)
| Parameter | Default | Description |
| ------------------ | -------------------------------------- | -------------------------- |
| `image.repository` | `ghcr.io/defenseunicorns/uds-registry` | Container image repository |
| `image.tag` | `0.20.1` | Container image tag |
| `image.pullPolicy` | `IfNotPresent` | Image pull policy |
### Package Configuration
[Section titled “Package Configuration”](#package-configuration)
| Parameter | Default | Description |
| ------------------------- | ----------------------- | ------------------------------------- |
| `package.gateway` | `tenant` | Gateway configuration for the package |
| `package.host` | `registry` | Hostname for the registry service |
| `package.domain` | `###ZARF_VAR_DOMAIN###` | Domain name (uses Zarf variable) |
| `package.useRootDomain` | `false` | Use root domain instead of subdomain |
| `package.serviceMeshMode` | `ambient` | Service mesh mode configuration |
### Resource Configuration [(example)](#basic-development-setup)
[Section titled “Resource Configuration (example)”](#resource-configuration-example)
Default resource values are suitable for uds-core only. Increase for production workloads.
| Parameter | Default | Description |
| --------------------------- | ------- | -------------- |
| `resources.requests.memory` | `128Mi` | Memory request |
| `resources.requests.cpu` | `250m` | CPU request |
| `resources.limits.memory` | `1Gi` | Memory limit |
| `resources.limits.cpu` | `750m` | CPU limit |
### Storage Configuration [(example)](#basic-development-setup)
[Section titled “Storage Configuration (example)”](#storage-configuration-example)
Two storage backends are available:
* **filesystem** - Uses persistent volumes for storage
* **s3** - Uses S3-compatible object storage
When `haDatabase` is enabled:
* `ociStorage` must be set to `s3`
* Database PVC creation is disabled
* External database must be configured via `database.connectionString`
| Parameter | Default | Options | Description |
| ------------ | ------------ | ------------------ | ---------------------------------------- |
| `ociStorage` | `filesystem` | `filesystem`, `s3` | Storage backend for OCI artifacts |
| `haDatabase` | `false` | - | Enable HA database (requires S3 storage) |
### Registry Configuration [(example)](#filesystem-storage-configuration)
[Section titled “Registry Configuration (example)”](#registry-configuration-example)
| Parameter | Default | Options | Description |
| ------------------------ | ------- | -------------------------------- | ----------- |
| `registry.logging.level` | `INFO` | `DEBUG`, `INFO`, `WARN`, `ERROR` | Log level |
### Authentication Configuration [(example)](#authentication-and-session-configuration)
[Section titled “Authentication Configuration (example)”](#authentication-configuration-example)
| Parameter | Default | Description |
| -------------------------------------------- | ------------- | ---------------------------------------------------- |
| `registry.auth.access.admins` | `["admin"]` | List of initial admin usernames |
| `registry.auth.publicOrgs.metadataAccess` | `["public"]` | Organizations with UI access (no OCI access) |
| `registry.auth.publicOrgs.readAccess` | `["library"]` | Organizations with UI access (auth required for OCI) |
| `registry.auth.webSession.duration` | `8h` | User session duration |
| `registry.auth.personalTokens.defaultExpiry` | `720h` | Default token expiry (30 days) |
| `registry.auth.personalTokens.maxExpiry` | `4320h` | Maximum token expiry (180 days) |
| `registry.auth.serviceTokens.defaultExpiry` | `1440h` | Default token expiry (60 days) |
| `registry.auth.serviceTokens.maxExpiry` | `8760h` | Maximum token expiry (365 days) |
### Scanner Configuration [(example)](#scanner-configuration)
[Section titled “Scanner Configuration (example)”](#scanner-configuration-example)
| Parameter | Default | Description |
| --------------------------------- | ------- | -------------------------------- |
| `registry.scanner.enabled` | `true` | Enable vulnerability scanning |
| `registry.scanner.updateInterval` | `12h` | Scanner database update interval |
| `registry.scanner.scanInterval` | `24h` | Image scanning interval |
### Feature Flags [(example)](#feature-flags-configuration)
[Section titled “Feature Flags (example)”](#feature-flags-example)
| Parameter | Default | Description |
| ------------------------------------- | ------- | -------------------------- |
| `registry.features.registryAnalytics` | `false` | Enable registry analytics |
| `registry.features.servePrivate` | `true` | Serve private repositories |
### Database Persistence
[Section titled “Database Persistence”](#database-persistence)
| Parameter | Default | Description |
| ------------------------------------------ | ---------------------------------- | ------------------------------- |
| `persistence.database.pv.storageClassName` | `""` | Storage class (empty = default) |
| `persistence.database.pv.accessModes` | `["ReadWriteOnce"]` | Access modes |
| `persistence.database.pv.size` | `256Mi` | Storage size |
| `persistence.database.pv.annotations` | `{}` | Persistent volume annotations |
| `persistence.database.pv.finalizers` | `["kubernetes.io/pvc-protection"]` | Persistent volume finalizers |
| `persistence.database.pv.existingClaim` | `""` | Use existing PVC |
| `persistence.database.pv.extraPvcLabels` | `{}` | Extra PVC labels |
### Registry Persistence
[Section titled “Registry Persistence”](#registry-persistence)
| Parameter | Default | Description |
| ------------------------------------------ | ---------------------------------- | ------------------------------- |
| `persistence.registry.pv.storageClassName` | `""` | Storage class (empty = default) |
| `persistence.registry.pv.accessModes` | `["ReadWriteOnce"]` | Access modes |
| `persistence.registry.pv.size` | `10Gi` | Storage size |
| `persistence.registry.pv.annotations` | `{}` | Persistent volume annotations |
| `persistence.registry.pv.finalizers` | `["kubernetes.io/pvc-protection"]` | Persistent volume finalizers |
| `persistence.registry.pv.existingClaim` | `""` | Use existing PVC |
| `persistence.registry.pv.extraPvcLabels` | `{}` | Extra PVC labels |
### Distribution Configuration [(example)](#filesystem-storage-configuration)
[Section titled “Distribution Configuration (example)”](#distribution-configuration-example)
Set a secure random string for production deployments to ensure consistency across replicas.
| Parameter | Default | Description |
| ----------------------------------------------- | -------------------- | --------------------------------- |
| `distribution.http.secret` | `""` | HTTP secret for upload resumption |
| `distribution.storage.filesystem.rootDirectory` | `/app/data/registry` | Root directory for registry data |
### S3 Storage Configuration [(example)](#s3-storage-configuration)
[Section titled “S3 Storage Configuration (example)”](#s3-storage-configuration-example)
| Parameter | Default | Required | Description |
| ----------------------------------------------------- | -------------- | -------- | ---------------------------------- |
| `distribution.storage.s3.region` | `us-west-1` | Yes | AWS region |
| `distribution.storage.s3.regionEndpoint` | `""` | No | Custom S3 endpoint |
| `distribution.storage.s3.bucket` | `uds-registry` | Yes | S3 bucket name |
| `distribution.storage.s3.rootDirectory` | `registry` | No | Root directory in bucket |
| `distribution.storage.s3.secure` | `false` | No | Use HTTPS |
| `distribution.storage.s3.v4Auth` | `true` | No | Use AWS Signature Version 4 |
| `distribution.storage.s3.chunkSize` | `5242880` | No | Chunk size for multipart uploads |
| `distribution.storage.s3.multipartCopyChunkSize` | `33554432` | No | Chunk size for multipart copy |
| `distribution.storage.s3.multipartCopyMaxConcurrency` | `100` | No | Max concurrency for multipart copy |
| `distribution.storage.s3.multipartCopyThresholdSize` | `33554432` | No | Threshold for multipart copy |
| `distribution.storage.s3.storageClass` | `STANDARD` | No | S3 storage class |
| `distribution.storage.s3.keyId` | `""` | No | AWS access key ID |
| `distribution.storage.s3.accessKey` | `""` | No | AWS secret access key |
| `distribution.storage.s3.sessionToken` | `""` | No | AWS session token |
### Database Configuration [(example)](#database-examples)
[Section titled “Database Configuration (example)”](#database-configuration-example)
| Parameter | Default | Options | Description |
| --------------------------- | --------------------------------------------------- | --------------------- | -------------------------- |
| `database.type` | `sqlite3` | `sqlite3`, `postgres` | Database type |
| `database.connectionString` | `file:./db/registry.sqlite?_pragma=foreign_keys(1)` | - | Database connection string |
### Security Configuration
[Section titled “Security Configuration”](#security-configuration)
| Parameter | Default | Description |
| ------------------------------------- | ------- | --------------------------- |
| `serviceAccount.annotations` | `""` | Service account annotations |
| `podSecurityContext.runAsUser` | `65532` | User ID to run pods |
| `podSecurityContext.runAsGroup` | `65532` | Group ID to run pods |
| `podSecurityContext.fsGroup` | `65532` | Filesystem group ID |
| `containerSecurityContext.runAsUser` | `65532` | User ID for containers |
| `containerSecurityContext.runAsGroup` | `65532` | Group ID for containers |
## Configuration Examples
[Section titled “Configuration Examples”](#configuration-examples)
### Basic Development Setup
[Section titled “Basic Development Setup”](#basic-development-setup)
```yaml
replicaCount: 1
ociStorage: "filesystem"
haDatabase: false
resources:
requests:
memory: "128Mi"
cpu: "250m"
limits:
memory: "1Gi"
cpu: "750m"
```
### Database Examples
[Section titled “Database Examples”](#database-examples)
**SQLite (Default):**
```yaml
database:
type: sqlite3
connectionString: "file:./db/registry.sqlite?_pragma=foreign_keys(1)"
```
**PostgreSQL for Production:**
```yaml
database:
type: postgres
connectionString: "postgres://user:password@host:5432/dbname?sslmode=require"
```
### Filesystem Storage Configuration
[Section titled “Filesystem Storage Configuration”](#filesystem-storage-configuration)
```yaml
# Basic filesystem storage with logging
distribution:
version: "0.1"
storage:
filesystem:
rootdirectory: "./data/registry"
http:
secret: "my-cool-secret"
logging:
level: "INFO"
```
### S3 Storage Configuration
[Section titled “S3 Storage Configuration”](#s3-storage-configuration)
```yaml
# S3 storage with comprehensive settings
distribution:
version: "0.1"
storage:
s3:
region: "us-east-1"
bucket: "uds-registry"
accesskey: "${AWS_ACCESS_KEY}"
secretkey: "${AWS_SECRET_KEY}"
# Optional: Custom S3 endpoint for S3-compatible storage
# regionendpoint: "https://custom.s3.endpoint"
# forcepathstyle: true
# encrypt: true
# rootdirectory: "/registry"
# storageclass: "STANDARD"
# secure: true
cache:
blobdescriptor: "inmemory"
```
### Authentication with OpenID Connect
[Section titled “Authentication with OpenID Connect”](#authentication-with-openid-connect)
```yaml
# OIDC authentication configuration
auth:
sso:
issuer: "https://sso.uds.dev/realms/uds"
clientId: "uds-registry"
clientSecret: "your-client-secret"
callbackUrl: "https://registry.example.com/uds/auth/callback"
# Optional: Custom scopes and claims
# scopes:
# - "openid"
# - "profile"
# - "email"
# claims:
# username: "preferred_username"
# email: "email"
# name: "name"
# groups: "groups"
```
### Authentication and Session Configuration
[Section titled “Authentication and Session Configuration”](#authentication-and-session-configuration)
```yaml
# Authentication, token management, and session settings
auth:
webSession:
duration: "8h"
cookieDomain: "example.com"
publicOrgs:
# Organizations with UI access (no OCI access)
metadataAccess:
- "public"
# Organizations with UI access (auth required for OCI)
readAccess:
- "defenseunicorns"
access:
admins:
- "admin@example.com"
personalTokens:
defaultExpiry: "168h" # 7 days
maxExpiry: "4320h" # 180 days
serviceTokens:
defaultExpiry: "168h" # 7 days
maxExpiry: "4320h" # 180 days
```
### Scanner Configuration
[Section titled “Scanner Configuration”](#scanner-configuration)
```yaml
# Vulnerability scanner settings
scanner:
enabled: true
updateInterval: "6h"
scanInterval: "1h" # More frequent for dev/test (default: 24h)
```
### Feature Flags Configuration
[Section titled “Feature Flags Configuration”](#feature-flags-configuration)
```yaml
# Enable/disable registry features
features:
servePrivate: true
registryAnalytics: false
strictPackageValidation: true
```
### Production Setup with S3 and HA
[Section titled “Production Setup with S3 and HA”](#production-setup-with-s3-and-ha)
```yaml
replicaCount: 3
ociStorage: "s3"
haDatabase: true
resources:
requests:
memory: "512Mi"
cpu: "500m"
limits:
memory: "2Gi"
cpu: "1000m"
distribution:
http:
secret: "your-secure-random-string"
storage:
s3:
region: "us-east-1"
bucket: "my-registry-bucket"
accessKey: "your-access-key"
secretKey: "your-secret-key"
database:
type: "postgres"
connectionString: "postgres://user:password@db-host:5432/registry"
```
### Complete Configuration Example
[Section titled “Complete Configuration Example”](#complete-configuration-example)
```yaml
# Comprehensive configuration combining multiple aspects
distribution:
version: "0.1"
storage:
s3:
region: "us-east-1"
bucket: "production-registry"
accesskey: "${AWS_ACCESS_KEY}"
secretkey: "${AWS_SECRET_KEY}"
encrypt: true
storageclass: "STANDARD"
cache:
blobdescriptor: "inmemory"
http:
secret: "production-secret-key"
auth:
sso:
issuer: "https://sso.company.com/realms/production"
clientId: "uds-registry-prod"
clientSecret: "${OIDC_CLIENT_SECRET}"
callbackUrl: "https://registry.company.com/uds/auth/callback"
webSession:
duration: "8h"
cookieDomain: "company.com"
publicOrgs:
metadataAccess:
- "public"
readAccess:
- "shared"
access:
admins:
- "registry-admin@company.com"
personalTokens:
defaultExpiry: "720h" # 30 days
maxExpiry: "4320h" # 180 days
scanner:
enabled: true
updateInterval: "12h"
scanInterval: "24h"
features:
servePrivate: true
registryAnalytics: true
logging:
level: "INFO"
database:
type: "postgres"
connectionString: "postgres://registry:${DB_PASSWORD}@db.company.com:5432/registry?sslmode=require"
```
-----
# Getting Started
### Explore Our Public Registry
[Section titled “Explore Our Public Registry”](#explore-our-public-registry)
[registry.defenseunicorns.com](https://registry.defenseunicorns.com/) is a hosted instance of UDS Registry and is **free to try**. It is the easiest way to explore UDS packages and see how the registry works. There are two main organizations to explore, each serving different purposes for package distribution and evaluation.
* **[Airgap Store](https://registry.defenseunicorns.com/org/airgap-store/packages)** - lists all UDS Packages published by Defense Unicorns. All packages in this organization are view-only: you can access configuration, SBOM and vulnerability data, but you cannot pull or deploy a package directly from this organization.
* **[Public](https://registry.defenseunicorns.com/org/public/packages)** - contains public packages that can be pulled and deployed.
**Create a free account** at [registry.defenseunicorns.com/sign-in](https://registry.defenseunicorns.com/sign-in) for additional benefits:
* Gain access to our public organization and download related packages at no cost
* Create and manage tokens for automated package retrieval and CI/CD integration
### Deploy Your Own Registry
[Section titled “Deploy Your Own Registry”](#deploy-your-own-registry)
UDS Registry is Airgap native and can be self hosted! [Contact us](https://defenseunicorns.com/registry-inquiry) to get access to the UDS Registry package.
Deploy the UDS Registry package in your [UDS Bundle](https://uds.defenseunicorns.com/reference/bundles/overview/), see the [UDS Registry Configuration Guide](/registry/configuration) for more details.
uds-bundle.yaml
```yaml
kind: UDSBundle
metadata:
name: registry
description: A UDS bundle for deploying UDS Registry package
version: dev
packages:
- name: uds-registry
path: "path/to/uds-registry/package"
ref: 0.0.1
overrides:
uds-registry:
uds-registry:
values:
# List of orgs that can be accessed without authentication in the UI, but no implicit access to OCI endpoints
- path: registry.auth.publicOrgs.metadataAccess
value:
- view-only
# List of orgs that can be accessed without authentication in the UI, but still require authentication for OCI endpoints
- path: registry.auth.publicOrgs.readAccess
value:
- public
# Specify initial admin users
- path: registry.auth.access.admins
value:
- admin-user@defenseunicorns.com
```
## Support
[Section titled “Support”](#support)
For assistance with the UDS Registry, contact the UDS support team at or through the internal support channels.
-----
# Registry Overview
Check it out now!
The [UDS Registry](https://registry.defenseunicorns.com/) is live now.
UDS Registry is an OCI-compliant registry specifically designed for the Department of Defense (DoD) to manage and deploy UDS packages to any mission environment. This centralized, security-focused system helps you discover, distribute, and deploy your team’s mission applications onto our DoD-compliant platform [UDS Core](https://uds.defenseunicorns.com/reference/uds-core/overview/) while preserving critical security metadata throughout the software delivery lifecycle.
**UDS Registry delivers three key benefits:**
* Reduces time to deployment through streamlined package management
* Consolidates CVE & Software Bill of Materials (SBOM) data for comprehensive security & compliance visibility
* Simplifies procurement by providing clear access and dissemination of authorized packages
| |
| ----------------------------------------------------------------------------- |
| 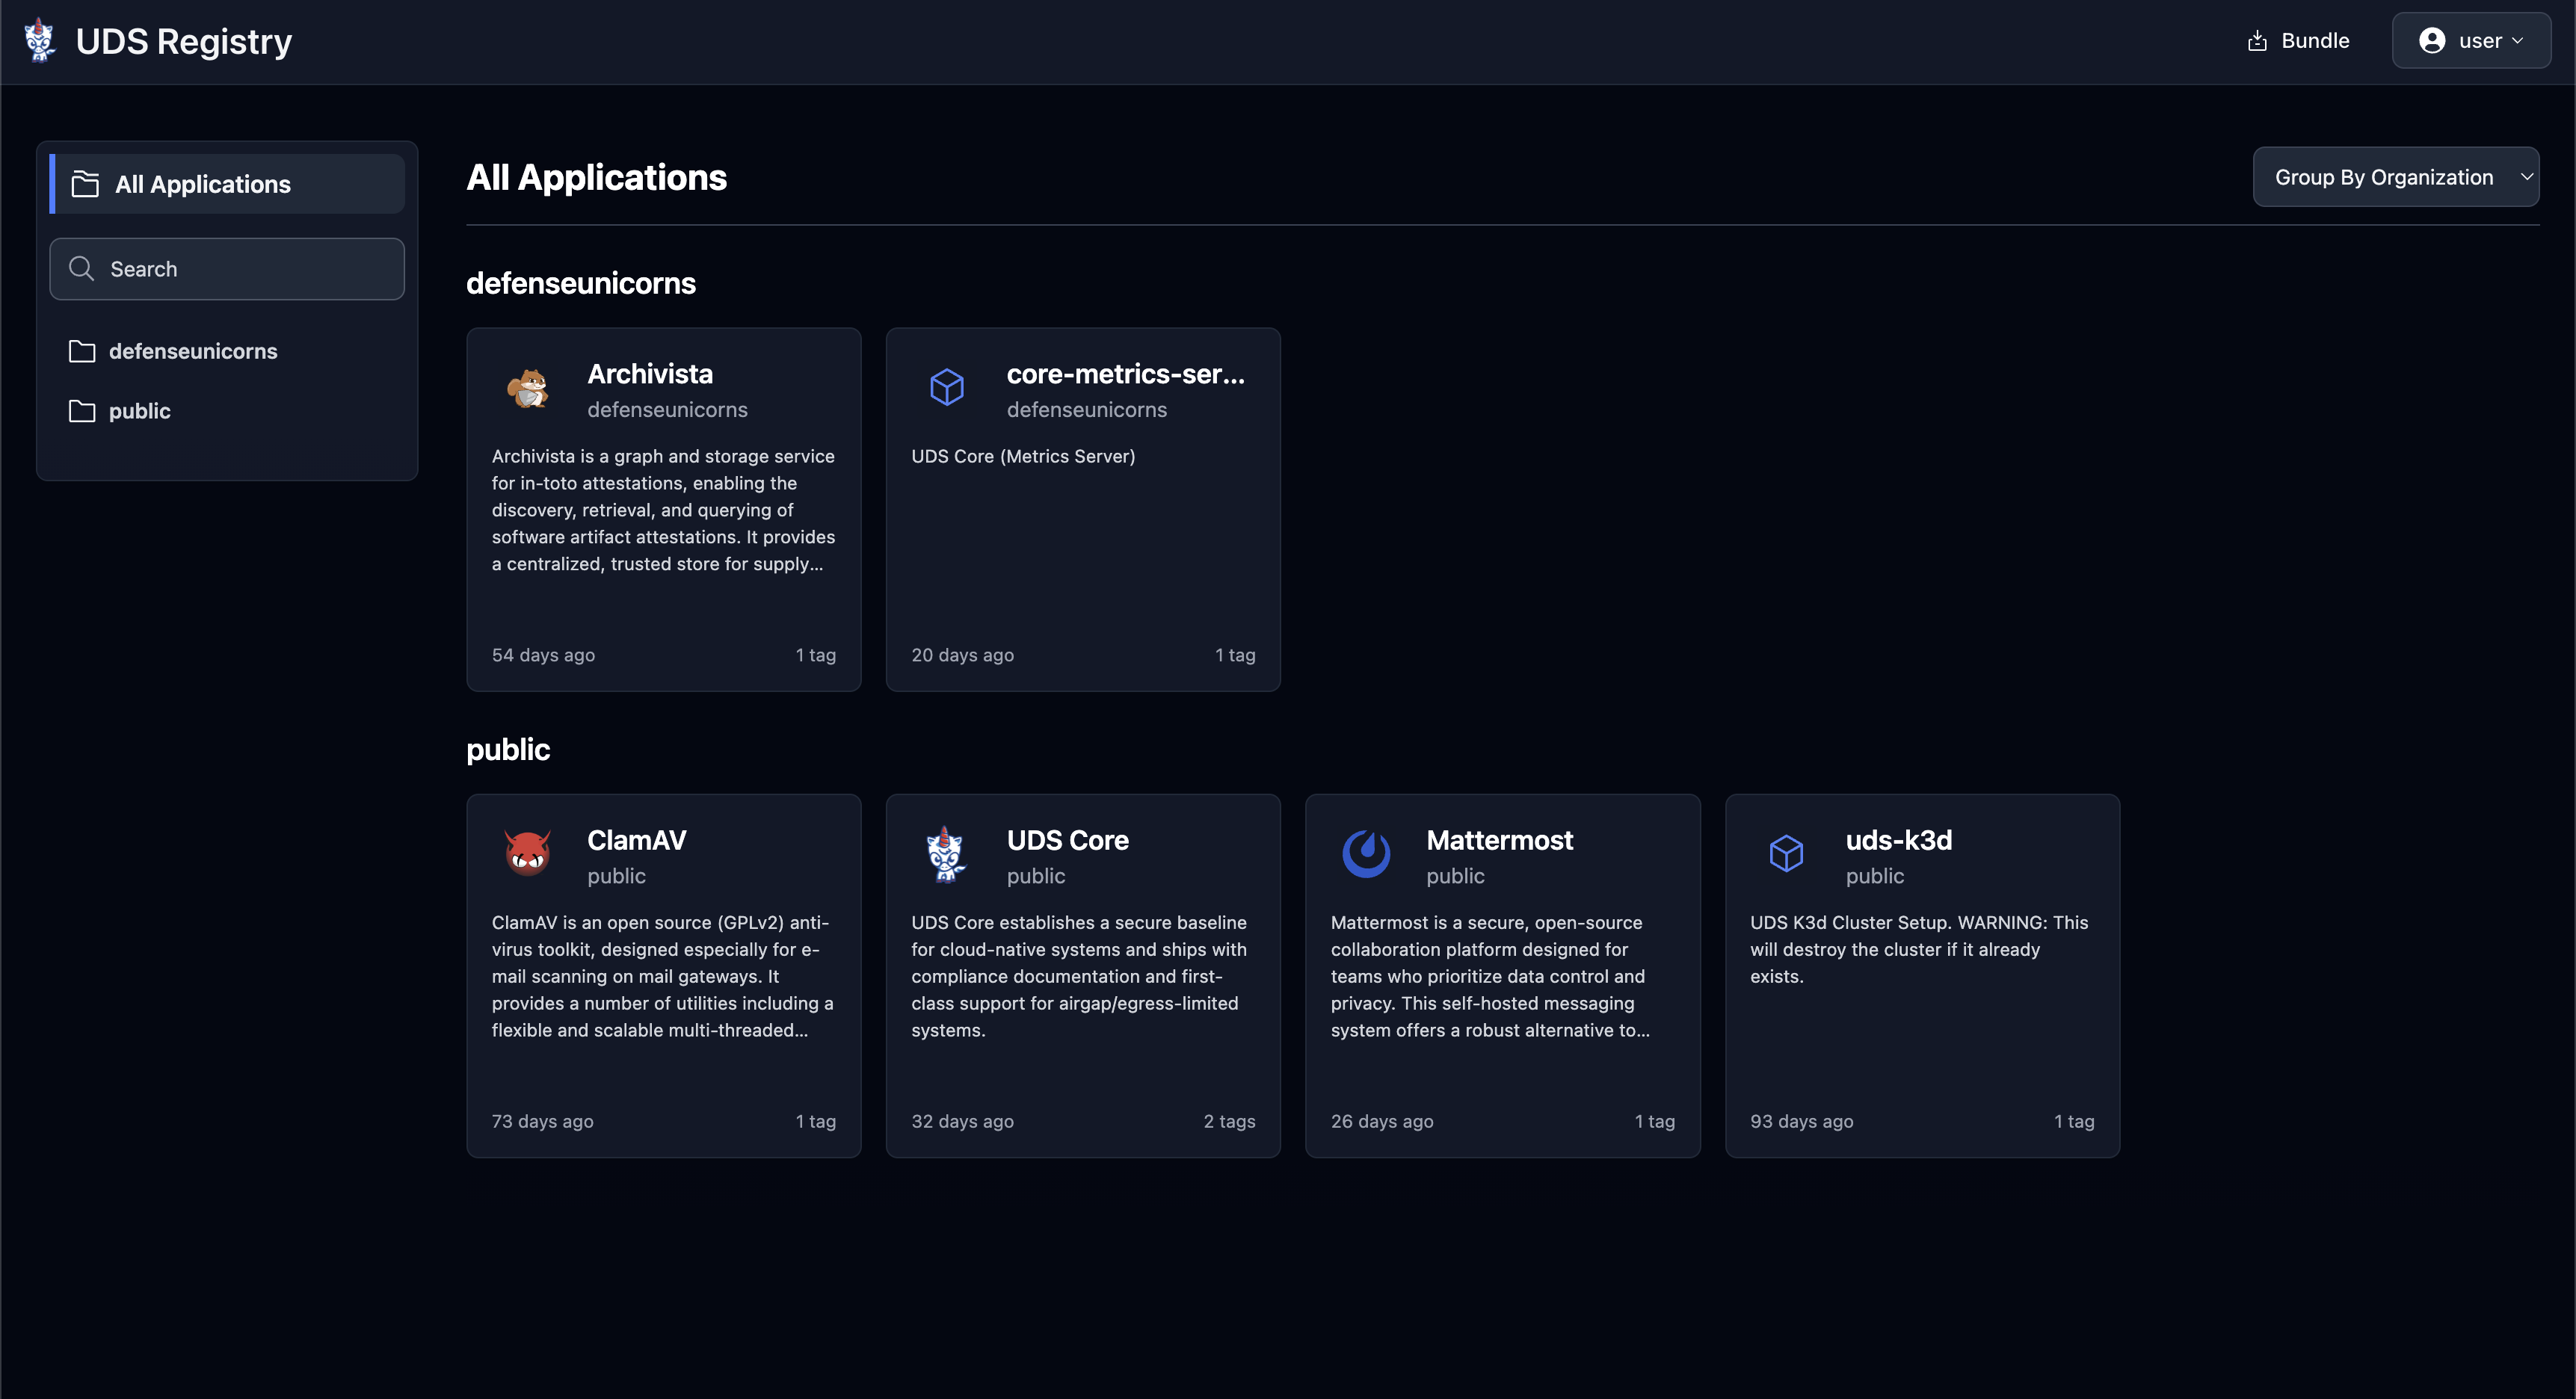 |
## Key Features
[Section titled “Key Features”](#key-features)
### Centralized Package Management
[Section titled “Centralized Package Management”](#centralized-package-management)
| | |
| ------------------------------------------------------------------------------ | -------------------------------------------------------------------------------------------------------------------------------------------------------------------------------------------------------------------------------------------------------------------------------------------------------------------------------------------------------------------------------------------------------------------------------------------------------------------------------------------------------------------------------------------------------------------------------------------------------------------- |
| 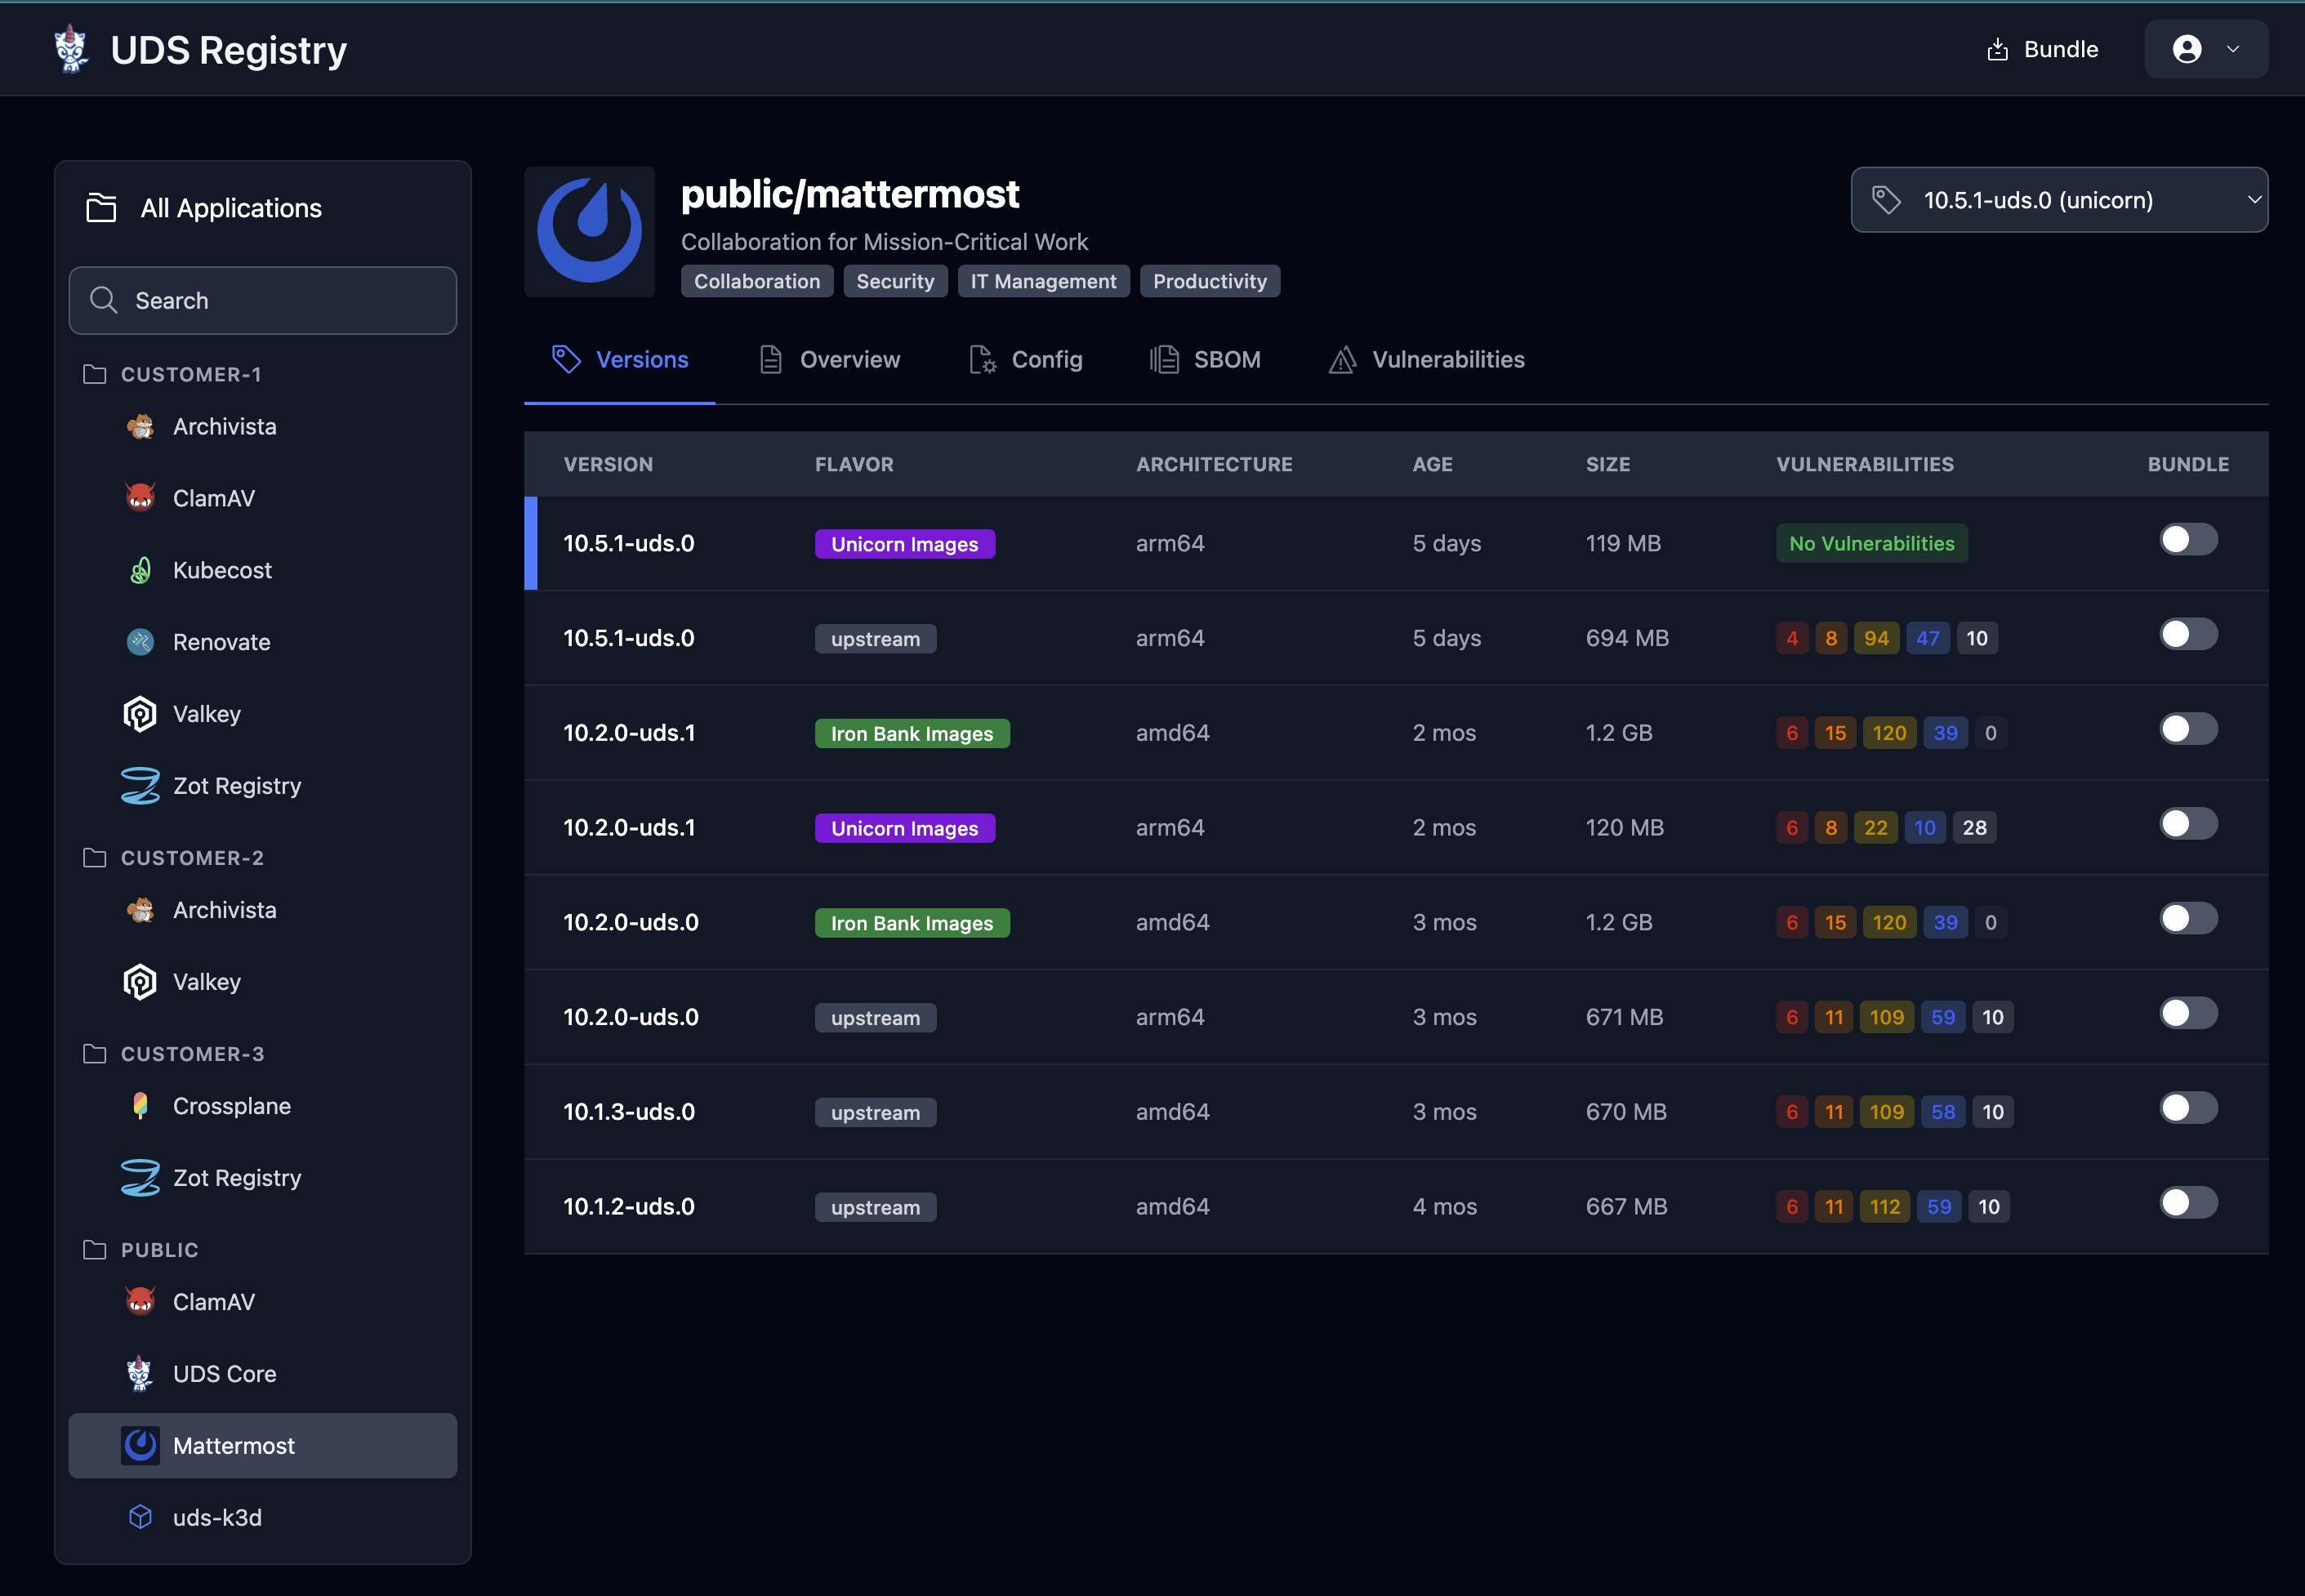 | * **Single Source of Truth** - Access all available UDS packages from one secure location.
* **Version Control** - Track and manage multiple package versions with complete history.
* **Multiple Image Flavors** - Support for different image flavors (Upstream, Iron Bank, Unicorn).
* **Cross-Architecture Support** - Full compatibility with both ARM64 and AMD64 architectures.
* **Comprehensive Metadata** - Preserve security information, dependencies, and deployment requirements.
* **Intuitive Search & Discovery** - Find relevant packages quickly with powerful filtering and search capabilities. |
## Security-First Architecture
[Section titled “Security-First Architecture”](#security-first-architecture)
| | |
| ---------------------------------------------------------------------------------- | -------------------------------------------------------------------------------------------------------------------------------------------------------------------------------------------------------------------------------------------------------------------------------------------------------------------------------------- |
| 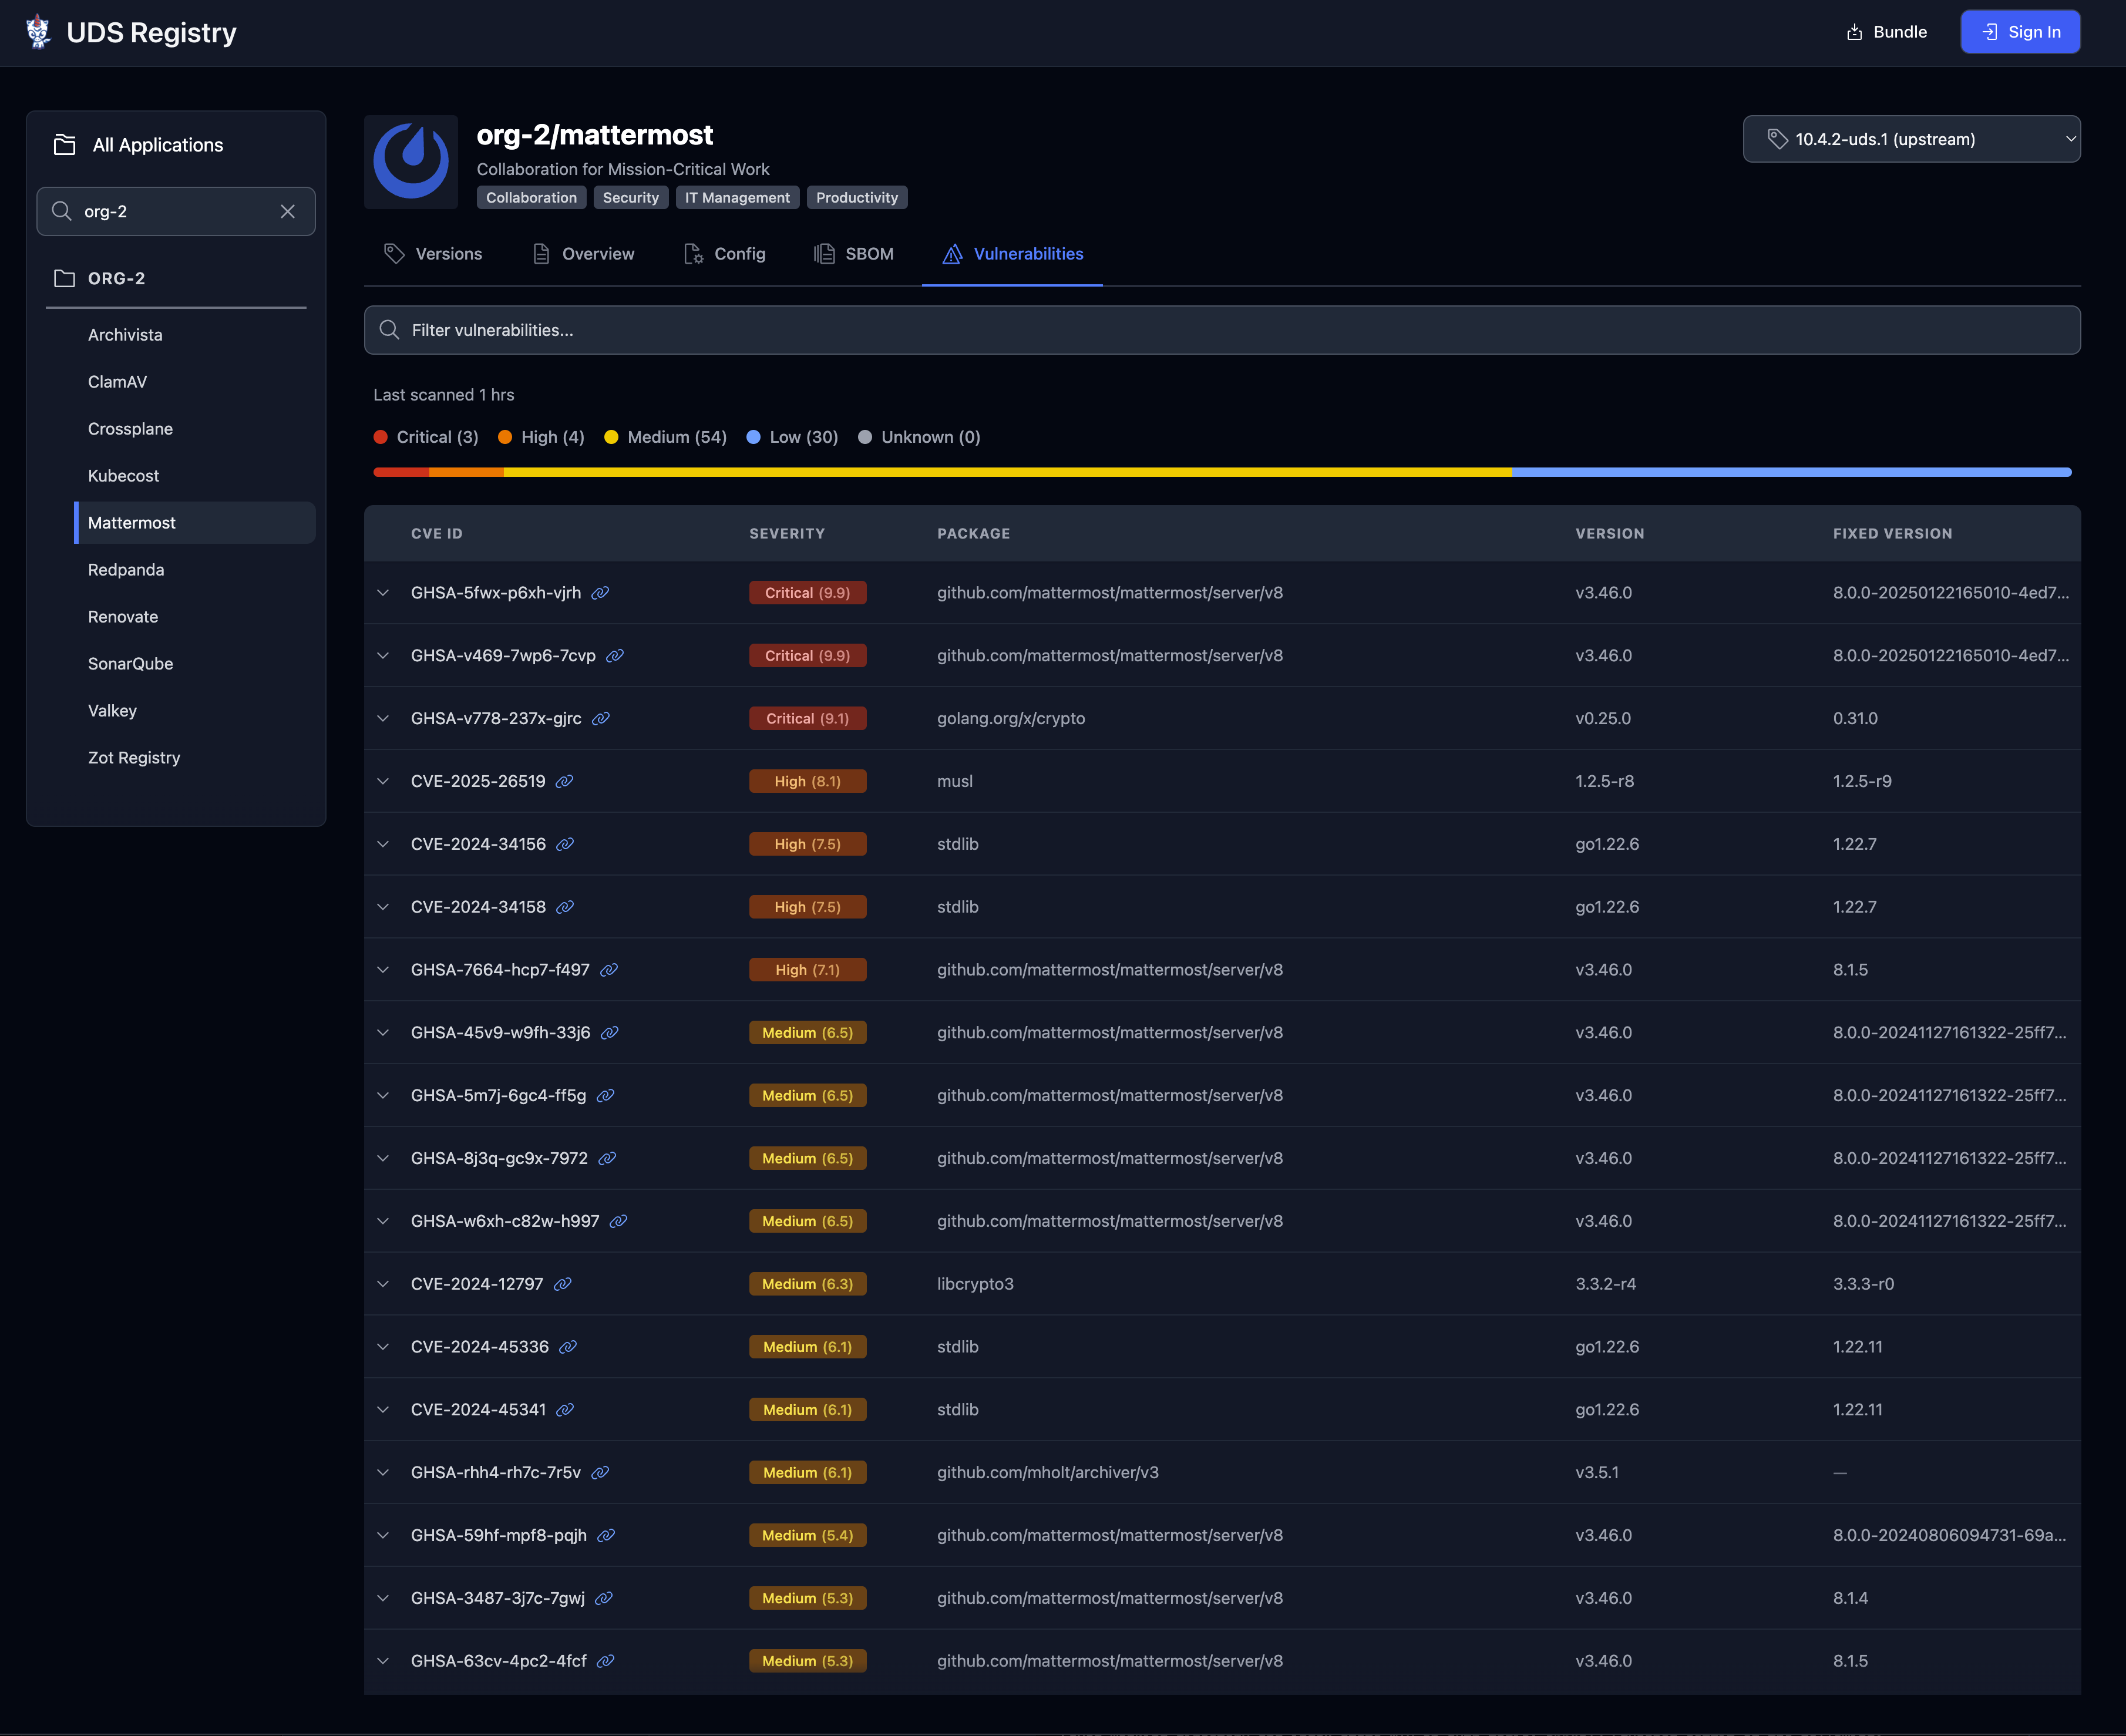 | * **CVE Tracking** - Monitor security vulnerabilities across all packages.
* **Metadata Preservation** - Maintain critical security information throughout deployment.
* **Compliance Validation** - Verify packages against DoD security standards.
* **Vulnerability Management** - Identify and address security risks proactively. |
## Flexible Distribution
[Section titled “Flexible Distribution”](#flexible-distribution)
| | |
| ------------------------------------------------------------------------------------------ | ------------------------------------------------------------------------------------------------------------------------------------------------------------------------------------------------------------------------------------------------------------------------------------------------------------------------------------------------------------------------------------------------- |
| 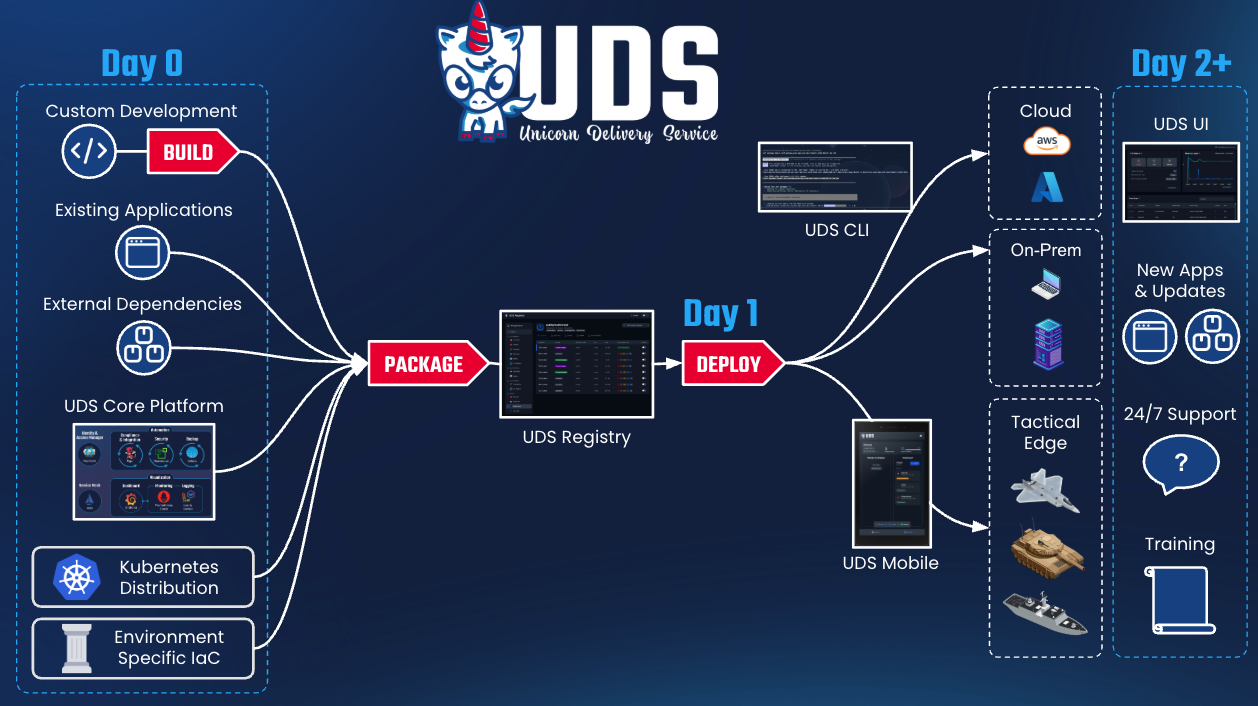 | * **Mission Environment Control** - Install only the packages needed for specific scenarios.
* **Customizable Deployments** - Tailor software configurations to mission requirements.
* **Contract-Based Access** - Control package distribution based on user permissions/Organization level entitlements.
* **Bundle Creation** - Group packages for specific mission scenarios or deployments. |
## On-Prem Deployment
[Section titled “On-Prem Deployment”](#on-prem-deployment)
| | |
| ------------------------------------------------------------------------- | ------------------------------------------------------------------------------------------------------------------------------------------------------------------------------------------------------------------------------------------------------------------------------------------------------------------------------------------ |
| 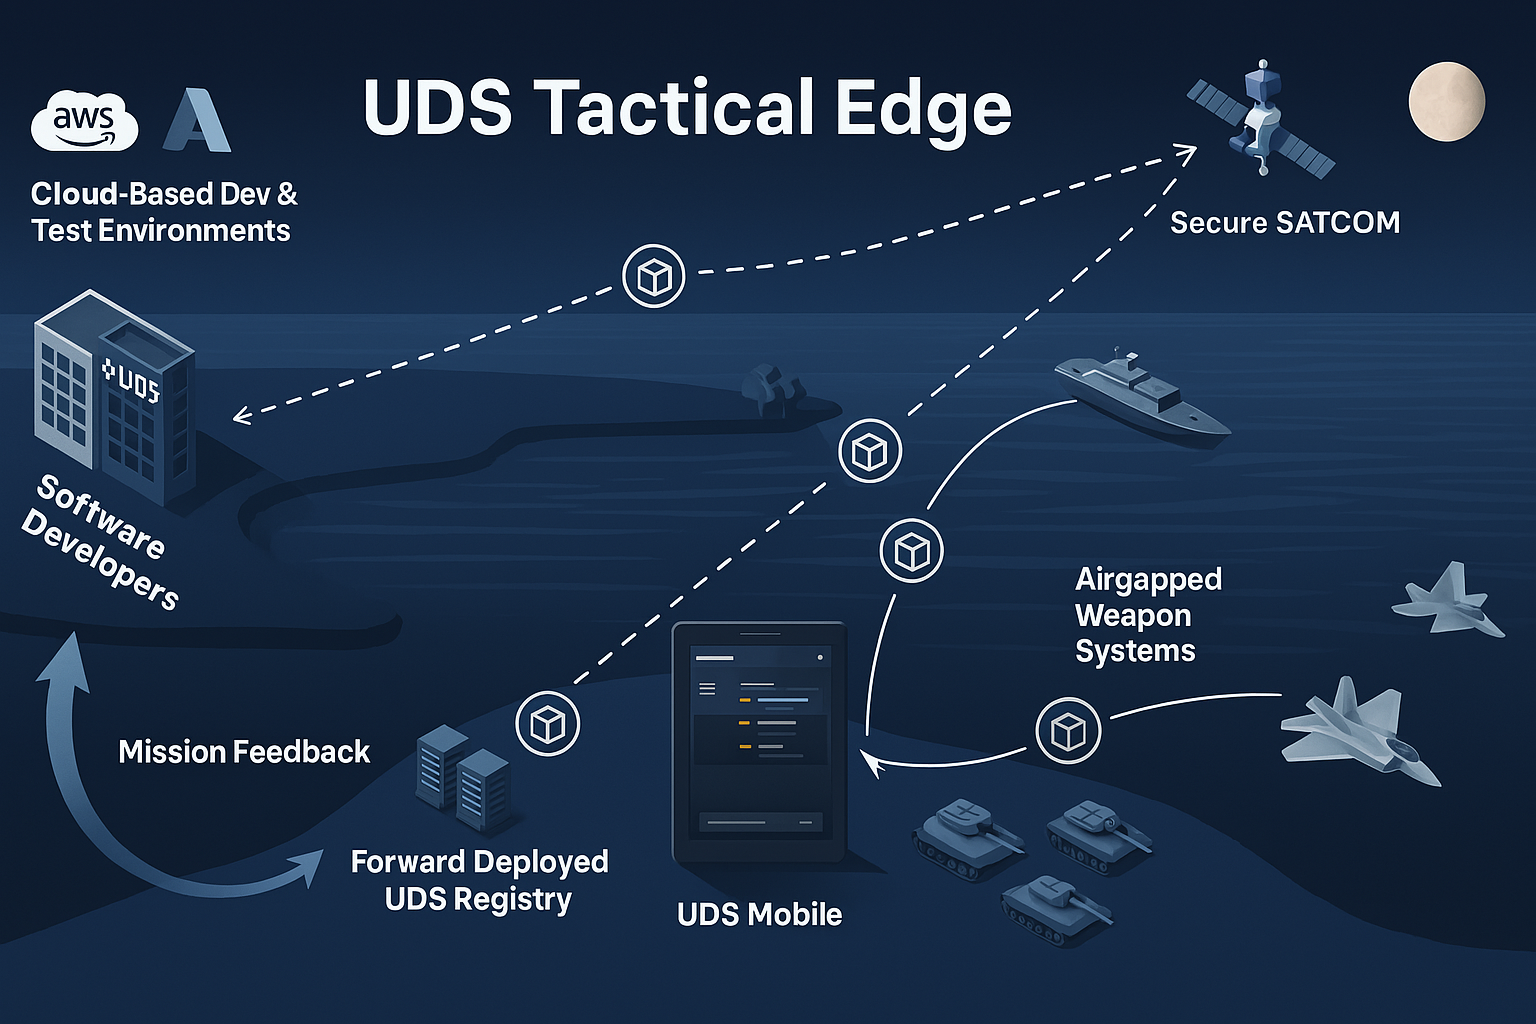 | * **Single Source of Truth** - Access all available UDS packages from one secure location.
* **Version Control** - Track and manage multiple package versions with complete history.
* **Edge Environment Support** - Optimize for tactical edge operations.
* **Reproducible Configurations** - Save and reuse deployment configurations. |
## Technical Details
[Section titled “Technical Details”](#technical-details)
The UDS Registry builds on standard OCI (Open Container Initiative) protocols, ensuring compatibility with existing container workflows while adding DoD-specific security enhancements.
### Architecture
[Section titled “Architecture”](#architecture)
* **Repository System** - Organizes packages by organization, mission, or type
* **Metadata Engine** - Preserves and manages security information
* **Access Control Layer** - Manages authentication and authorization
* **Distribution System** - Handles package bundling and delivery
* **API Driven Design** - Makes sure that integration and automation with CI/CD pipelines is seamless
### UDS Package Support
[Section titled “UDS Package Support”](#uds-package-support)
* **Multiple Image Flavors** - Create, manage, and deploy packages with different image sources:
* Upstream (community source)
* Iron Bank (hardened DoD-approved images)
* Unicorn (Defense Unicorns optimized images)
### Cross-Architecture Compatibility
[Section titled “Cross-Architecture Compatibility”](#cross-architecture-compatibility)
* Deploy to diverse environments with support for:
* ARM64 architecture for edge and energy-efficient environments
* AMD64 architecture for traditional server environments
**[Contact us](https://defenseunicorns.com/registry-inquiry) for more information on how UDS Registry can accelerate your mission!**
## Related Documentation
[Section titled “Related Documentation”](#related-documentation)
[Why UDS](https://uds.defenseunicorns.com/overview/why-uds/)\
[Mission and Technical Relevance](https://uds.defenseunicorns.com/overview/uds-mission-relevance/)\
[UDS Packages](https://uds.defenseunicorns.com/structure/packages/)\
[UDS Security Overview](https://uds.defenseunicorns.com/security/overview/)\
[Published Package Flavors](https://uds.defenseunicorns.com/reference/deployment/flavors/)
## Support
[Section titled “Support”](#support)
For assistance with the UDS Registry, contact the UDS support team at or through the internal support channels.
-----
# UDS Security Overview
> A general overview of security in UDS.
## Overview
[Section titled “Overview”](#overview)
UDS maintains a defense-in-depth baseline, providing real security through the entire software delivery process:
* **Secure supply chain** with CVE data and SBOMs for transparent software composition analysis and security audits.
* **Airgap ready** with **Zarf** packages for predictable, offline deployments in disconnected environments.
* **Zero‑trust networking** with default‑deny Kubernetes `NetworkPolicy`, Istio **STRICT mTLS**, and ALLOW‑based `AuthorizationPolicy`.
* **Identity & SSO** via Keycloak and Authservice so apps can be protected consistently, whether they natively support authentication or not.
* **Admission control** enforced by **Pepr** policies (non‑root, drop capabilities, block privileged/host access, etc.).
* **Runtime security** with realtime detection and alerting on malicious behavior.
* **Observability & audit**: centralized collection and shipping as well as metrics and dashboards.
Note
Security defaults are intentionally restrictive. End users can loosen controls, but changing defaults may reduce your security posture. This should be done carefully and any reductions in security should be documented.
## Secure Supply Chain
[Section titled “Secure Supply Chain”](#secure-supply-chain)
**What you get:**
* **Per-release CVE scanning and SBOMs**: View CVEs and full SBOMs for every Core release in the UDS Registry
* **Deterministic packaging**: Packages include only what is needed for your environment, reducing drift and surprise dependencies
**Why it matters:**
* You can verify exactly what ships with each release through SBOMs and CVE scans
* Transparent software composition analysis helps you understand and mitigate security risks
* Clear visibility into dependencies helps with compliance and security audits
**References:**
* UDS Registry:
* Zarf:
## Airgap Ready
[Section titled “Airgap Ready”](#airgap-ready)
**What you get:**
* **Built with Zarf**: Full support for offline/airgapped deployment through Zarf
* **No external dependencies**: All tools operate seamlessly without internet access
* **Purpose-built for disconnected environments**: Designed from the ground up for airgapped systems
**Why it matters:**
* You can deploy and operate securely in offline environments without introducing “backdoor” network dependencies
* Supports mission-critical use cases in highly secure networks where connectivity cannot be assumed
* Unlike typical industry products that need adaptation for airgapped systems, UDS is built for airgap from the start
**References:**
* Zarf:
## Identity & SSO
[Section titled “Identity & SSO”](#identity--sso)
**What you get:**
* **Keycloak** for SSO management with opinionated defaults for realms, clients, and group-based access.
* **Authservice** integration to protect apps that don’t natively speak OIDC—enforced at the mesh edge.
**Why it matters:**
* Consistent login, token handling, and group mapping across apps.
* Centralized access control that is easy to audit.
**References:**
* Keycloak SSO:
* Authservice Protection:
## Zero‑Trust Networking & Service Mesh
[Section titled “Zero‑Trust Networking & Service Mesh”](#zerotrust-networking--service-mesh)
**What you get:**
* **Default‑deny network posture**: Per‑namespace `NetworkPolicy` isolates workloads by default with explicit allow rules generated from your package’s declared needs.
* **Istio STRICT mTLS**: All in-mesh traffic is encrypted and identity-authenticated by default.
* **ALLOW‑based authorization**: `AuthorizationPolicy` enforces least privilege at the service layer.
* **Explicit egress**: Outbound access is explicitly declared to both in-cluster endpoints and remote hosts.
* **Admin vs Tenant ingress**: Administrative UIs are isolated behind a dedicated admin gateway.
**Why it matters:**
* Lateral movement is constrained by both the Kubernetes networking layer and Istio.
* Connectivity to/from your application is explicitly declared and easily reviewable.
**References:**
* Istio mTLS:
* Ingress Gateways:
* Authorization Policies:
## Admission Control (Pepr Policies)
[Section titled “Admission Control (Pepr Policies)”](#admission-control-pepr-policies)
**What you get:**
* **Secure defaults** that block overly privileged workloads.
* **Security mutations** to force workloads to use more secure configuration.
* **Controlled exemptions** for edge cases, keeping RBAC tight and changes auditable.
**Why it matters:**
* Misconfigurations and overly-permissive settings are blocked before they reach the cluster.
* In some cases workloads are automatically “downgraded” to least privilege.
* Exemptions are explicit and reviewable.
**References:**
* Pepr Policies:
* Exemptions:
## Runtime Security
[Section titled “Runtime Security”](#runtime-security)
**What you get:**
* **Runtime/container security** from NeuVector, used in alerting/monitor mode by default. *(Note: NeuVector will be removed from UDS Core on November 10, 2025)*
* **Runtime/container security** from Falco, providing real-time threat detection and security monitoring.
* **Visibility** into suspicious process, network, and file activity with alerts routed to your ops tooling.
**Why it matters:**
* You get actionable detection without the risk of blocking production traffic.
* Malicious behavior is instantly detected, allowing for quick triage and resolution.
## Observability & Audit
[Section titled “Observability & Audit”](#observability--audit)
**What you get:**
* **Centralized logging**: Vector collects and ships all cluster and application logs for searchable audit trails.
* **Metrics & dashboards**: Prometheus scrapes metrics and Grafana provides pre‑wired datasources and dashboards.
**Why it matters:**
* Unified troubleshooting across logs and metrics.
* Auditability for change control and incident response.
-----
# Tactical Edge FAQ
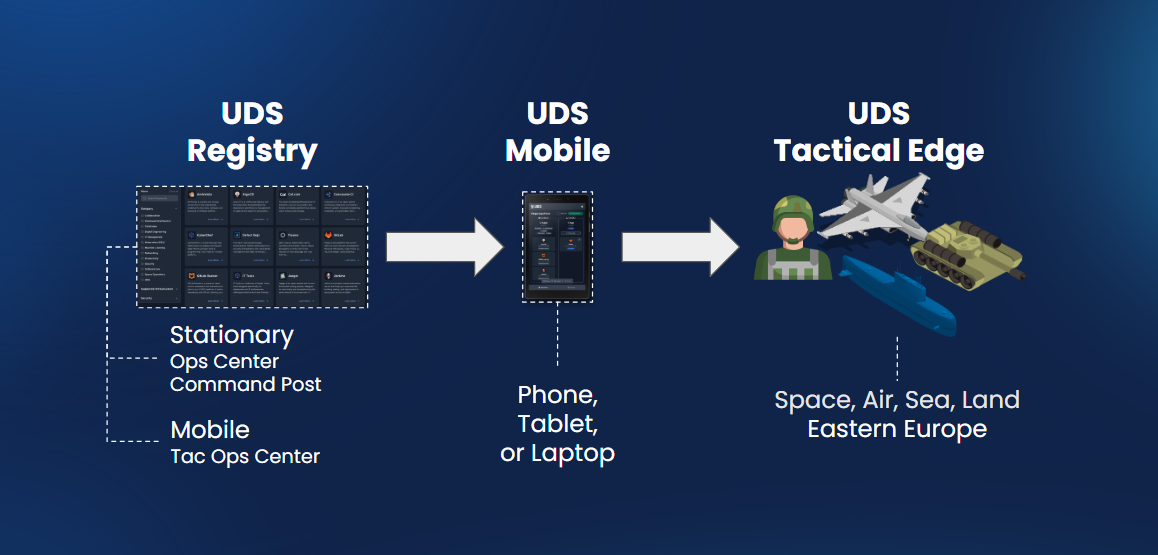
### Is UDS Tactical Edge part of UDS?
[Section titled “Is UDS Tactical Edge part of UDS?”](#is-uds-tactical-edge-part-of-uds)
* Yes, UDS Tactical Edge is a part of UDS. UDS Tactical Edge is a UDS capability with its own licensing.
### Can you explain what makes UDS Tactical Edge a capability of UDS?
[Section titled “Can you explain what makes UDS Tactical Edge a capability of UDS?”](#can-you-explain-what-makes-uds-tactical-edge-a-capability-of-uds)
* It is a collection of UDS clients and services that simplifies the use of UDS in resource-constrained environments.
* UDS is being configured specifically for tactical edge environments.
### Has UDS been deployed successfully in resource-constrained environments (edge)?
[Section titled “Has UDS been deployed successfully in resource-constrained environments (edge)?”](#has-uds-been-deployed-successfully-in-resource-constrained-environments-edge)
* Yes, Defense Unicorns has deployed UDS in resource-constrained environments. To discuss real-world applications, please contact for more information.
### What additional features come with UDS Tactical Edge?
[Section titled “What additional features come with UDS Tactical Edge?”](#what-additional-features-come-with-uds-tactical-edge)
Defense Unicorns offers a variety of capabilities that can be bundled with your UDS Tactical Edge subscription. Some examples include:
* Unicorn or Ironbank Hardened Images
* Software Bill of Materials
* Compliance Artifacts (SCTM, SSP, etc.)
* UDS Registry and observability dashboards
* Infrastructure-specific support
* Hands-on training
To discuss licensing options, please contact for more information.
### Does UDS Tactical Edge come with 24/7 support?
[Section titled “Does UDS Tactical Edge come with 24/7 support?”](#does-uds-tactical-edge-come-with-247-support)
* Yes, UDS Tactical Edge includes 24/7 customer support via business email and phone number.
### Can you explain what in UDS Tactical Edge is proprietary or open source?
[Section titled “Can you explain what in UDS Tactical Edge is proprietary or open source?”](#can-you-explain-what-in-uds-tactical-edge-is-proprietary-or-open-source)
* UDS Tactical Edge is a paid stock-keeping unit (SKU) of products that includes the open-source UDS Core platform along with proprietary components that make application management easier while operating at the tactical edge.
### What happens if I stop paying for UDS Tactical Edge?
[Section titled “What happens if I stop paying for UDS Tactical Edge?”](#what-happens-if-i-stop-paying-for-uds-tactical-edge)
If you stop paying for UDS Tactical Edge:
* You would retain access to UDS Core and other open-source components.
* You would revert to the AGPLv3 license for receiving updates for those open-source components.
* You would lose operational support from Defense Unicorns.
* You would no longer receive updates for proprietary components, such as the Android application.
-----
# Tactical Edge Overview
UDS Tactical Edge brings our proven secure software delivery platform, UDS, to the most challenging operational environments. Deploy Kubernetes directly to anything from small remote devices with resource constraints to the DoD’s next-generation weapon systems and platforms.
* Limited resources needed (4GB RAM, such as a Raspberry Pi 5)
* Applications can run with or without connectivity - a fully airgapped solution
* Control deployments using a mobile app (tablets/smartphones) or CLI tools (laptops/desktops).
UDS Tactical Edge ensures your critical operations have the same secure and efficient software delivery capabilities in the field that you expect in enterprise environments.
To learn more watch this product explainer video. [**Contact us**](https://defenseunicorns.com/contactus) if you want to see how we can help your mission.
[YouTube video player](https://www.youtube.com/embed/qbv0fc5Zxec?si=M_u3KjjTGHTm7Xqk)
## One-to-Many Fleet Management
[Section titled “One-to-Many Fleet Management”](#one-to-many-fleet-management)
| | |
| --------------------------------------------------------- | ------------------------------------------------------------------------------------------------------------------------------------------------------------------------------------------------------------------------------------------------------------------------------------------------------------------------------------------------------------------------------------------------------------------------------------------------------------------------------------------------------------------------ |
|  | * Warfighters risk their safety and efficiency when operating outdated systems—reduce exposure and streamline updates with bundled packages that deliver seamless, all-in-one application and platform upgrades, eliminating the need for fragile, patchwork scripts.
* Certified system administrators aren’t always available to perform software updates, which delays critical operations. UDS enables warfighters to deploy updates themselves, decentralizing software management and keeping assets in the fight. |
## Integrate Once, Deploy Anywhere
[Section titled “Integrate Once, Deploy Anywhere”](#integrate-once-deploy-anywhere)
| | |
| ------------------------------------------------------------------- | --------------------------------------------------------------------------------------------------------------------------------------------------------------------------------------------------------------------------------------------------------------------------------------------------------------------------------------- |
|  | * Fragmented environments create delays and inconsistencies—seamlessly integrate once and deploy across cloud, on-prem, and tactical edge environments without rework.
* UDS dynamically configures applications to fit their environment without extra effort. UDS will automatically configure your application via the UDS Operator. |
## Built for Combat Operations
[Section titled “Built for Combat Operations”](#built-for-combat-operations)
| | |
| --------------------------------------------------------------- | -------------------------------------------------------------------------------------------------------------------------------------------------------------------------------------------------------------------------------------------------------------------------------------------------------------- |
|  | * Mission-critical apps shouldn’t require IT expertise—UDS eliminates complexity with a declarative approach for fast, effortless deployments.
* Operations leave no time for complex software—UDS delivers an intuitive interface pilots can use in-flight and commanders can operate while leading a convoy. |
## Airgapped, Mission Applications
[Section titled “Airgapped, Mission Applications”](#airgapped-mission-applications)
| | |
| ----------------------------------------------------------------- | --------------------------------------------------------------------------------------------------------------------------------------------------------------------------------------------------------------------------------- |
|  | * Whether in a cockpit, fighting hole, submarine or data center, UDS can deliver software applications.
* Continued operations in contested, degraded and denied environments gives our forces the advantage in maneuver warfare. |
## Real-World Applications
[Section titled “Real-World Applications”](#real-world-applications)
To get a better idea of UDS Tactical Edge watch this real-world demonstration.
[YouTube video player](https://www.youtube.com/embed/xZ3T9ePwa3U?si=jgnFIwd8Ap8qLY8a)
| **Domain** | **Problem** | **Solution** |
| ------------------------------------------------------ | ---------------------------------------------------------------------------------------------------------------------------------------------------------------------------------------------------------------------------------------------- | ------------------------------------------------------------------------------------------------------------------------------------------------------------------------------------------------------------------------------------------------------------------------------------------ |
| **Joint Command & Control (JADC2 & Multi-Domain Ops)** | The DoD wants to create a unified data mesh across domains, but platforms are incompatible, software updates are inconsistent, and portability is lacking between cloud, on-prem, and edge. | UDS enables interoperability between legacy and modern systems through hardware-agnostic software portability, ensuring seamless and secure updates across diverse environments. For joint C2 to become a reality, portability and air-gapped operations at the edge must be foundational. |
| **Air** | Aircraft suffer from costly sustainment cycles due to software complexity and update delays. | UDS enables seamless, automated software updates for containerized mission applications, reducing downtime and sustainment costs. Our product is built to modernize legacy platforms and keep next-gen platforms updated and secure. |
| **Sea** | Naval systems require costly, manual software updates that degrade readiness and increase cyber vulnerabilities. Additionally, airgapped vessels like submarines have avoided adopting modern technology due to non-connectivity environments. | Secure, airgapped, containerized applications that enable zero-downtime updates, improving fleet availability. Our airgapped processes can bring modern enterprise applications to our submarine force, increasing productivity and quality of life while underway. |
| **Land** | Aging ground combat systems require frequent, complex software updates, increasing sustainment costs and limiting adaptability. | UDS enables rapid, low-Size, Weight, and Power (SWaP) software deployment that keeps platforms like tanks and armored vehicles mission-ready with minimal logistics burden. |
| **Cyber & Electronic Warfare (EW)** | Mission-critical cyber and EW tools require frequent updates to counter evolving threats, but legacy software delivery models are slow and ineffective. | Cyber and EW is the tip of the spear for DoD software capabilities. UDS supports airgapped, rapid deployment, enabling warfighters to update and deploy cyber tools and algorithms at the speed of relevance on the battlefield. |
| **Special Operations Forces (SOF)** | SOF teams operate in low-infrastructure, high-risk environments, making traditional sustainment and software updates impossible. | UDS minimizes Size, Weight, and Power (SWaP), allowing SOF operators to carry more AI-powered devices on the frontlines. |
| **Unmanned Systems (Sea, Air, Land, Space)** | Autonomous systems require frequent mission updates, but real-time connectivity is often disrupted in contested environments. | UDS enables secure, Kubernetes workloads, which can be preloaded and updated in the field to ensure mission adaptability. |
| **Expeditionary & Tactical Operation Centers** | Forward bases require self-sustaining software environments that can operate independently for extended periods. | UDS delivers hardened, containerized mission applications with automated sustainment capabilities, reducing dependency on external IT support. This approach enables supporting software factories at the enterprise level and applications at the edge level. |
| **DevSecOps & CI/CD for Tactical Edge** | Traditional software updates are slow, manual, and expensive, increasing lifecycle costs and limiting adaptability. | UDS provides a declarative deployment model, ensuring that what you develop and test will behave consistently in a production environment. |
**For a 1:1 consultation, [contact us.](https://defenseunicorns.com/contactus)**[](https://defenseunicorns.com/contactus)
-----
# Tactical Edge Technical Features
## UDS Tactical Edge Technical Features
[Section titled “UDS Tactical Edge Technical Features”](#uds-tactical-edge-technical-features)
UDS as a platform was built to be scalable and flexible to accommodate a variety of deployment scenarios. UDS Tactical Edge is the specific implementation of the UDS Core platform along with additional UDS services tailored for tactical edge deployments.
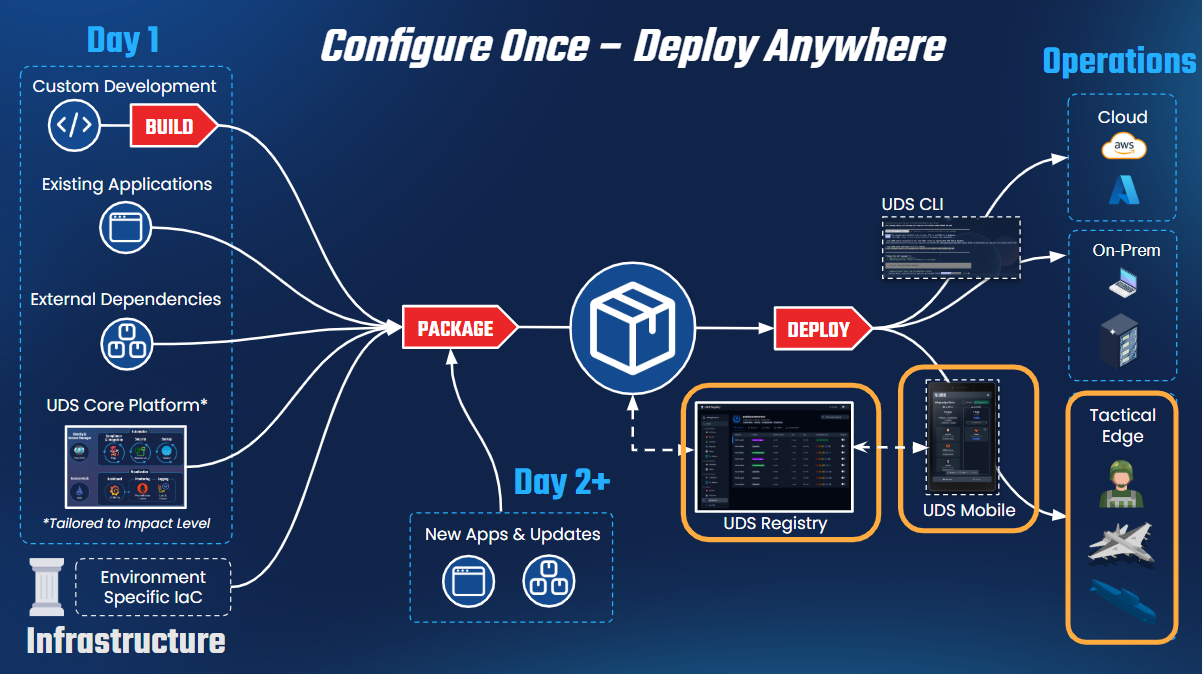
This is achieved through:
* **Functional Layer Paradigm**: UDS Core’s modular architecture allows unnecessary features to be omitted, optimizing for size, weight, and power (SWaP) constraints.
* **UDS Remote Agent**: A critical service that enables remote operation, facilitating control and monitoring of edge deployments. While primarily for UDS Edge, it can also benefit hub-spoke cloud deployments.
* **UDS Android App**: Designed to provide a mobile interface, ensuring accessibility and operational efficiency in austere environments.
While these services may not be exclusive to UDS Tactical Edge, this implementation serves as their primary use case in the near term, ensuring lightweight, efficient, and flexible deployment models tailored for tactical edge missions.
## Walkthrough Demo
[Section titled “Walkthrough Demo”](#walkthrough-demo)
## Technical Features for UDS Tactical Edge
[Section titled “Technical Features for UDS Tactical Edge”](#technical-features-for-uds-tactical-edge)
### **1. Distributed Software and Asset Management**
[Section titled “1. Distributed Software and Asset Management”](#1-distributed-software-and-asset-management)
* UDS enables declarative versioning of application states, ensuring consistent and reliable deployments across a distributed fleet.
* Automated or semi-automated execution allows less-experienced personnel to manage deployments, reducing system administrator workload.
* Supports smooth, incremental updates that minimize operational disruptions while maintaining software integrity across disconnected and contested environments.
### **2. Integrate Once, Deploy Anywhere**
[Section titled “2. Integrate Once, Deploy Anywhere”](#2-integrate-once-deploy-anywhere)
* Operator-based architecture allows applications to dynamically adapt to their environment.
* Automates infrastructure configuration, including:
* Domain name management via UDS Package custom resources.
* Single sign-on (SSO) integration.
* Network policy automation.
* Metrics monitoring and logging.
* Ensures seamless application portability across cloud, on-premise, and edge environments.
### **3. Interface Built for Use in Combat Operations**
[Section titled “3. Interface Built for Use in Combat Operations”](#3-interface-built-for-use-in-combat-operations)
* Designed for high-stakes environments where user focus on the mission is critical to survival.
* Simplifies complex deployments, making software updates and management intuitive.
* Actively incorporates real user feedback to surface critical information while removing unnecessary distractions.
### **4. Airgapped Mission Applications Where You Need It**
[Section titled “4. Airgapped Mission Applications Where You Need It”](#4-airgapped-mission-applications-where-you-need-it)
* UDS manages software updates via declarative Open Container Initiative (OCI) artifacts.
* These artifacts include:
* Application binaries.
* Defined end-state configurations.
* Compliance artifacts for security validation.
* Ensures that UDS-deployed applications are self-contained, portable, and built on open standards, enabling seamless transport and deployment anywhere the mission requires.
With these features, UDS Tactical Edge provides a battlefield-ready platform that ensures operational efficiency, security, and adaptability for modern warfighting environments.
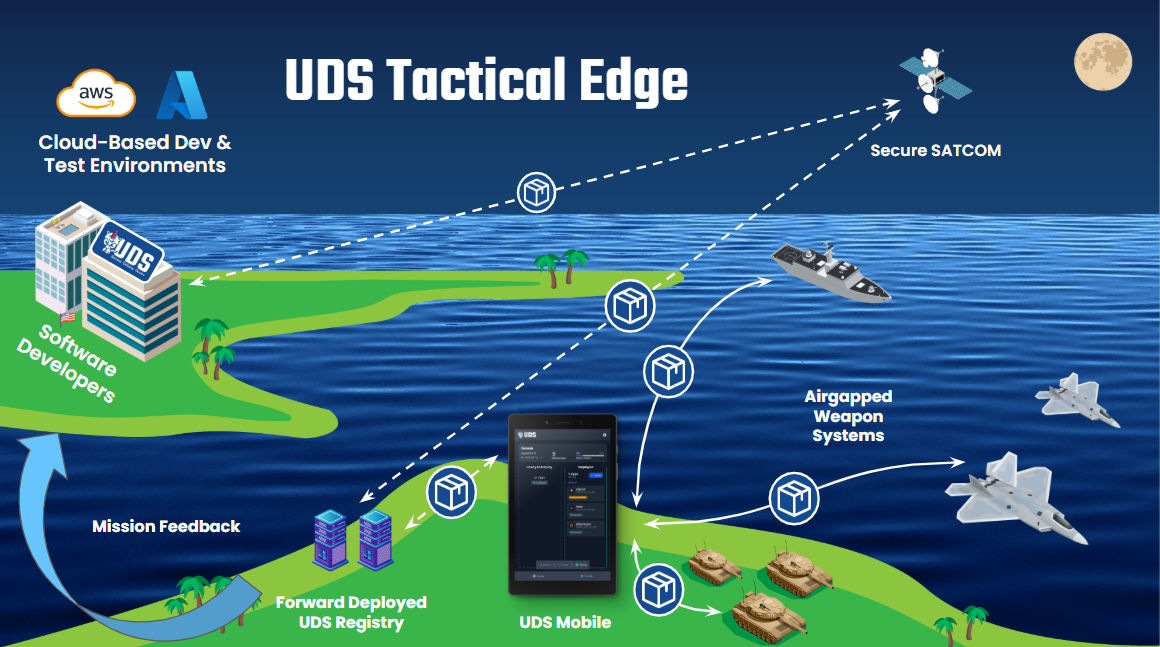
-----
# Adding UDS Configuration to a Zarf Package
To consider `podinfo` as a fully integrated [UDS Package](https://uds.defenseunicorns.com/structure/packages/), the `Package` Custom Resource for the UDS Operator must be included as part of the Zarf Package for `podinfo`. In this section, we will cover adding the `podinfo-package.yaml` to the sample UDS Bundle that we created in the [first](/tutorials/deploy-with-uds-core) tutorial.
### Prerequisites
[Section titled “Prerequisites”](#prerequisites)
This guide assumes that you created the UDS `Package` Custom Resource in the [previous](/tutorials/create-uds-package) tutorial.
### Adding Package Manifest to Podinfo
[Section titled “Adding Package Manifest to Podinfo”](#adding-package-manifest-to-podinfo)
Within the `zarf.yaml` file that exists in the `package` directory, modify the `podinfo` component to reference the manifest created in the previous tutorial:
```yaml
kind: ZarfPackageConfig
metadata:
name: podinfo
version: 0.0.1
components:
- name: podinfo
required: true
charts:
- name: podinfo
version: 6.4.0
namespace: podinfo
url: https://github.com/stefanprodan/podinfo.git
gitPath: charts/podinfo
# Add this new manifests section with our Package CR
manifests:
- name: podinfo-uds-config
namespace: podinfo
files:
- podinfo-package.yaml
images:
- ghcr.io/stefanprodan/podinfo:6.4.0
actions:
onDeploy:
after:
- wait:
cluster:
kind: deployment
name: podinfo
namespace: podinfo
condition: available
```
Re-run `zarf package create --confirm` and `uds create --confirm` commands to generate new artifacts that now include the `Package` Custom Resource for `podinfo`. From there, the bundle can be re-deployed (`uds deploy uds-bundle-podinfo-bundle-*-0.0.1.tar.zst --confirm`) and `podinfo` will be automatically integrated with UDS Core.
#### Next Steps
[Section titled “Next Steps”](#next-steps)
(Optional) This tutorial deployed podinfo in Istio Sidecar mode - the default deployment method for applications in UDS Core. UDS Core releases v0.40.0 and later added support for Istio Ambient Mesh. To walkthrough migrating the podinfo application to Istio Ambient Mesh using the UDS Operator, continue to the next tutorial.
-----
# Integrating an Application with UDS Core
## Background
[Section titled “Background”](#background)
When UDS Core is deployed into a Kubernetes Cluster, an [operator](https://kubernetes.io/docs/concepts/extend-kubernetes/operator/) is deployed. An operator allows users to extend the functionality of their Kubernetes clusters via [Custom Resource Definitions](https://kubernetes.io/docs/concepts/extend-kubernetes/api-extension/custom-resources/) and custom controllers. This operator, henceforth known as the UDS Operator, looks for `Package` Custom Resources to be created. When a user creates a `Package` resource, the UDS Operator processes the request and performs the necessary operations to create the package per the [specification](/reference/configuration/custom-resources/packages-v1alpha1-cr/) given.
Read more about the UDS Operator [here](https://uds.defenseunicorns.com/reference/configuration/uds-operator/).
### Prerequisites
[Section titled “Prerequisites”](#prerequisites)
In this section, we will configure Single Sign On (SSO) for a sample user to access the `podinfo` application. This requires that your Keycloak instance has existing users and groups defined. This configuration has been automated via the `uds` cli.
In the root of the `package` directory, create a new file called `tasks.yaml` and include the lines below:
```yaml
includes:
- common-setup: https://raw.githubusercontent.com/defenseunicorns/uds-common/refs/tags/v0.13.1/tasks/setup.yaml
```
### Integrate Podinfo with UDS Core
[Section titled “Integrate Podinfo with UDS Core”](#integrate-podinfo-with-uds-core)
You can think of the UDS Operator as the “glue” between your application and the services that are provided by UDS Core. It is a [Kubernetes Operator](https://kubernetes.io/docs/concepts/extend-kubernetes/operator/) that has working knowledge of UDS Core services in the cluster and takes care of integrating your app with those services for you. To register your application with the UDS Operator, you need to create a `Package` Kubernetes Custom Resource. Within the specification of the `Package` resource, you can specify different parameters that dictate how the UDS Operator should integrate your app per its unique requirements. The sections below cover creating a `Package` resource for `podinfo` and integrating `podinfo` with several UDS Core services.
Note
The `Package` Custom Kubernetes Resource is different from a [UDS Package](https://uds.defenseunicorns.com/structure/packages/), which is a collection of the Zarf Package for your application and the Kubernetes `Package` Custom Resource.
Note
All resources created by the UDS Operator for `podinfo` will have a `uds/package=podinfo` label applied to it.
#### Create a Package Resource for Podinfo
[Section titled “Create a Package Resource for Podinfo”](#create-a-package-resource-for-podinfo)
Below is a baseline definition of a `Package` Custom Resource for the `podinfo` application. As you progress through this demo, you will add values for `network`, `sso`, and `monitor`. These fields instruct the UDS Operator on how to configure networking, SSO, and monitoring for the `podinfo` application.
```yaml
apiVersion: uds.dev/v1alpha1
kind: Package
metadata:
name: podinfo
namespace: podinfo
spec:
network:
# Expose rules generate Istio VirtualServices and related network policies
expose: {}
```
Copy this YAML into a code editor and save the file as `podinfo-package.yaml`.
#### Secure Podinfo with Istio and Network Policies
[Section titled “Secure Podinfo with Istio and Network Policies”](#secure-podinfo-with-istio-and-network-policies)
UDS Core deploys [Istio](https://istio.io/), a powerful networking component that allows cluster administrators to end-to-end encrypt all cluster traffic, set explicit rules for traffic routing, add load balancing, and much more. Building on the existing `Package` definition, add the following configuration under `spec.network.expose` field:
```yaml
apiVersion: uds.dev/v1alpha1
kind: Package
metadata:
name: podinfo
namespace: podinfo
spec:
network:
# Expose rules generate Istio VirtualServices and related network policies
expose:
- service: podinfo
selector:
app.kubernetes.io/name: podinfo
gateway: tenant
host: podinfo
port: 9898
```
This change will allow us to interact with `podinfo` without having to use `kubectl port-forward`.
Save your changes and apply the file:
```bash
kubectl apply -f podinfo-package.yaml
```
View the package resource:
```bash
❯ kubectl get package -n podinfo
NAME STATUS SSO CLIENTS ENDPOINTS MONITORS NETWORK POLICIES AUTHORIZATION POLICIES AGE
podinfo Ready [] ["podinfo.uds.dev"] [] 5 2 4s
```
View the pods. Notice how the podinfo pod has an additional container as a result of the UDS Operator configuring istio:
```bash
❯ kubectl get pods -n podinfo
NAME READY STATUS RESTARTS AGE
podinfo-5cbbf59f6d-bqhsk 2/2 Running 0 2m
```
Observe the Istio VirtualService that the UDS Operator created:
```bash
❯ kubectl get virtualservice -n podinfo
NAME GATEWAYS HOSTS AGE
podinfo-tenant-podinfo-9898-podinfo ["istio-tenant-gateway/tenant-gateway"] ["podinfo.uds.dev"] 60s
```
You will also notice that the UDS Operator automatically generated a set of Kubernetes `NetworkPolicies` that restrict access to your application to only required services:
```bash
❯ kubectl get networkpolicy -n podinfo
NAME POD-SELECTOR AGE
allow-podinfo-egress-dns-lookup-via-coredns 50s
allow-podinfo-egress-istiod-communication 50s
allow-podinfo-ingress-9898-podinfo-istio-tenant-gateway app.kubernetes.io/name=podinfo 50s
allow-podinfo-ingress-sidecar-monitoring 50s
deny-podinfo-default 50s
```
Navigate to `podinfo.uds.dev` from your browser to interact with `podinfo`.
#### Integrate with Single Sign On
[Section titled “Integrate with Single Sign On”](#integrate-with-single-sign-on)
At this stage, anyone can access the `podinfo` application. You may wish to protect your application by only allowing authenticated users to access it. As part of UDS Core, [Keycloak](https://www.keycloak.org/) and [Authservice](https://github.com/istio-ecosystem/authservice) are provided for Identity and Authorization management. Add the configuration under the `spec.sso` field below to integrate the `podinfo` application with Keycloak and Authservice
```yaml
apiVersion: uds.dev/v1alpha1
kind: Package
metadata:
name: podinfo
namespace: podinfo
spec:
network:
# Expose rules generate Istio VirtualServices and related network policies
expose:
- service: podinfo
selector:
app.kubernetes.io/name: podinfo
gateway: tenant
host: podinfo
port: 9898
# SSO allows for the creation of Keycloak clients and with automatic Authservice integration
sso:
- name: Podinfo SSO
clientId: uds-core-podinfo
redirectUris:
- "https://podinfo.uds.dev/login"
enableAuthserviceSelector:
app.kubernetes.io/name: podinfo
groups:
anyOf:
- "/UDS Core/Admin"
```
Save the file and apply the changes:
```bash
kubectl apply -f podinfo-package.yaml
```
The package will now show the `uds-core-podinfo` client under `SSO CLIENTS`:
```bash
❯ kubectl get package -n podinfo
NAME STATUS SSO CLIENTS ENDPOINTS MONITORS NETWORK POLICIES AUTHORIZATION POLICIES AGE
podinfo Ready ["uds-core-podinfo"] ["podinfo.uds.dev"] [] 7 4 3m29s
```
Note
Notice how the count under `NETWORK POLICIES` has increased. The UDS Operator recognized that additional `NetworkPolicies` were required for Keycloak to communicate with `podinfo`, so it automatically created additional `NetworkPolicies` to allow that.
When navigating to , you will be redirected to a login screen. Only users that are members of the `/UDS Core/Admin` group in Keycloak are permitted to access the site. Run the `create-doug-user` task with the UDS CLI to create a test user that is part of the `/UDS Core/Admin` group:
```bash
uds run setup:keycloak-user --set KEYCLOAK_USER_GROUP="/UDS Core/Admin"
```
Use the following credentials to login to : `username: doug / password: unicorn123!@#UN`
#### Add Monitoring and Metrics Scraping
[Section titled “Add Monitoring and Metrics Scraping”](#add-monitoring-and-metrics-scraping)
UDS Core also deploys Prometheus for collecting application metrics. Prometheus relies on `ServiceMonitor` and `PodMonitor` resources that inform Prometheus on which workloads to collect metrics from. These resources can be configured via the `spec.monitor` field in the `Package` Custom Resource:
```yaml
apiVersion: uds.dev/v1alpha1
kind: Package
metadata:
name: podinfo
namespace: podinfo
spec:
network:
# Expose rules generate Istio VirtualServices and related network policies
expose:
- service: podinfo
selector:
app.kubernetes.io/name: podinfo
gateway: tenant
host: podinfo
port: 9898
# SSO allows for the creation of Keycloak clients and with automatic secret generation and protocolMappers
sso:
- name: Podinfo SSO
clientId: uds-core-podinfo
redirectUris:
- "https://podinfo.uds.dev/login"
enableAuthserviceSelector:
app.kubernetes.io/name: podinfo
groups:
anyOf:
- "/UDS Core/Admin"
# Monitor generates Prometheus Service and Pod monitor resources, capturing metrics exposed by your application
monitor:
- selector:
app.kubernetes.io/name: podinfo
targetPort: 9898
portName: http
description: "podmonitor"
kind: PodMonitor
- selector:
app.kubernetes.io/name: podinfo
targetPort: 9898
portName: http
description: "svcmonitor"
kind: ServiceMonitor
```
Save the file and apply the changes:
```bash
kubectl apply -f podinfo-package.yaml
```
The package will now show `ServiceMonitors` and `PodMonitors` configured under `MONITORS`:
```bash
❯ kubectl get package -n podinfo
NAME STATUS SSO CLIENTS ENDPOINTS MONITORS NETWORK POLICIES AUTHORIZATION POLICIES AGE
podinfo Ready ["uds-core-podinfo"] ["podinfo.uds.dev"] ["podinfo-podmonitor","podinfo-svcmonitor"] 9 6 6m38s
```
View the `PodMonitor` and `ServiceMonitor` resources that were created by the UDS Operator:
```bash
❯ kubectl get podmonitor,servicemonitor -n podinfo
NAME AGE
podmonitor.monitoring.coreos.com/podinfo-podmonitor 24s
NAME AGE
servicemonitor.monitoring.coreos.com/podinfo-svcmonitor 24s
```
Logs and Metrics for `podinfo` can now be viewed in Grafana, which is deployed with UDS Core. Navigate to `grafana.admin.uds.dev` and login using the same credentials from the previous step (you may still be signed in since Keycloak is used for all authentication).
From the menu, navigate to `Explore`, then select `Prometheus` from the top drop-down. Paste in the query `rate(process_cpu_seconds_total{namespace="podinfo"}[$__rate_interval])` and hit the `Run Query` button (blue refresh button on top right). This will provide us with a graph based on the metrics served by Podinfo.
Now you have successfully integrated `podinfo` with UDS Core!
#### Next Steps
[Section titled “Next Steps”](#next-steps)
(Optional) With the `Package` Custom resource now created that integrates `podinfo` into UDS Core, the next guide will cover including the `Package` Custom Resource as part of your Zarf Package and UDS Bundle.
-----
# Deploying UDS on RKE2
This tutorial demonstrates how to deploy UDS onto a VM-based RKE2 Kubernetes cluster. This scenario is common in on-prem and airgap environments where cloud-based deployments are not feasible.
Caution
The deployment in this tutorial is designed specifically for development and testing environments and is *not intended for production use*.
### Prerequisites
[Section titled “Prerequisites”](#prerequisites)
* Recommended [system requirements](https://uds.defenseunicorns.com/getting-started/basic-requirements/#system-requirements)
* Hypervisor for running VMs (recommend [Lima](https://lima-vm.io/))
* [UDS CLI](https://uds.defenseunicorns.com/reference/cli/overview/)
### Quickstart
[Section titled “Quickstart”](#quickstart)
The fastest way to get up and running with UDS Core on RKE2 is using the automation and configuration provided in the [uds-rke2-demo](https://github.com/defenseunicorns-labs/uds-rke2-demo) repo. Follow the instructions in the `README` to either provision a VM running RKE2 with UDS, or install UDS on an RKE2 cluster directly.
### Starting the VM and Installing RKE2
[Section titled “Starting the VM and Installing RKE2”](#starting-the-vm-and-installing-rke2)
#### Lima (recommended)
[Section titled “Lima (recommended)”](#lima-recommended)
Lima provides a template for quickly spinning up an Ubuntu VM running RKE2 with appropriate shared network configs, follow the instructions in [uds-rke2-demo](https://github.com/defenseunicorns-labs/uds-rke2-demo) to quickly get up and running. The [automation](https://github.com/defenseunicorns-labs/uds-rke2-demo/blob/303c146fffb9e6660e38902fa6ee4c8a8ca6e98d/tasks.yaml#L39) in the demo repo uses the following Lima command to provision an Ubuntu VM running RKE2:
```plaintext
if [[ "$(uname)" == "Darwin" ]]; then
limactl start template://experimental/rke2 \
--memory 20 --cpus 10 --vm-type=vz --network=vzNAT -y
else
limactl start template://experimental/rke2 \
--memory 20 --cpus 10 --vm-type=qemu -y
fi
```
After the VM has been created and RKE2 installed, ensure connectivity by setting the `KUBECONFIG`:
```plaintext
export KUBECONFIG="$HOME"/.lima/rke2/copied-from-guest/kubeconfig.yaml
```
Then run `kubectl get pods -A` to verify that the pods are running.
#### Other Hypervisors
[Section titled “Other Hypervisors”](#other-hypervisors)
##### VM Requirements
[Section titled “VM Requirements”](#vm-requirements)
Aside from the system requirements mentioned in the prerequisites, you will need to provision a VM running a Linux instance [compatible with RKE2](https://docs.rke2.io/install/requirements#operating-systems). Additionally, this tutorial assumes the following network configuration:
* The VM has its own IP and is accessible to the host machine by both SSH and HTTPS
* Recommend either a shared network or bridge setup (hypervisor port forwarding can also be useful but is often unnecessary)
* Ability to configure DNS resolution (often done by modifying `/etc/hosts`)
#### Installing RKE2
[Section titled “Installing RKE2”](#installing-rke2)
SSH into the newly created Linux VM and follow the [official quickstart](https://docs.rke2.io/install/quickstart) to install RKE2 on the VM. Note that this is a single server node setup, no need to add agent nodes.
After RKE2 is installed, ensure connectivity by running `kubectl get pods -A` and verifying that the native RKE2 pods are running. You may need to `export KUBECONFIG=/etc/rancher/rke2/rke2.yaml` (read the [official docs](https://docs.rke2.io/install/quickstart#server-node-installation)). Depending on your VM setup, it may be easier to run this command from the VM itself as opposed to the host machine. If running from the host machine, you will need to ensure the Kube API (port 6443) is exposed to the host.
### Bootstrapping the Cluster
[Section titled “Bootstrapping the Cluster”](#bootstrapping-the-cluster)
In order to take advantage of the full range of capabilities UDS provides, the cluster must have the following prerequisites installed:
* Default Storage Class
* Load Balancer Controller
* Object Store
Each of these prereqs is covered in greater detail below.
Note
The `uds-rke2-demo` repo contains a [zarf.yaml](https://github.com/defenseunicorns-labs/uds-rke2-demo/blob/main/zarf.yaml) that will install the necessary prereqs on your cluster.
#### Default Storage Class
[Section titled “Default Storage Class”](#default-storage-class)
Since RKE2 does not ship with a `default` [storage class](https://kubernetes.io/docs/tasks/administer-cluster/change-default-storage-class/), you will need to install one. For demo purposes, we recommend using the [local-path-provisioner](https://github.com/rancher/local-path-provisioner) by Rancher.
#### Load Balancer Controller
[Section titled “Load Balancer Controller”](#load-balancer-controller)
Although RKE2 ships with an NGINX ingress controller, UDS uses Istio ingress gateways to logically separate admin traffic from other types of traffic coming into the cluster. Using Istio also ensures that traffic within the cluster is encrypted and all applications are integrated into a secure service mesh. More information can be found in the [UDS service mesh](https://uds.defenseunicorns.com/reference/configuration/service-mesh/ingress/) docs.
UDS ingress gateways are K8s `Services` of type `LoadBalancer`. In order to provide an IP to these load balancer services, a load balancer controller, such as [MetalLB](https://metallb.io/), must be installed. An example configuration for MetalLB can be found in the [demo repo](https://github.com/defenseunicorns-labs/uds-rke2-demo/blob/main/chart/templates/metallb.yaml). Note that the base IP used for the MetalLB `IPAddressPool` will come from the internal IP of the cluster nodes, and can be found with:
```plaintext
uds zarf tools kubectl get nodes -o=jsonpath='{.items[0].status.addresses[?(@.type=="InternalIP")].address}'
```
Note the [Zarf package](https://github.com/defenseunicorns-labs/uds-rke2-demo/blob/303c146fffb9e6660e38902fa6ee4c8a8ca6e98d/zarf.yaml#L30) in the demo repo configures this IP for you.
#### Object Store
[Section titled “Object Store”](#object-store)
The UDS log store ([Loki](https://github.com/grafana/loki)) uses object storage to store cluster logs. For demo purposes, we recommend installing [Minio](https://github.com/minio/minio) to provide object storage. Example Helm values for Minio can be found [here](https://github.com/defenseunicorns-labs/uds-rke2-demo/blob/main/values/minio-values.yaml).
Loki can be configured to use other buckets or storage providers by using UDS bundle overrides to configure the UDS Loki Helm chart [values](https://github.com/defenseunicorns/uds-core/blob/main/src/loki/values/values.yaml#L32).
#### Zarf
[Section titled “Zarf”](#zarf)
The [zarf init](https://docs.zarf.dev/ref/init-package/#_top) package will bootstrap your cluster and make it airgap-ready. This is typically included as part of the `uds-bundle.yaml` when installing UDS.
### Installing UDS
[Section titled “Installing UDS”](#installing-uds)
With all prerequisites satisfied, UDS is ready to be installed in the cluster. You can use the [automation](https://github.com/defenseunicorns-labs/uds-rke2-demo?tab=readme-ov-file#quickstart-rke2-already-running) in the demo repo to install UDS with a single command:
```plaintext
uds run install
```
Otherwise, a sample [uds-bundle.yaml](https://github.com/defenseunicorns-labs/uds-rke2-demo/blob/main/uds-bundle.yaml) is provided for reference and is partially shown below:
```plaintext
kind: UDSBundle
metadata:
name: uds-rke2-demo
description: A UDS bundle for deploying the standard UDS Core package on a development cluster
version: "0.1.0"
packages:
# prereq packages go here
...
- name: init
repository: ghcr.io/zarf-dev/packages/init
ref:
- name: core
repository: ghcr.io/defenseunicorns/packages/uds/core
ref:
# additional configuration overrides go here
```
### Accessing UDS Apps
[Section titled “Accessing UDS Apps”](#accessing-uds-apps)
Note
UDS web apps are protected by Keycloak. See the “Configuring Keycloak SSO” section below to create a user for demo purposes.
After installing UDS Core, find the IPs of the Istio ingress gateway services. The following command run from the root of the [demo repo](https://github.com/defenseunicorns-labs/uds-rke2-demo) will show the ingress gateway IPs.
```plaintext
uds run get-gw-ips
```
You can also use the vendored `kubectl` to get the IPs:
```plaintext
# admin gateway ips (repeat for other gateways)
uds zarf tools kubectl get svc admin-ingressgateway -n istio-admin-gateway -o jsonpath='{.status.loadBalancer.ingress[0].ip}'
```
Note
It takes a moment for MetalLB to assign IPs to the ingress gateway services, so the IP may not show up right away.
After getting the IP, use `/etc/hosts` (or configure a DNS provider) to enable resolution of UDS Core app hostnames, for example:
/etc/hosts
```plaintext
...
# admin apps use the admin-ingressgateway IP
192.168.64.200 keycloak.admin.uds.dev grafana.admin.uds.dev neuvector.admin.uds.dev
# tenant apps use the tenant-ingressgateway IP
192.168.64.201 sso.uds.dev podinfo.uds.dev
```
UDS Core apps should now be accessible via the host machine’s web browser.
### Configuring Keycloak SSO
[Section titled “Configuring Keycloak SSO”](#configuring-keycloak-sso)
Keycloak is hardened by default and can be configured further as per the documentation in the [UDS IdAM](https://uds.defenseunicorns.com/reference/uds-core/idam/uds-identity-config-overview/) docs. To explore the demo environment, we recommend using the following command, ran from the root of the demo repo, to run a UDS task to create a user we can use to access UDS services:
```plaintext
uds run setup:keycloak-user --set KEYCLOAK_USER_GROUP="/UDS Core/Admin"
```
This will create an admin user with the following credentials:
```plaintext
username: doug
password: unicorn123!@#UN
role: /UDS Core/Admin
```
These credentials can be used to log into any of the apps in UDS.
### Integrating a Mission App
[Section titled “Integrating a Mission App”](#integrating-a-mission-app)
UDS uses a custom `Package` resource backed by a UDS K8s controller to automatically integrate and secure mission applications with minimal configuration. An example of such a configuration for the app [PodInfo](https://github.com/stefanprodan/podinfo) exists in the [demo repo](https://github.com/defenseunicorns-labs/uds-rke2-demo/tree/main/podinfo). It can be deployed into the UDS RKE2 cluster by running the following command from the root of the repo:
```plaintext
uds run deploy-podinfo
```
For a more in-depth explanation of `Package` resources, see the [Package CR](https://uds.defenseunicorns.com/reference/configuration/custom-resources/packages-v1alpha1-cr/) reference docs and the [Integrating an Application with UDS Core](https://uds.defenseunicorns.com/tutorials/create-uds-package/) tutorial.
-----
# Switching to Istio Ambient Mesh
The UDS Operator supports automatically integrating your application with Istio Ambient Mesh. It also supports automatically migrating your workload from Istio Sidecars to Ambient mode if you are upgrading an existing application.
For the sake of this tutorial, we will cover migrating the podinfo application that was deployed in the previous tutorials to Ambient mode.
### Prerequisites
[Section titled “Prerequisites”](#prerequisites)
For this tutorial please ensure you are running at UDS Core version 0.48.0 or higher. This will ensure full ambient support is present, including Authservice protection.
Run `zarf package list` and check the version number for the `core` package:
```bash
❯ zarf package list
Package | Namespace Override | Version | Components
core | | 0.50.0 | [uds-crds uds-operator-config prometheus-operator-crds pepr-uds-core istio-controlplane gateway-api-crds istio-admin-gateway istio-tenant-gateway keycloak neuvector loki kube-prometheus-stack vector grafana authservice velero]
init | | v0.60.0 | [zarf-injector zarf-seed-registry zarf-registry zarf-agent]
podinfo | | 0.0.1 | [podinfo]
uds-k3d | | 0.16.0 | [destroy-cluster create-cluster uds-dev-stack]
```
### Migrate Podinfo To Istio Ambient Mode
[Section titled “Migrate Podinfo To Istio Ambient Mode”](#migrate-podinfo-to-istio-ambient-mode)
While not explicitly called out in the previous tutorials, the UDS Operator automatically handled setting up Istio injection for the podinfo application. The default method for Istio mesh integration in UDS is [Sidecar](https://istio.io/latest/docs/reference/config/networking/sidecar/). If you look at the podinfo application and its namespace, you will notice that the UDS Operator added the proper attributes for the workload to be recognized by istio and have sidecar injection enabled. You’ll also note that the podinfo pod is running two containers, one of these being the Istio sidecar:
```bash
❯ kubectl get ns podinfo --show-labels
NAME STATUS AGE LABELS
podinfo Active 33m app.kubernetes.io/managed-by=zarf,istio-injection=enabled,kubernetes.io/metadata.name=podinfo
❯ kubectl get pods -n podinfo
NAME READY STATUS RESTARTS AGE
podinfo-7d47686cc7-jdxng 2/2 Running 0 25m
```
By default, UDS Core ships with all required components to support both Istio Sidecar mode and Ambient mode starting in release v0.40.0 and onward. v0.48.0 and beyond include support for Authservice with Ambient mode. Migrating podinfo to Istio Ambient mode is as simple as making a single change to the Package Custom Resource.
In the Package Custom Resource definition, add a new entry for `spec.network.serviceMesh.mode: ambient`:
```yaml
apiVersion: uds.dev/v1alpha1
kind: Package
metadata:
name: podinfo
namespace: podinfo
spec:
network:
# Configure Istio Mode - can be either ambient or sidecar. Default is sidecar.
serviceMesh:
mode: ambient
# Expose rules generate Istio VirtualServices and related network policies
expose:
- service: podinfo
selector:
app.kubernetes.io/name: podinfo
gateway: tenant
host: podinfo
port: 9898
# SSO allows for the creation of Keycloak clients and with automatic secret generation and protocolMappers
sso:
- name: Podinfo SSO
clientId: uds-core-podinfo
redirectUris:
- "https://podinfo.uds.dev/login"
enableAuthserviceSelector:
app.kubernetes.io/name: podinfo
groups:
anyOf:
- "/UDS Core/Admin"
# Monitor generates Prometheus Service and Pod monitor resources, capturing metrics exposed by your application
monitor:
- selector:
app.kubernetes.io/name: podinfo
targetPort: 9898
portName: http
description: "podmonitor"
kind: PodMonitor
- selector:
app.kubernetes.io/name: podinfo
targetPort: 9898
portName: http
description: "svcmonitor"
kind: ServiceMonitor
```
Save your changes and re-apply the Package Custom Resource with `kubectl apply -f podinfo-package.yaml`.
Once applied, the UDS Operator will migrate the podinfo workload to Ambient mode by first updating the Istio label on the namespace:
```bash
❯ kubectl get ns podinfo --show-labels
NAME STATUS AGE LABELS
podinfo Active 71m app.kubernetes.io/managed-by=zarf,istio.io/dataplane-mode=ambient,kubernetes.io/metadata.name=podinfo
```
The `istio.io/dataplane-mode=ambient` label tells Istio that all workloads in the `podinfo` namespace will use Ambient mode.
Next, the operator performed a rolling restart of the podinfo application. This is required to decommission the sidecar that was previously present:
```bash
❯ kubectl get po -n podinfo
NAME READY STATUS RESTARTS AGE
podinfo-7d47686cc7-mlr59 1/1 Running 0 3m14s
uds-core-podinfo-waypoint-55547ff65b-2nqsf 1/1 Running 0 3m13s
```
Notice how the pod only has a single container. The podinfo application has been successfully migrated to Ambient! Also notice the `waypoint` pod which is added here. This waypoint is required to support SSO with Authservice (read more about waypoints [here](https://istio.io/latest/docs/ambient/usage/waypoint/)).
Note
Learn more about the changes introduced in Ambient mode [here](https://istio.io/latest/docs/ambient/overview/).
You can also validate that all of the other integrations we setup are still present (navigate to and login again, etc).
#### Clean up
[Section titled “Clean up”](#clean-up)
Execute the following command to clean up your cluster:
```bash
k3d cluster delete uds
```
-----
# Deploy with UDS Core
## Sample Application with UDS Core
[Section titled “Sample Application with UDS Core”](#sample-application-with-uds-core)
This tutorial uses UDS CLI to deploy an example application, [podinfo](https://github.com/stefanprodan/podinfo), alongside UDS Core as a UDS Bundle.
### Prerequisites
[Section titled “Prerequisites”](#prerequisites)
* [Zarf](https://docs.zarf.dev/getting-started/)
* [UDS CLI](https://uds.defenseunicorns.com/reference/cli/overview/)
* [Docker](https://www.docker.com/)
* [k3d](https://k3d.io)
### Quickstart
[Section titled “Quickstart”](#quickstart)
To begin, a Zarf Package needs to be created for `podinfo`. See the [Zarf documentation](https://docs.zarf.dev/) for in-depth information on how to create a Zarf Package, or simply use the information provided below to create a basic package.
#### Make a Directory
[Section titled “Make a Directory”](#make-a-directory)
Make a new directory for this package using the following command:
```bash
mkdir package && cd package
```
Create the following `zarf.yaml` in the new directory:
```yaml
kind: ZarfPackageConfig
metadata:
name: podinfo
version: 0.0.1
components:
- name: podinfo
required: true
charts:
- name: podinfo
version: 6.9.1
namespace: podinfo
url: https://github.com/stefanprodan/podinfo.git
gitPath: charts/podinfo
images:
- ghcr.io/stefanprodan/podinfo:6.9.1
actions:
onDeploy:
after:
- wait:
cluster:
kind: deployment
name: podinfo
namespace: podinfo
condition: available
```
#### Create the Zarf Package
[Section titled “Create the Zarf Package”](#create-the-zarf-package)
Run the following command in the same directory as the above `zarf.yaml`. This will create a Zarf Package named `zarf-package-podinfo--0.0.1.tar.zst`:
```bash
zarf package create --confirm
```
Note
The `` field in the name of your Zarf Package will depend on your system architecture (eg. `zarf-package-podinfo-amd64-0.0.1.tar.zst`).
#### Create the UDS Bundle
[Section titled “Create the UDS Bundle”](#create-the-uds-bundle)
Create the UDS Bundle in the same directory as the `package` directory. The following bundle includes:
* k3d cluster: `uds-k3d`.
* Zarf init package: `init`.
* UDS Core: `core`.
* Locally built example application: `podinfo`.
Create the following `uds-bundle.yaml`:
```yaml
kind: UDSBundle
metadata:
name: podinfo-bundle
description: Bundle with k3d, Zarf init, UDS Core, and podinfo.
version: 0.0.1
packages:
- name: uds-k3d
repository: ghcr.io/defenseunicorns/packages/uds-k3d
ref: 0.16.0
overrides:
uds-dev-stack:
minio:
variables:
- name: buckets
description: "Set Minio Buckets"
path: buckets
- name: svcaccts
description: "Minio Service Accounts"
path: svcaccts
- name: users
description: "Minio Users"
path: users
- name: policies
description: "Minio policies"
path: policies
- name: init
repository: oci://ghcr.io/zarf-dev/packages/init
ref: v0.60.0
- name: core
repository: oci://ghcr.io/defenseunicorns/packages/uds/core
ref: 0.50.0-upstream
overrides:
# Set overrides for k3d dev stack
pepr-uds-core:
module:
values:
- path: additionalIgnoredNamespaces
value:
- uds-dev-stack
- name: podinfo
path: ./
ref: 0.0.1
```
UDS Bundles can easily be configured to include additional applications and capabilities. For example, if you would like to deploy [dos-games](https://docs.zarf.dev/tutorials/3-deploy-a-retro-arcade/) instead of `podinfo`, in the `uds-bundle.yaml` simply replace:
```yaml
- name: podinfo
path: ./
ref: 0.0.1
```
with:
```yaml
- name: dos-games
repository: oci://defenseunicorns/dos-games
ref: 1.0.0
```
Note
Most UDS Packages are published as Zarf Packages in an OCI registry. This makes it easier to pull packages down into a UDS Bundle. If no OCI artifact is published for a certain application or capability, a new `zarf.yaml` and Zarf Package must be created. Alternatively, you have the option to publish a Zarf Package to an [OCI compliant registry](https://docs.zarf.dev/tutorials/6-publish-and-deploy/).
#### Create and Confirm the UDS Bundle
[Section titled “Create and Confirm the UDS Bundle”](#create-and-confirm-the-uds-bundle)
This process will take a few minutes while UDS CLI pulls down the images that will be deployed. This command will produce a UDS Bundle named `uds-bundle-podinfo-bundle--0.0.1.tar.zst`:
```bash
uds create --confirm
```
Note
As above, the `` field in the name of your UDS Bundle will depend on your system architecture (eg. `uds-bundle-podinfo-bundle-amd64-0.0.1.tar.zst`).
#### Deploy
[Section titled “Deploy”](#deploy)
You can now deploy the bundle which will create a k3d cluster, deploy UDS Core, and deploy `podinfo`. This process will take approximately 10-15 minutes to complete:
```bash
uds deploy uds-bundle-podinfo-bundle-*-0.0.1.tar.zst --confirm
```
#### Interact with Cluster
[Section titled “Interact with Cluster”](#interact-with-cluster)
Once successfully deployed, you can interact with the deployed cluster and applications using [kubectl](https://kubernetes.io/docs/tasks/tools/) or [k9s](https://k9scli.io/topics/install/). Both tools are included with `uds` as `uds zarf tools kubectl` and `uds zarf tools monitor` respectively. In the command below, we are listing pods and services in `podinfo` namespace that were just deployed as part of the UDS Bundle. Please note that the output for your `podinfo` pod will likely have a different name:
```bash
❯ kubectl get pods,services -n podinfo
NAME READY STATUS RESTARTS AGE
pod/podinfo-5cbbf59f6d-bqhsk 1/1 Running 0 2m
NAME TYPE CLUSTER-IP EXTERNAL-IP PORT(S) AGE
service/podinfo ClusterIP 10.43.63.124 9898/TCP,9999/TCP 2m
```
Connect to `podinfo` using `kubectl port-forward`:
```bash
kubectl port-forward service/podinfo 9898:9898 -n podinfo
```
You can now use a web browser to naviage to `http://localhost:9898` to interact with `podinfo`.
#### Next Steps
[Section titled “Next Steps”](#next-steps)
In this section, a Zarf Package was created that consists of the sample application, `podinfo`. The resulting `podinfo` Zarf Package was added to a UDS Bundle where additional Zarf Packages such as a K3d cluster, Zarf Internal components, and UDS Core were included. With the stack now deployed, visit the next page to discover how you can integrate the application with the monitoring, logging, security and other services provided by UDS Core.